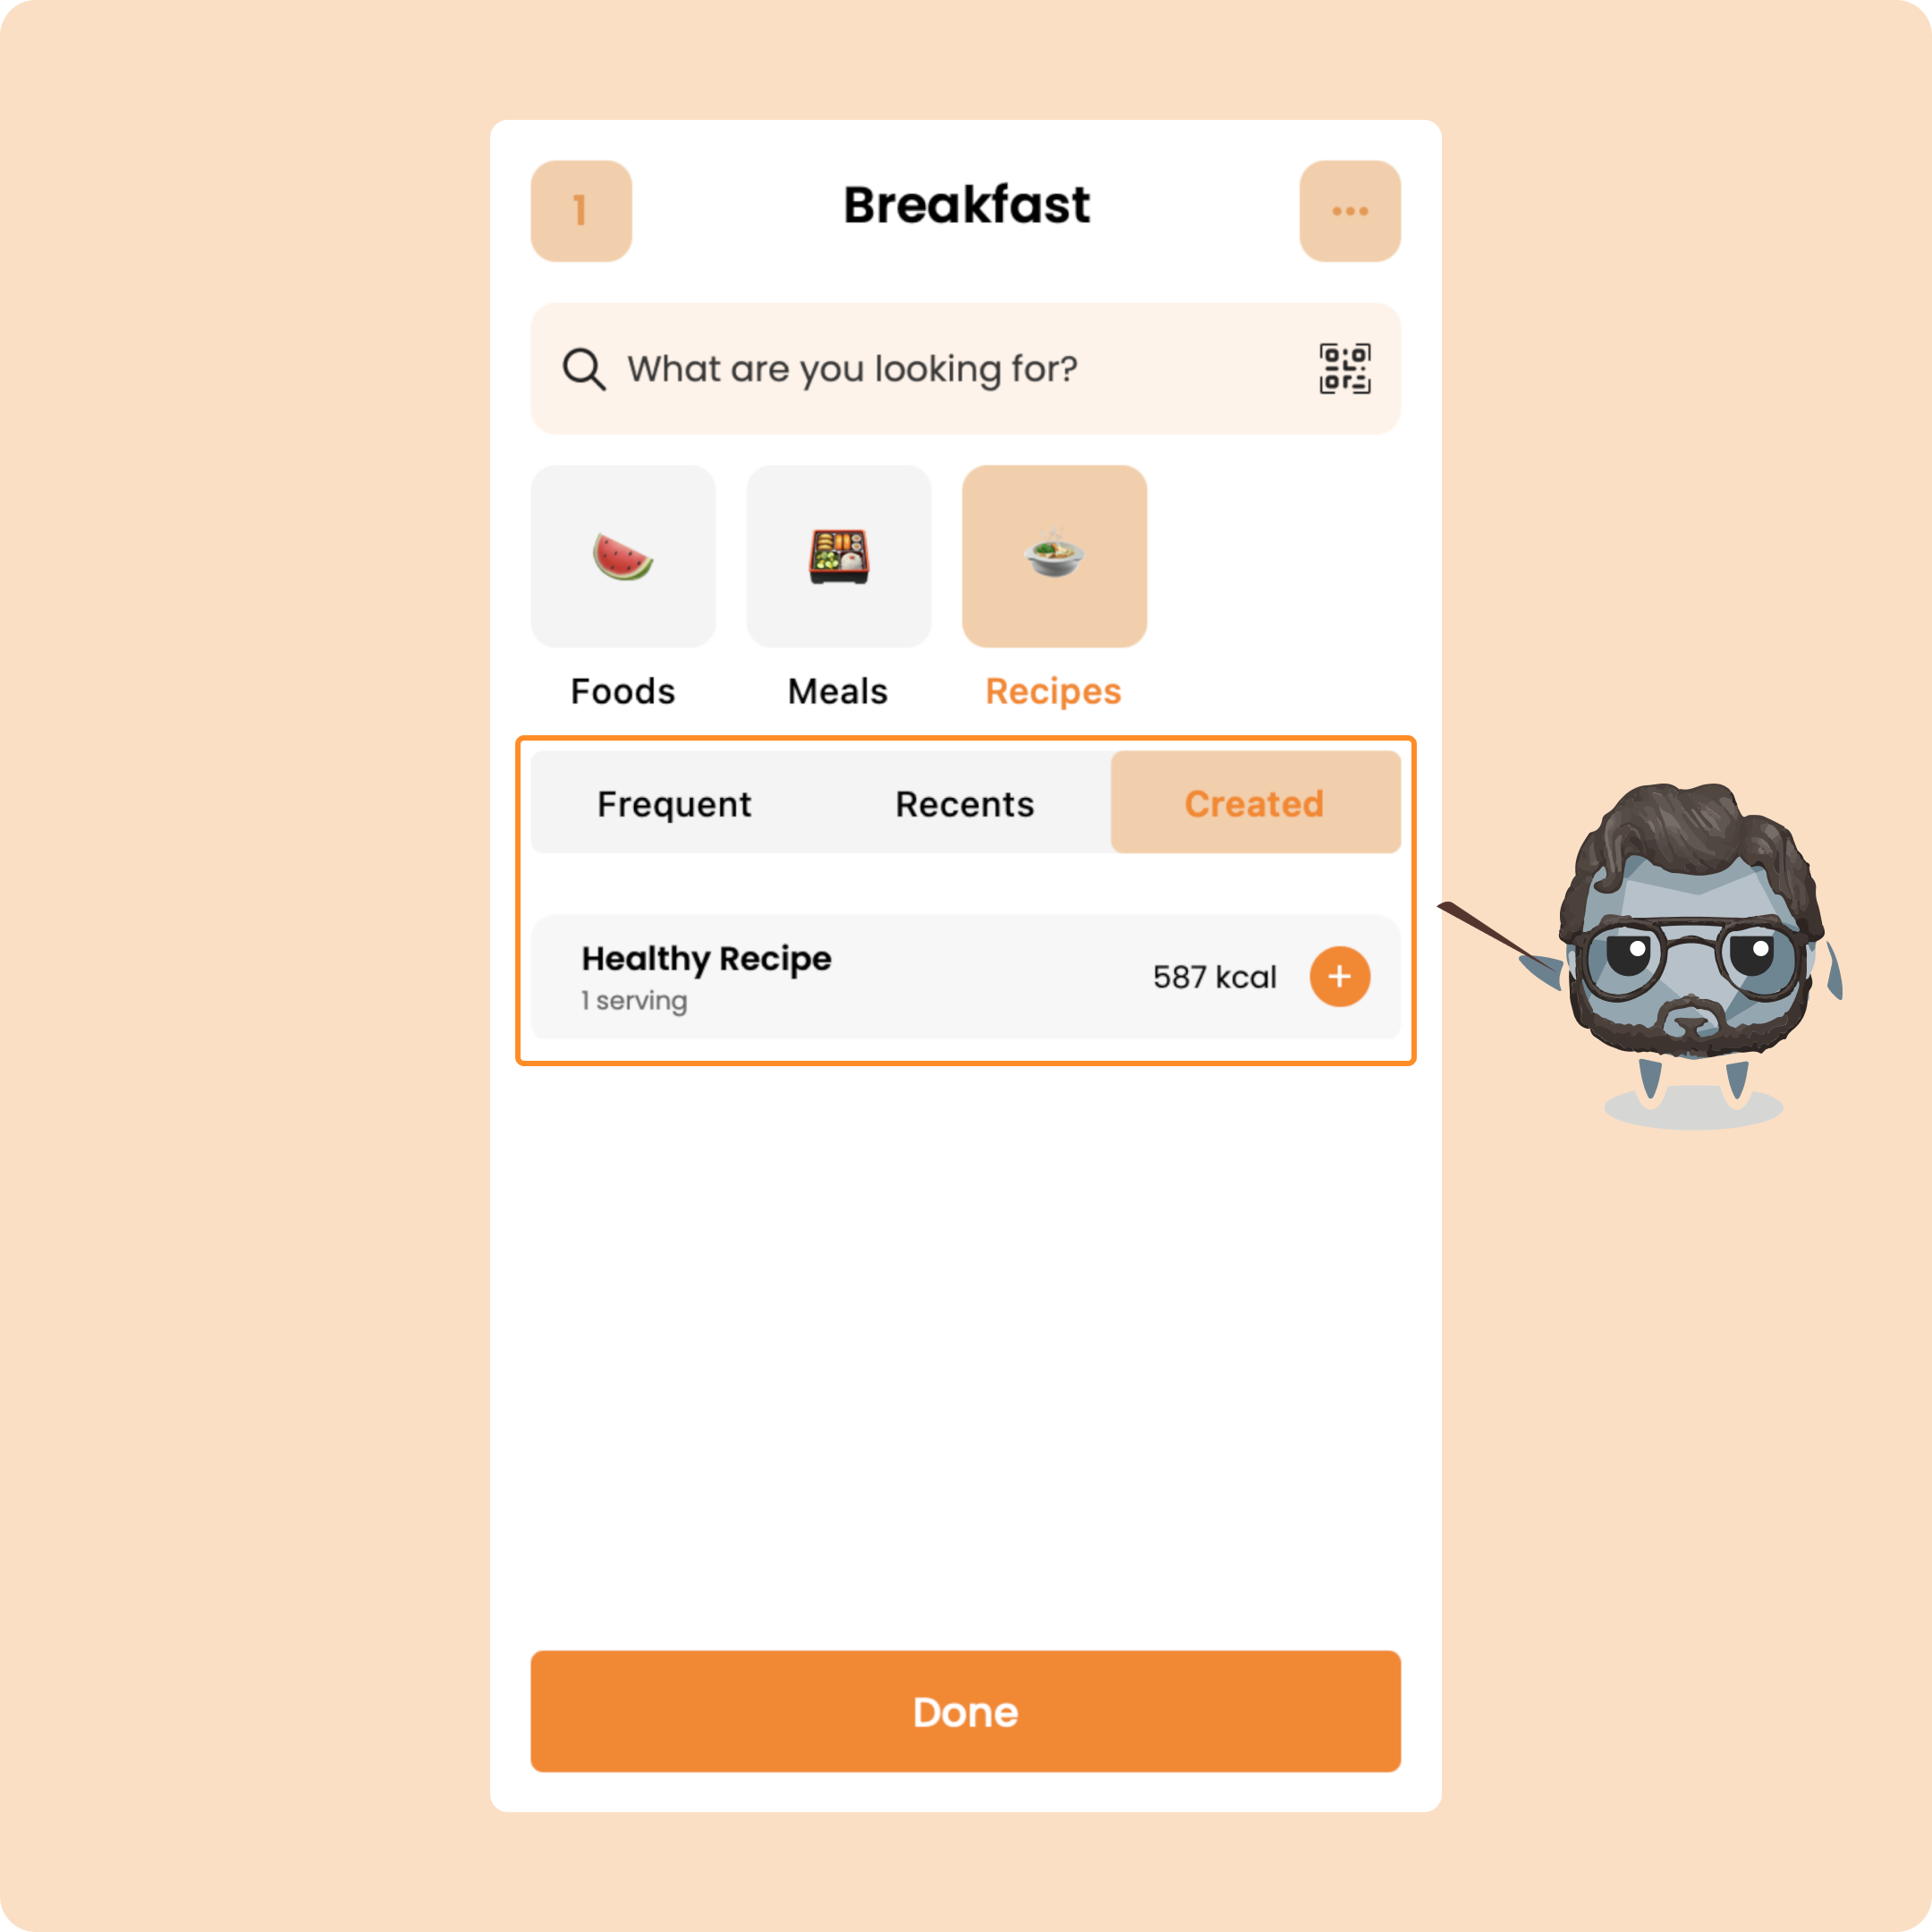
On Gymkee, depending on your coaching setup, there are 3 ways to log your meals:
- Log meals without a nutrition program
- Log meals with a daily calorie target
- Log meals with a full meal plan
Read through the article to the end, it is very well illustrated to help you understand how to do it, and once you’ve understood, it’s very simple 😊
Log meals without a nutrition program
If you don’t have a nutritional follow-up or a Nutrition program, you can still log your meals.
(⚠️ Provided your coach has enabled this feature on mobile.)
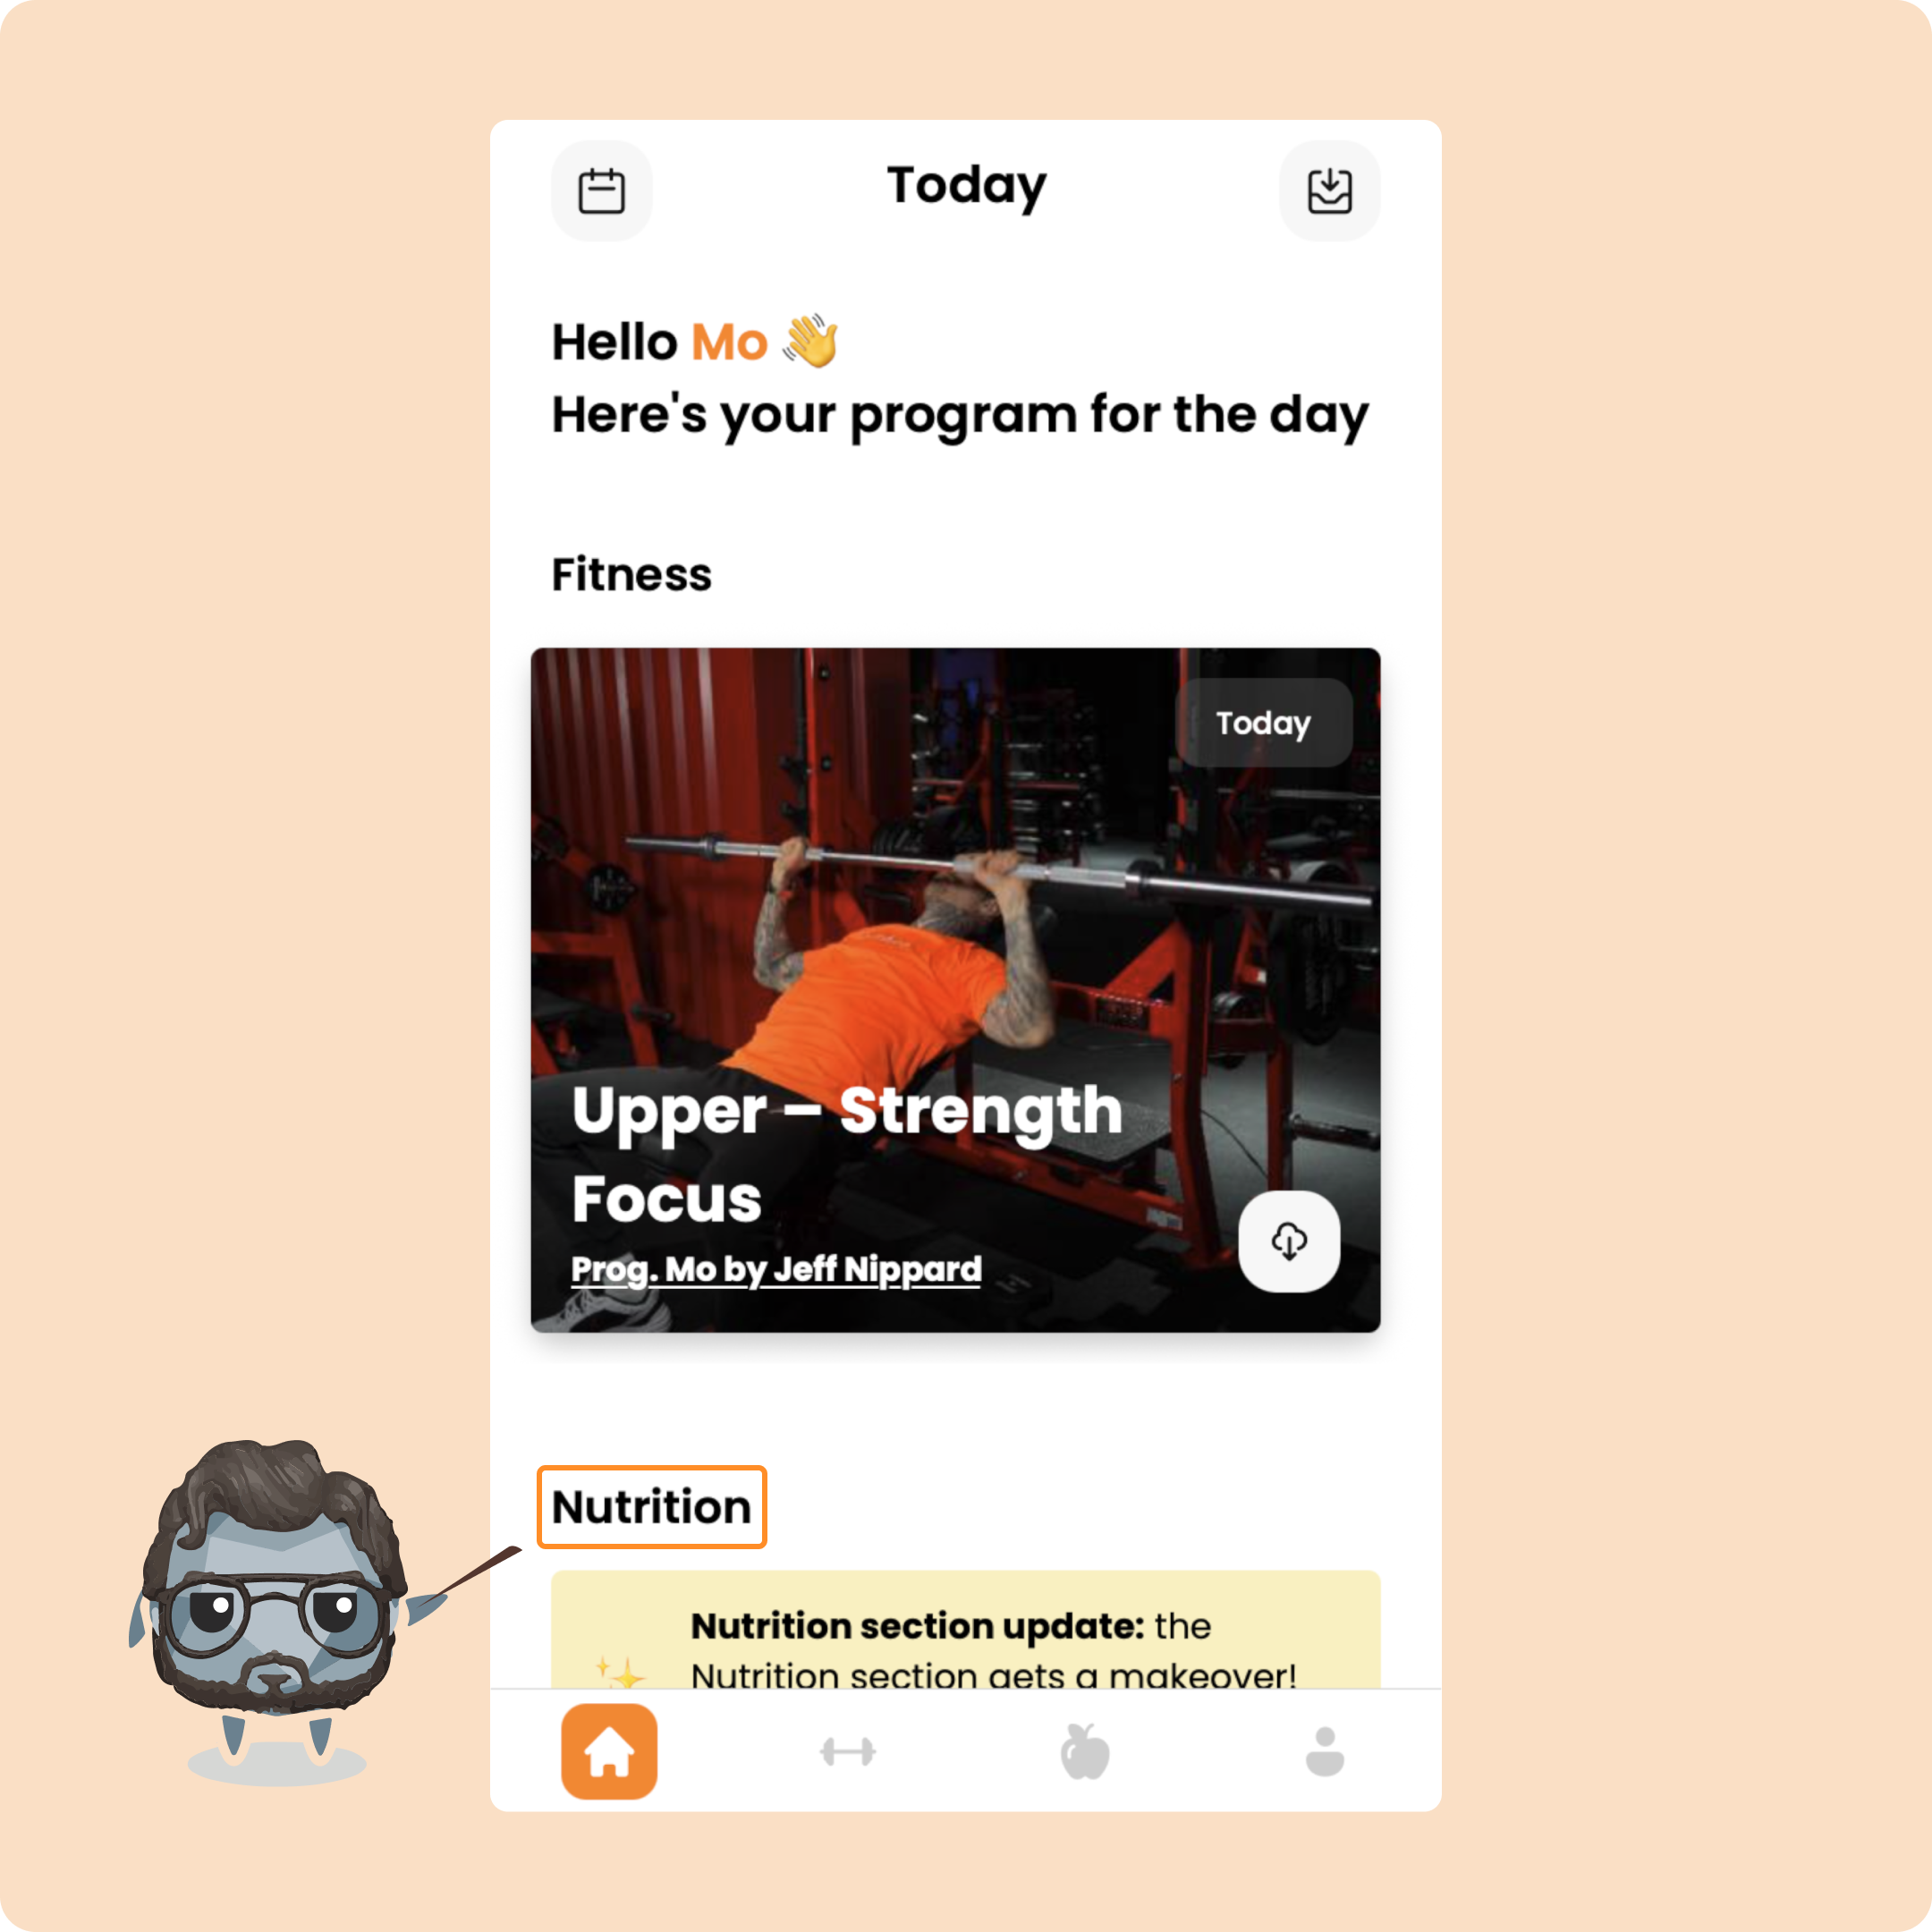
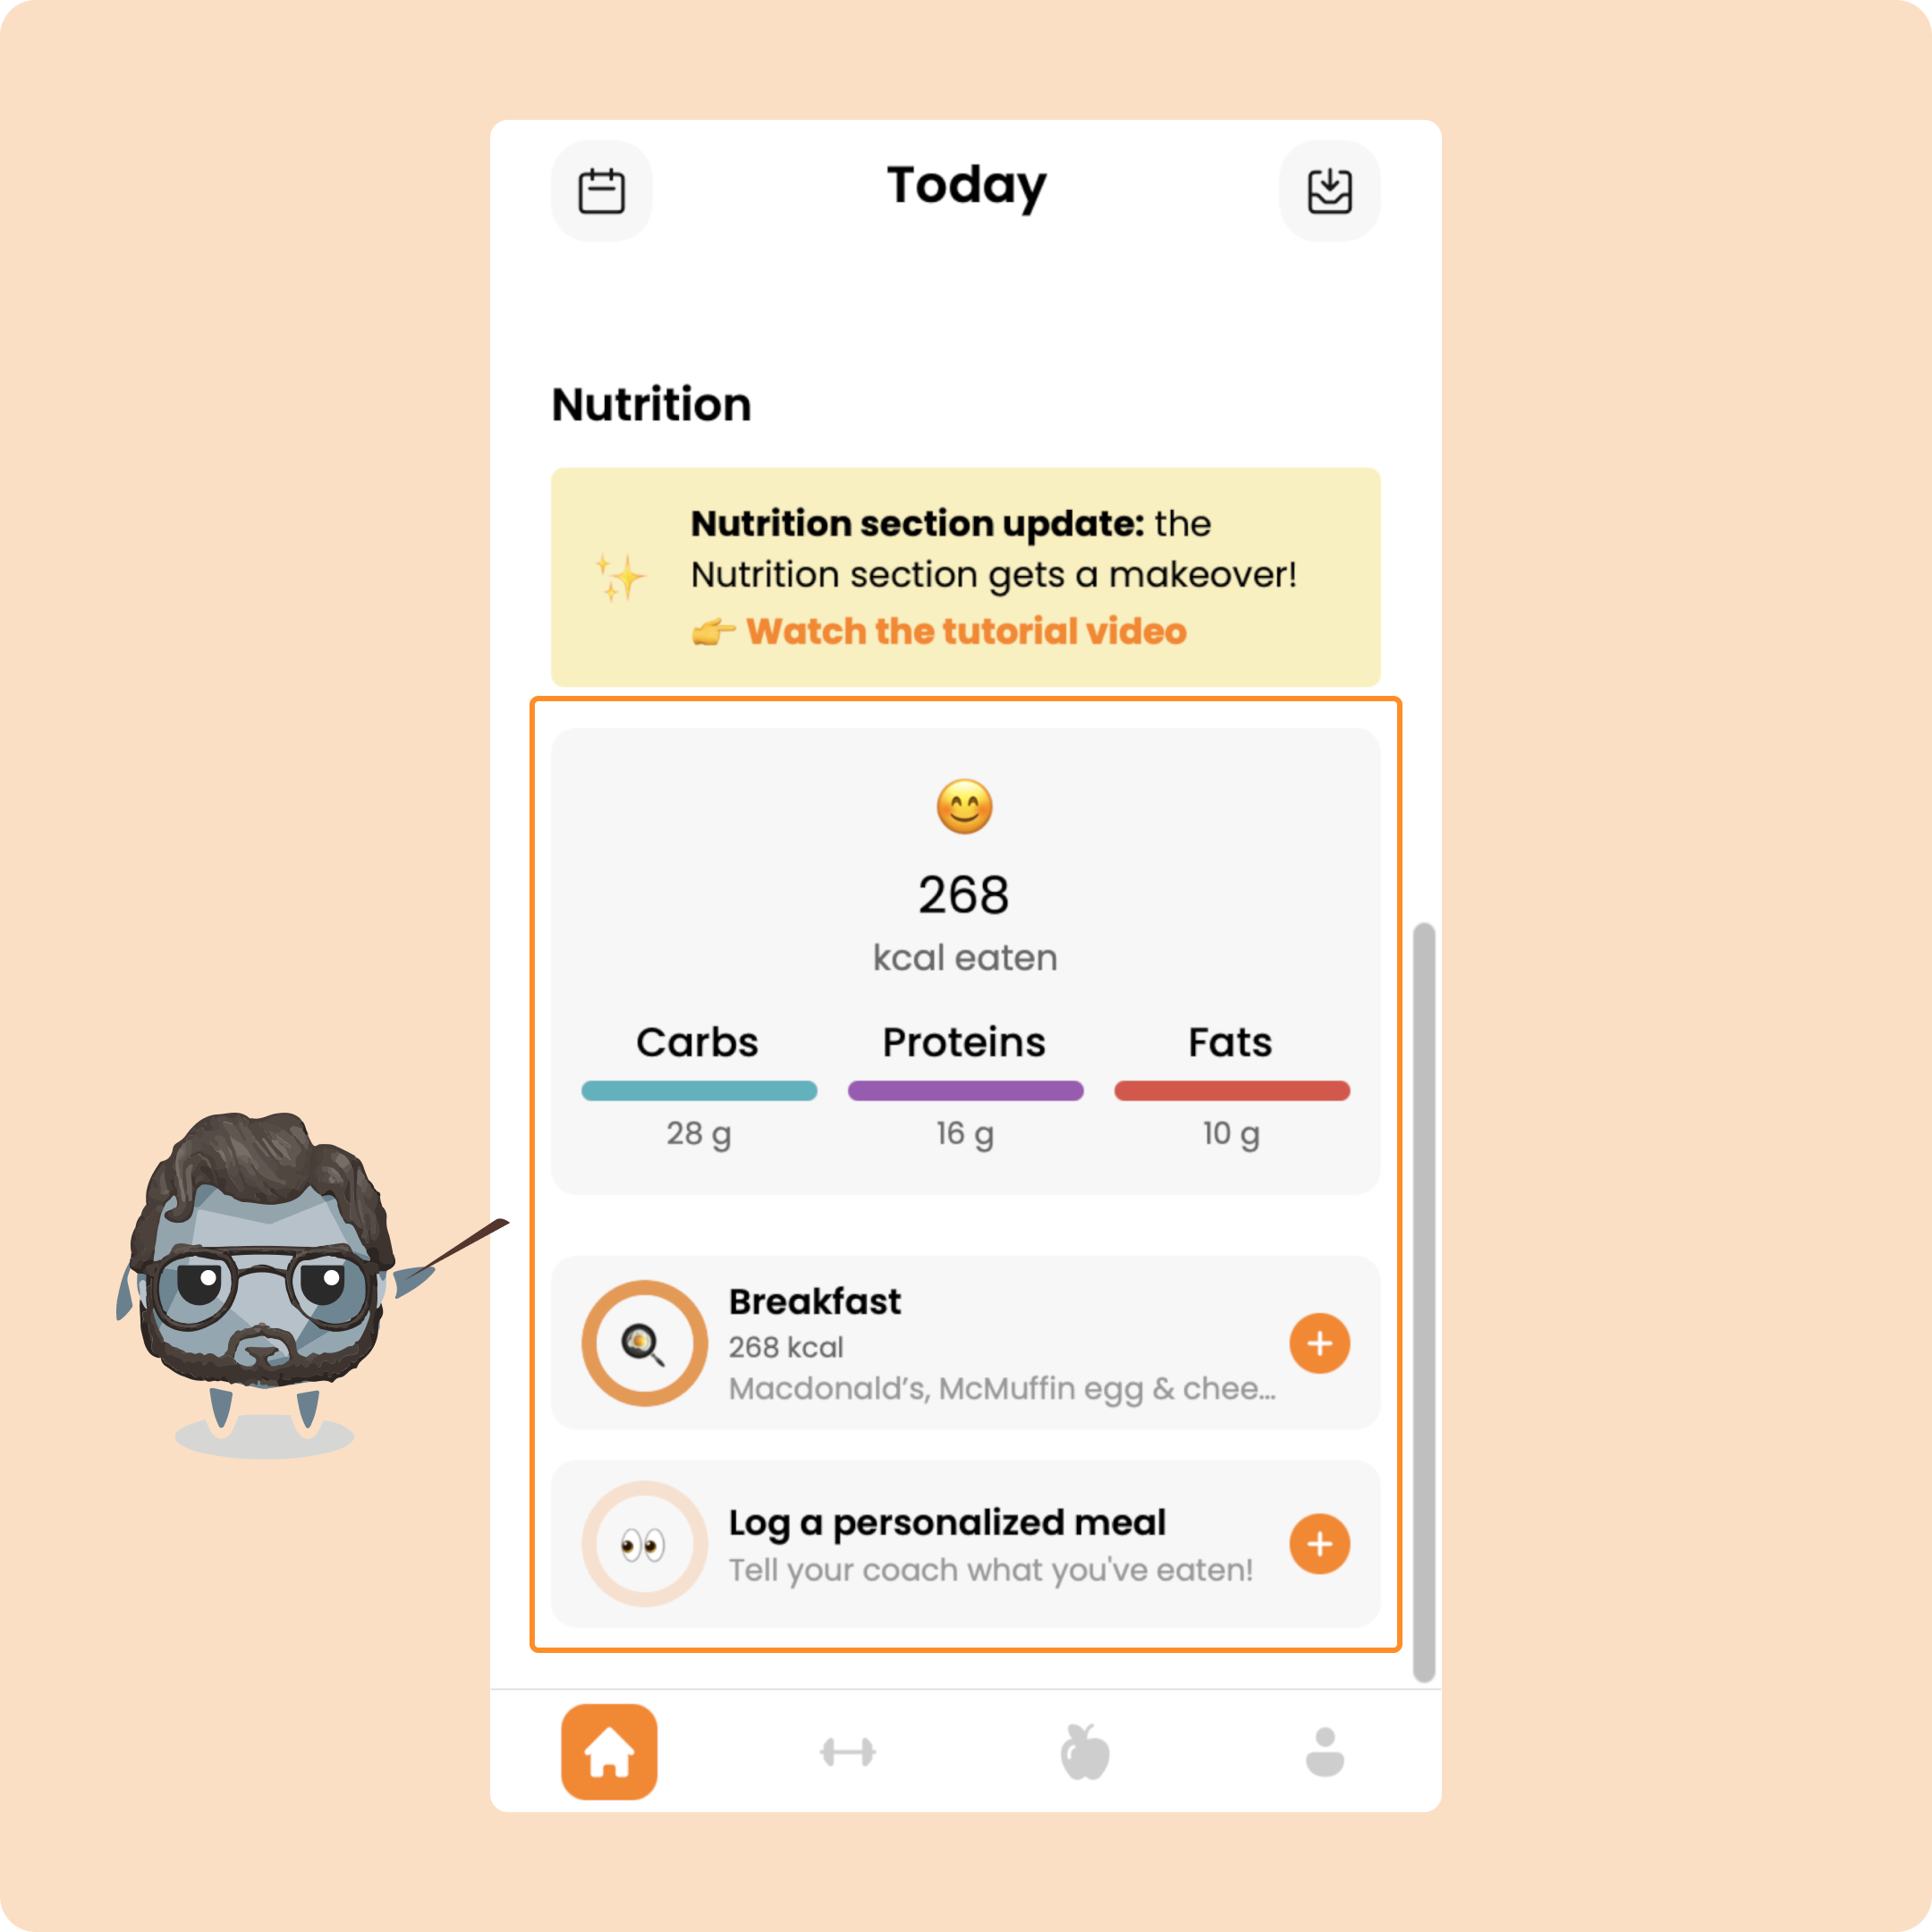
From the home page, go to the Nutrition section by scrolling.
You’ll see your counter of calories and macros.
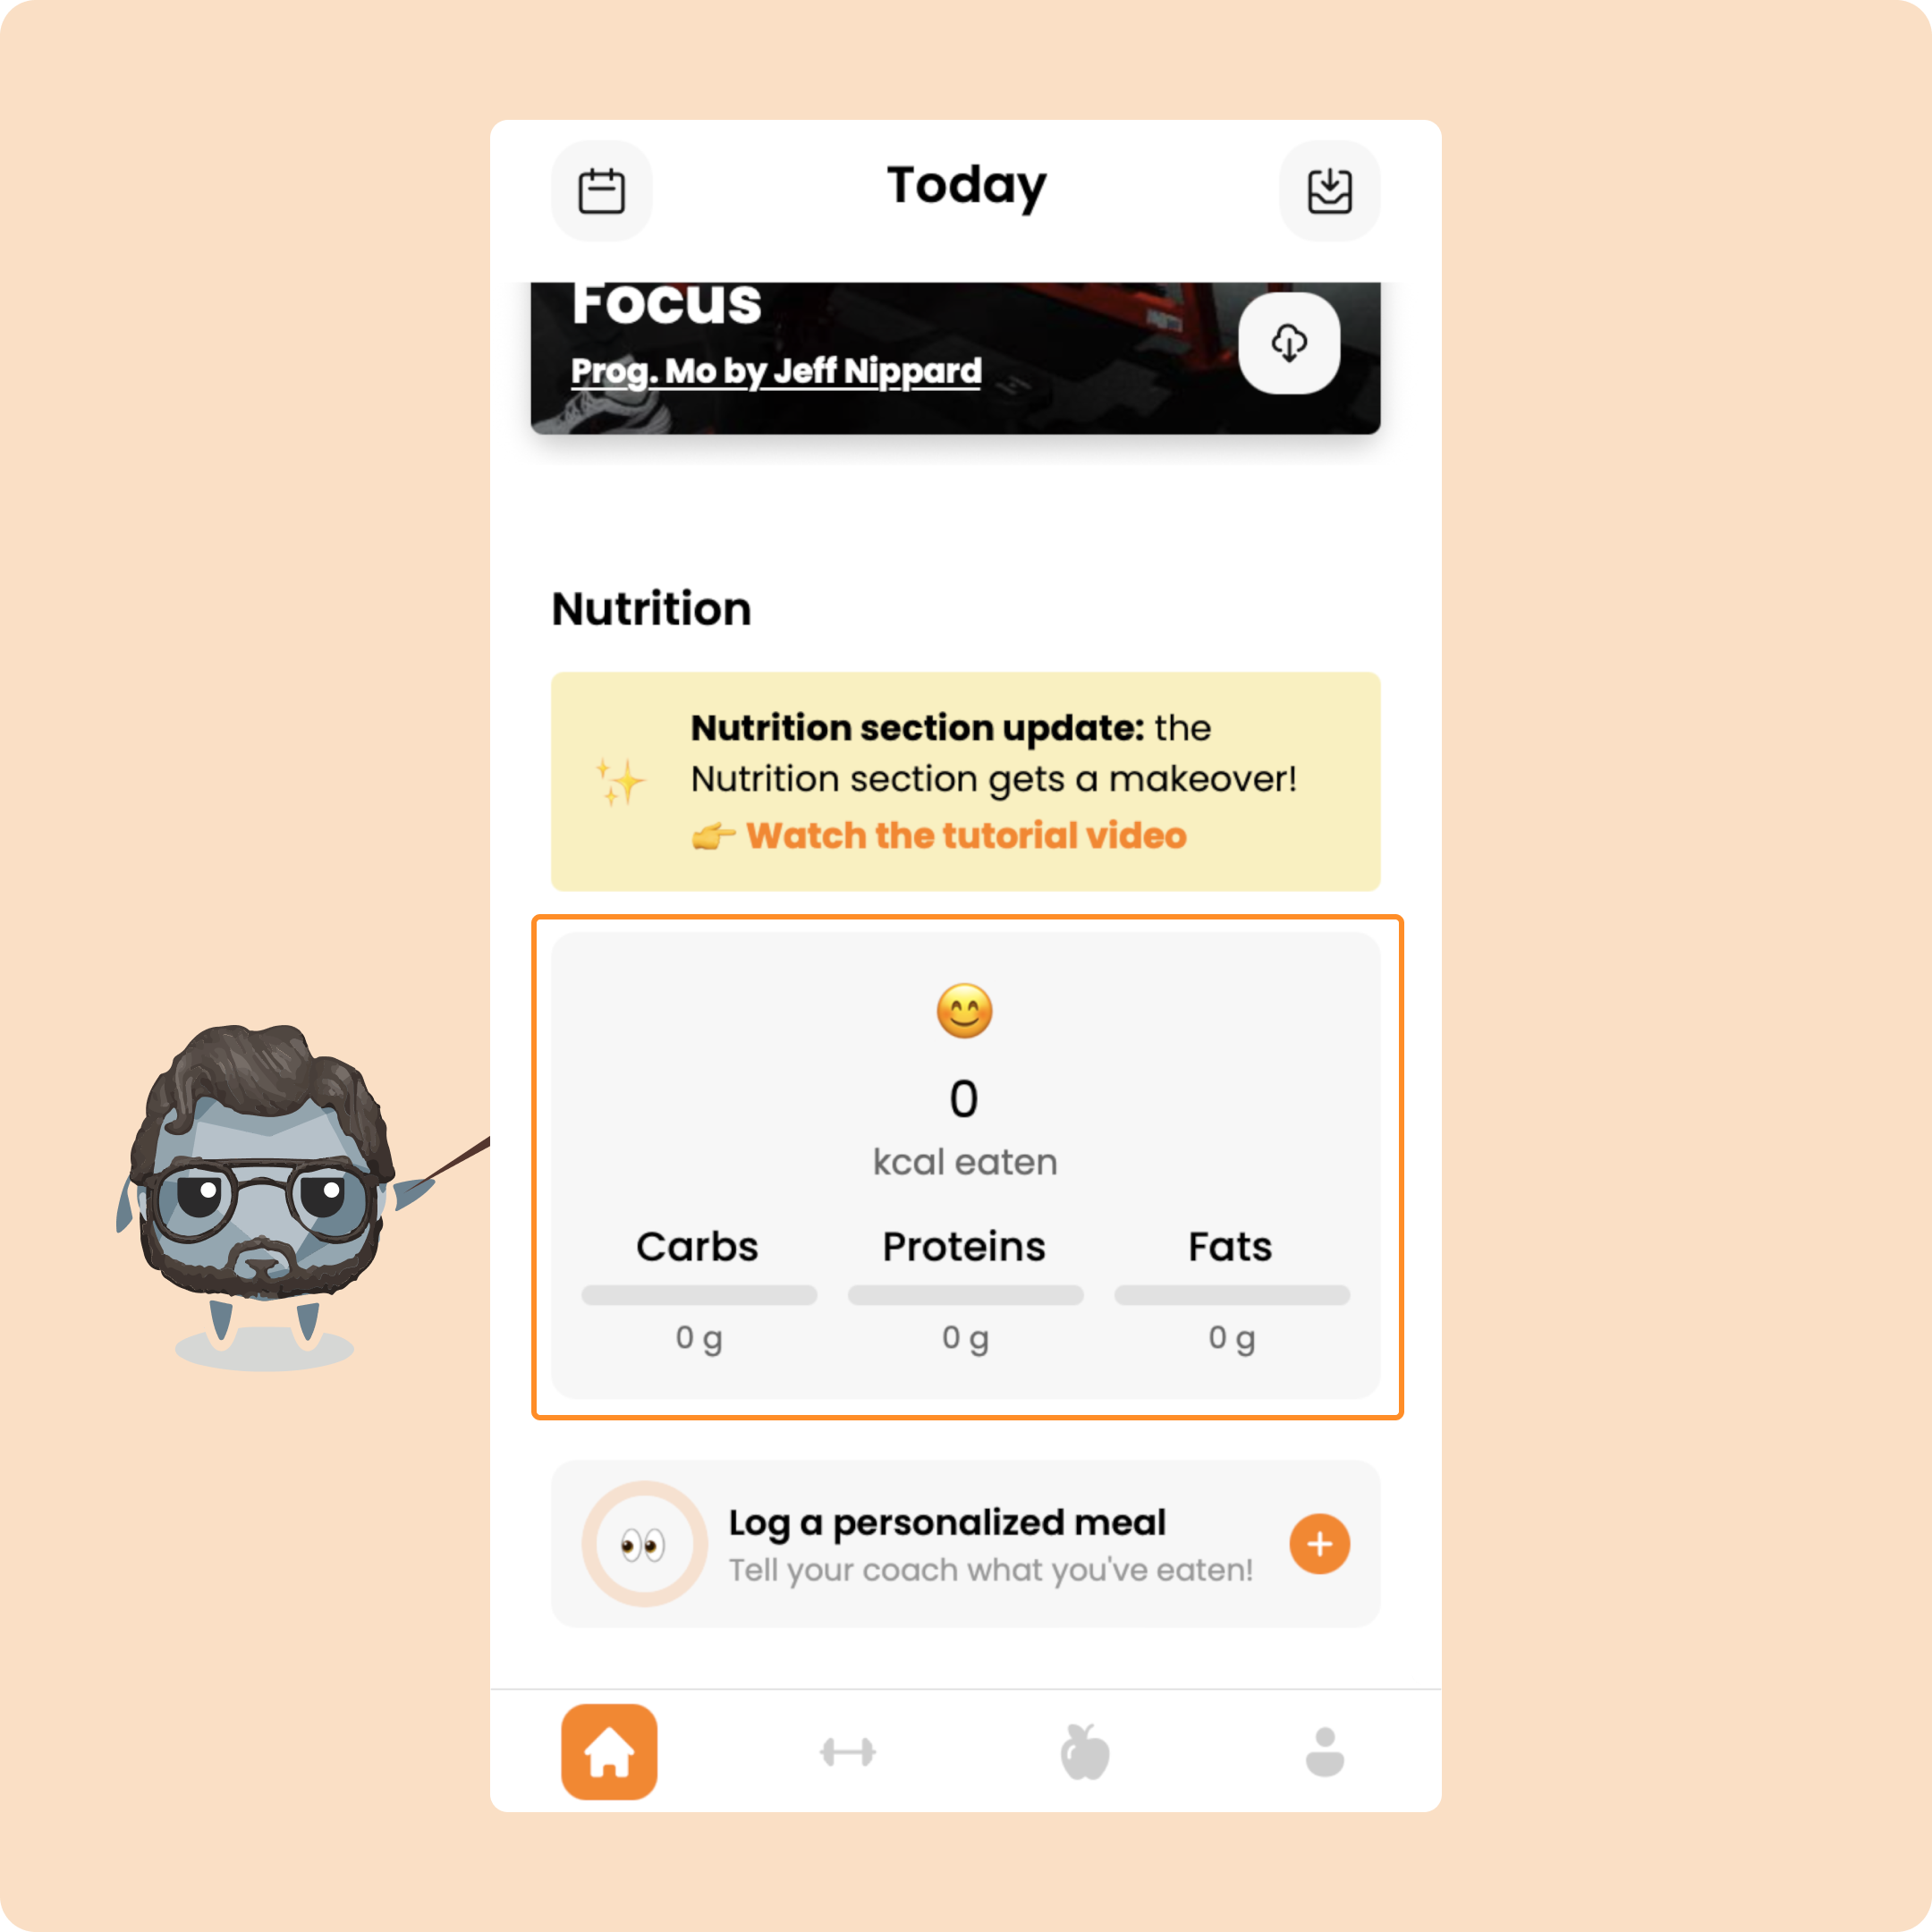
Since you have no meal plan or goals, you won’t see any pre-set meals or goal gauges.
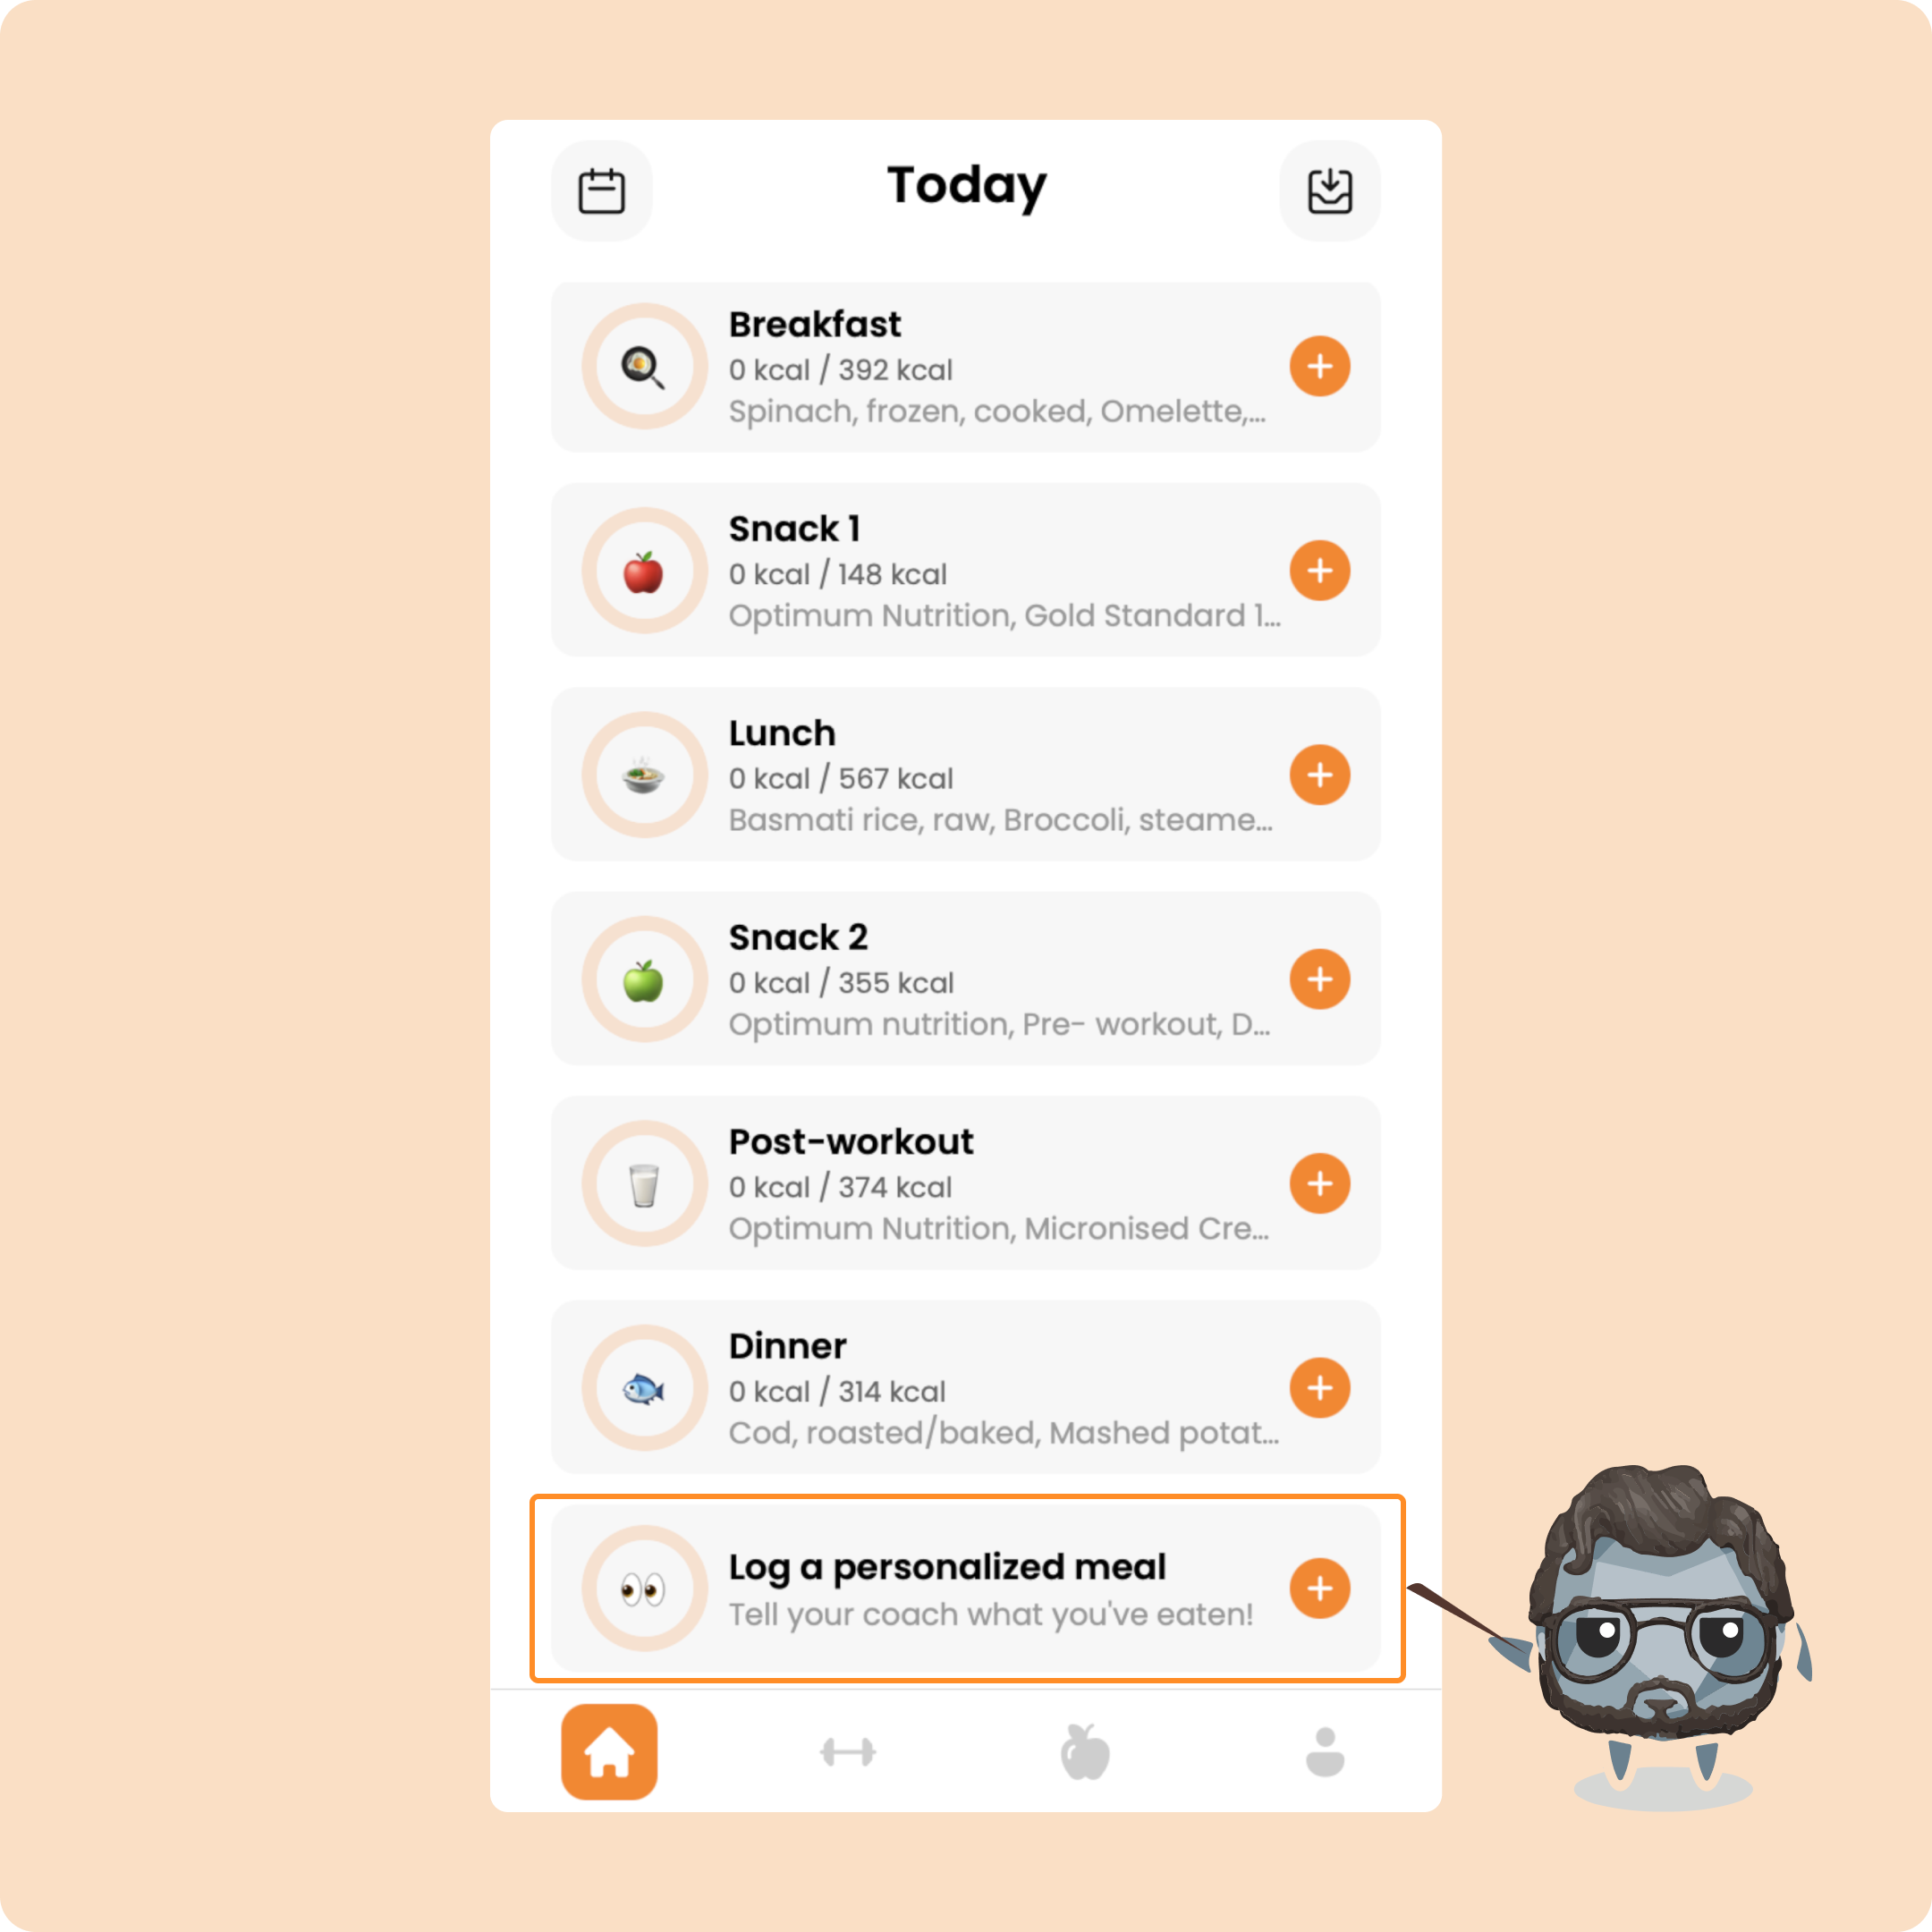
To log meals for the day, click on “Log a custom meal” (Consigner un repas personnalisé).
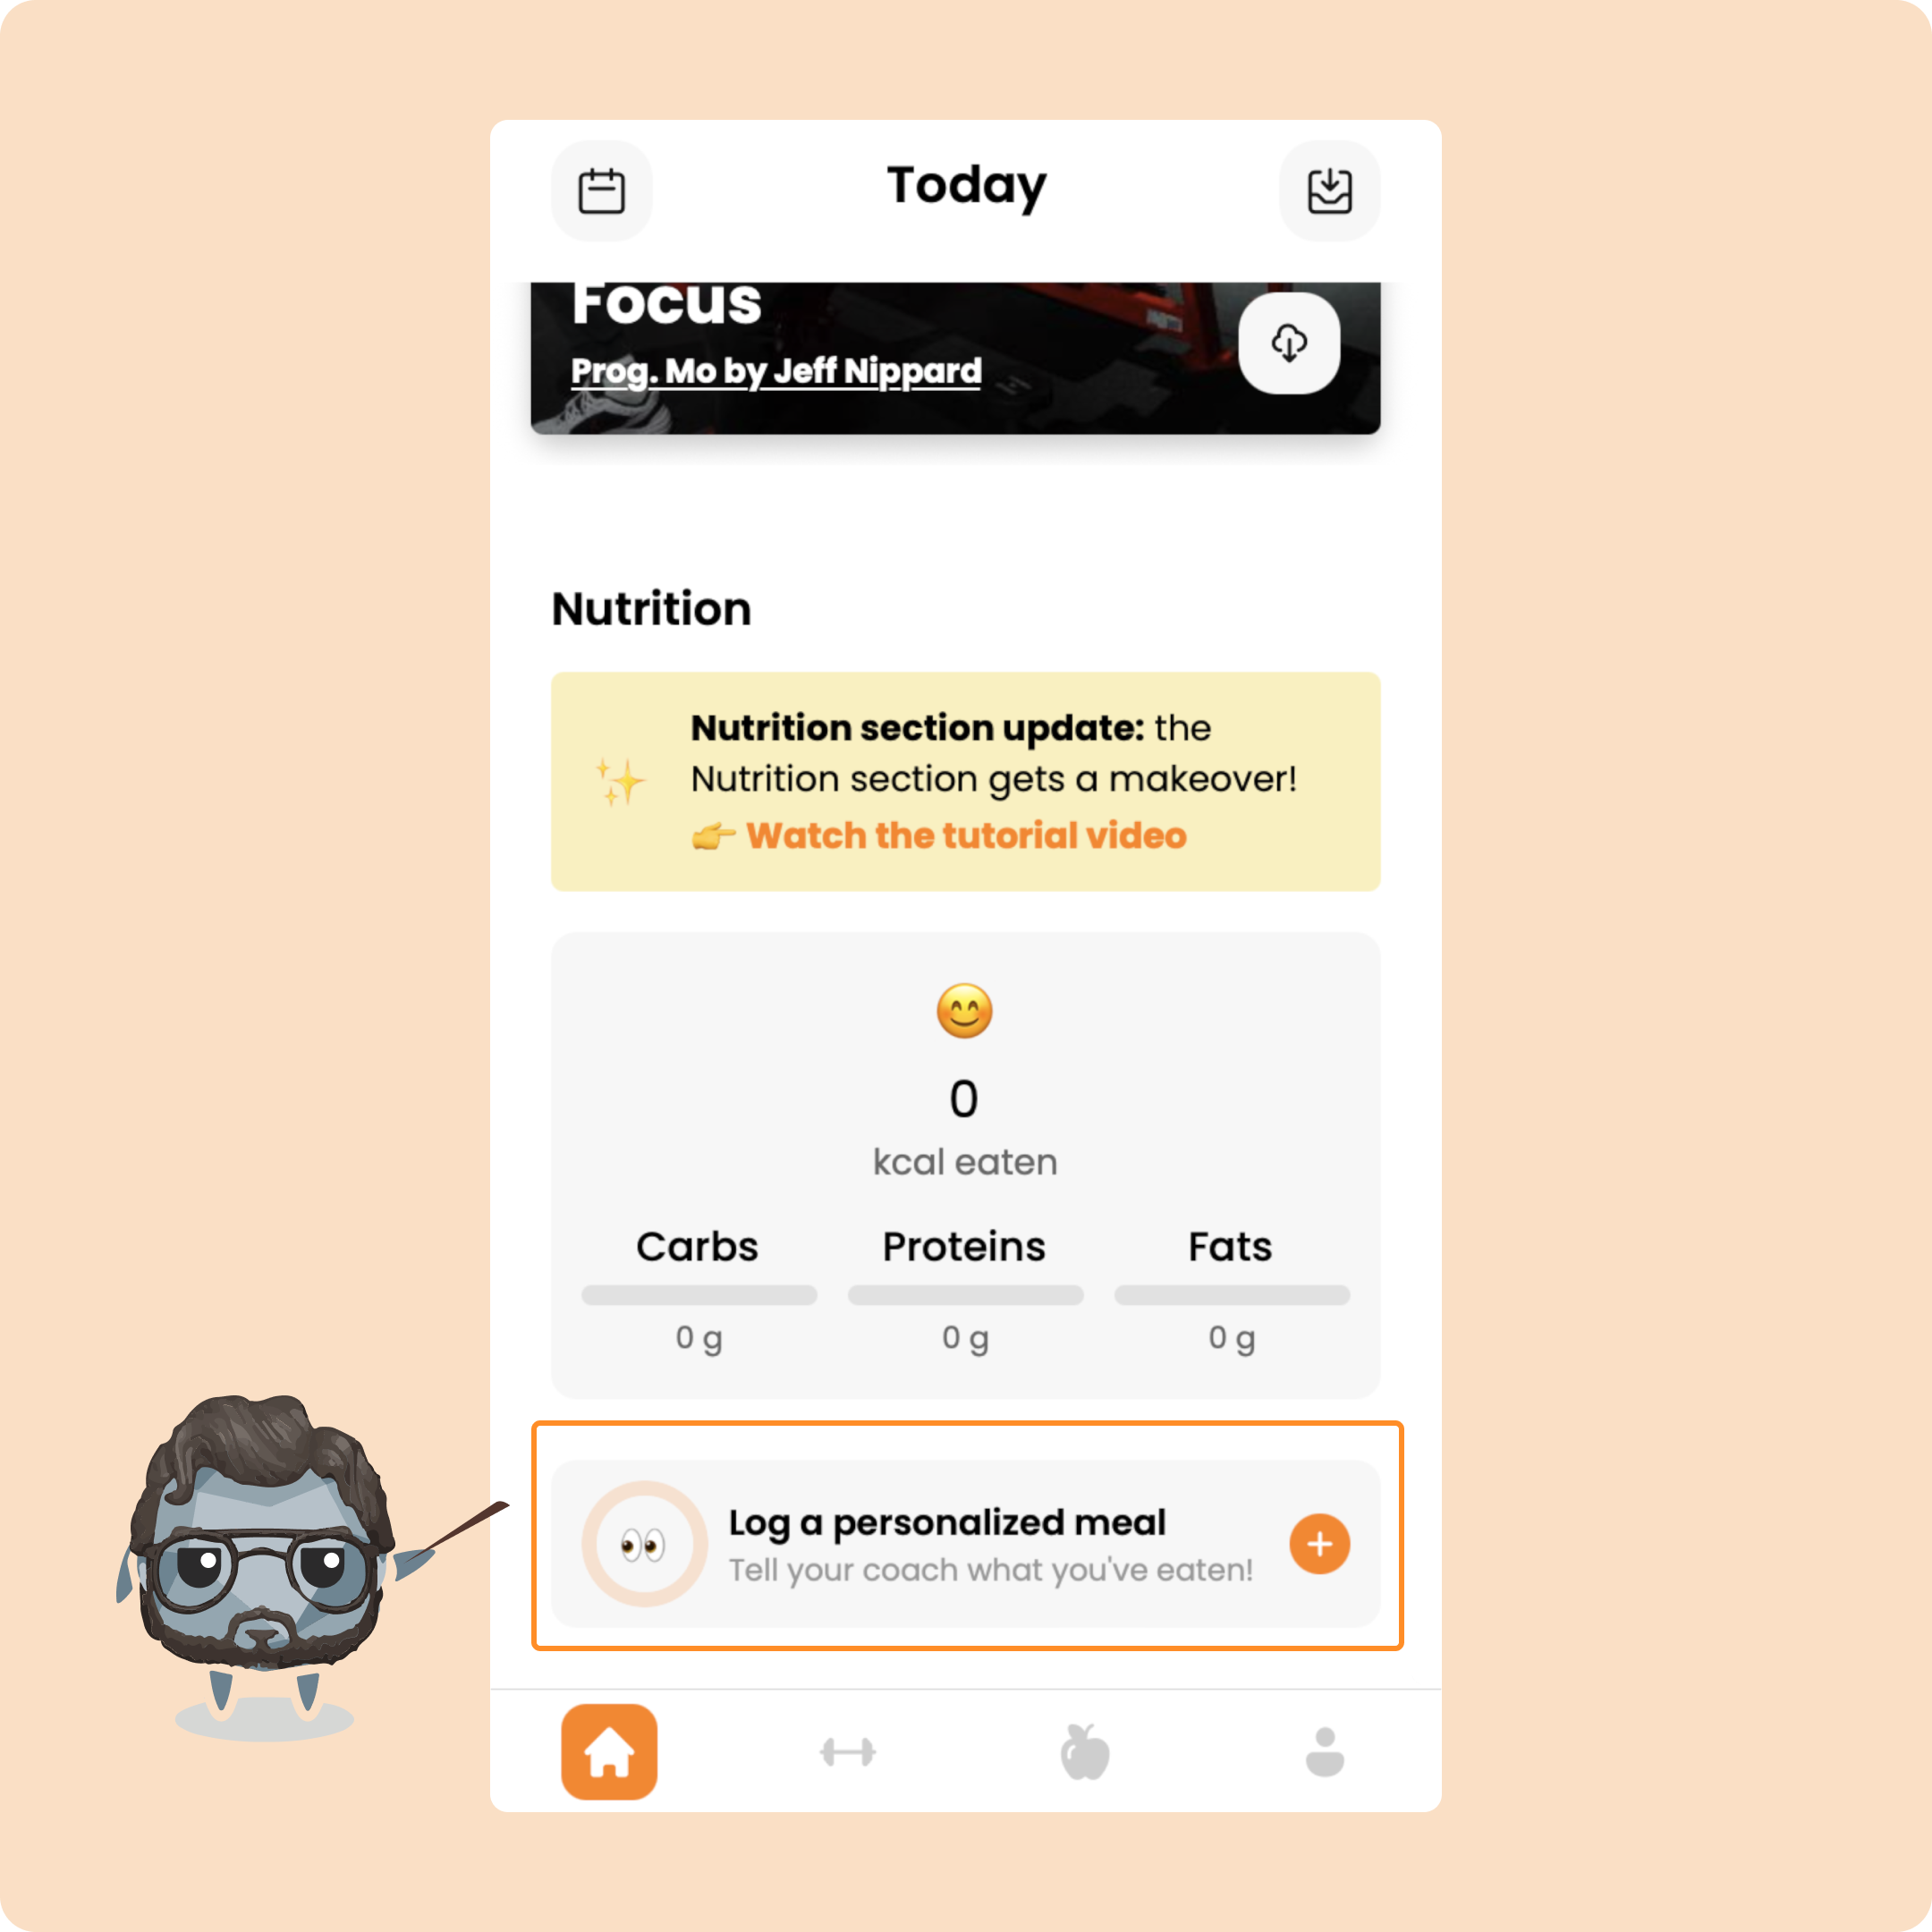
Each time you add a meal, it will appear below with its macro details.
Log meals with a daily calorie goal
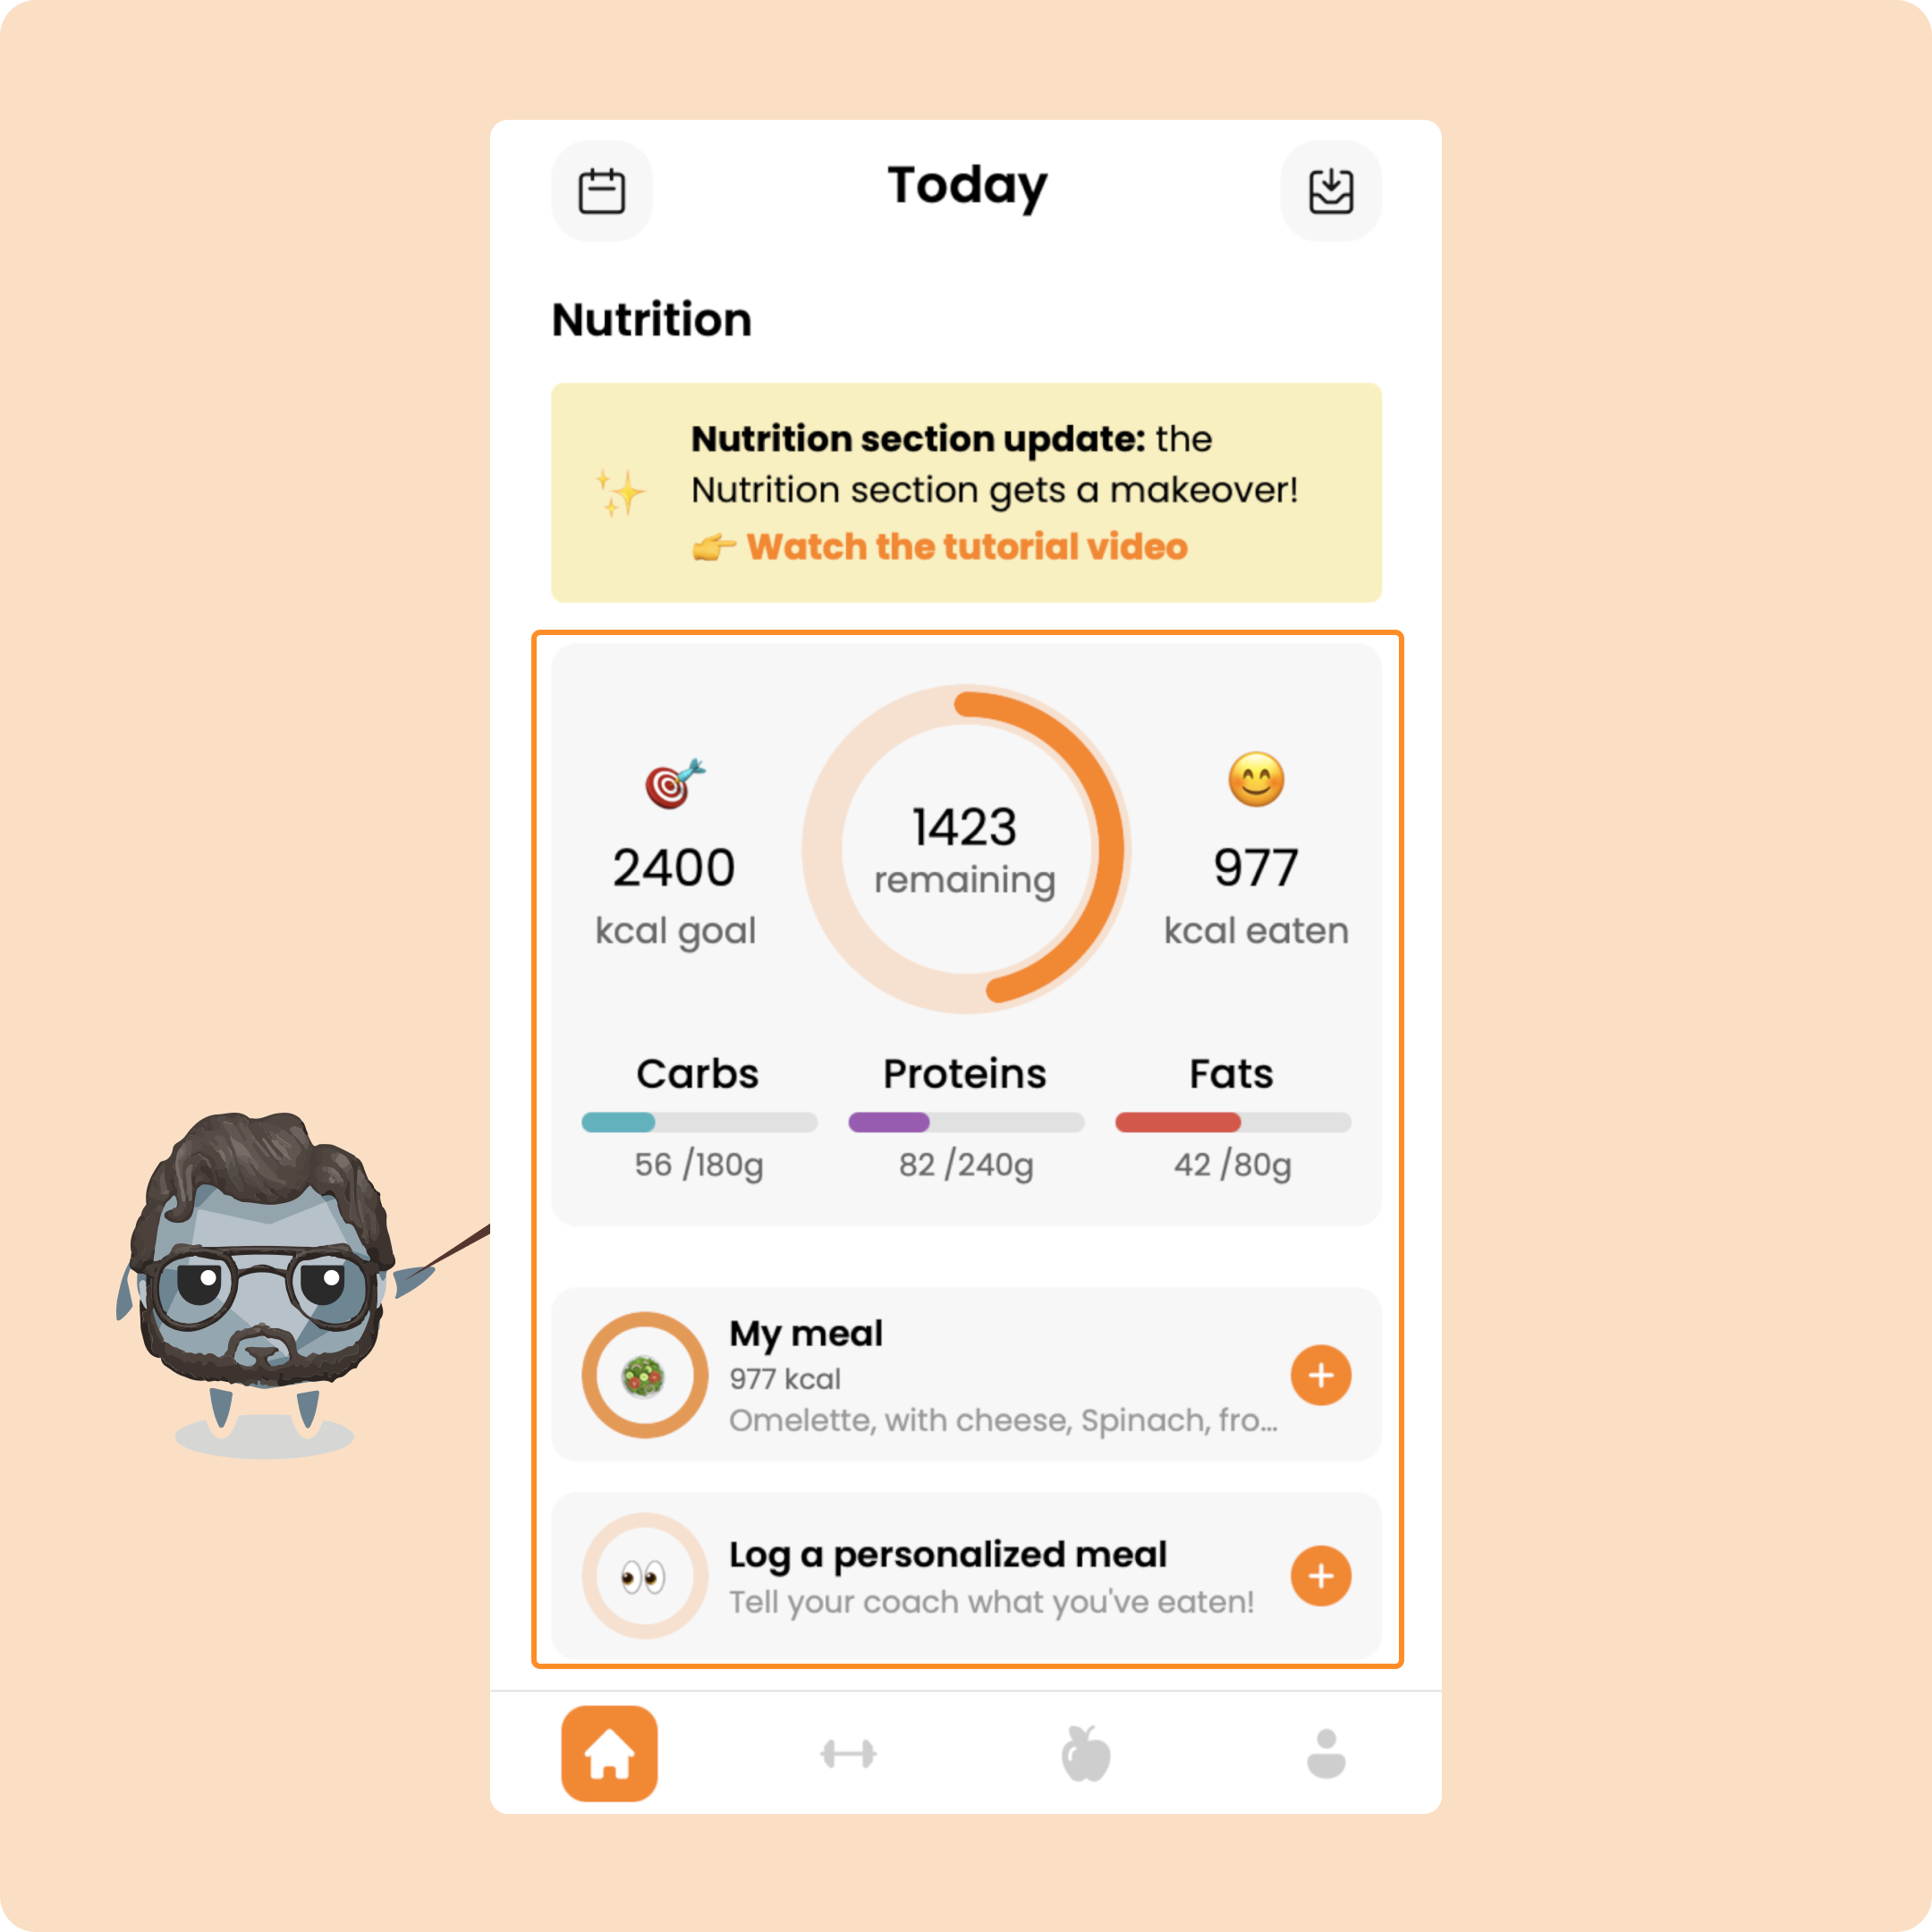
If your coach has given you a daily calorie goal and an indication of macro distribution (carbs, proteins, fats):
It will be the same as in the first case, except that you will have a calorie goal to reach.
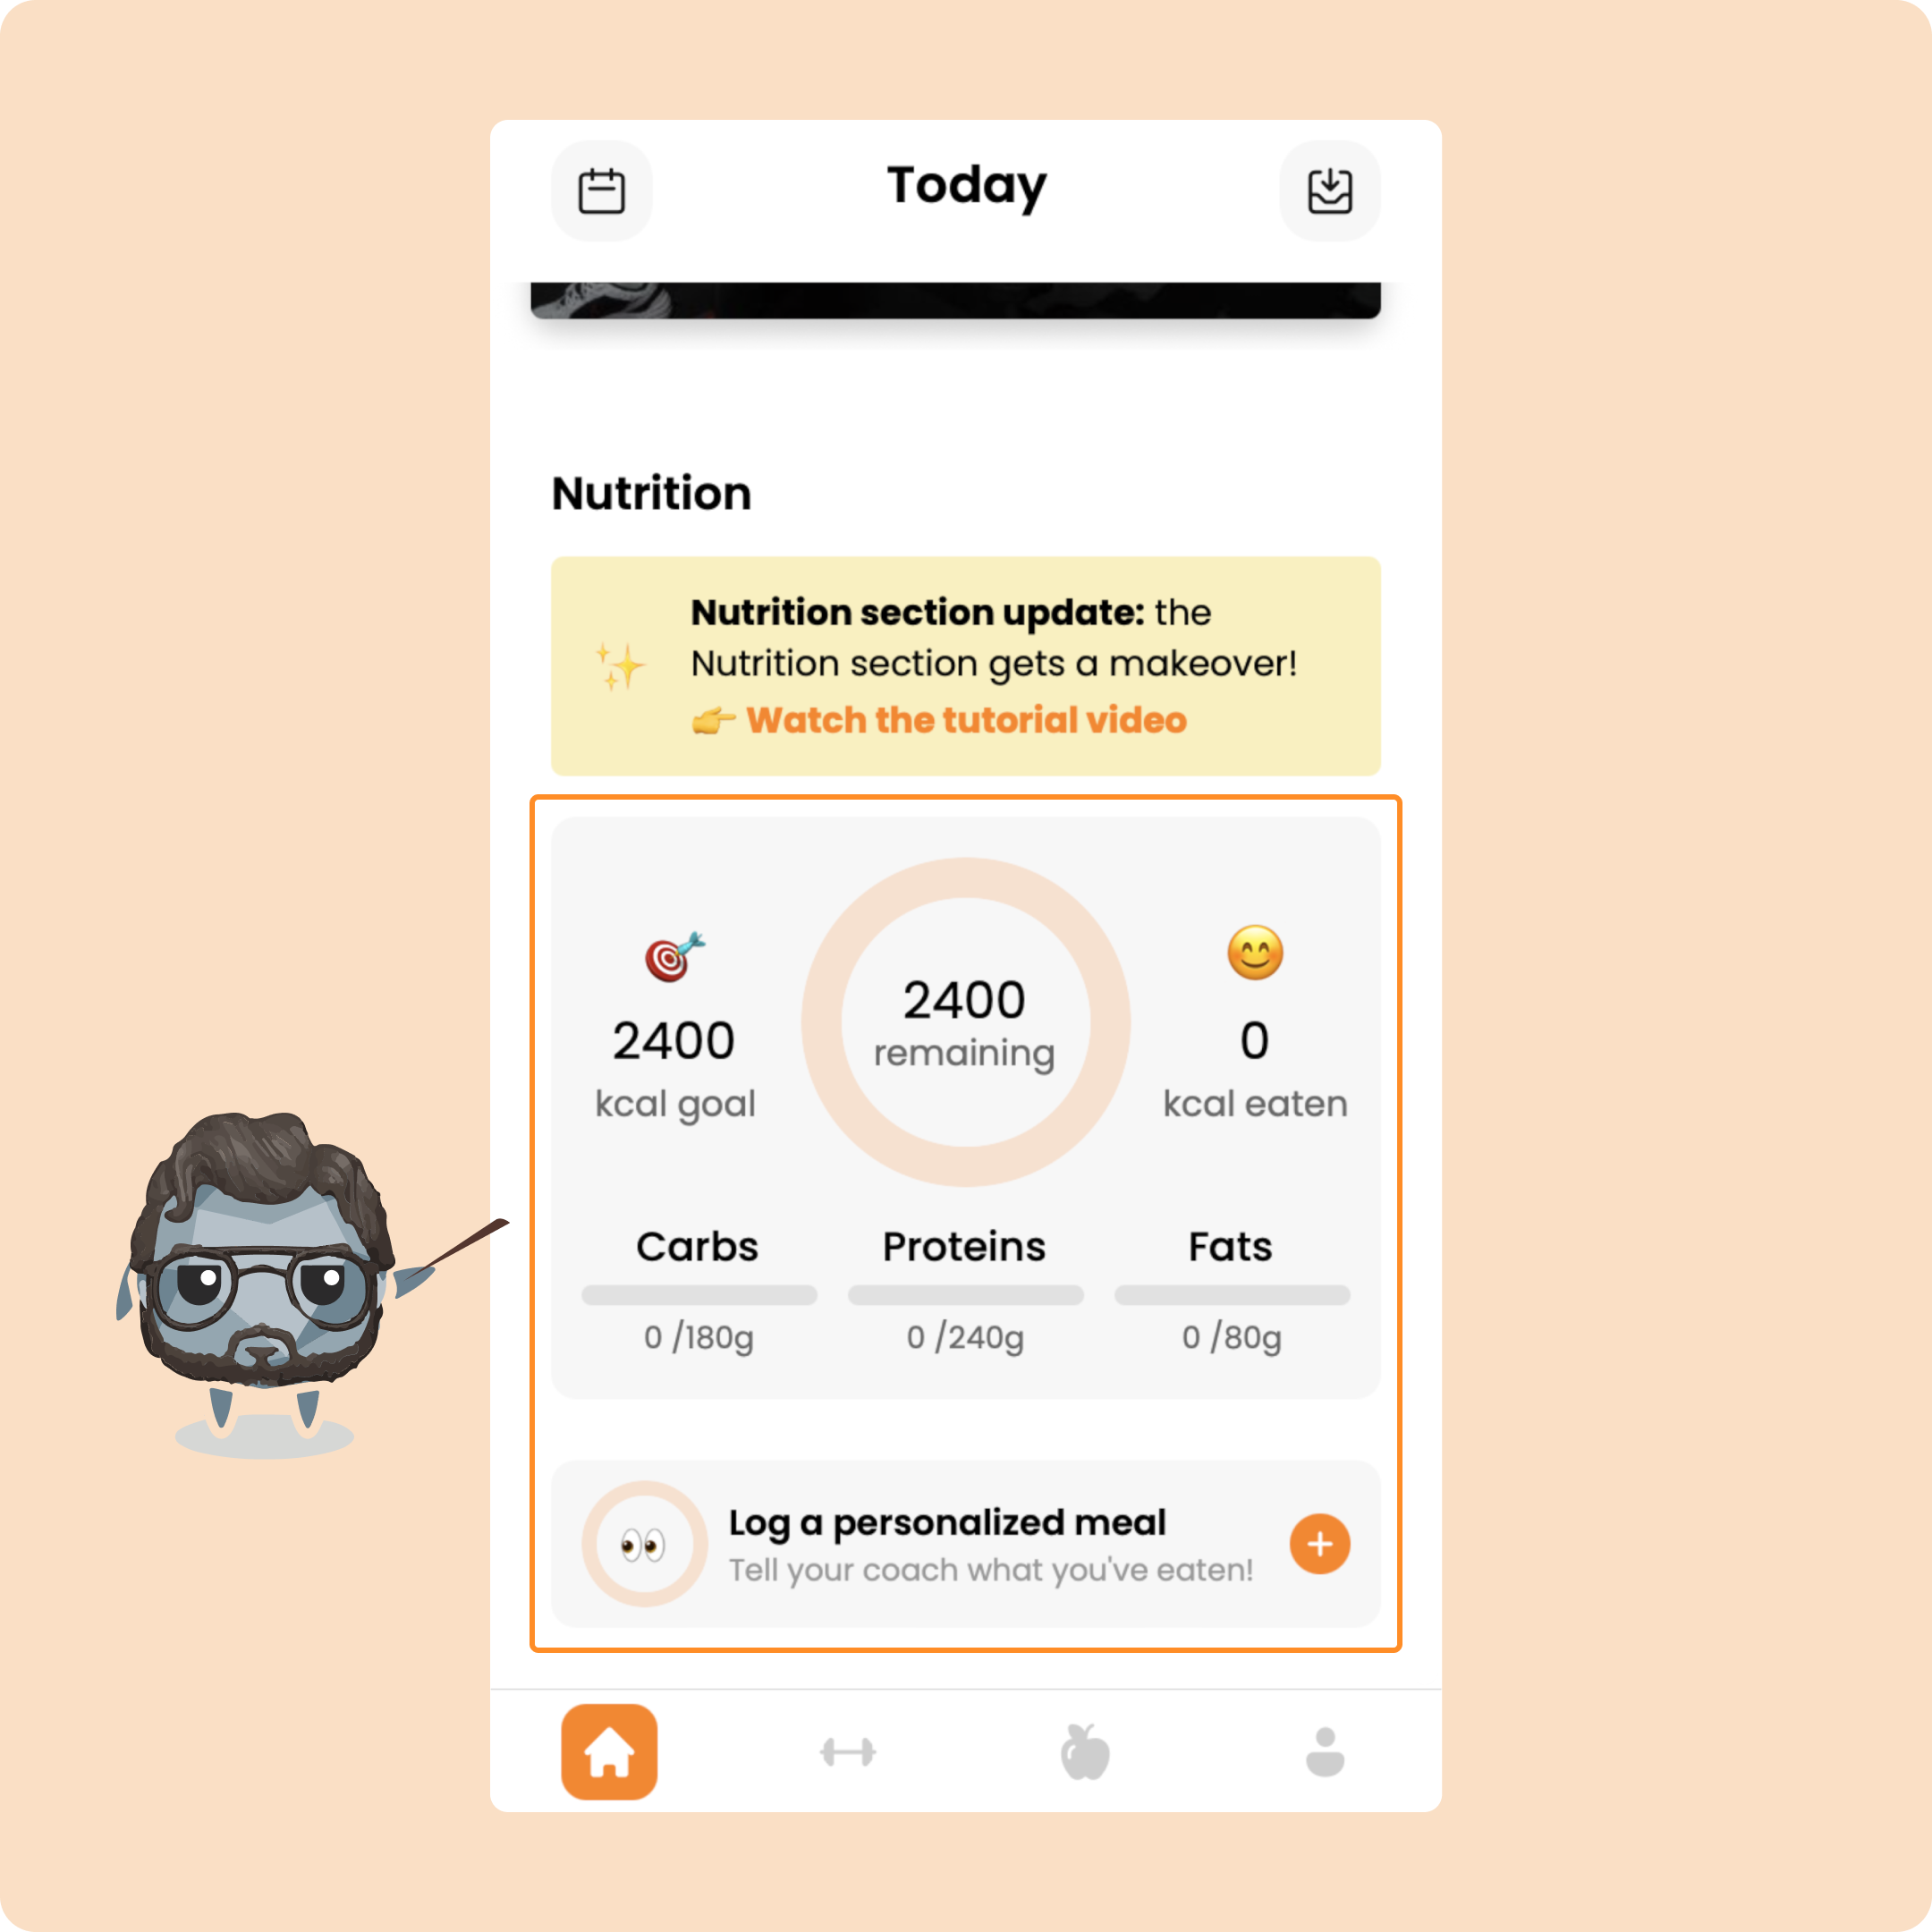
Each time you log a meal, you will see your gauge progress to help you reach your objective.
Log meals with a complete food plan
If you have complete food monitoring, you will receive all your meals from your coach/nutritionist.
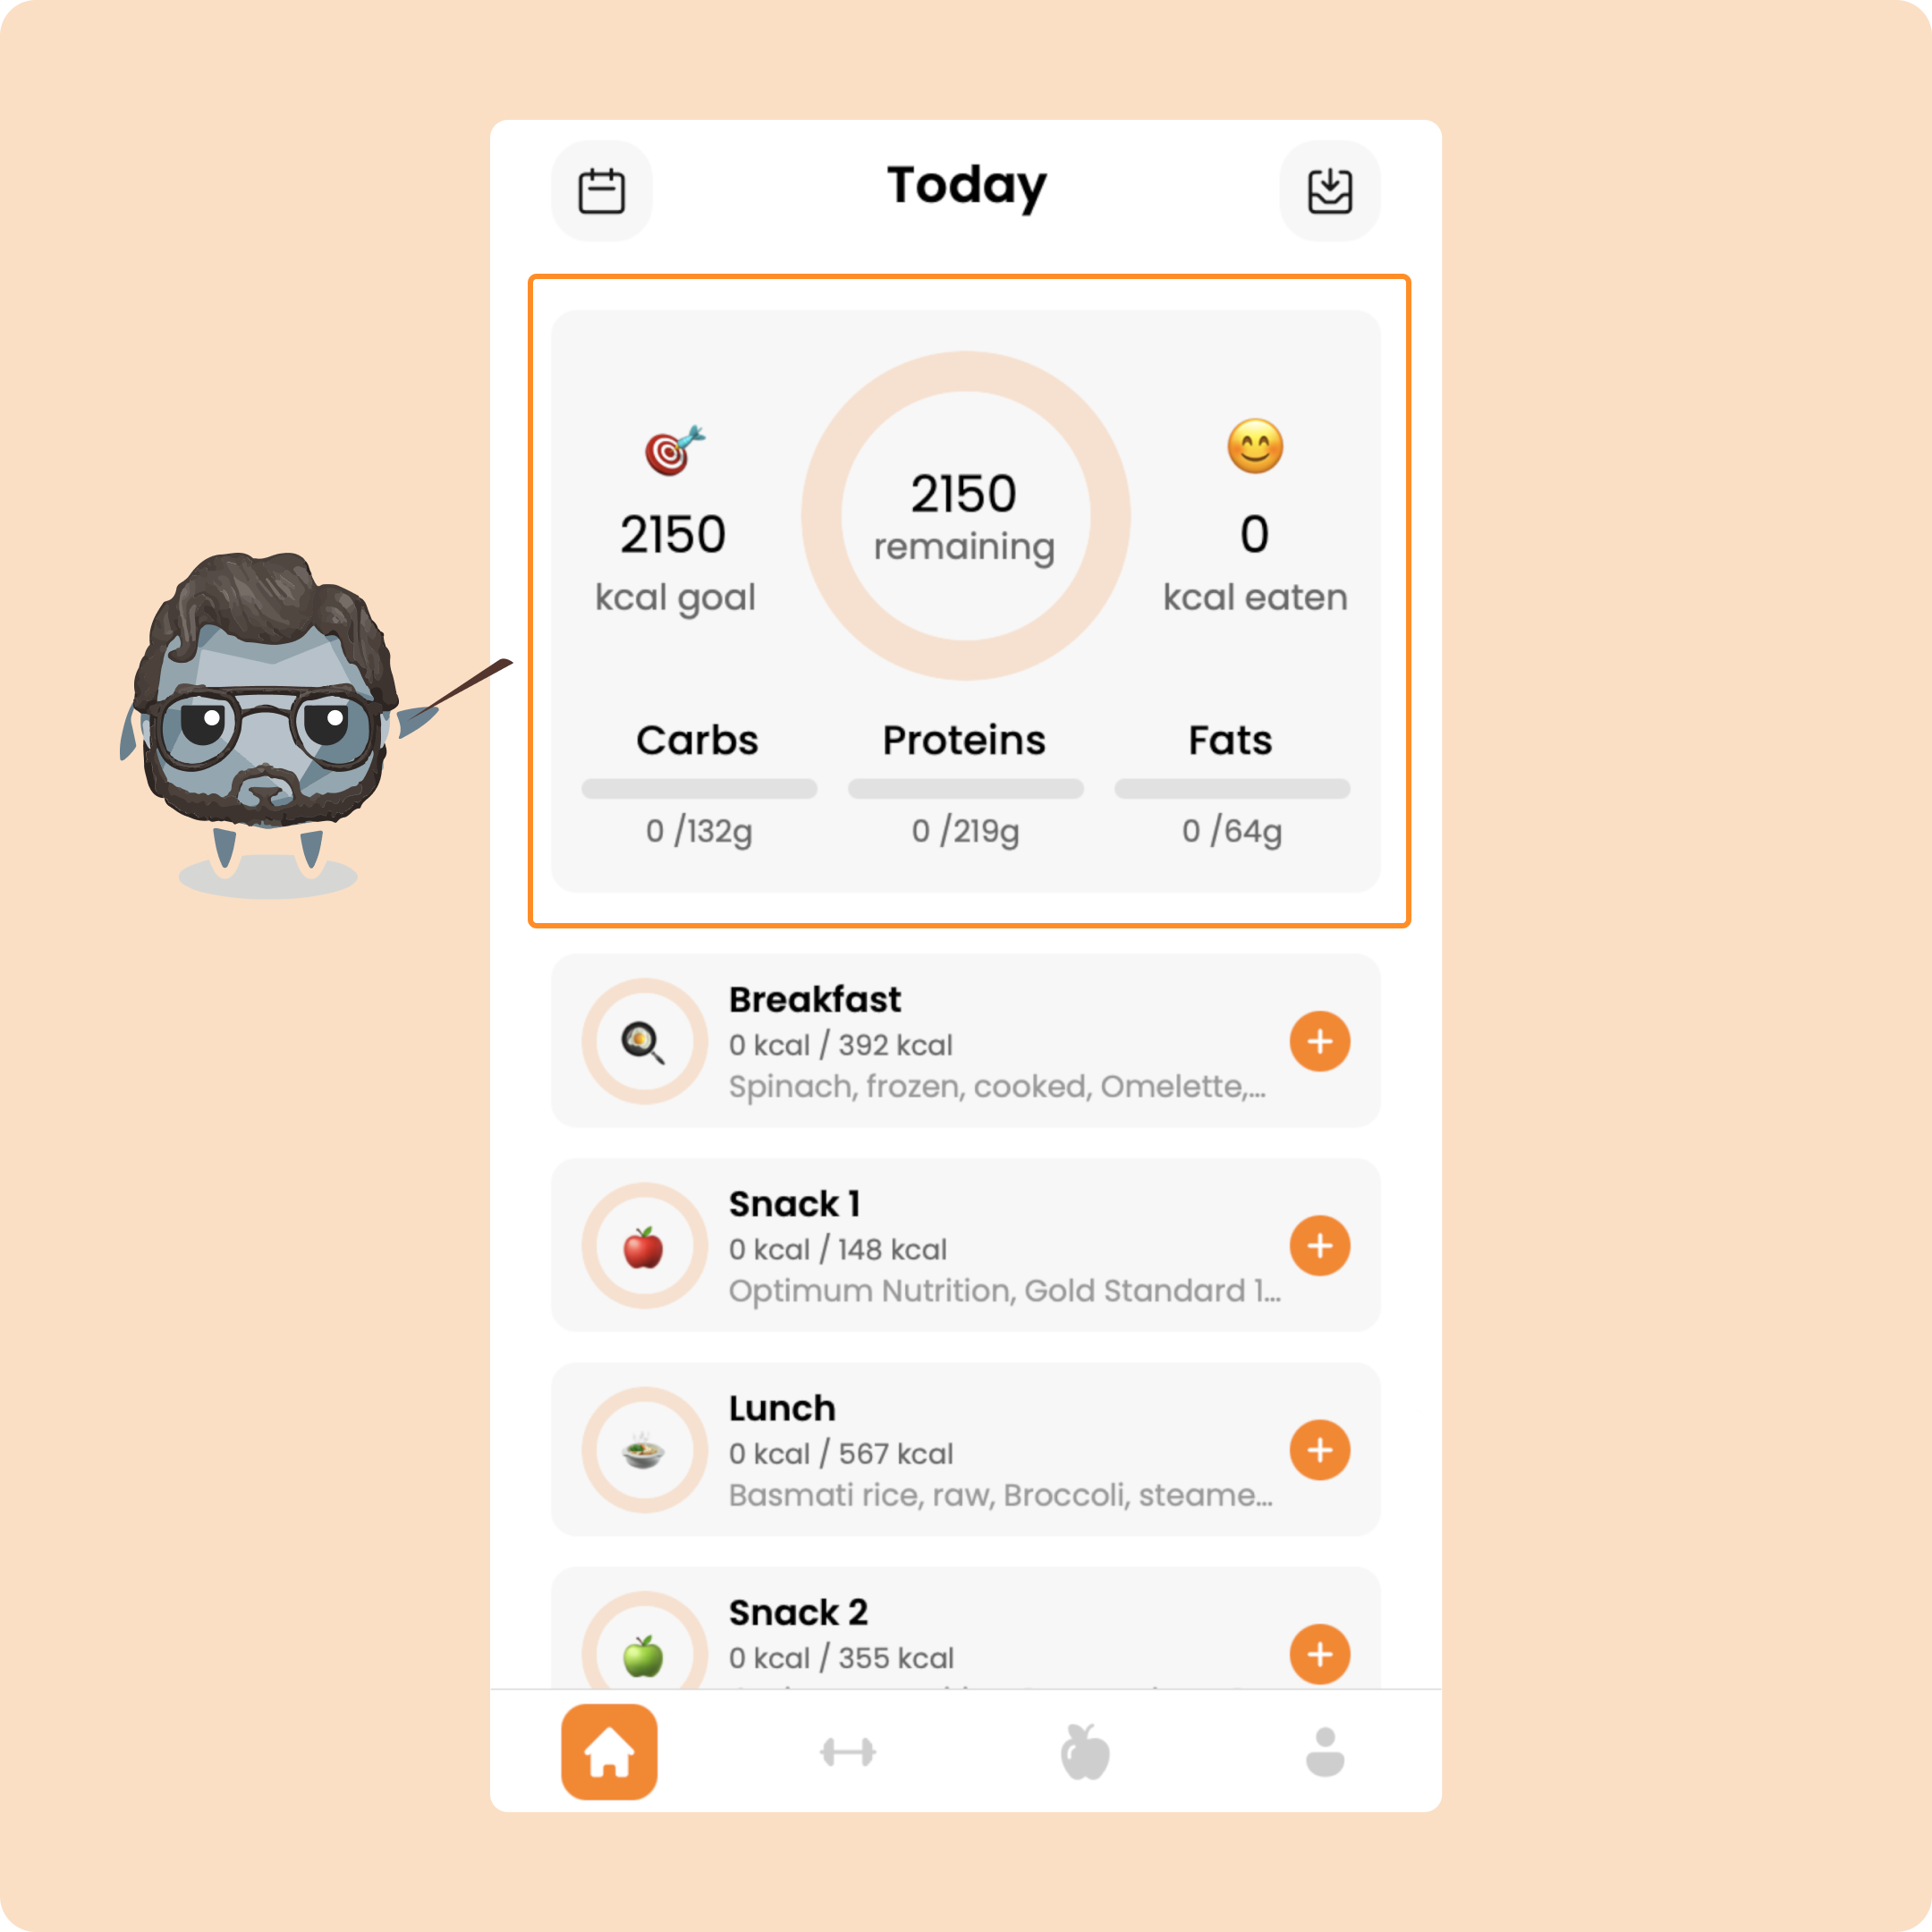
You will therefore receive all your daily meals.
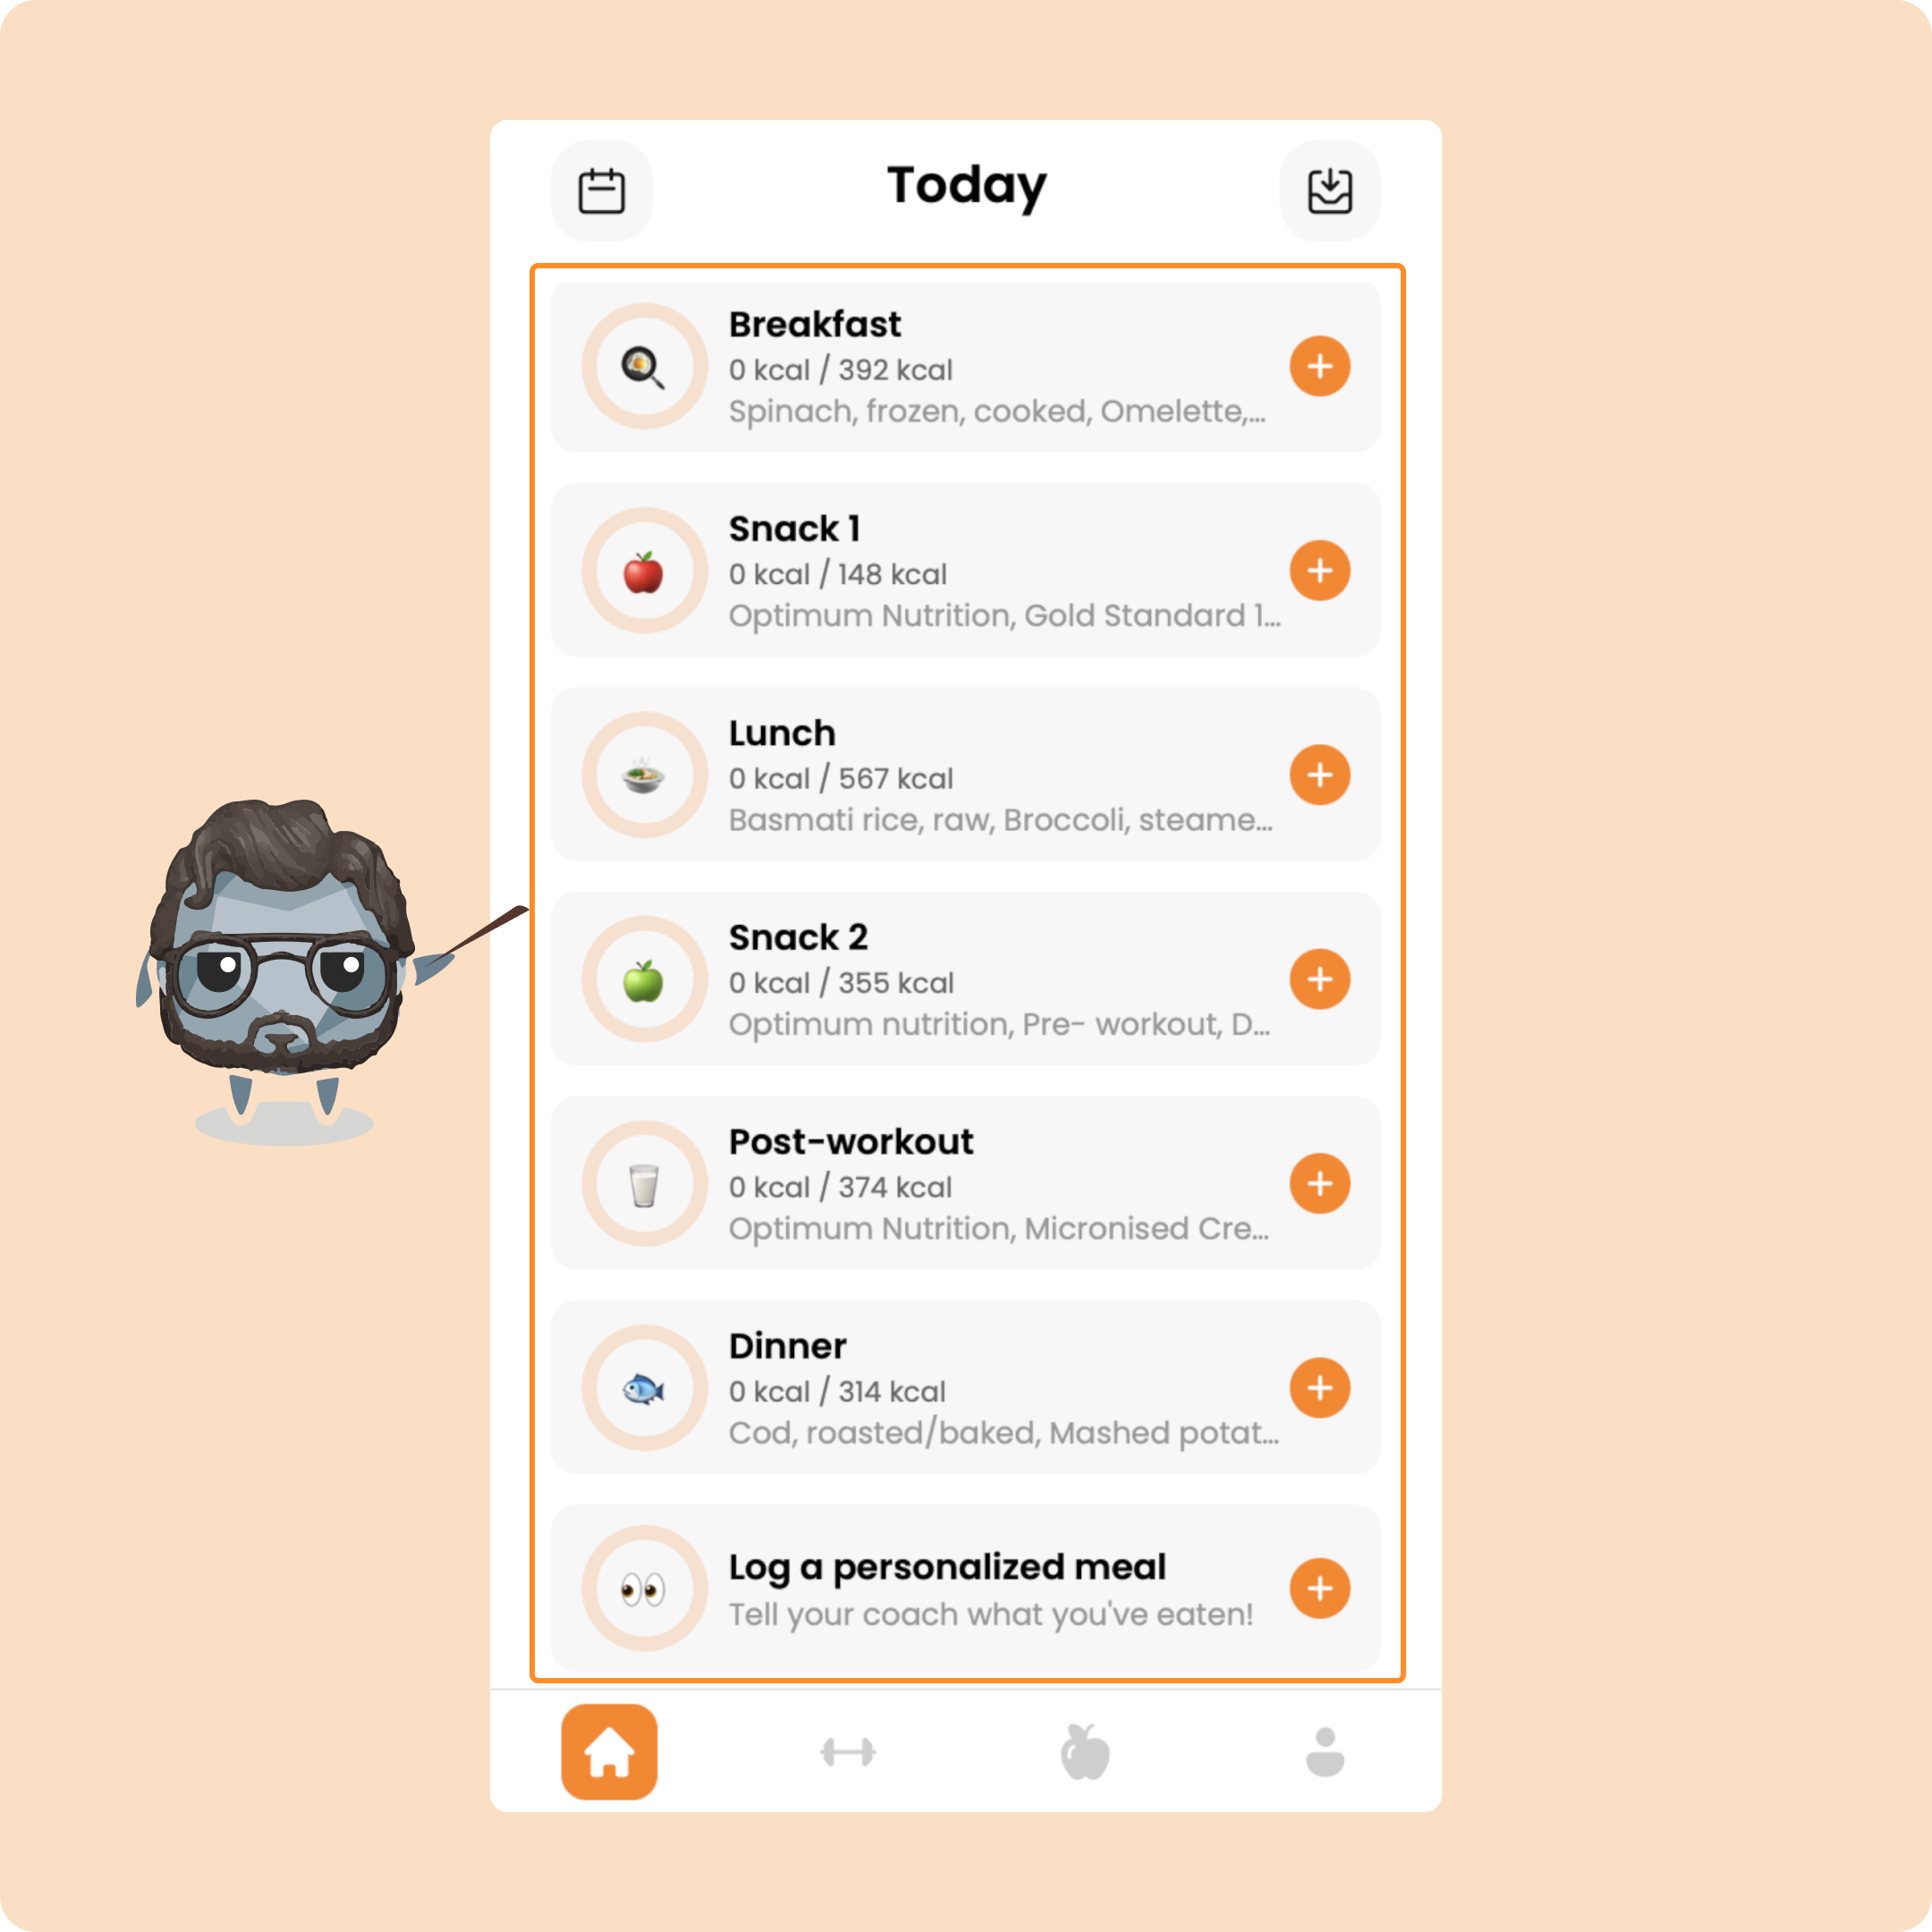
If you eat something else, not included in your basic plan, you will be able to log it.
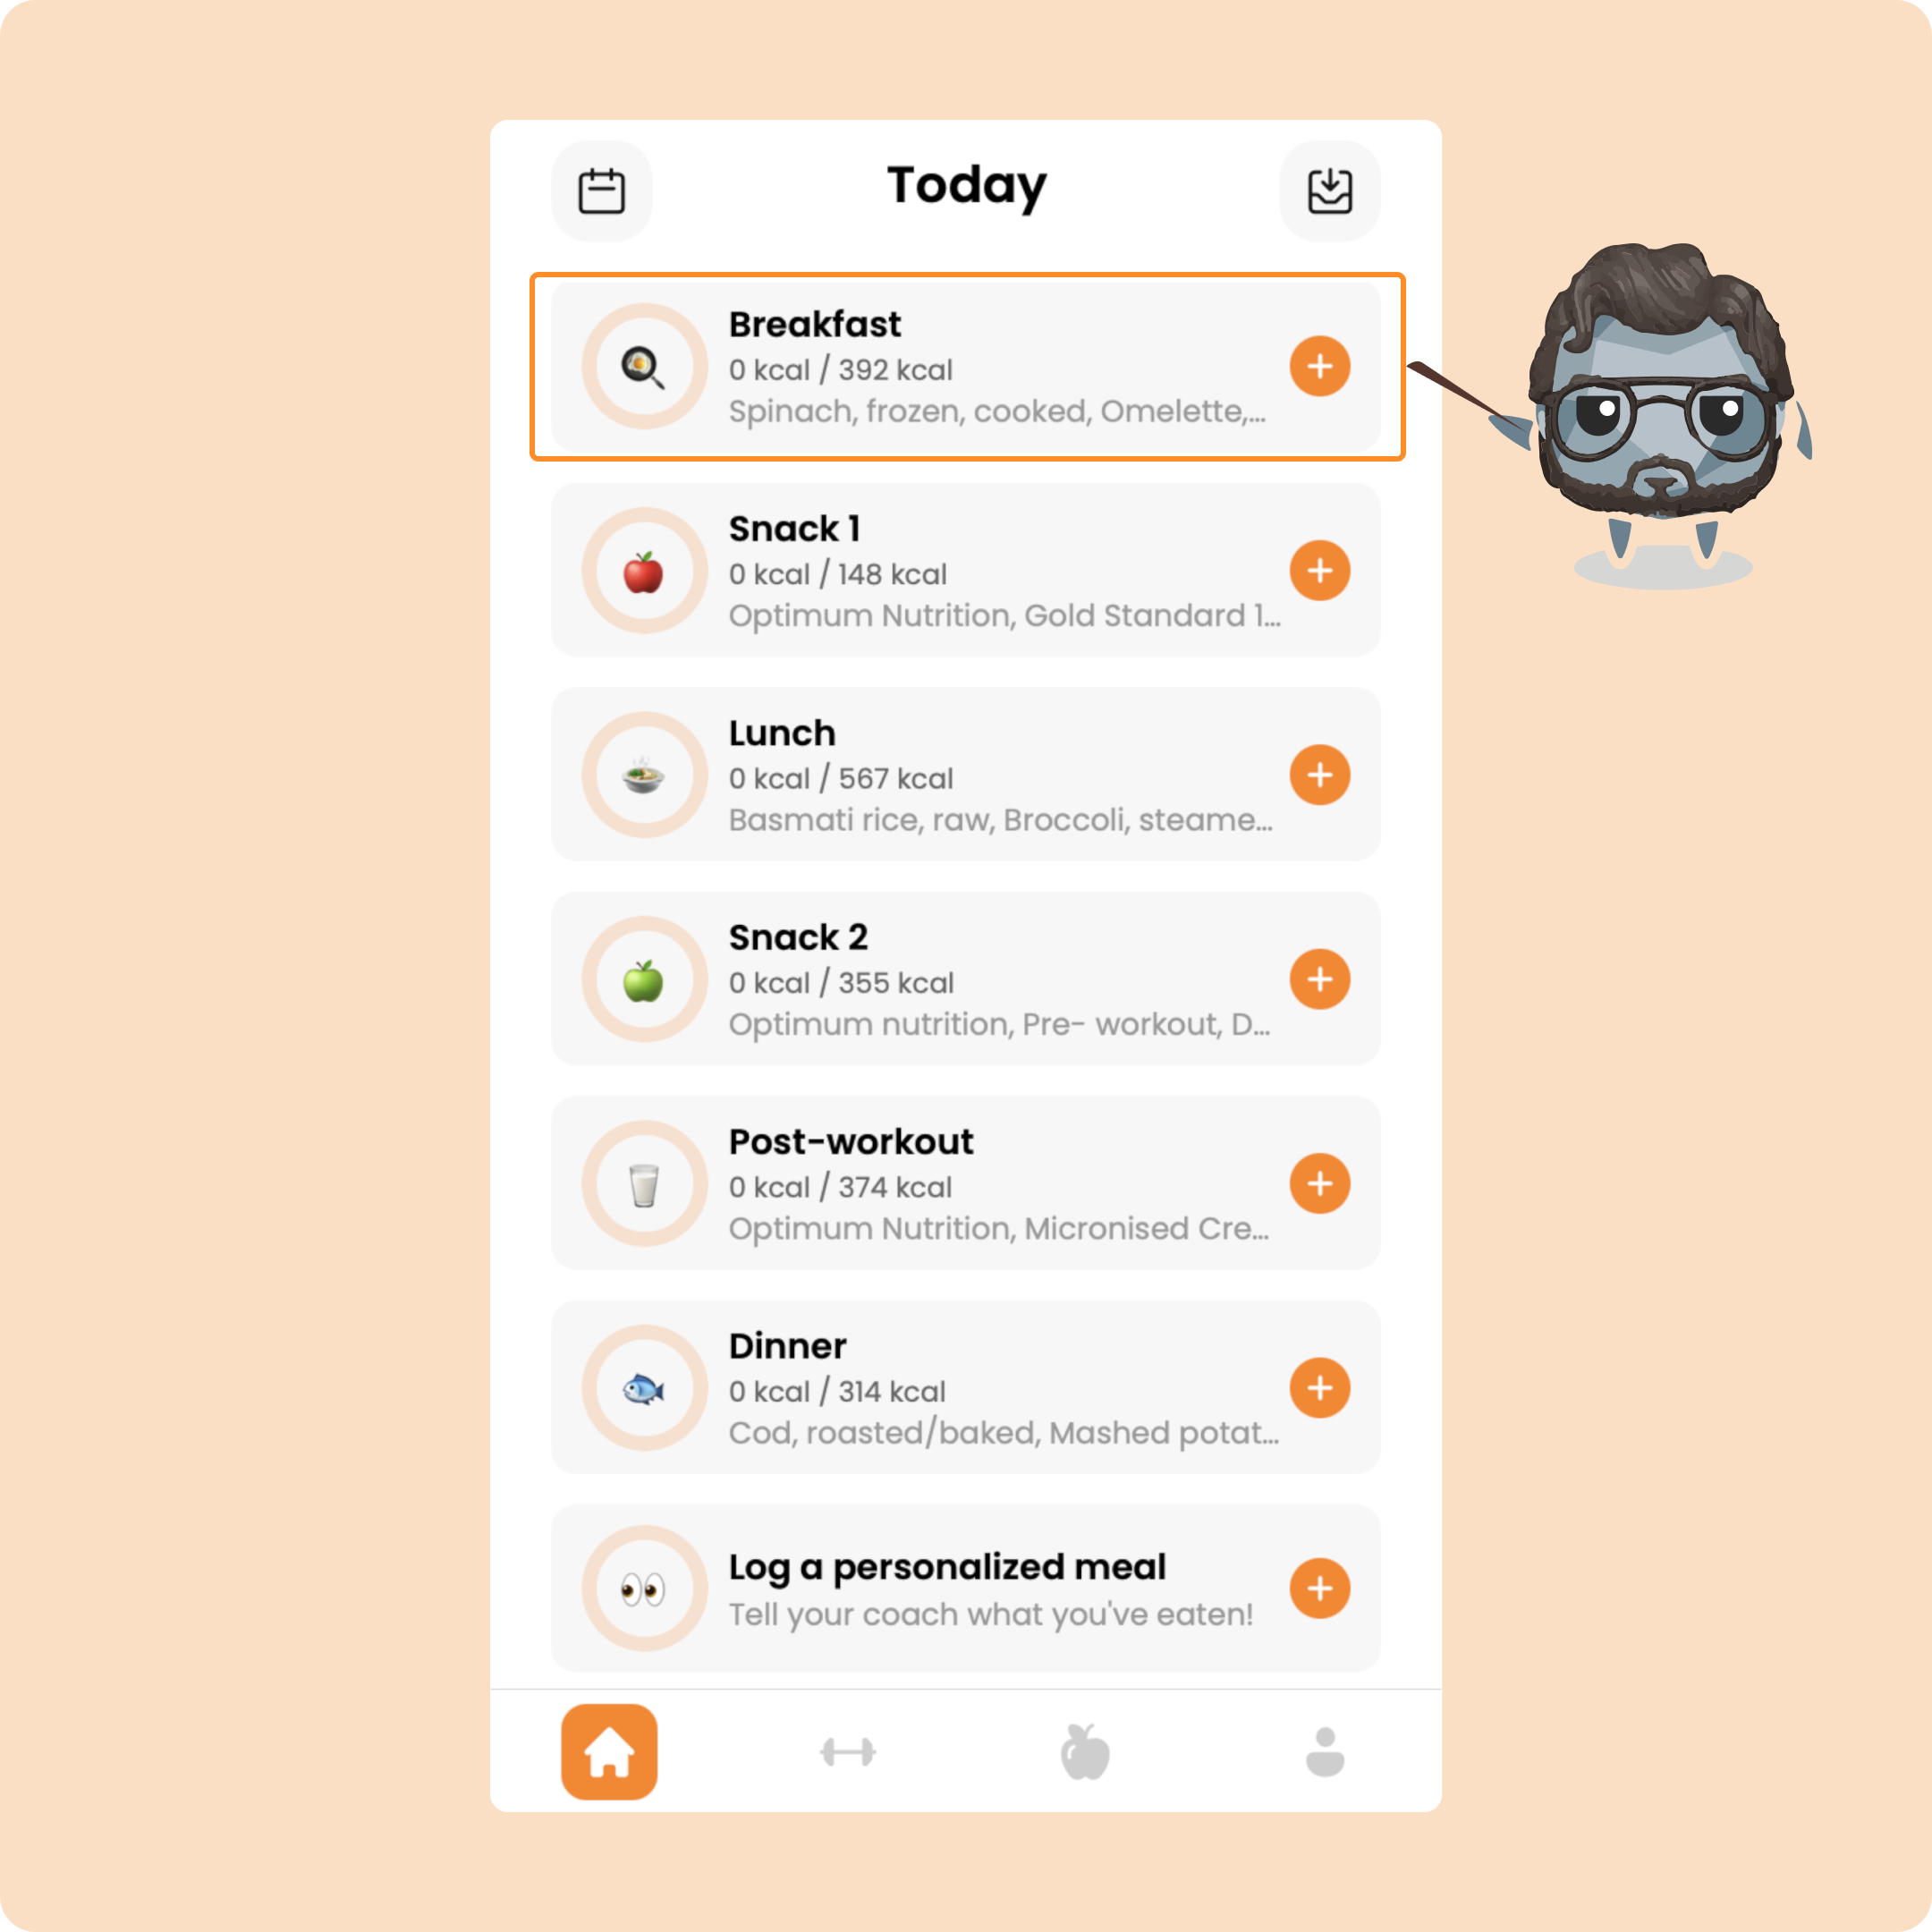
Now we will be able to see directly how to log the meal given by your coach.
To log a meal, you just need to press on it.
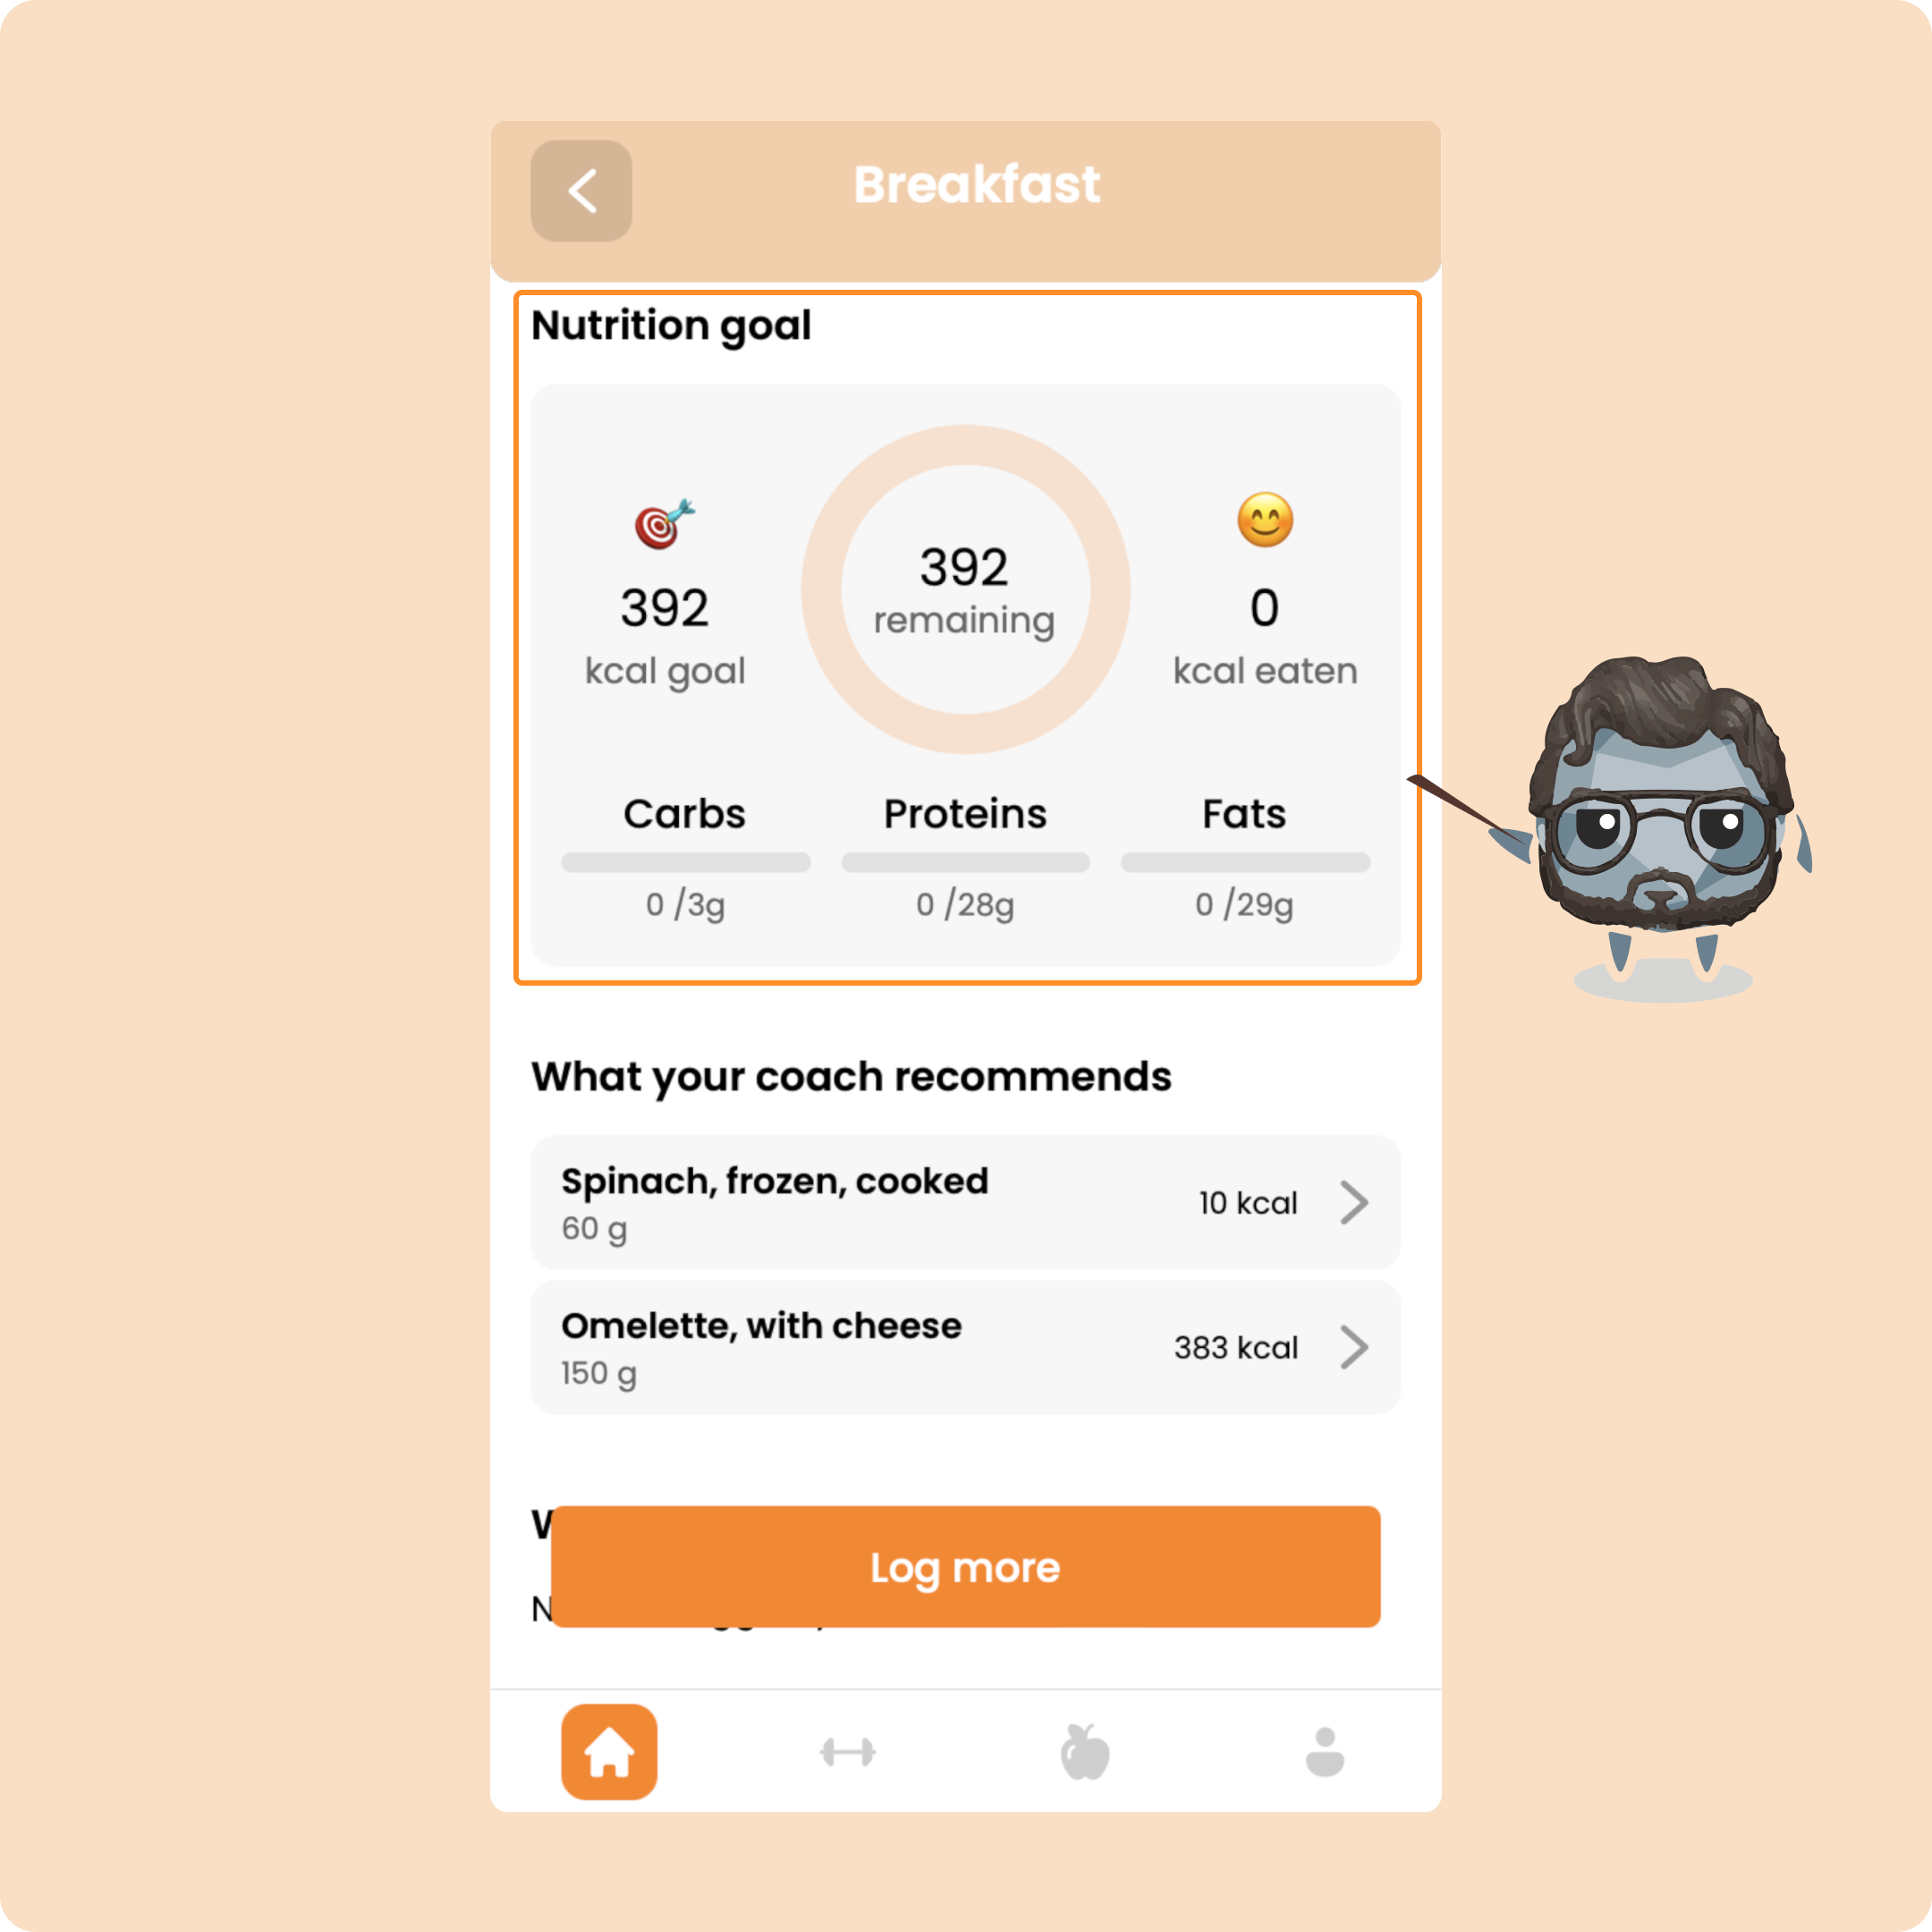
You will be able to access the nutritional goal of this meal.
As for the day, you will be able to see what you have consumed compared to the set goal and you will have visibility on all the macros.
If you scroll down just a little, you will be able to find the foods that your coach recommends you to consume.
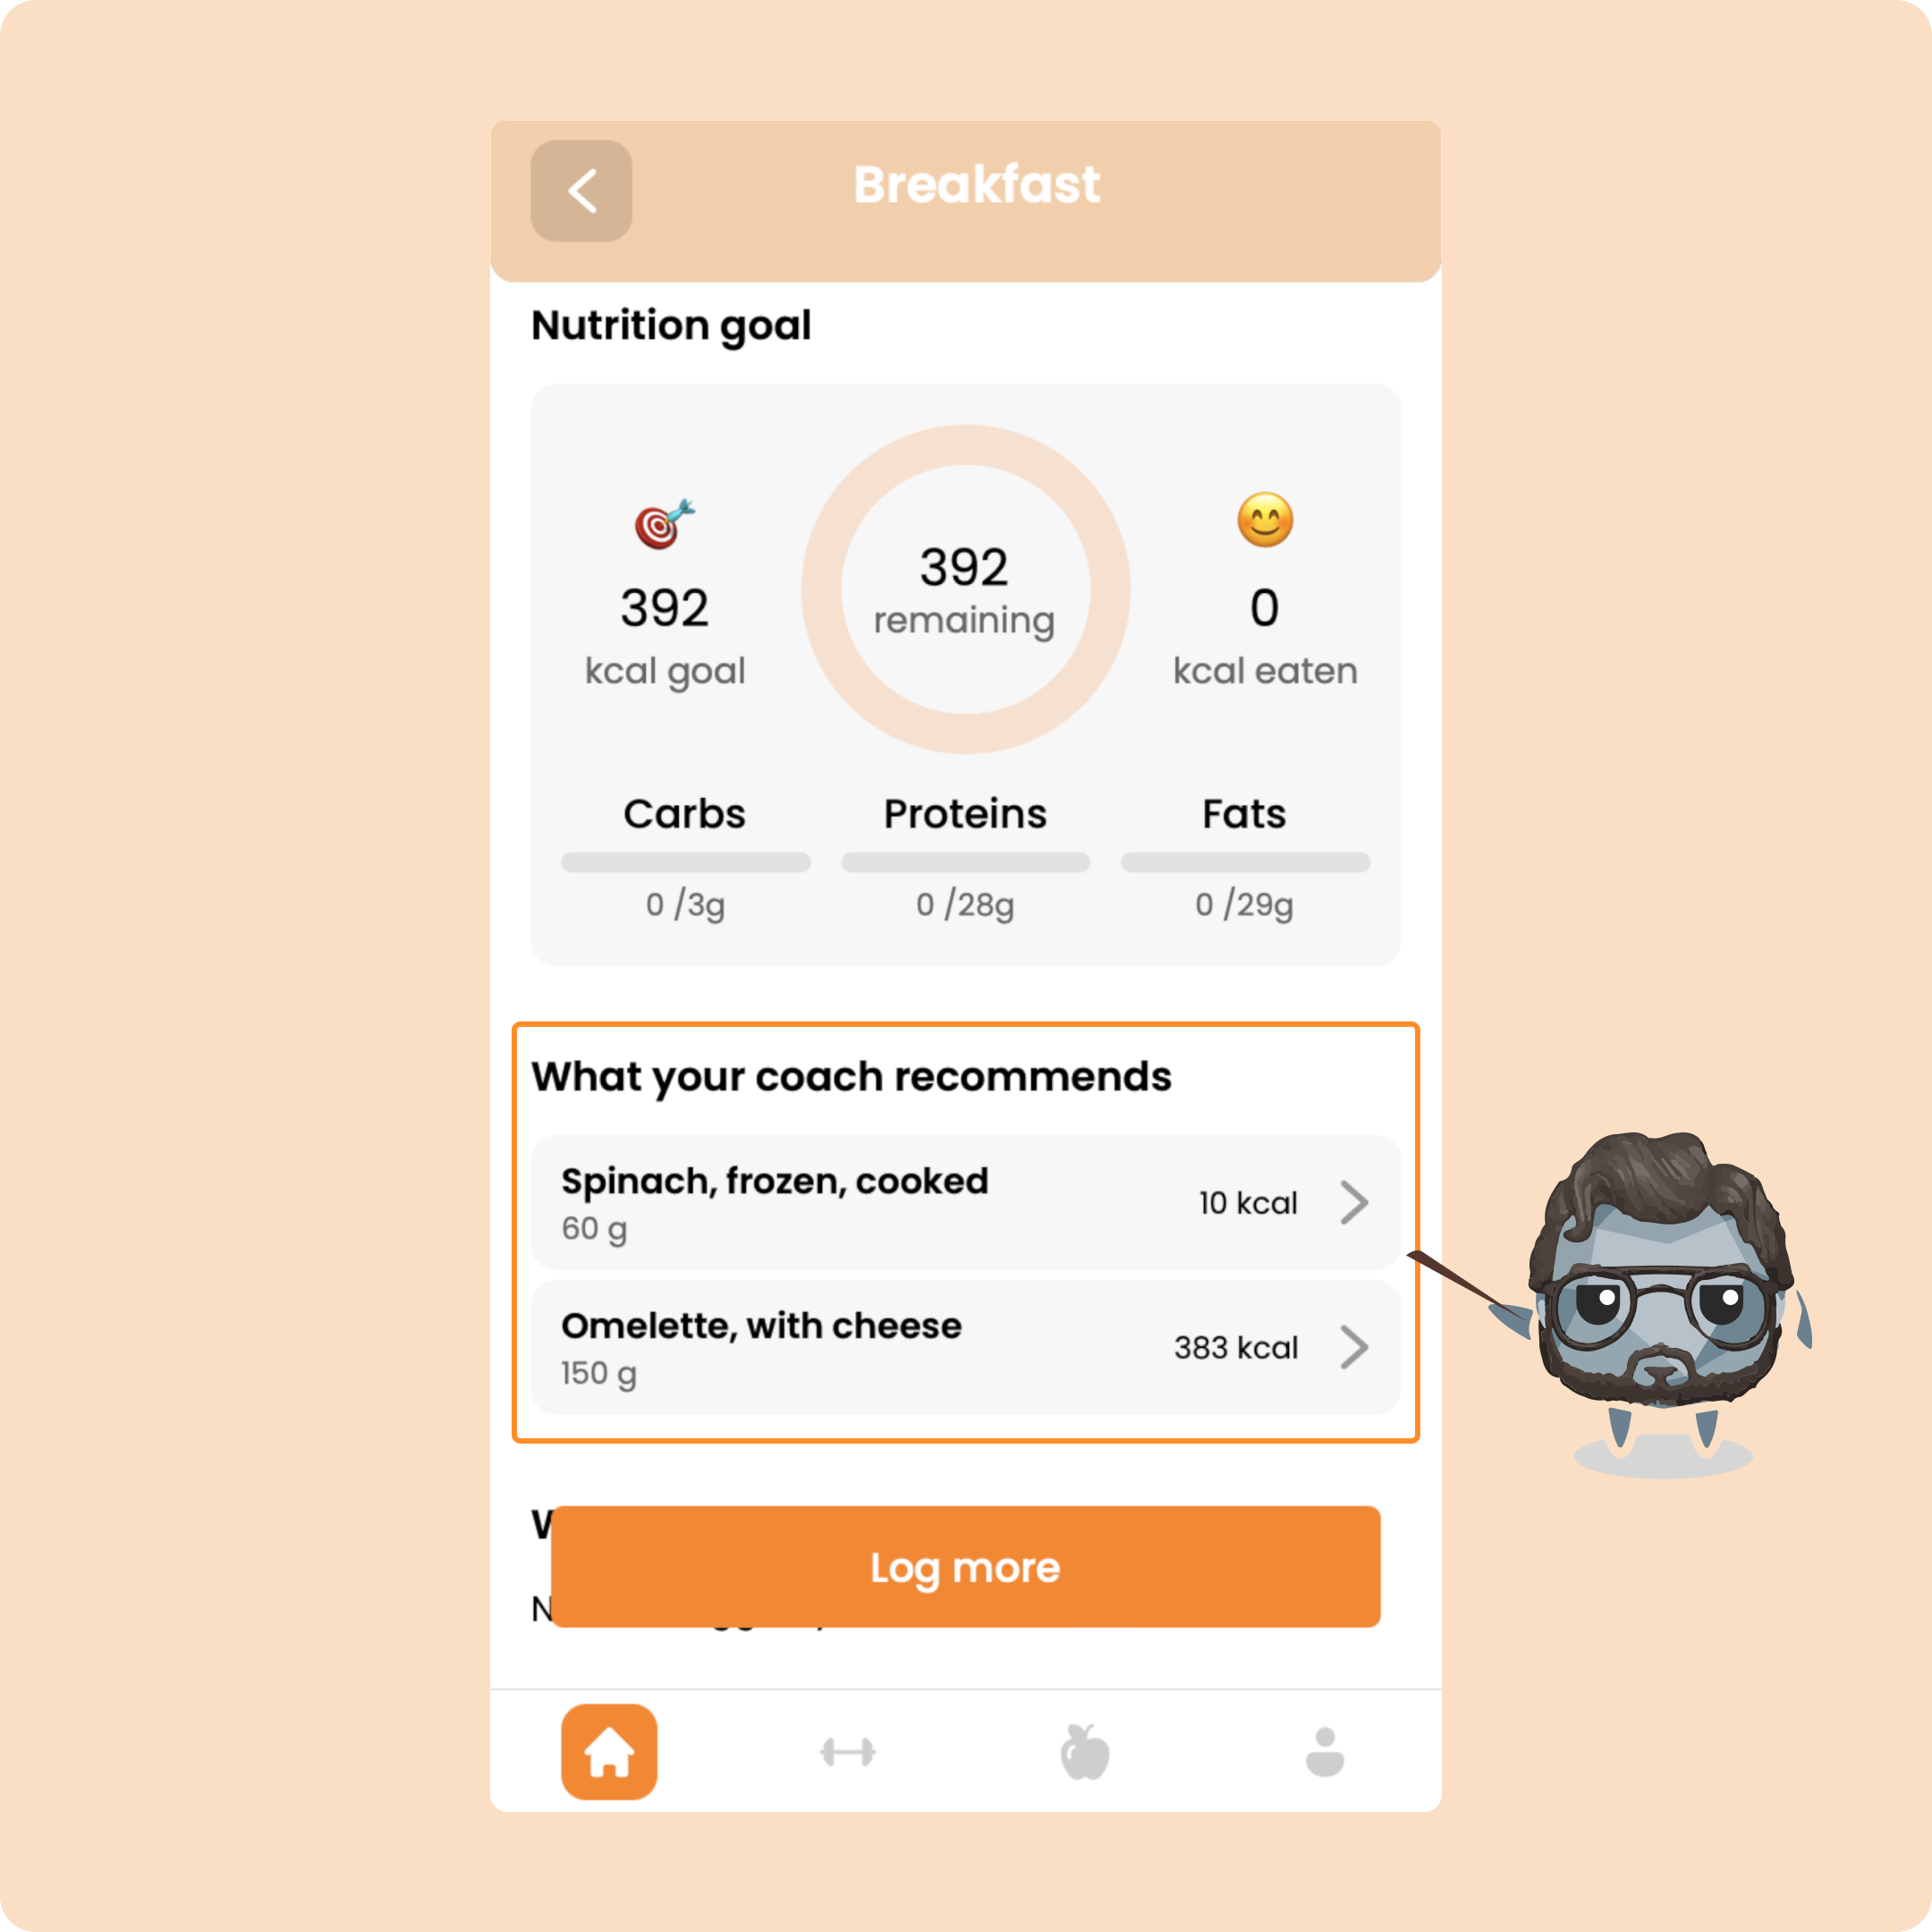
To log a food from your coach, you simply just need to press on it.
Once you have pressed on it, you will be able to log it in one click because it will already be at the recommended value:
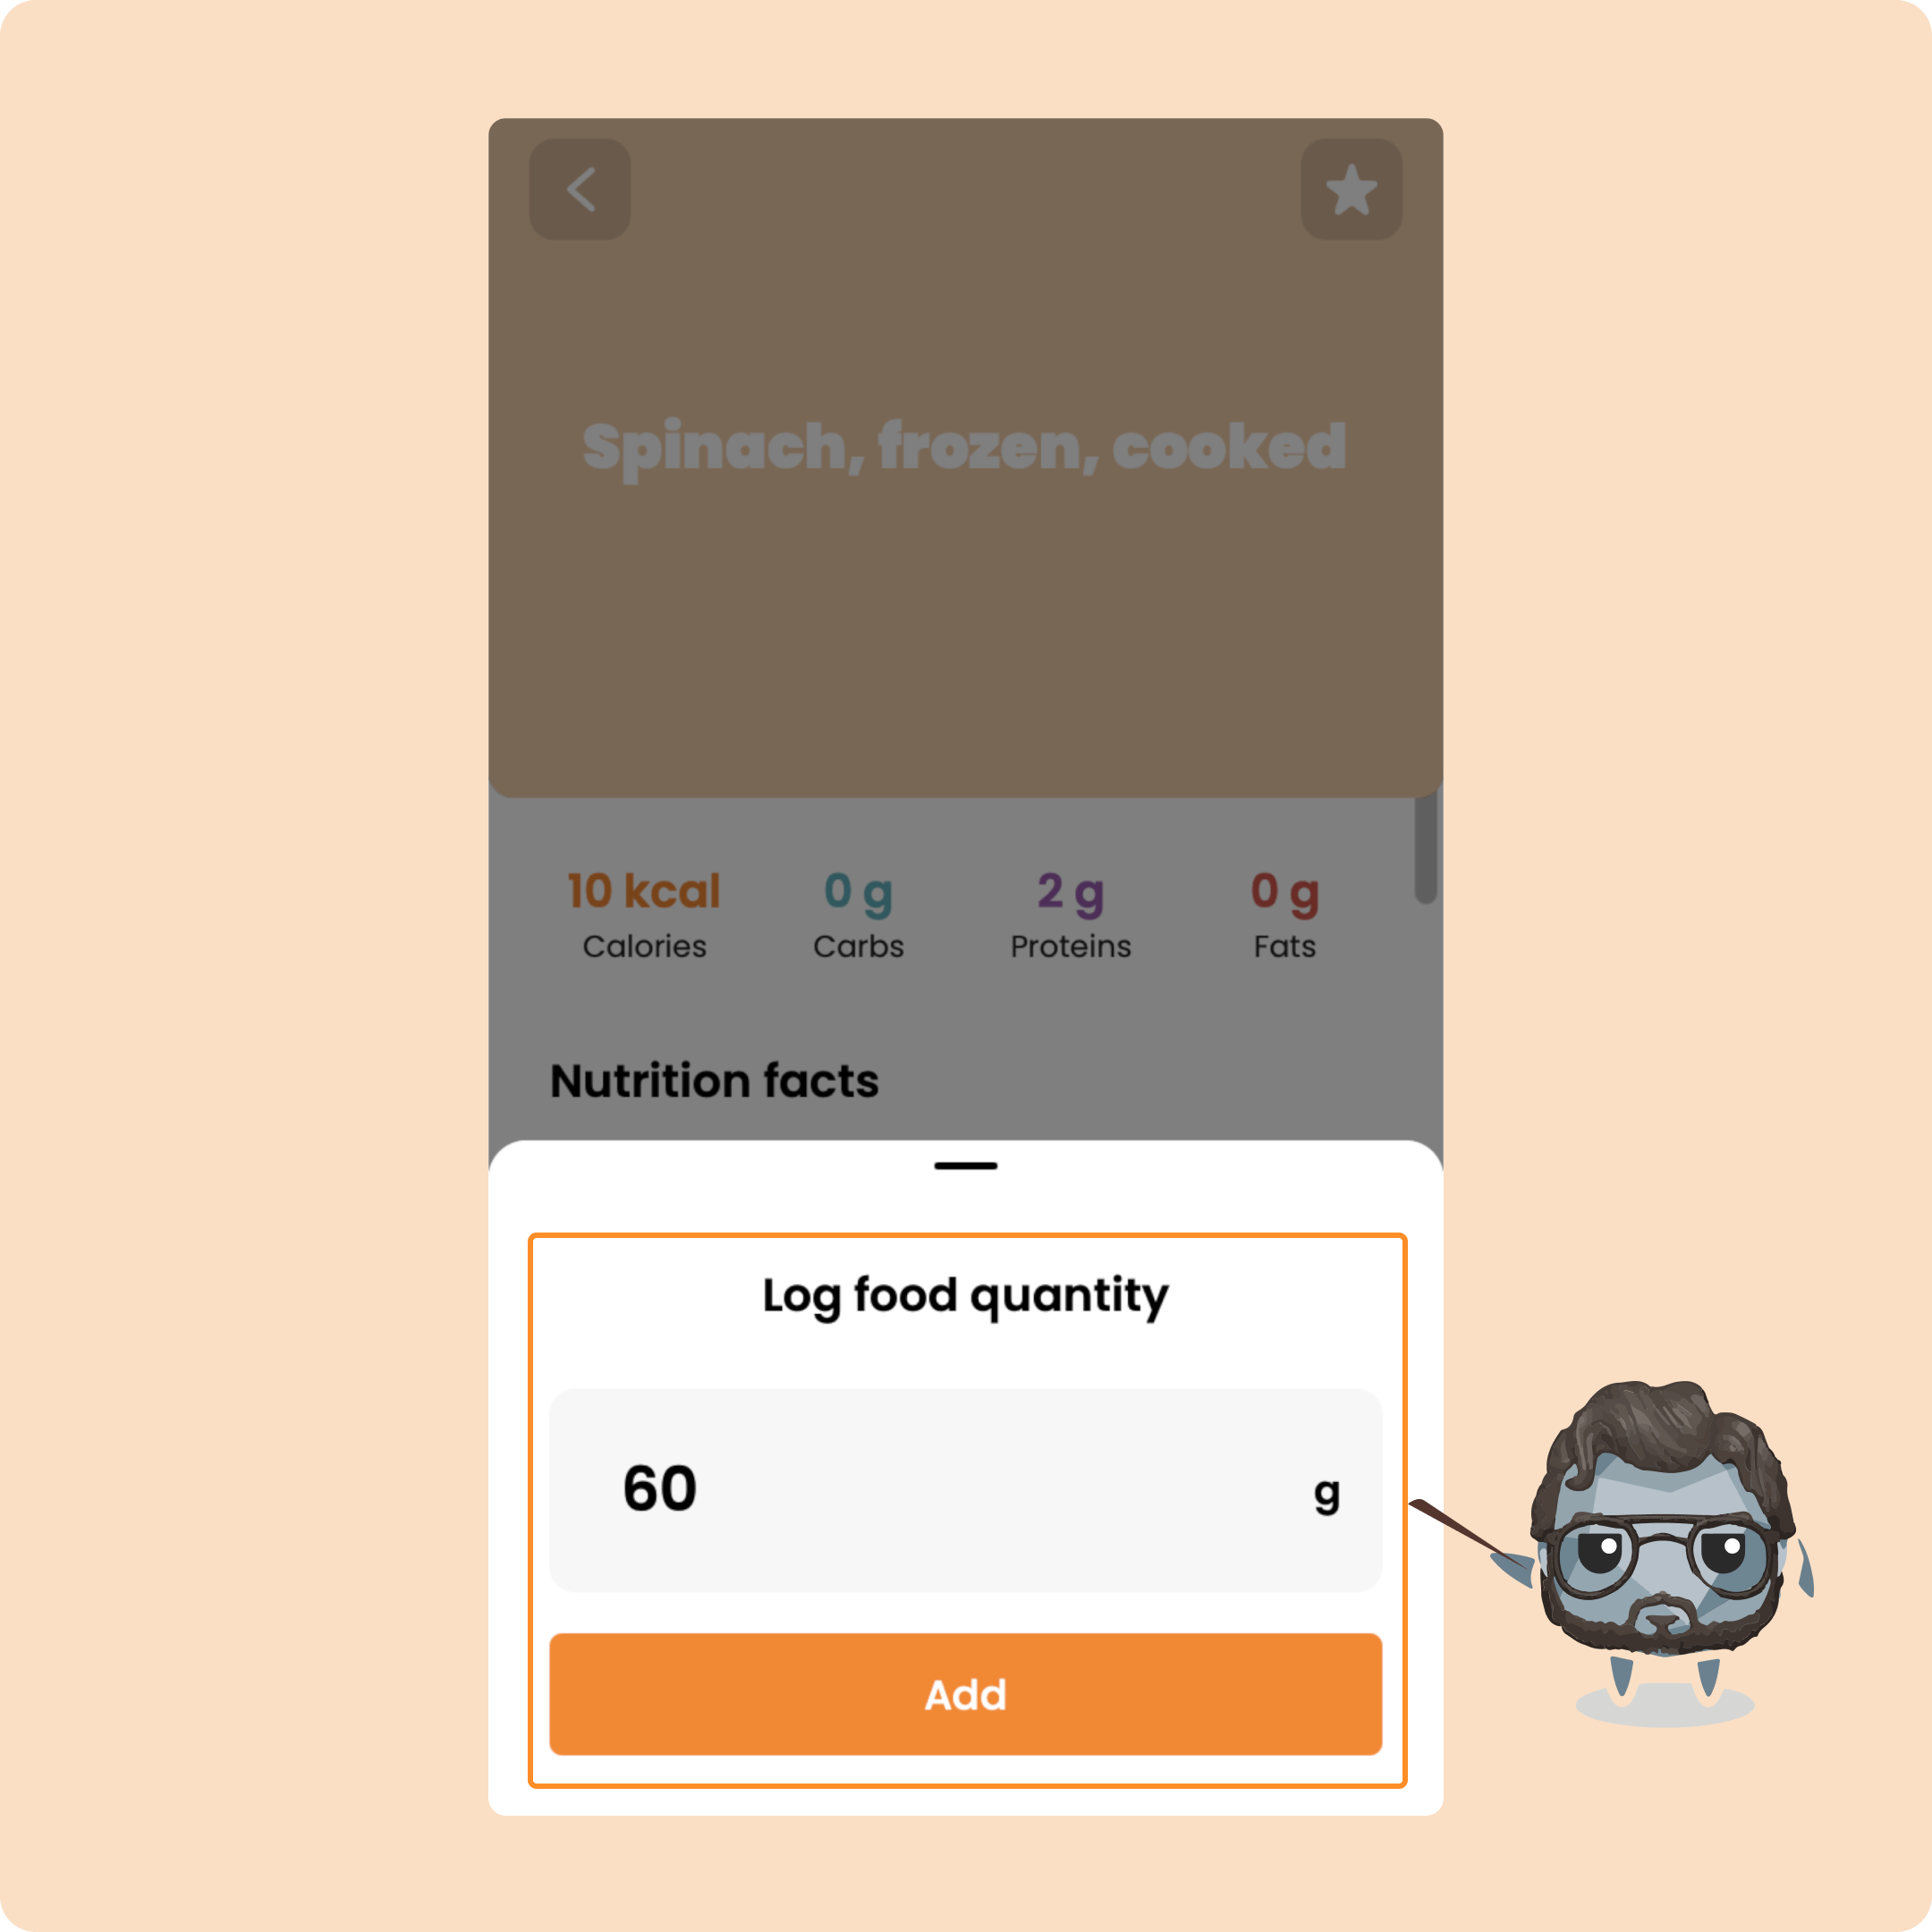
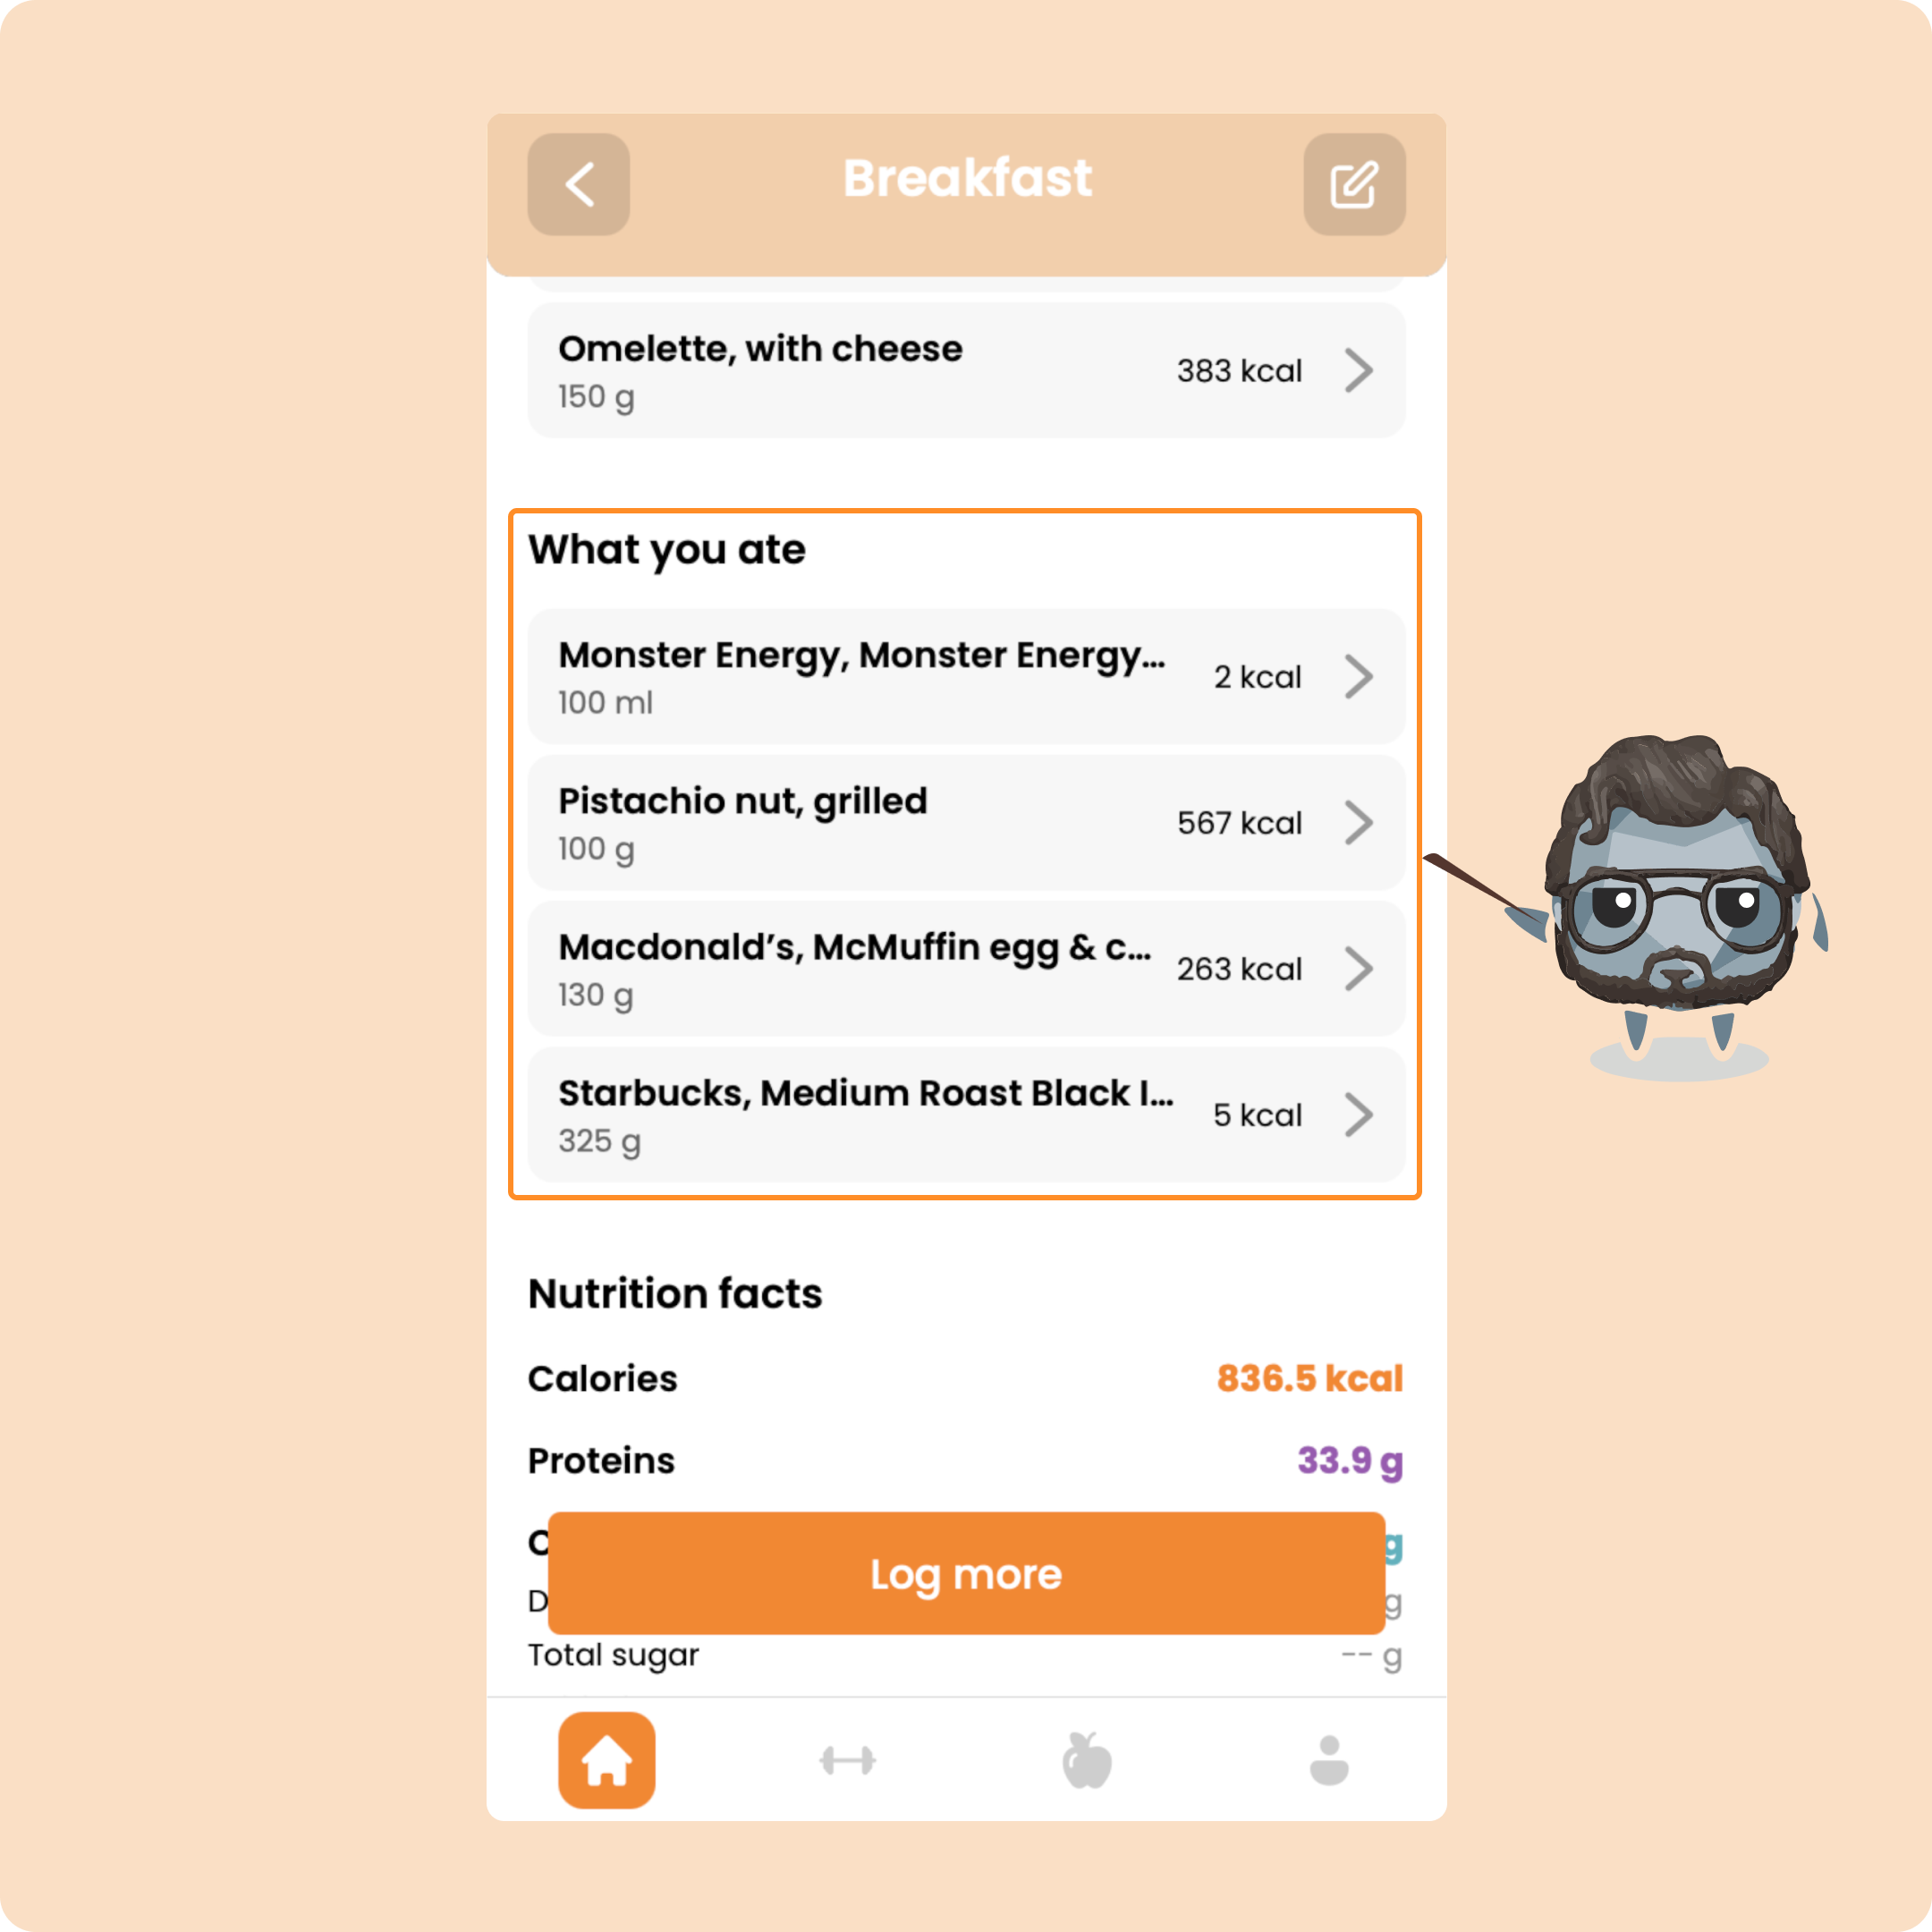
Click on "Add" and you will then see it appear in the section "What you ate".
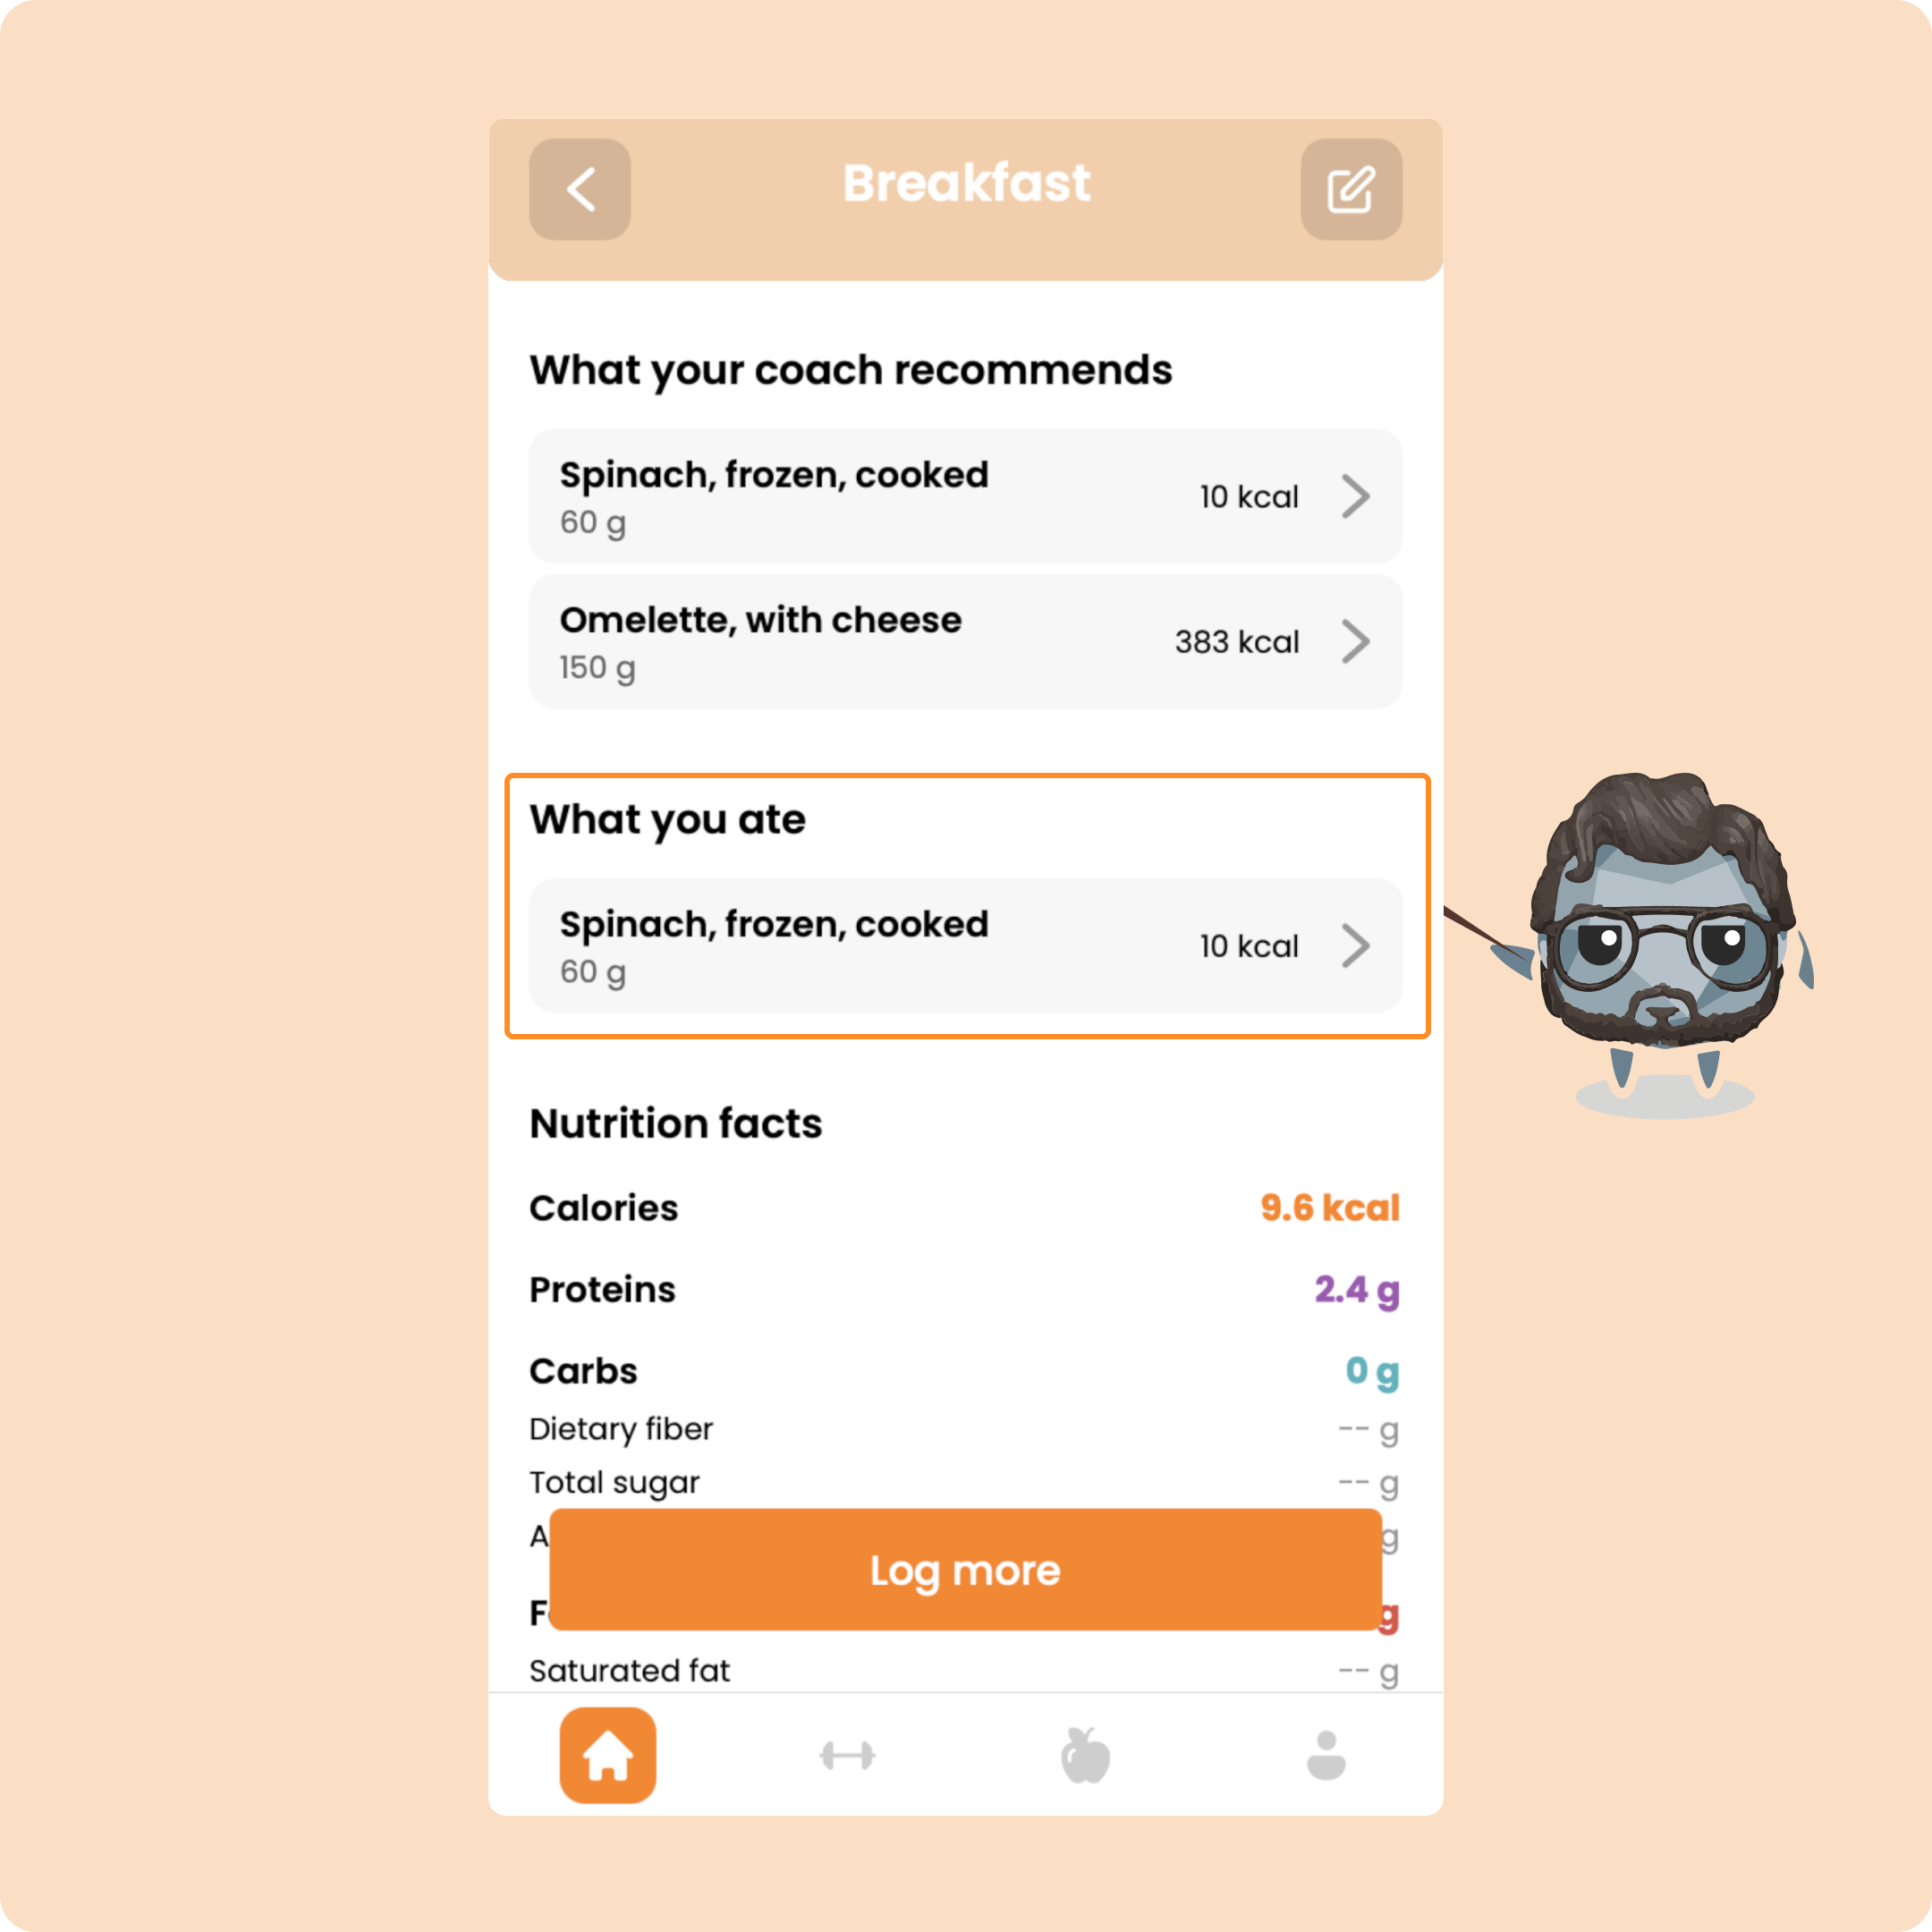
If ever you want to modify it, you can press on it.
If ever you want to delete it from your meal, swipe the food to the left then press on the trash icon.
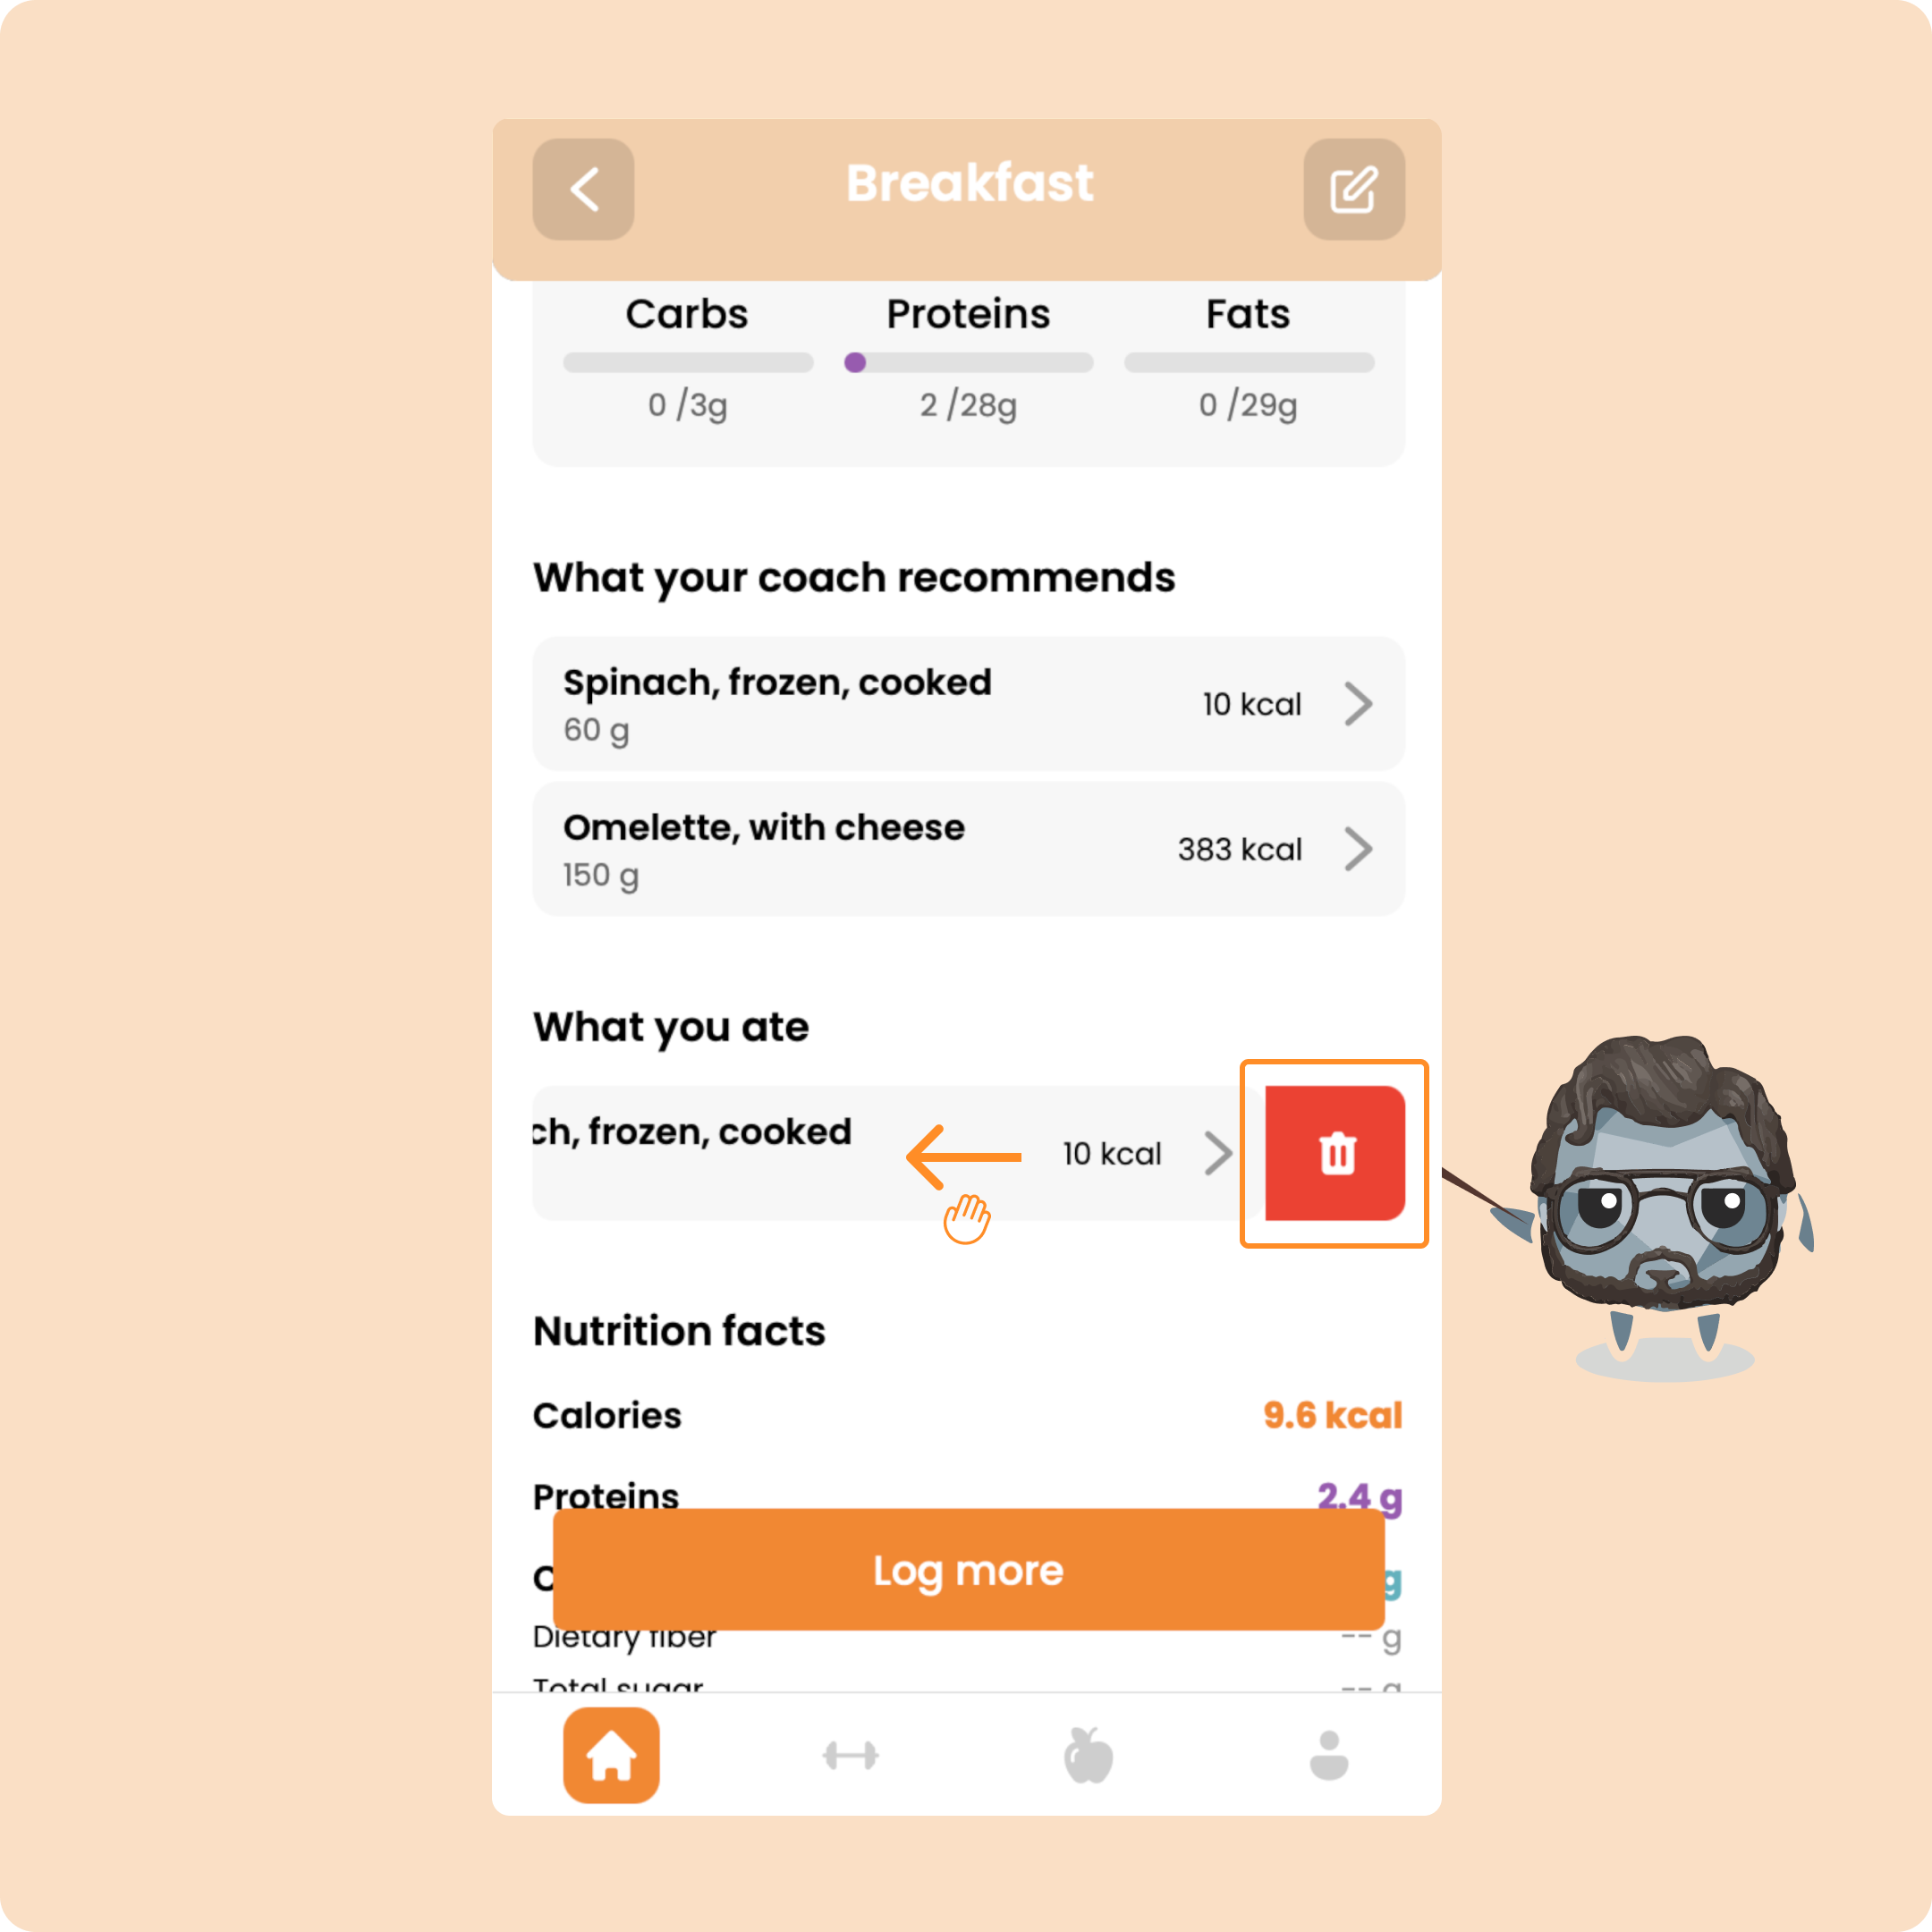
You can do this for all the foods recommended by your coach.
Now, we will be able to show you all the possibilities available to you to log other foods, meals, or recipes in your day..
Logging foods, meals, and recipes in your meal
Search & log a food or product manually
If you have nothing in your meal, you can press the "Log more" button.
From this page, you will be able to access more than 5 million foods and products from all over the world in our database.
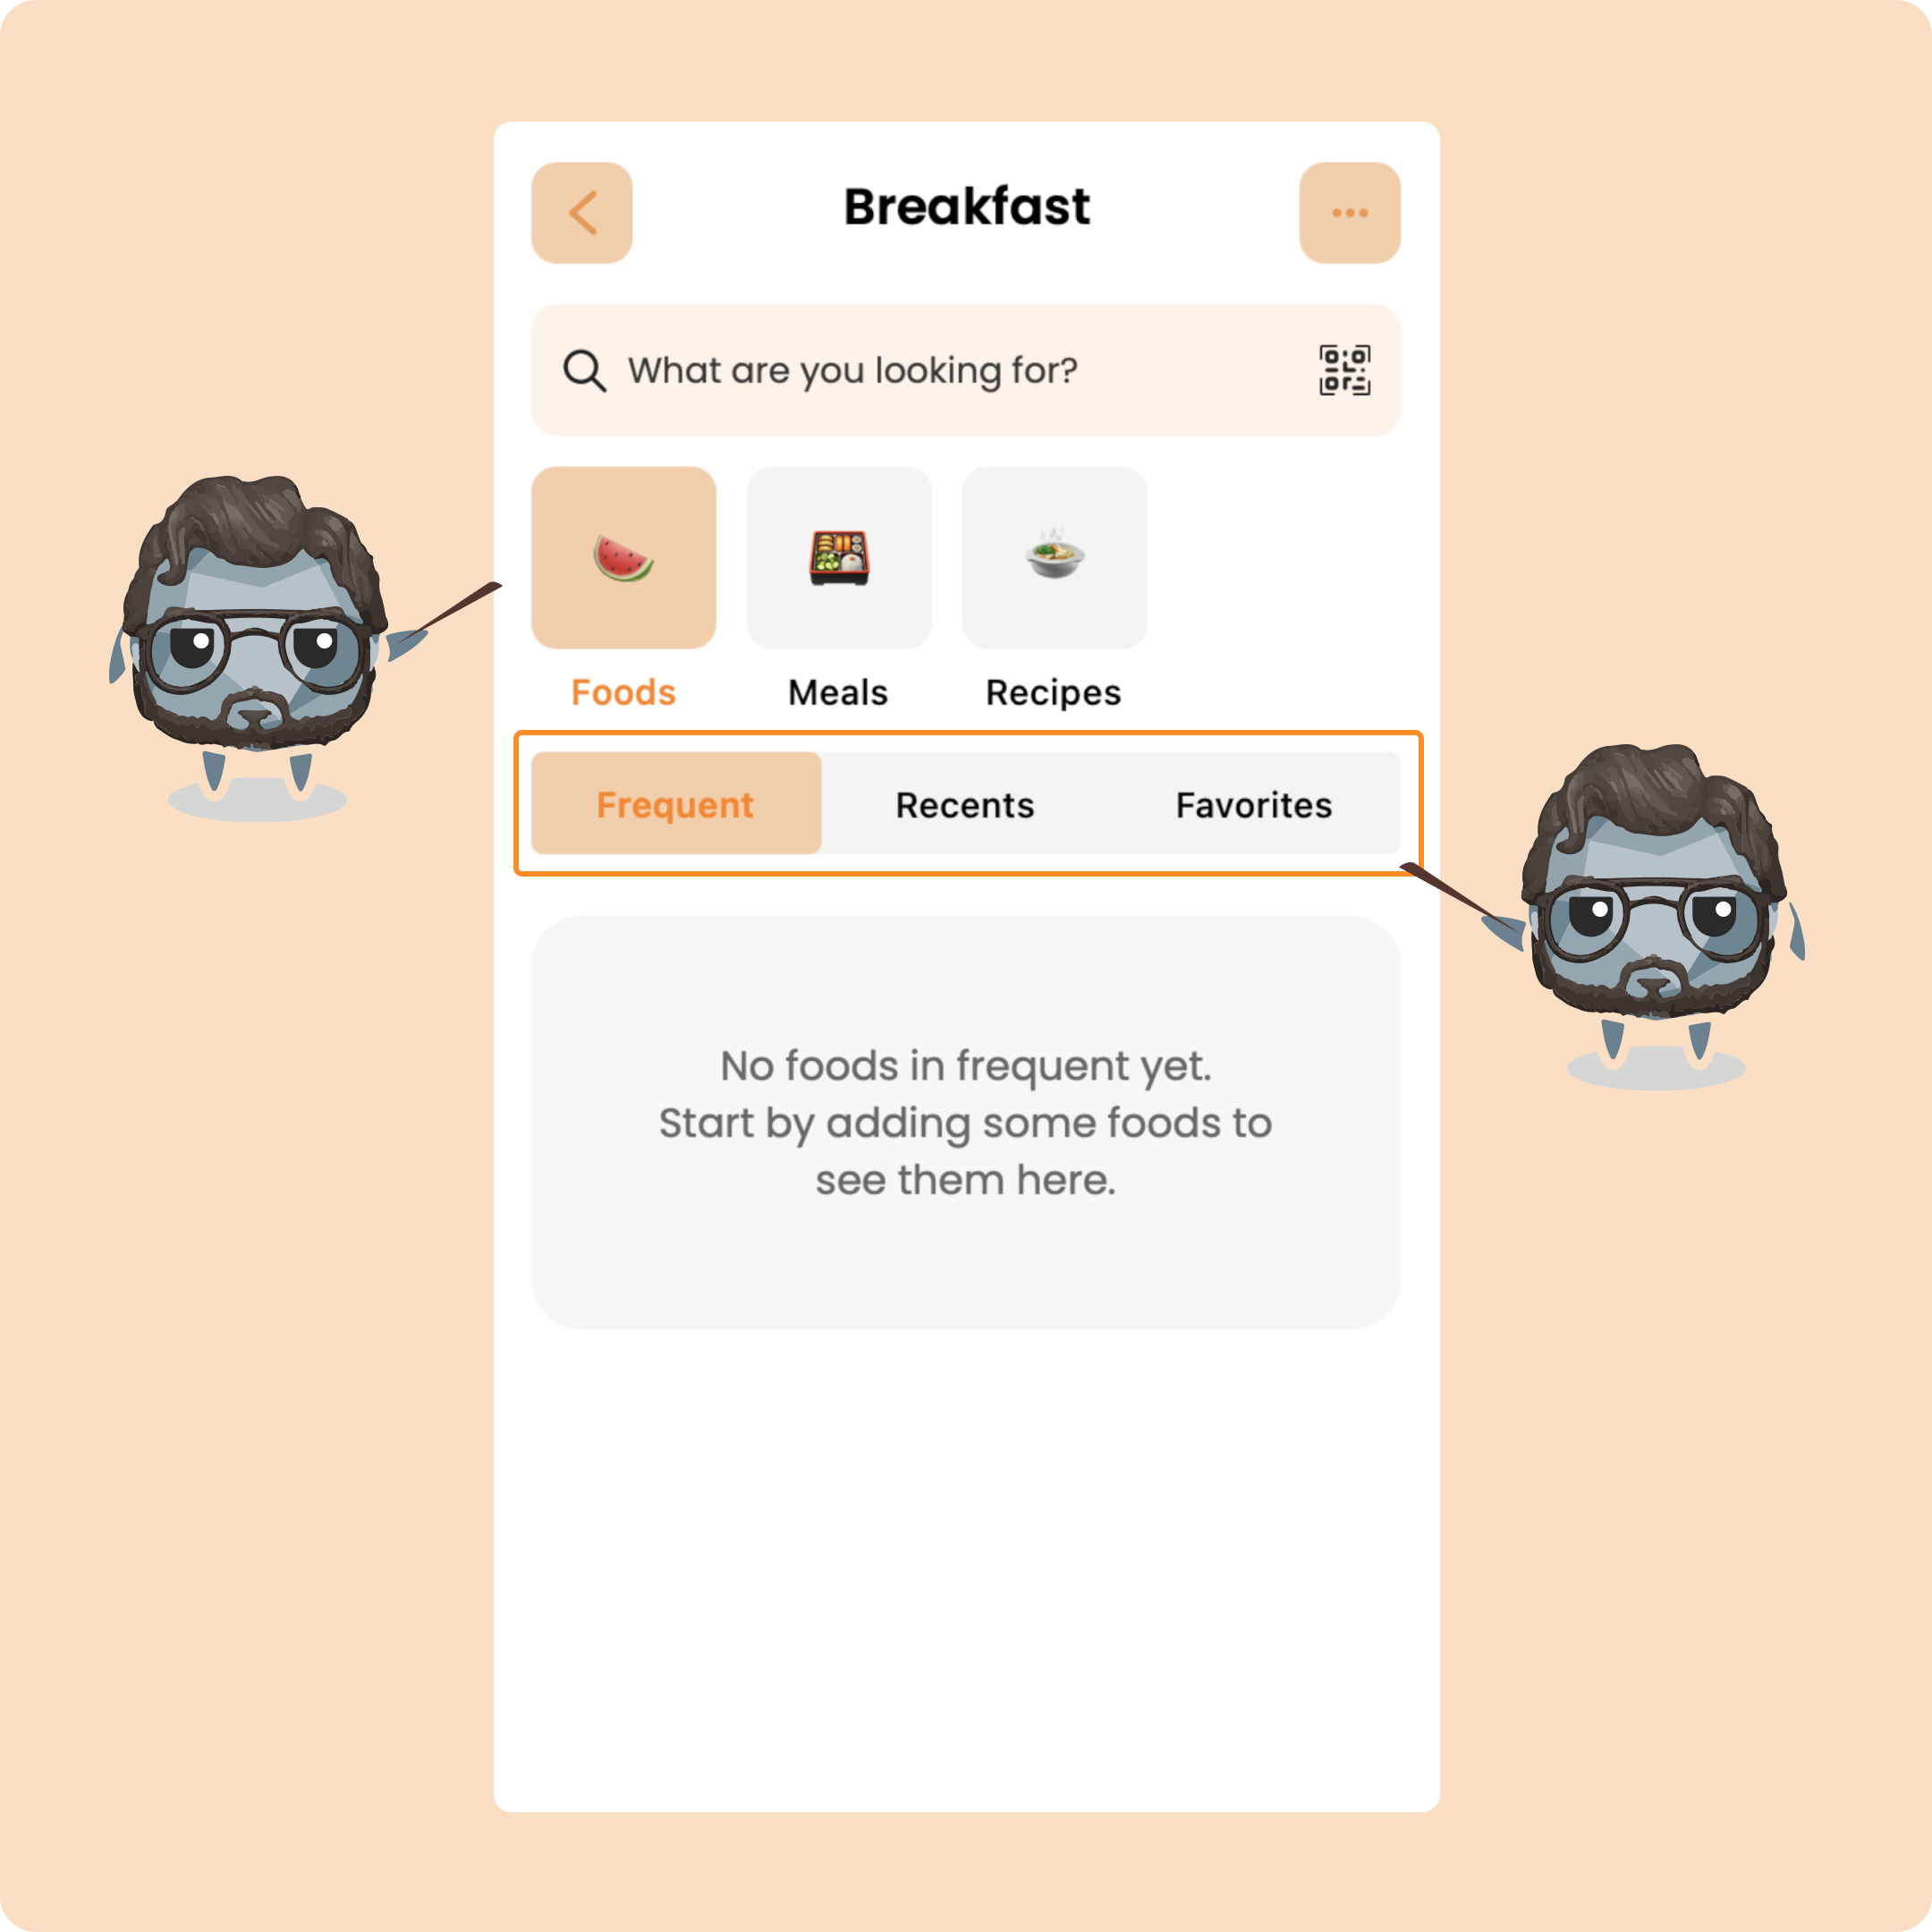
You will find your foods, meals, and recipes in 3 categories:
→ Frequent: these are the foods, meals, or recipes that come up the most (+4 times in the last few days)
→ Recent: these are the foods, meals, or recipes recently used
→ Favorites: these are the foods and meals that you will have added to your favorites
For recipes, this "Favorites" category is replaced by the "Saved" category because you have the possibility to create your own recipes.
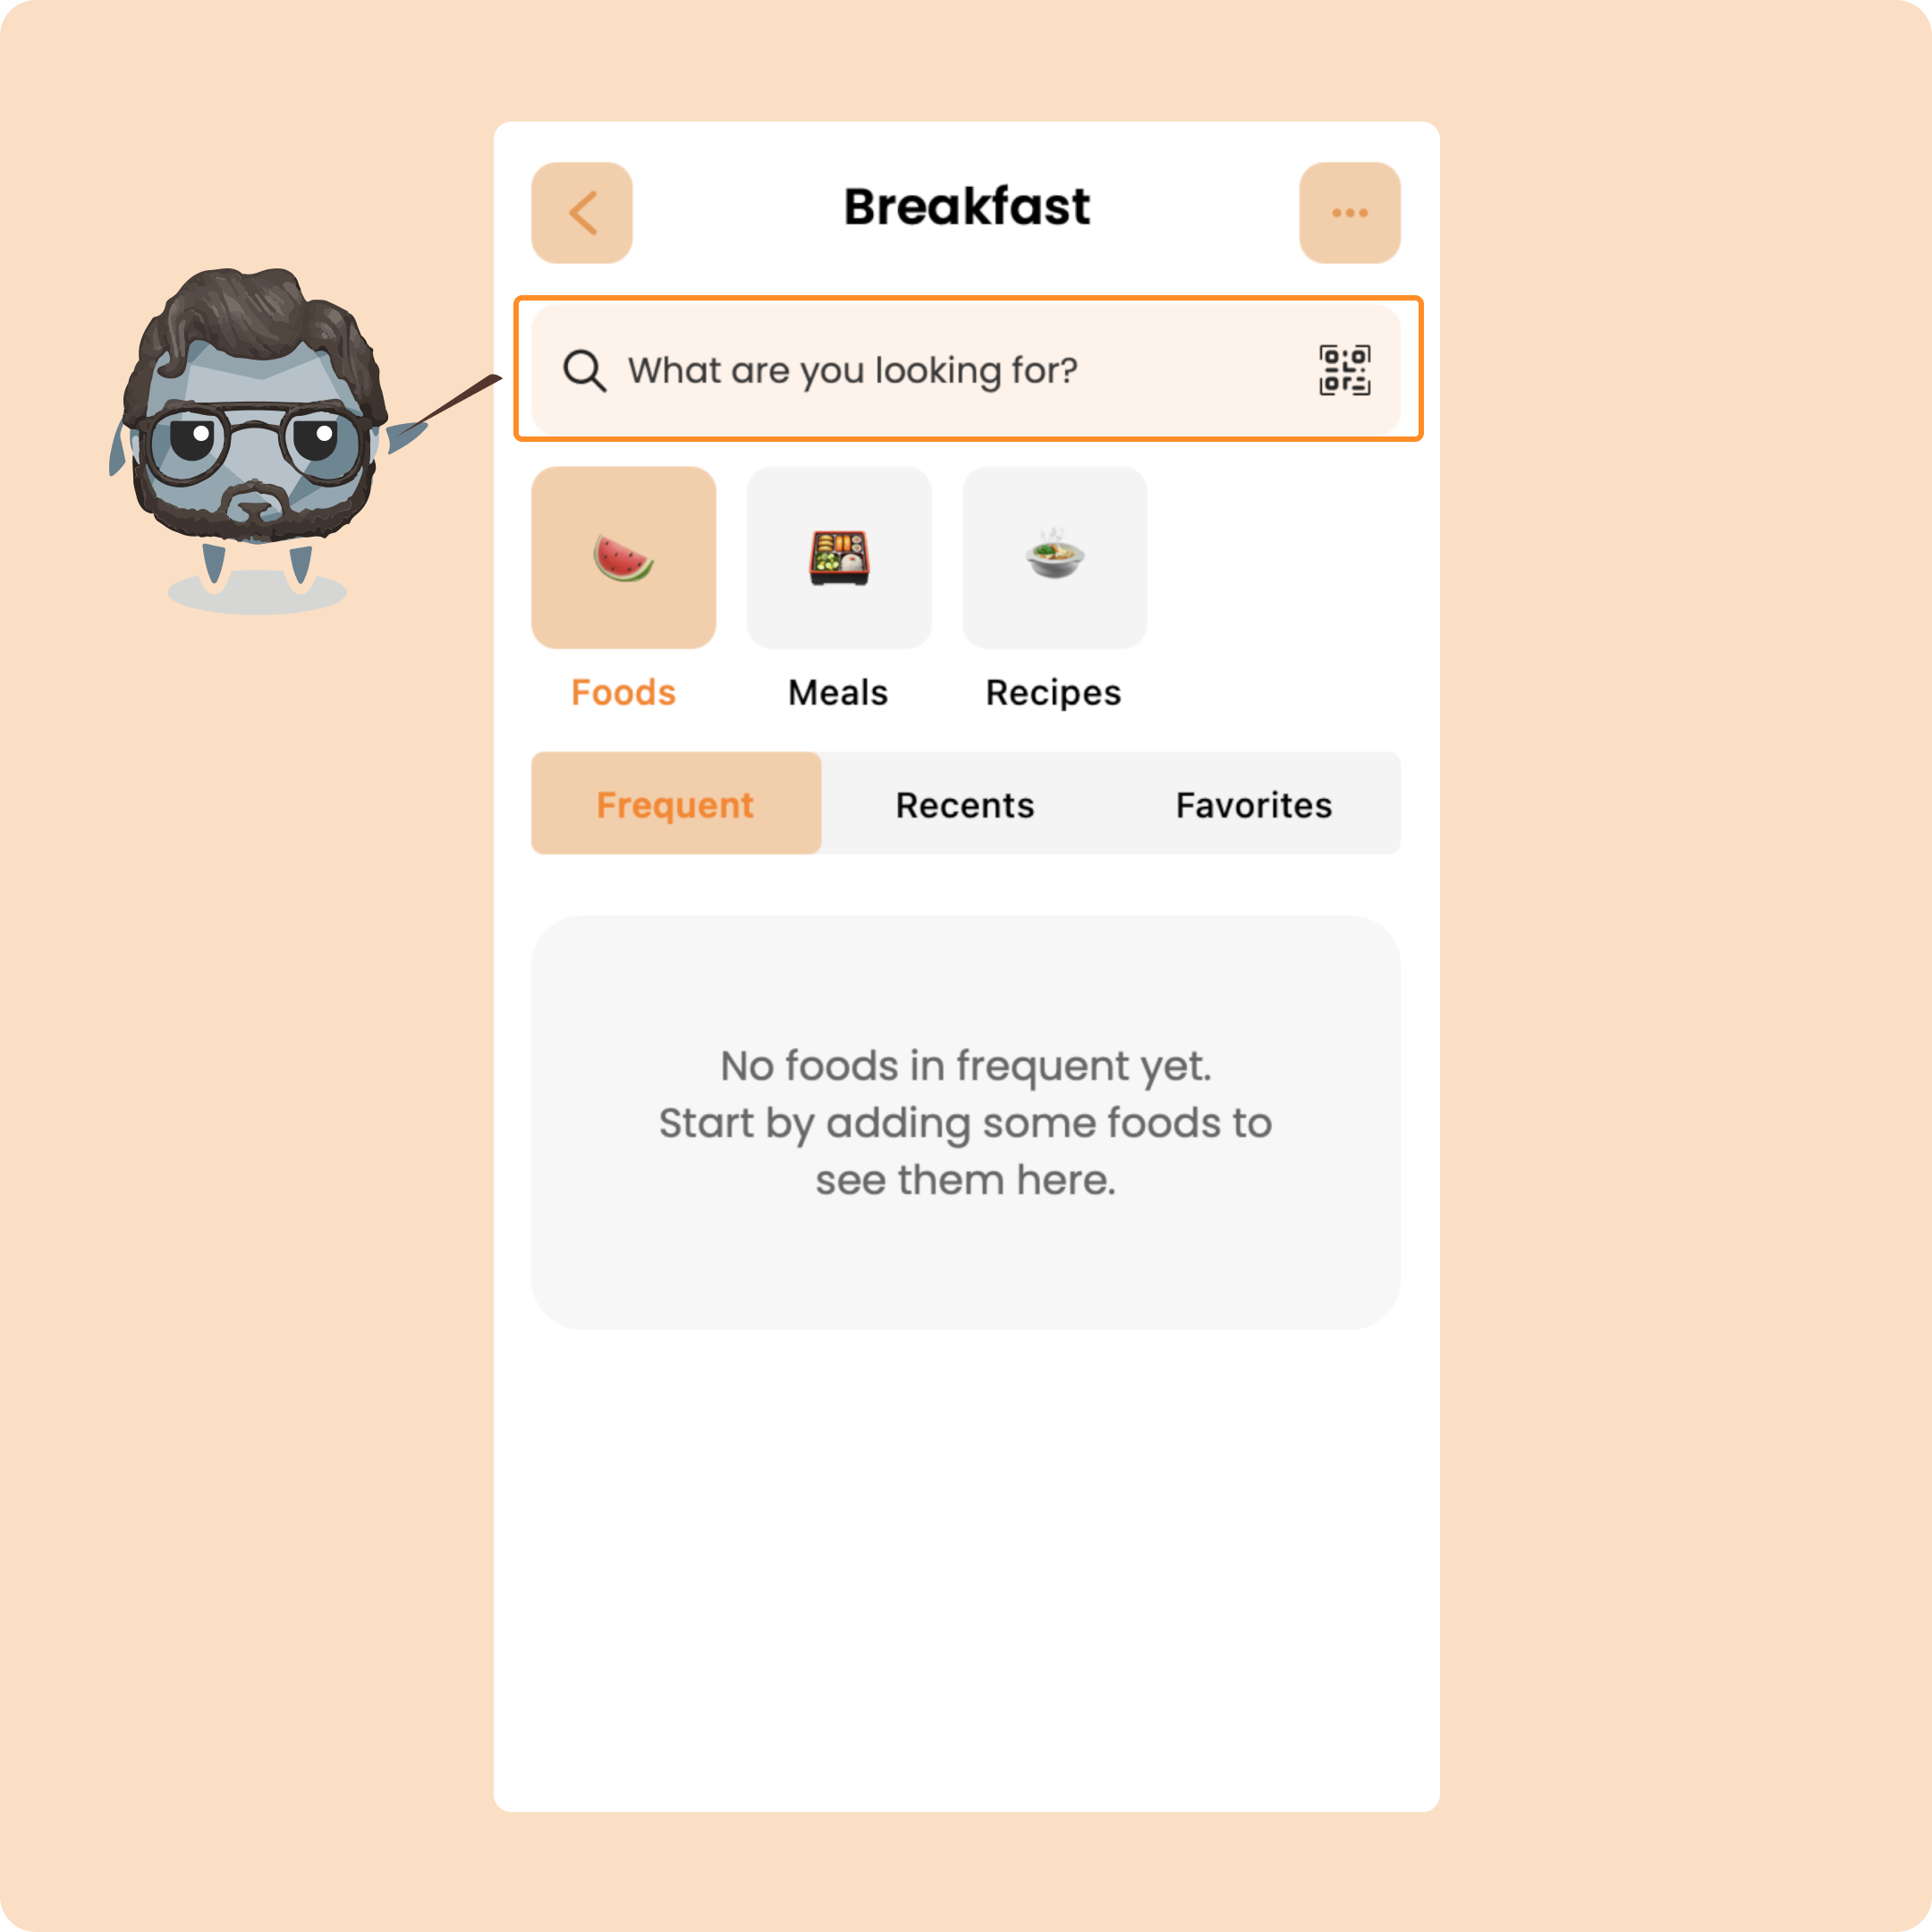
To search for your first food, click on the search bar
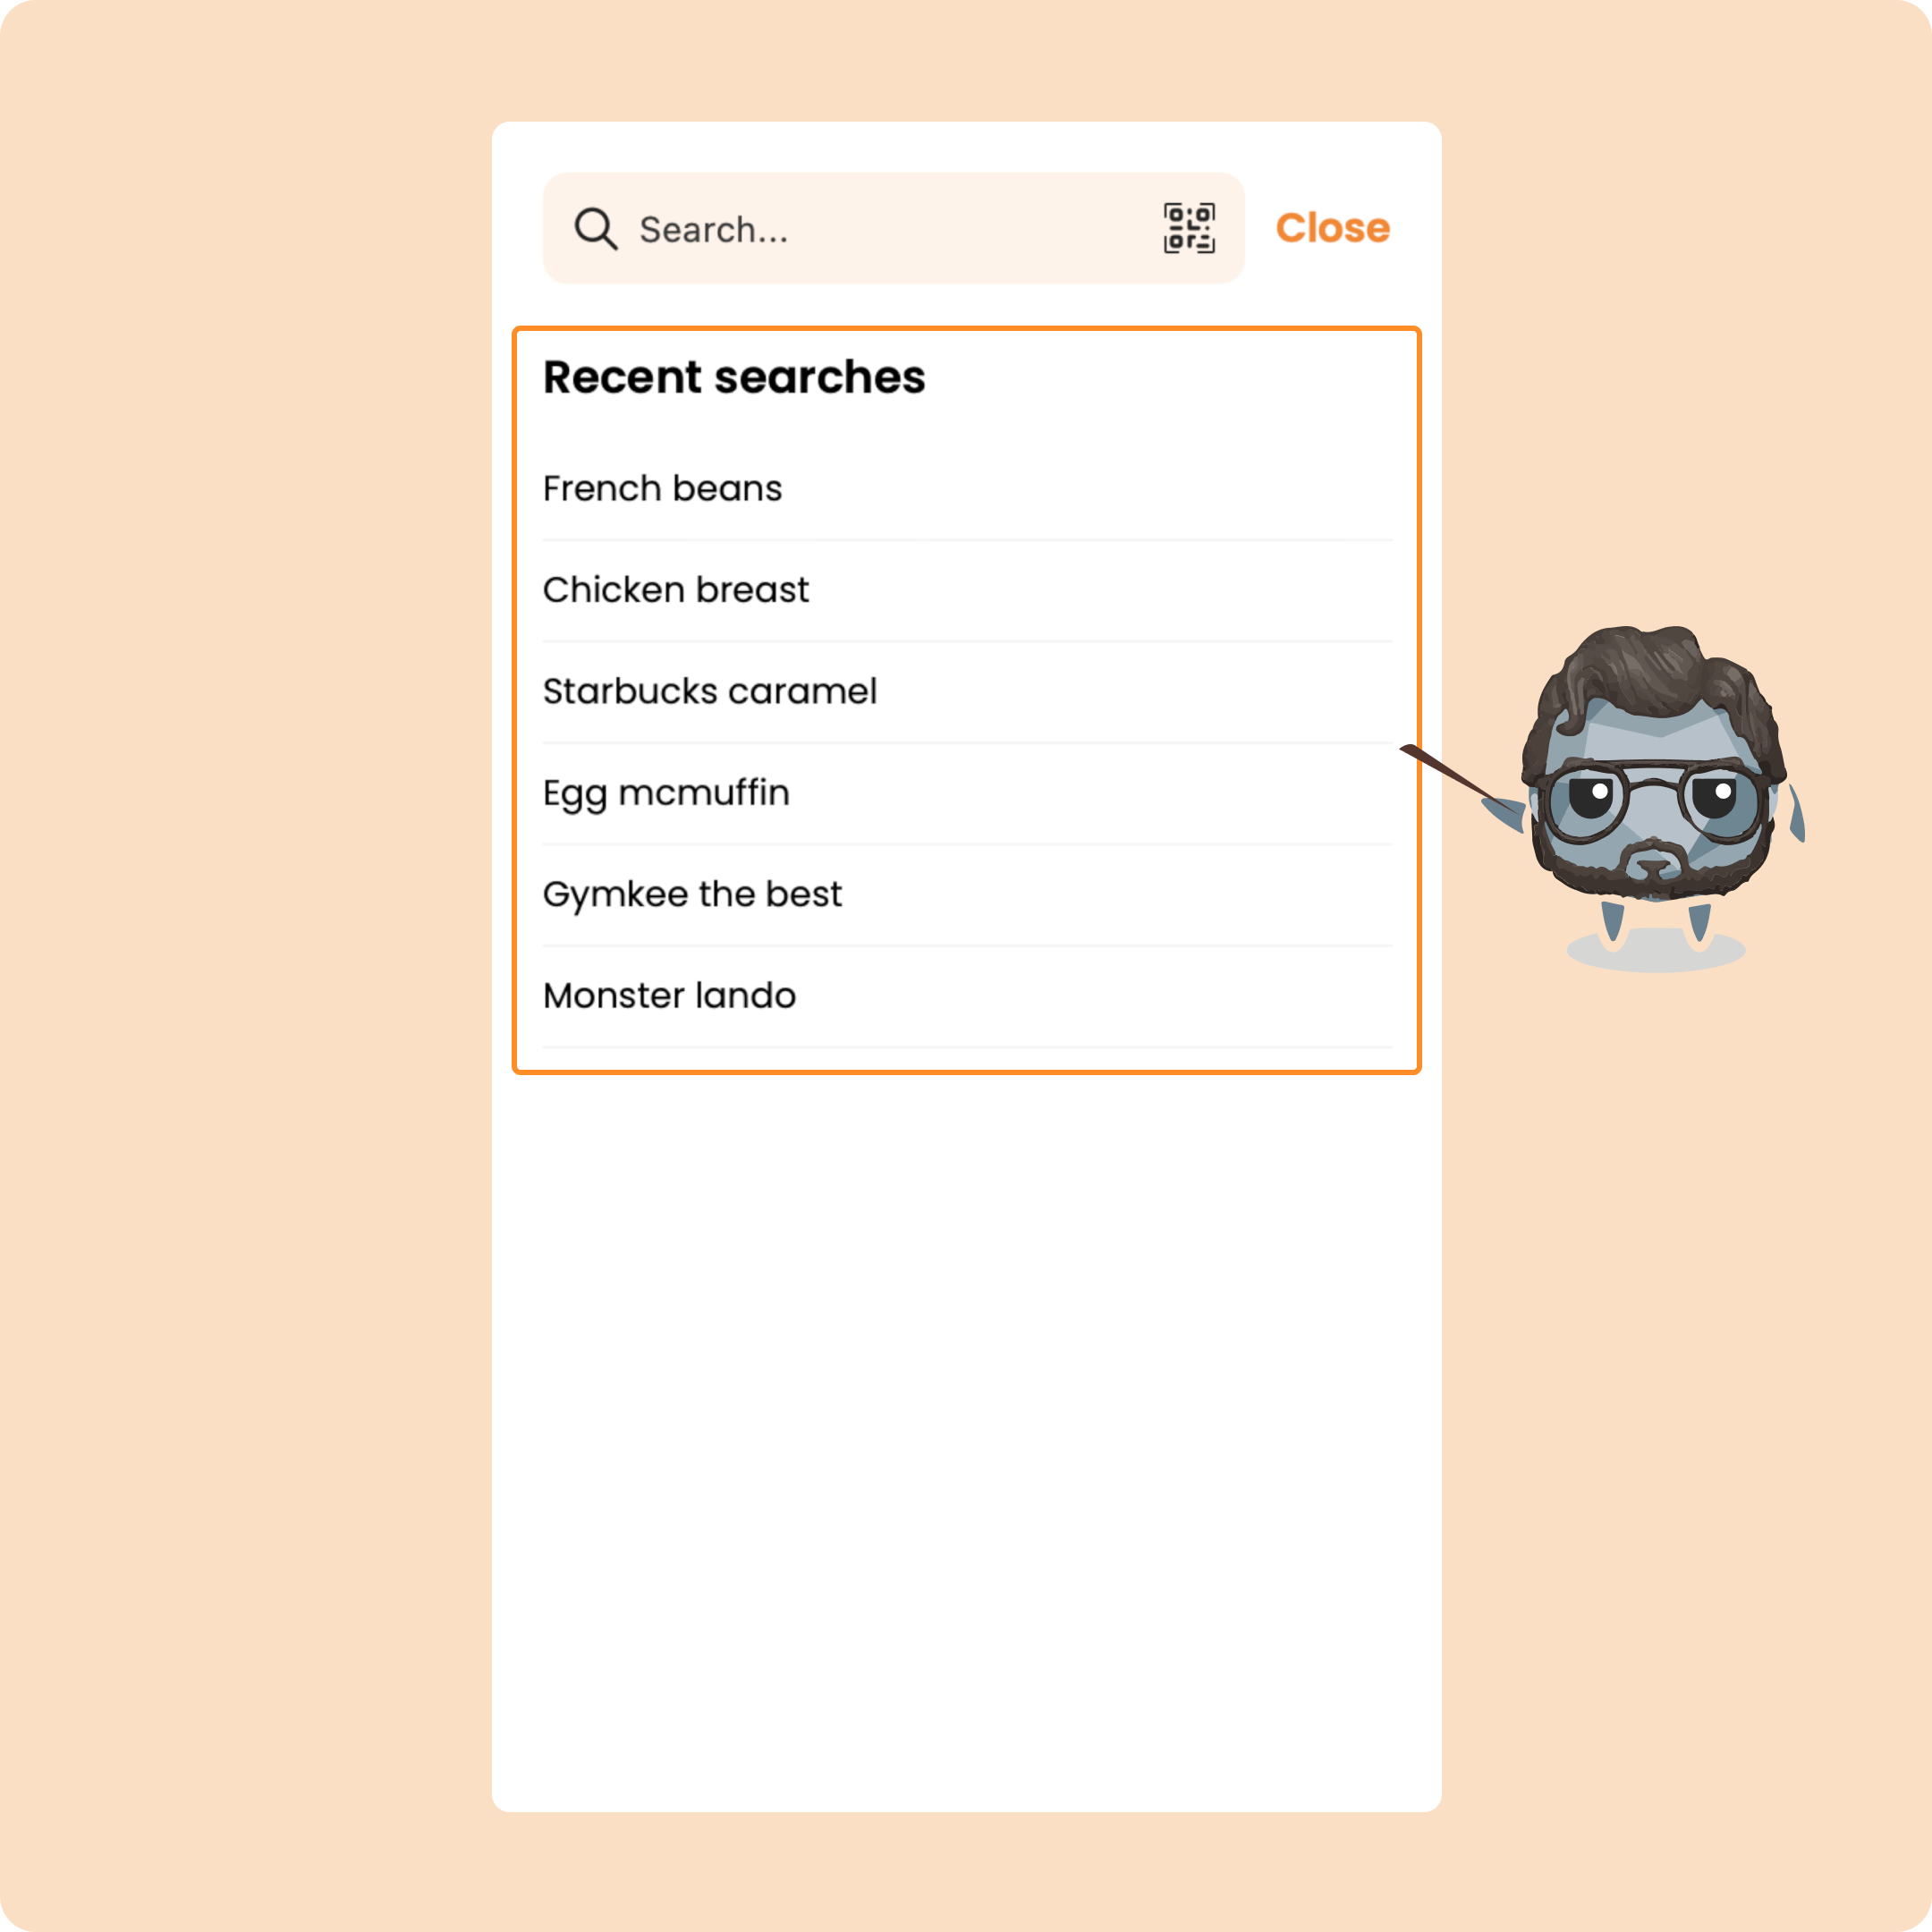
When you are on it, you will find the history of all your latest searches.
If you want to start a new search, simply type the food that you want to add.
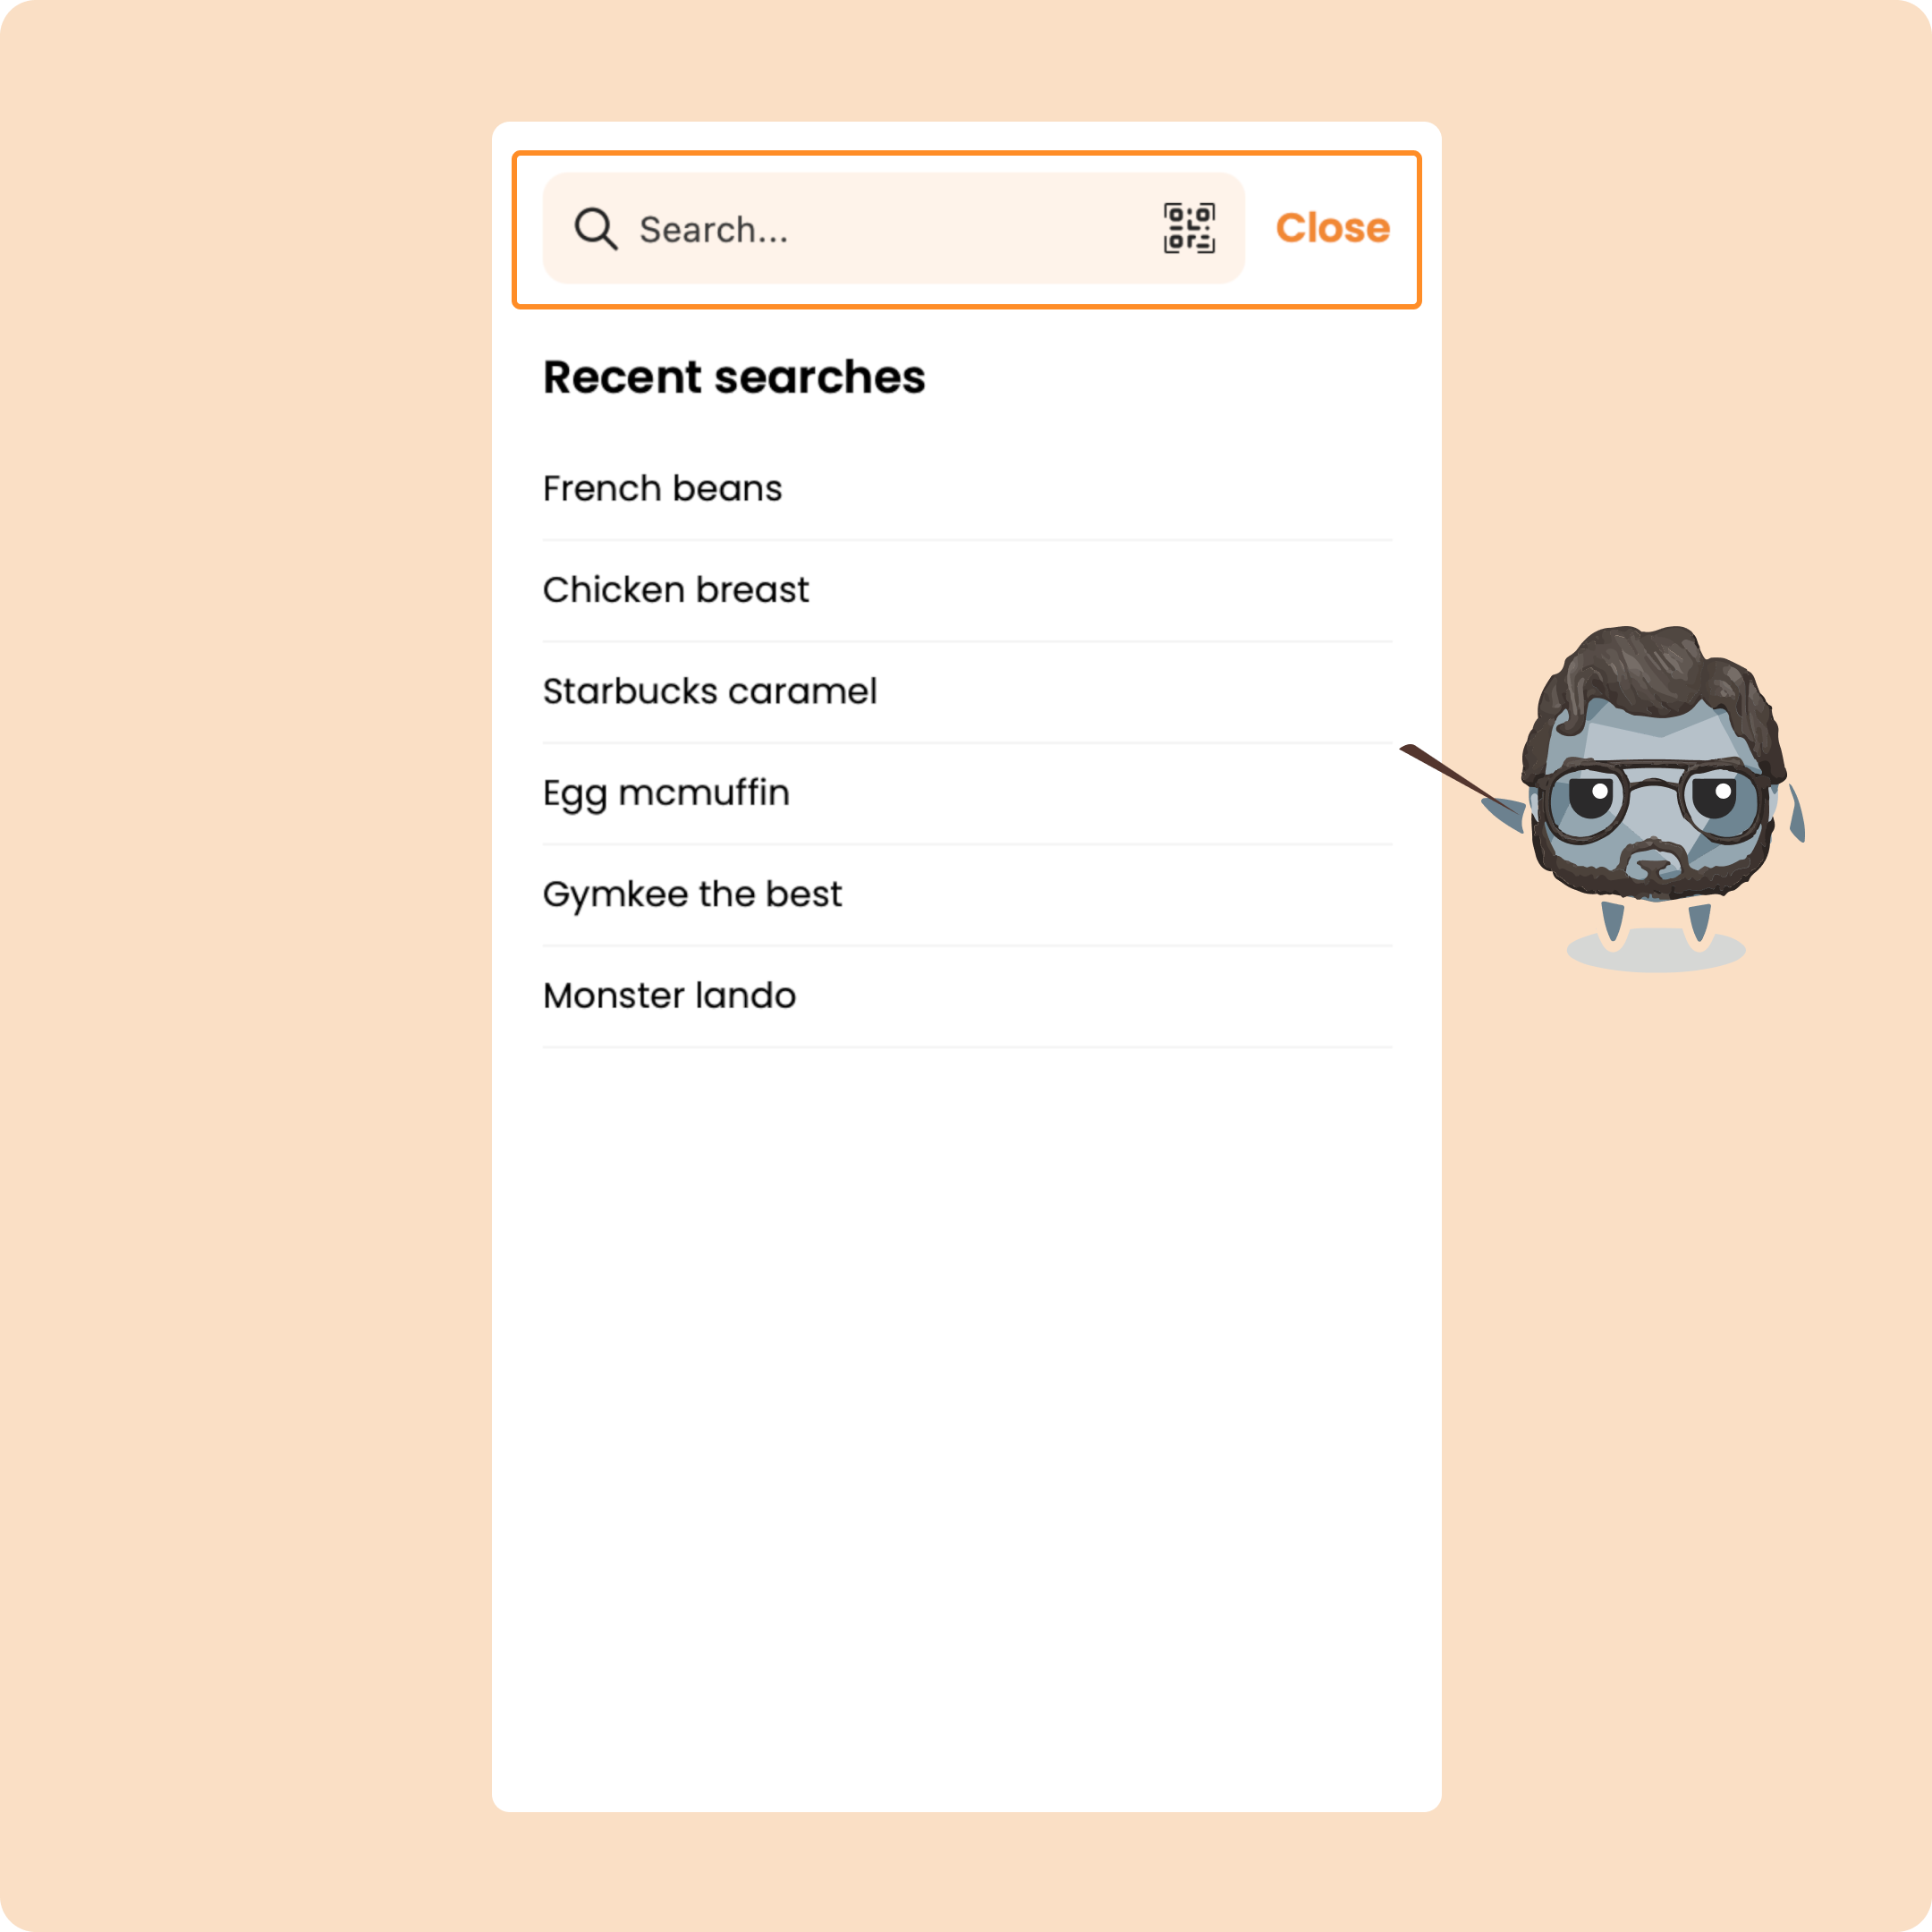
You can also search for what we call products.
On Gymkee, it is necessary to make the distinction:
→ Foods: these are raw foods.
→ Product: these are foods with a barcode that are found in stores
For example, Skyr is not a food.
It is a product.
When you search for a food or a product, you will see a list of first results appear.
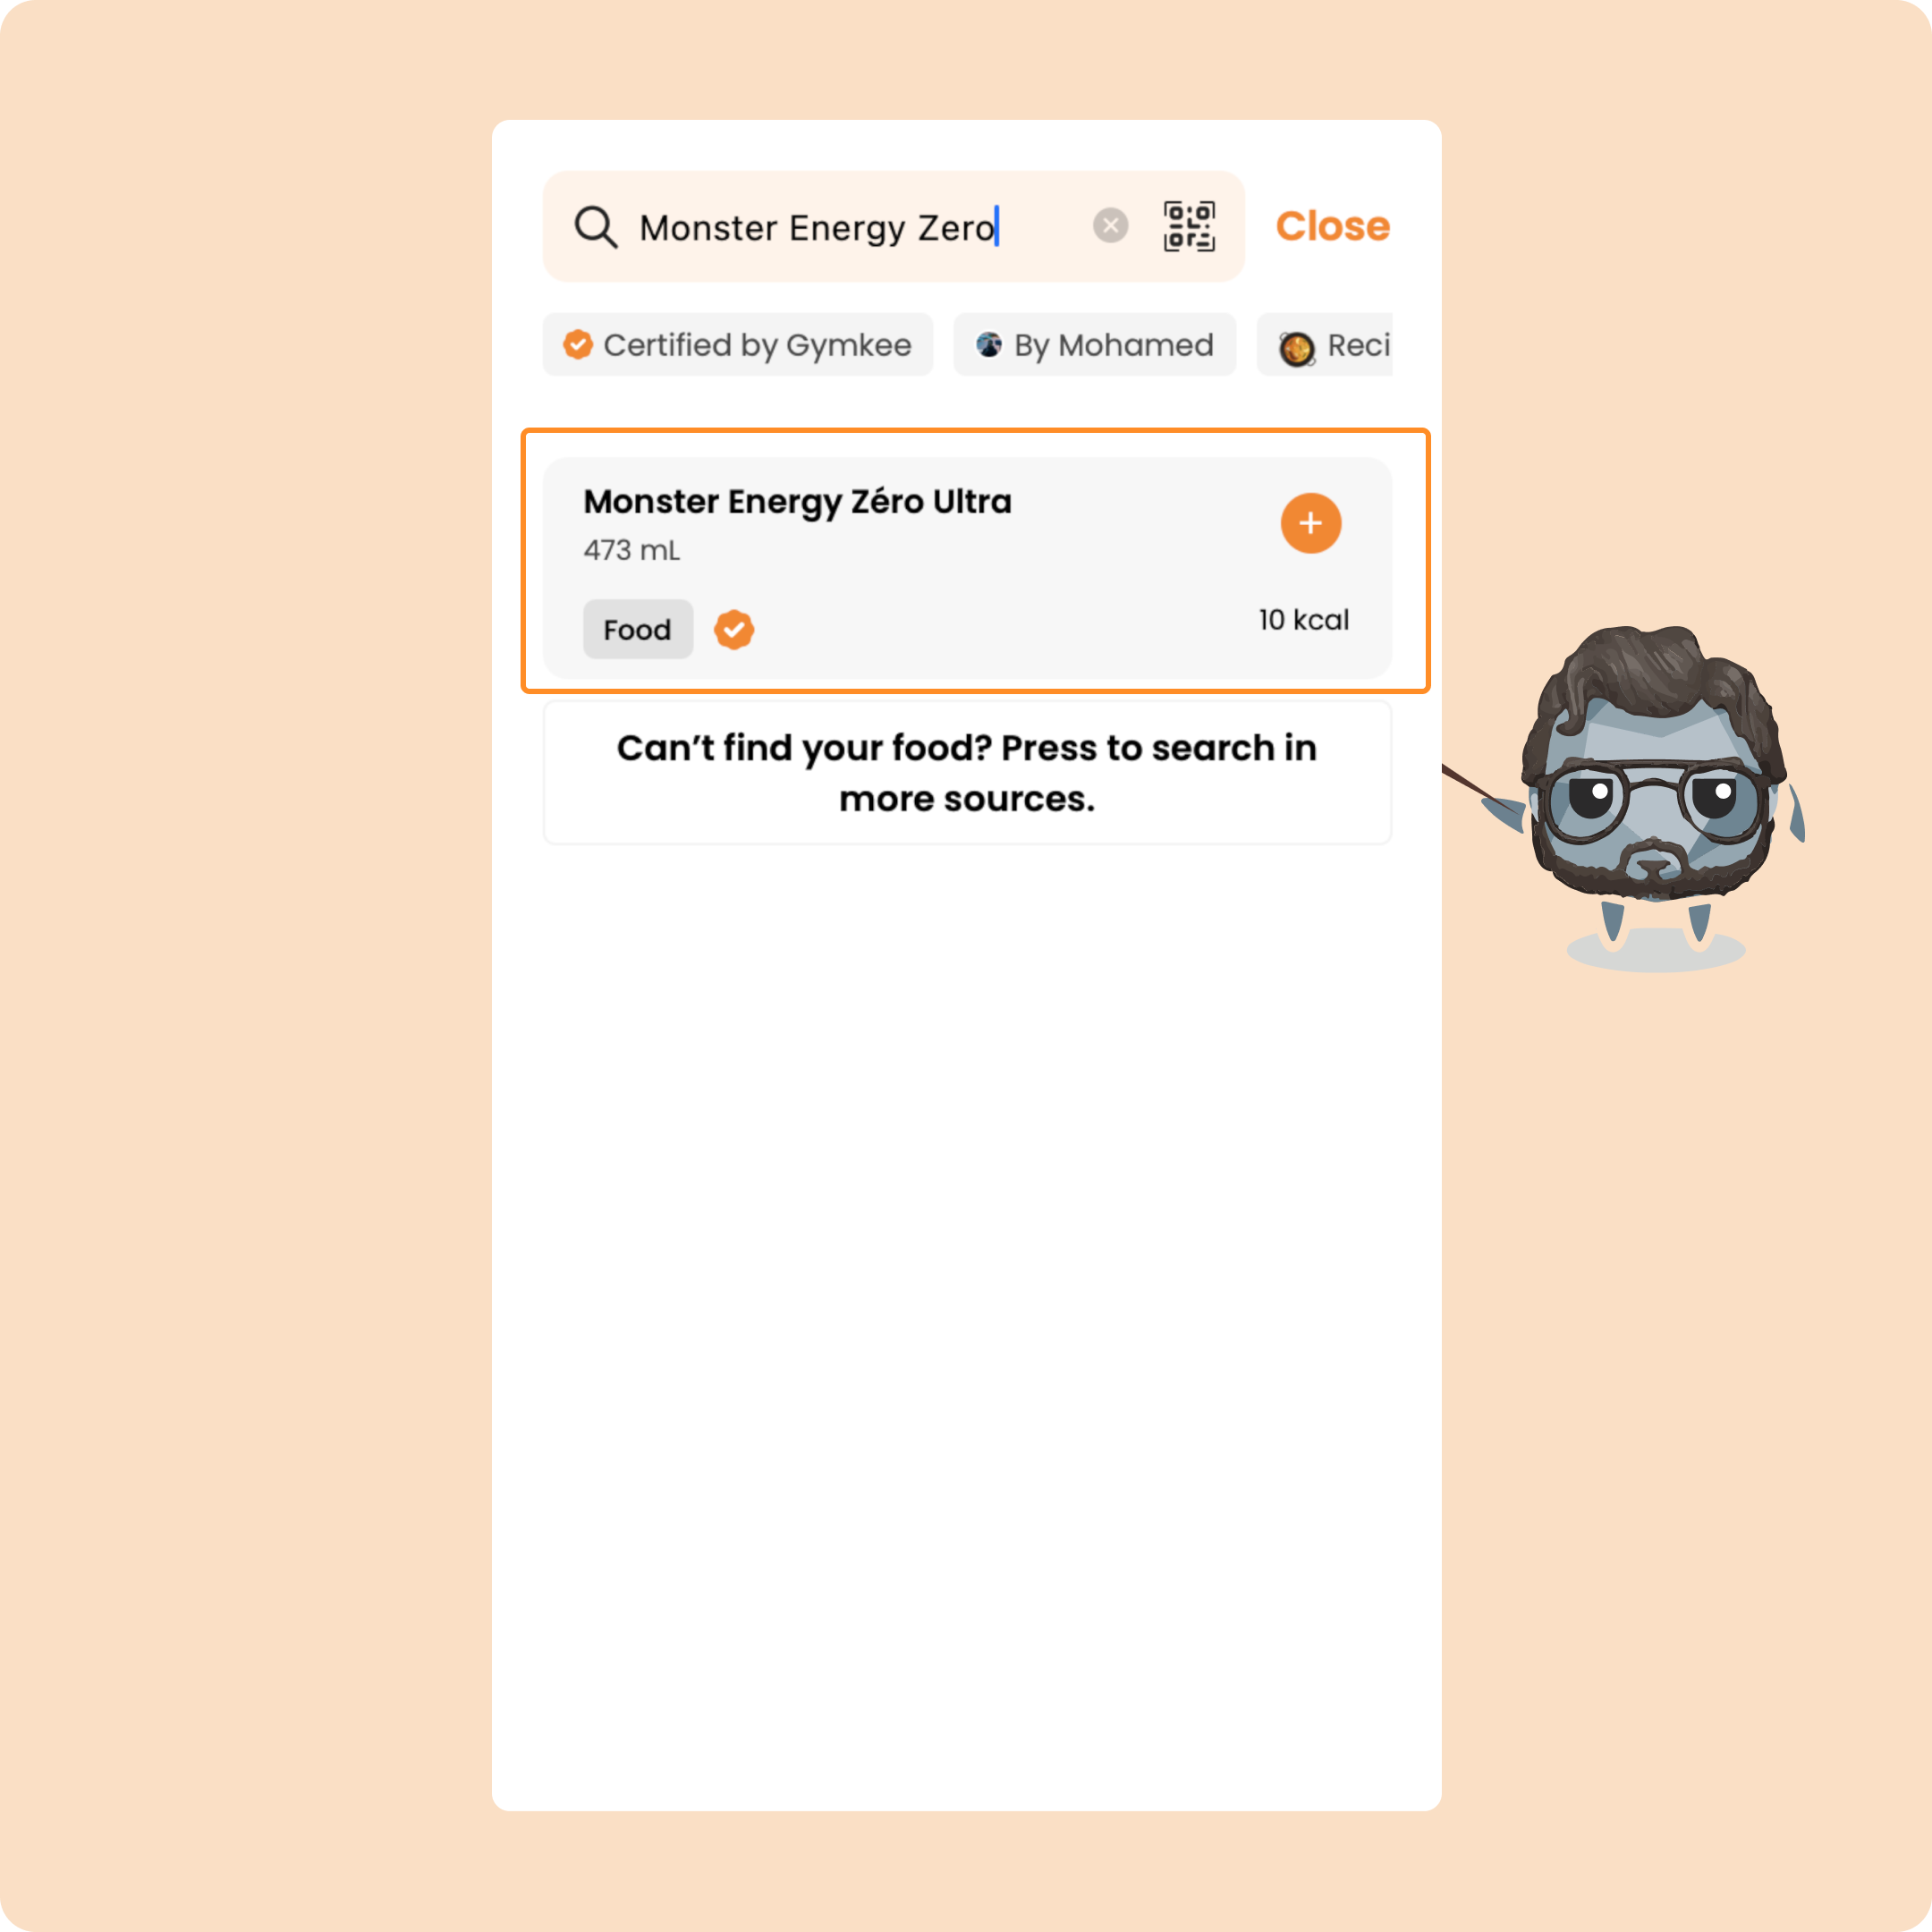
The Gymkee library is a community library on the coach side.
That means that our sports coaches can add their own foods if ever one is not available in our database (very rare).
Some foods may not contain the correct calorie and macro values.
That is why, next to most foods, you will find a certification badge.
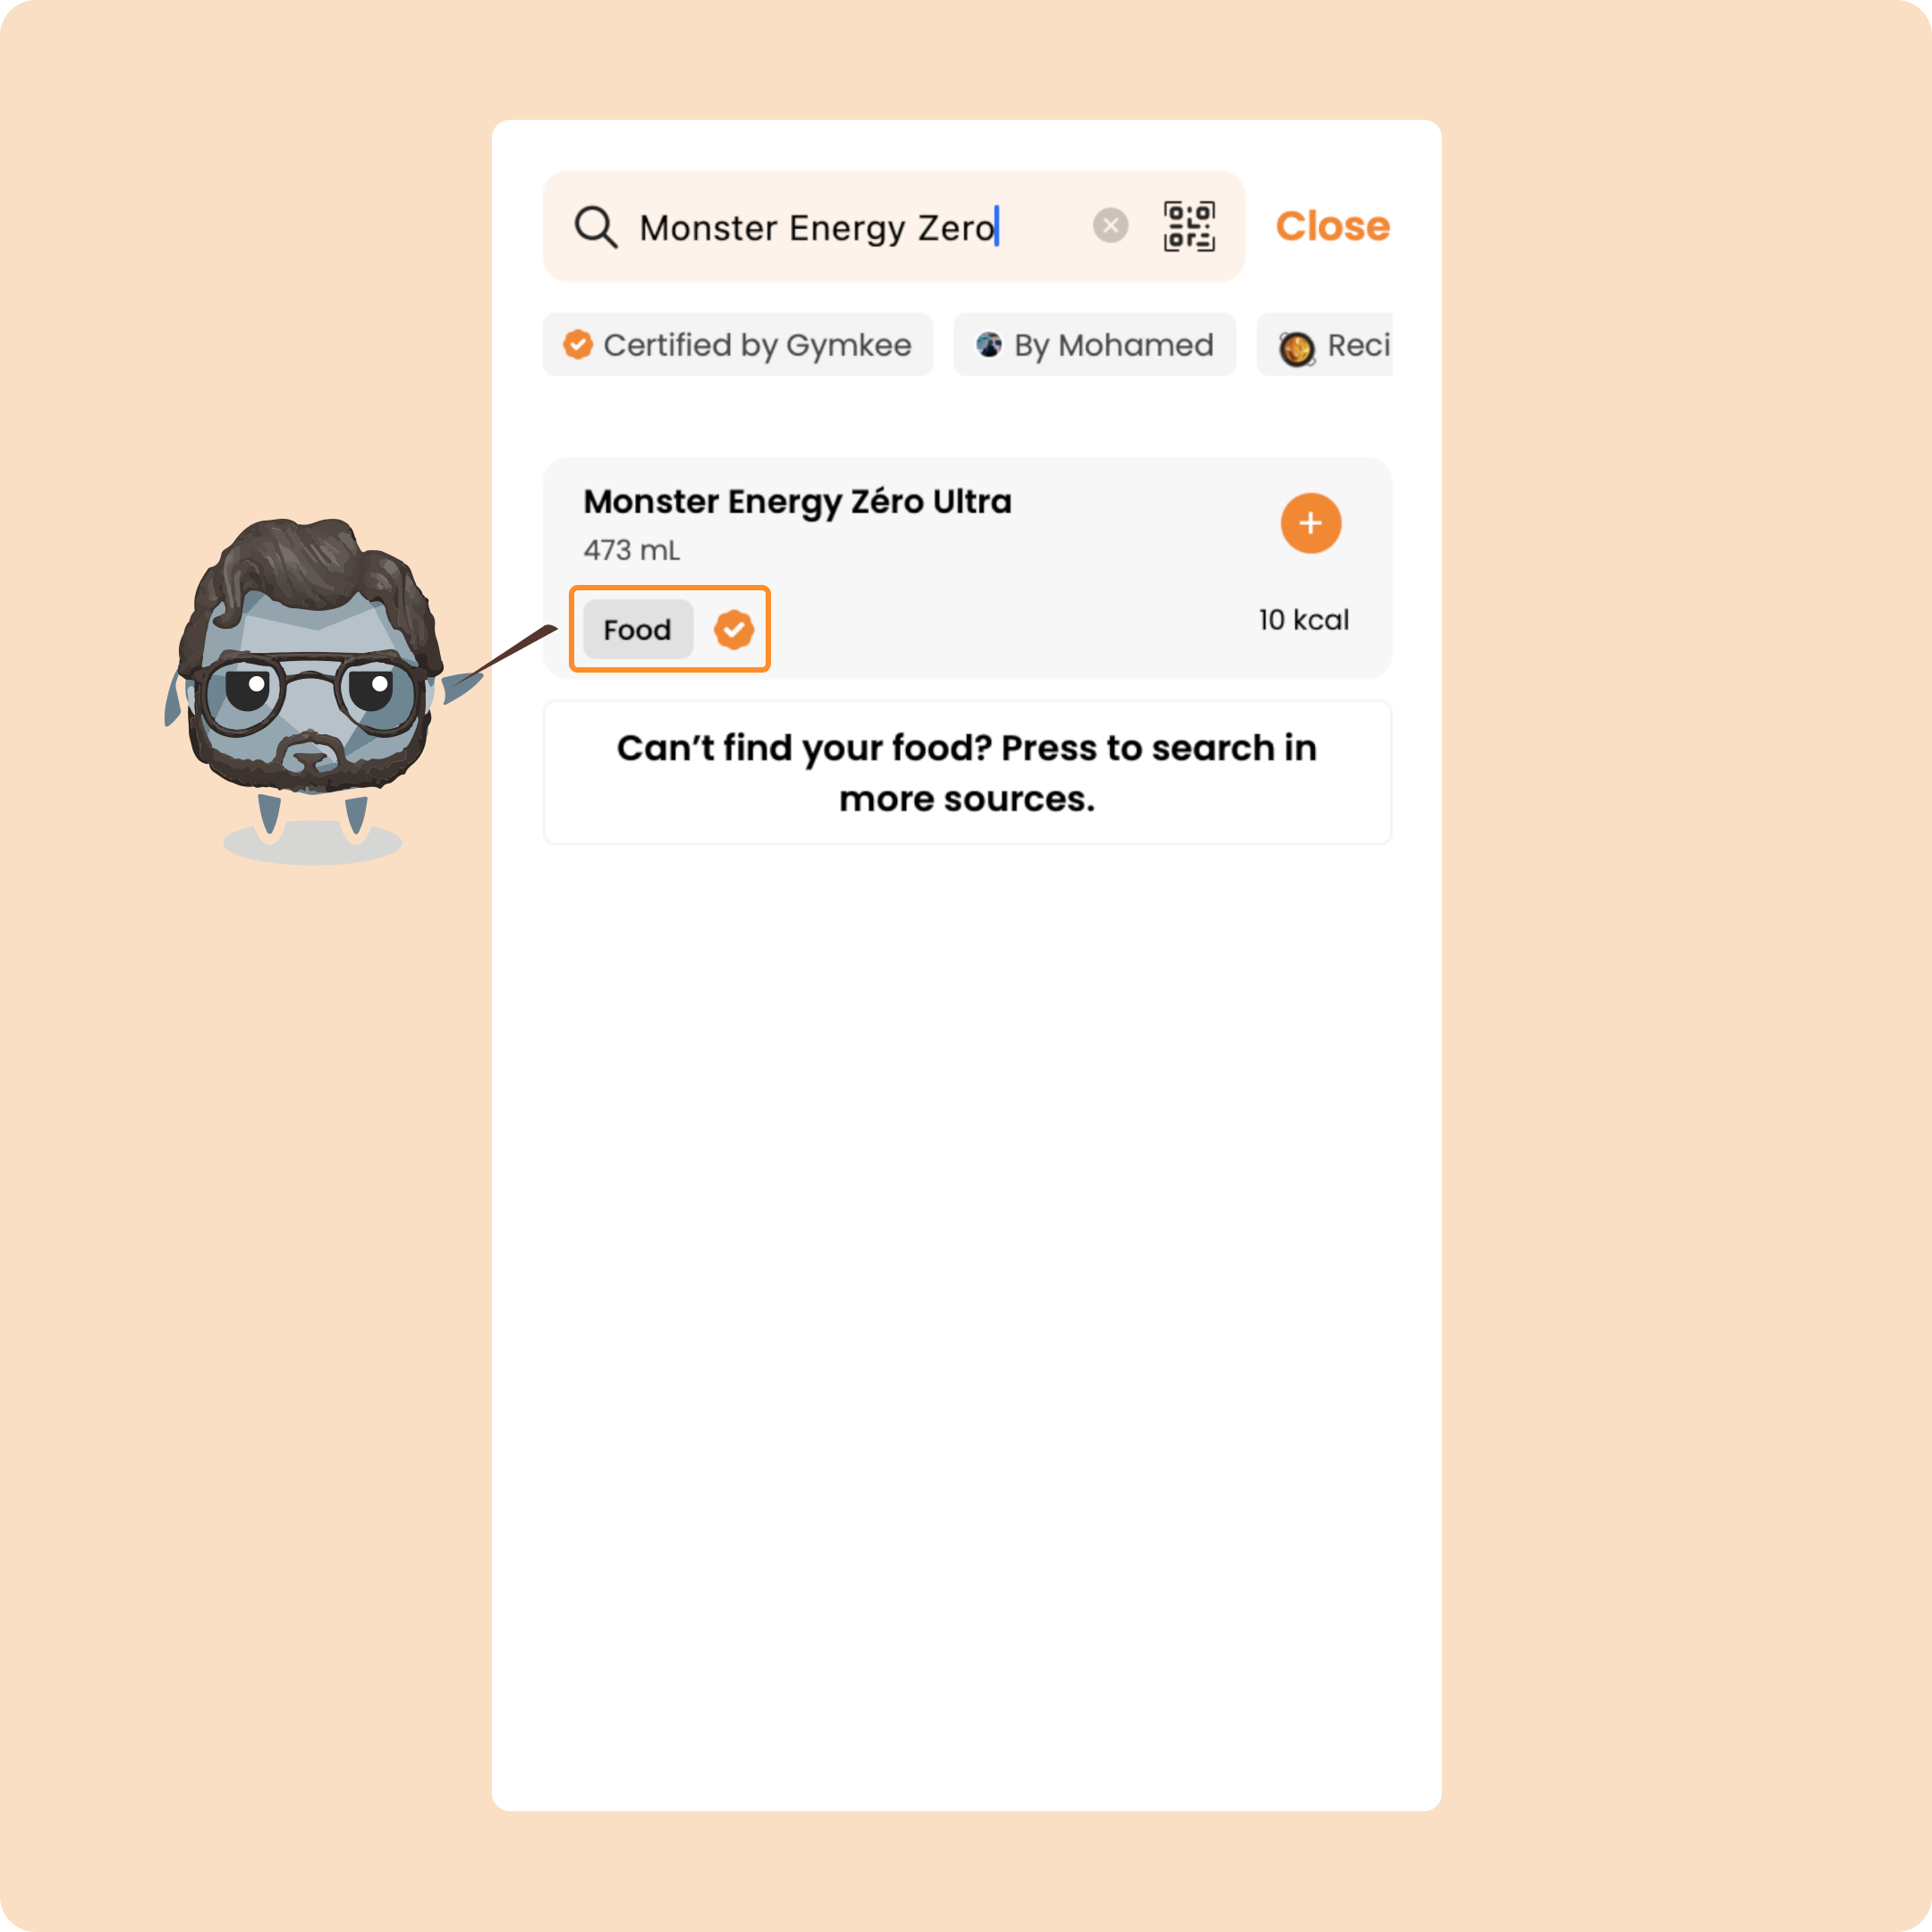
This is only affixed to the foods from our database (therefore with the correct nutritional values) and some certified coaches.
This allows you to add the food while being sure that you are entering the correct values and ensuring the monitoring of your nutritional coaching.
In the case where you do not find the food or product you want during the first search, you can launch an advanced search by clicking on the button that will appear after the last result:
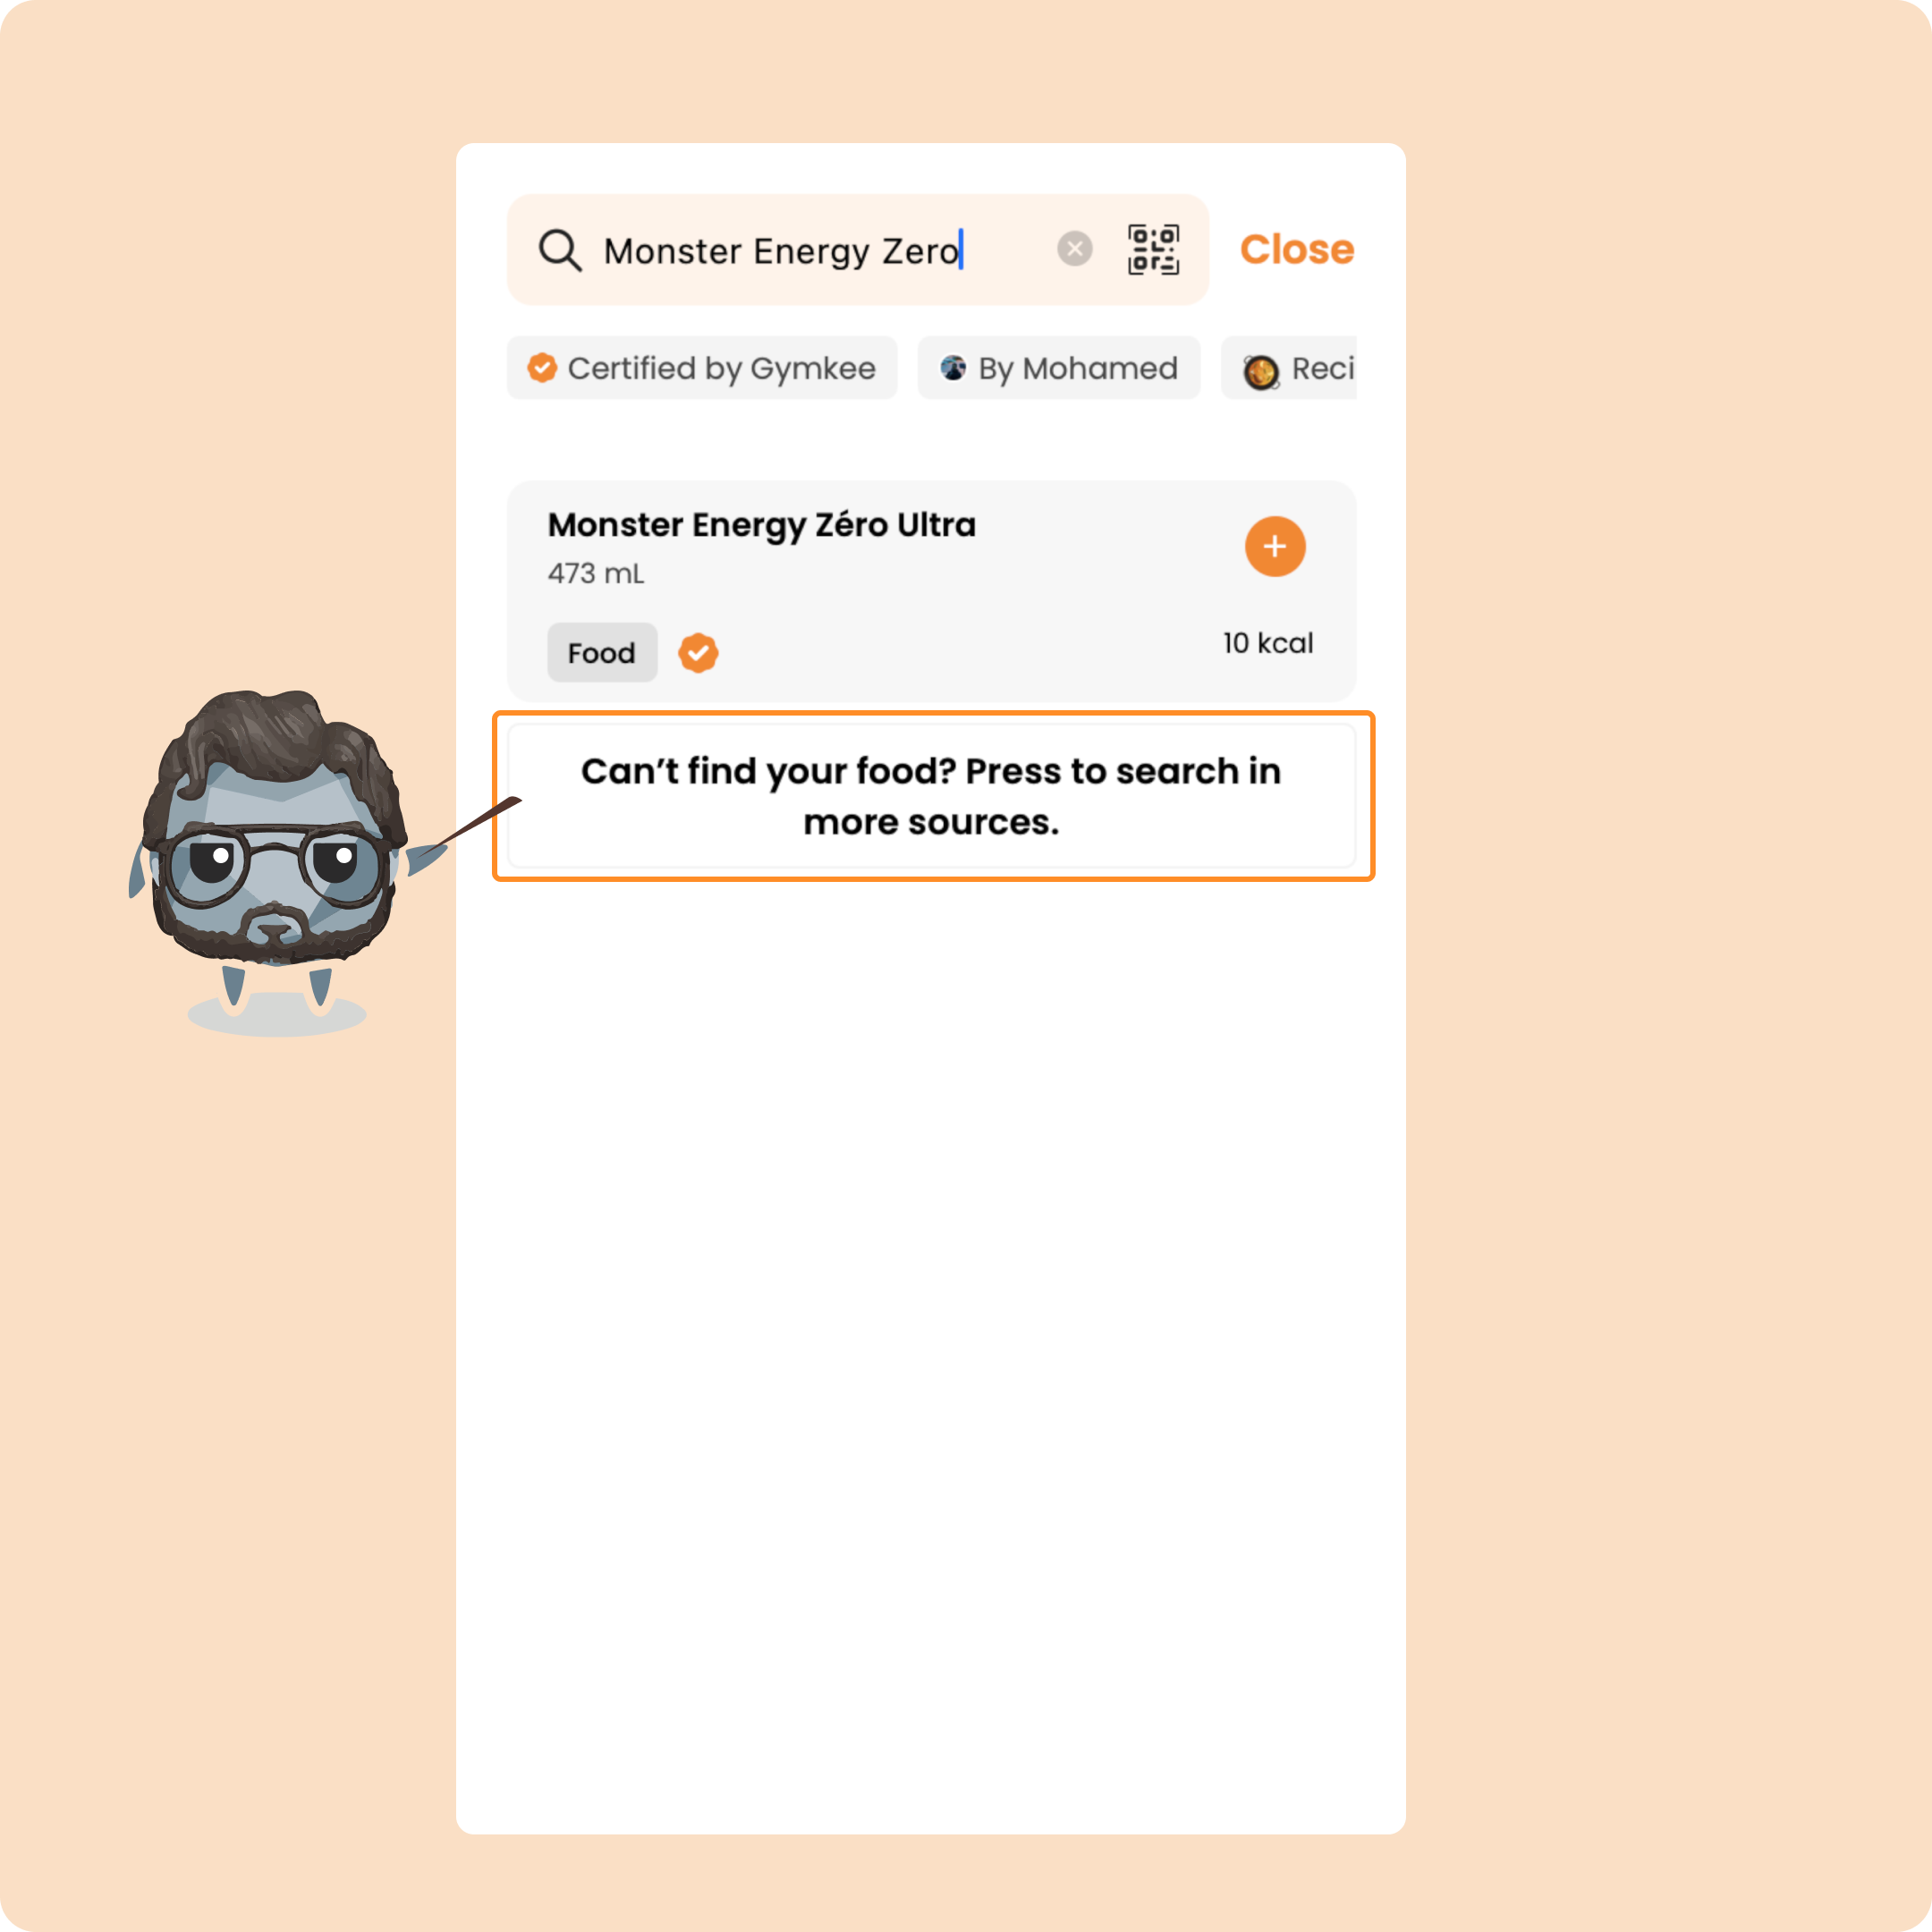
This will relaunch a search to find more foods and products that match what you want to log.
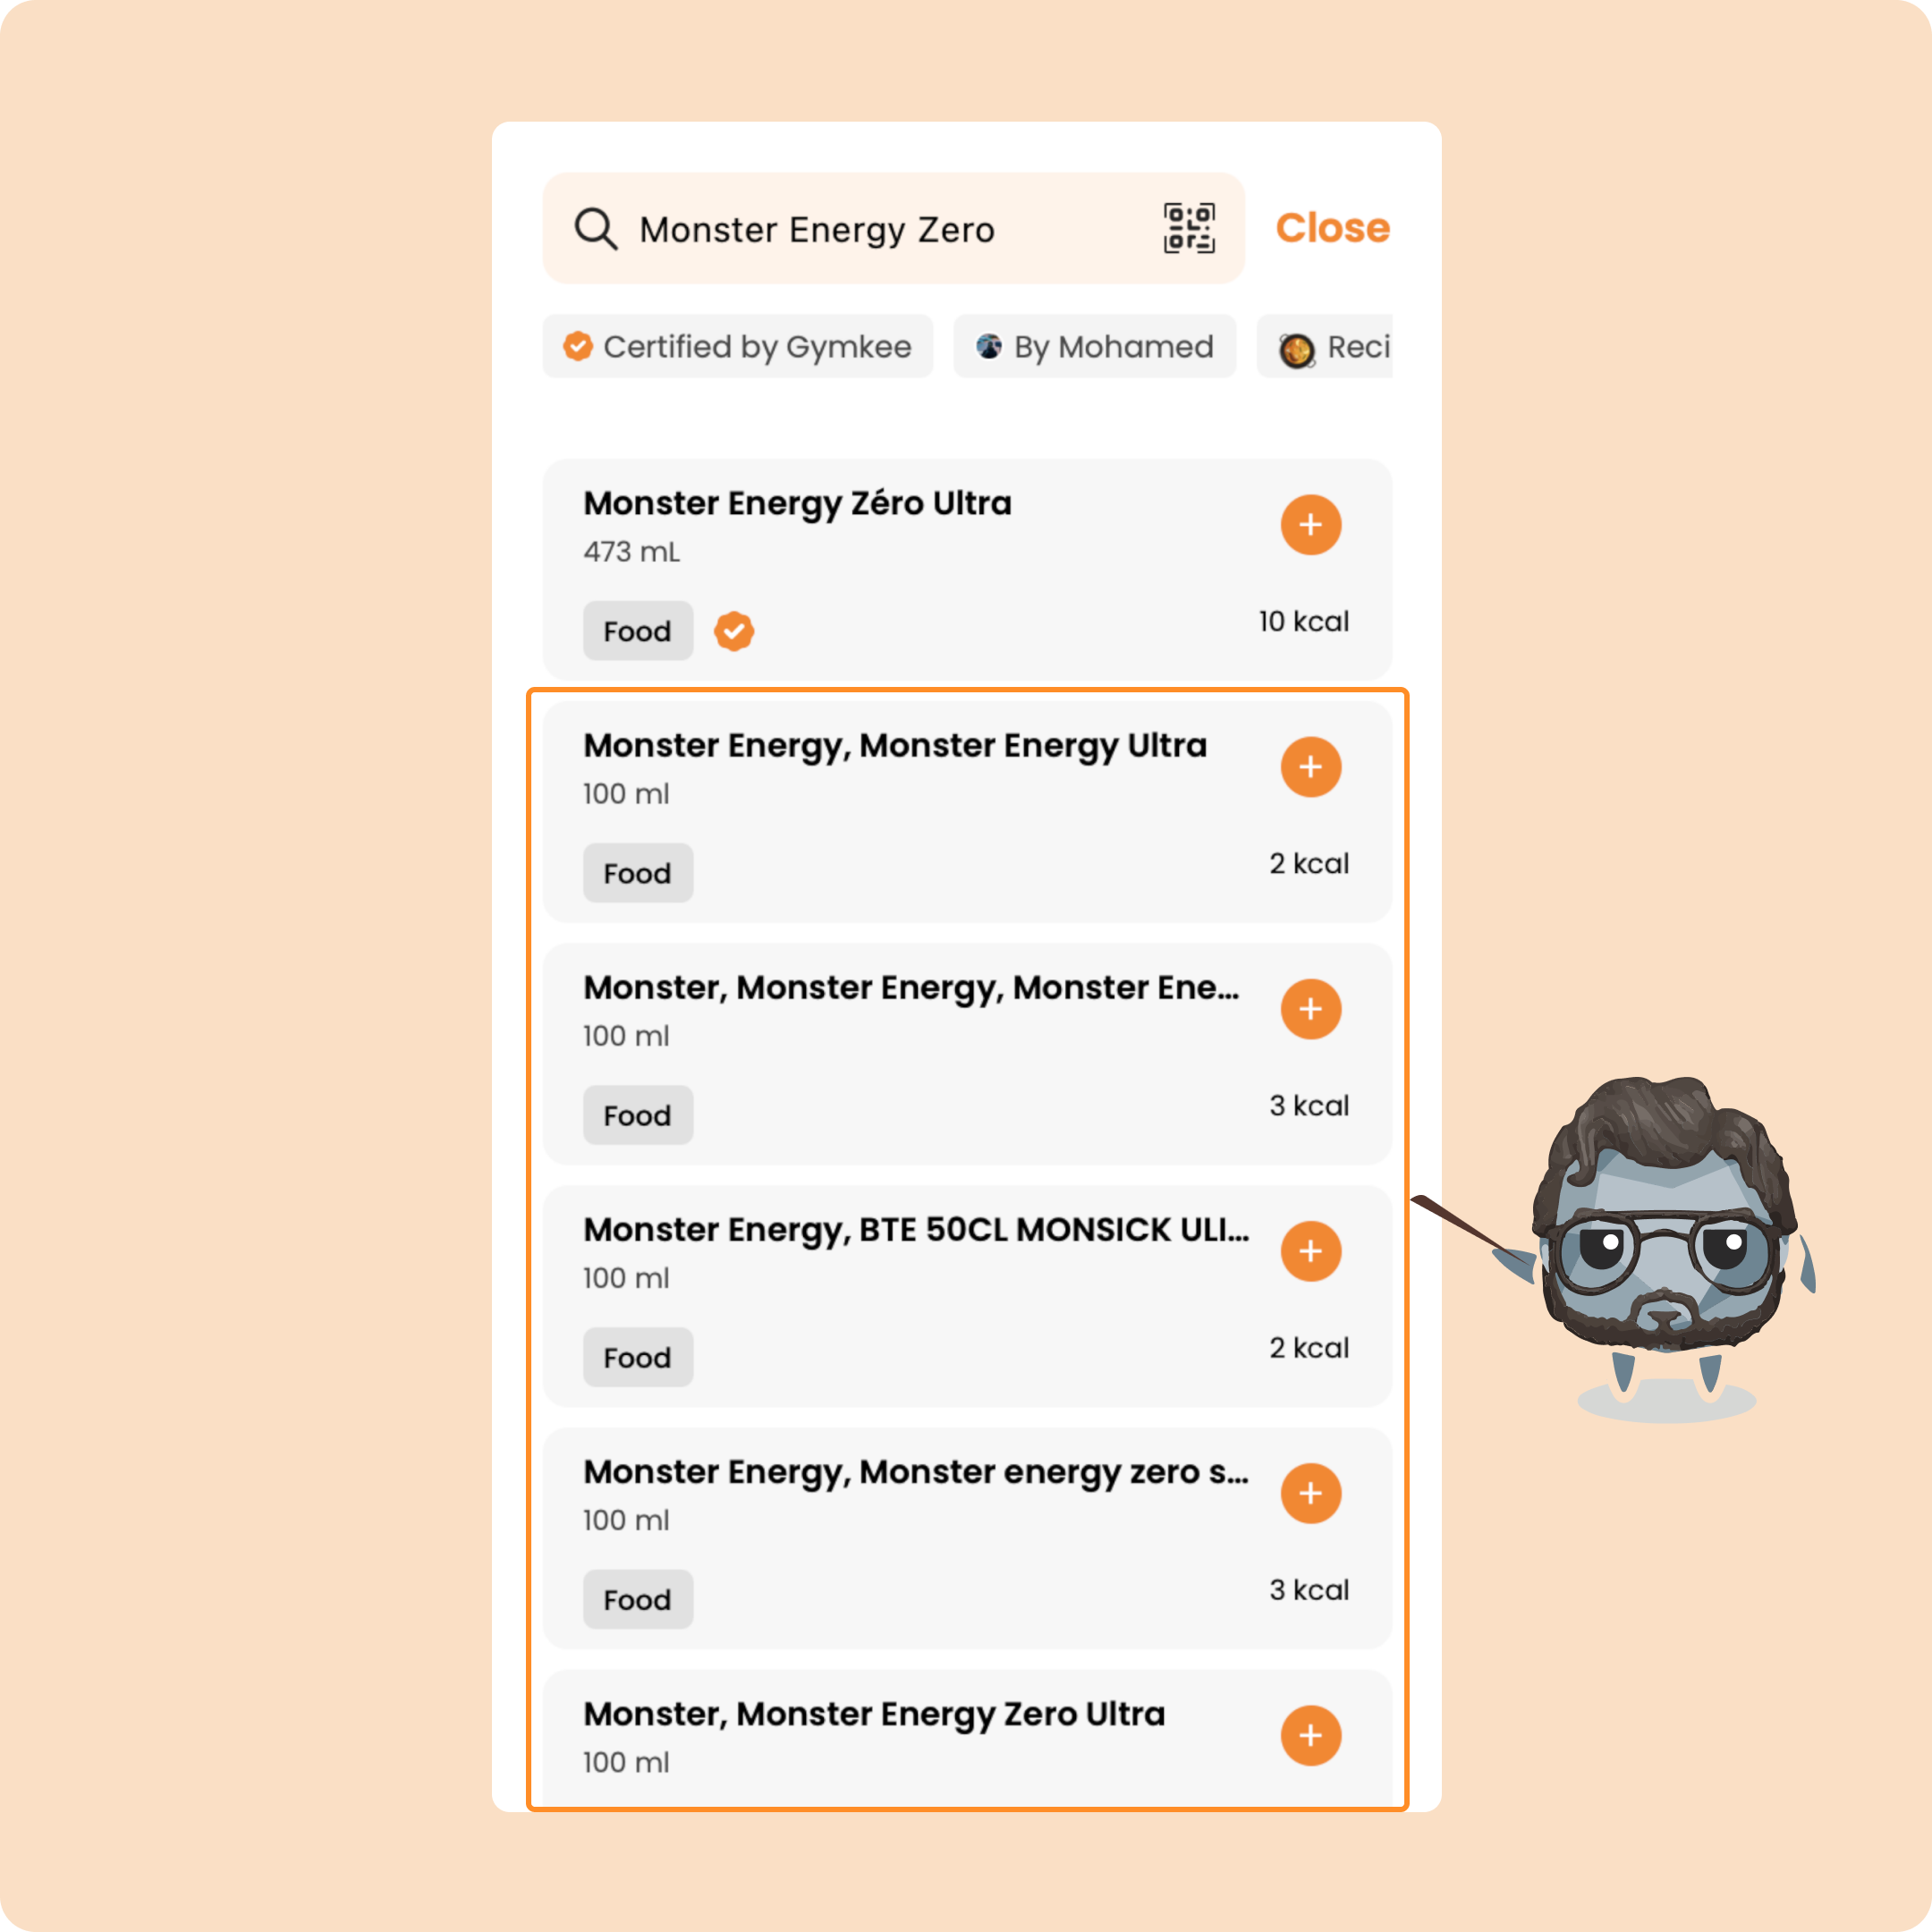
Once you have found the right food/product, you will be able to log it.
For that, you have 2 ways to do it:
1 – Press the "+" button which will allow you to add it directly at its default value (100 + unit)
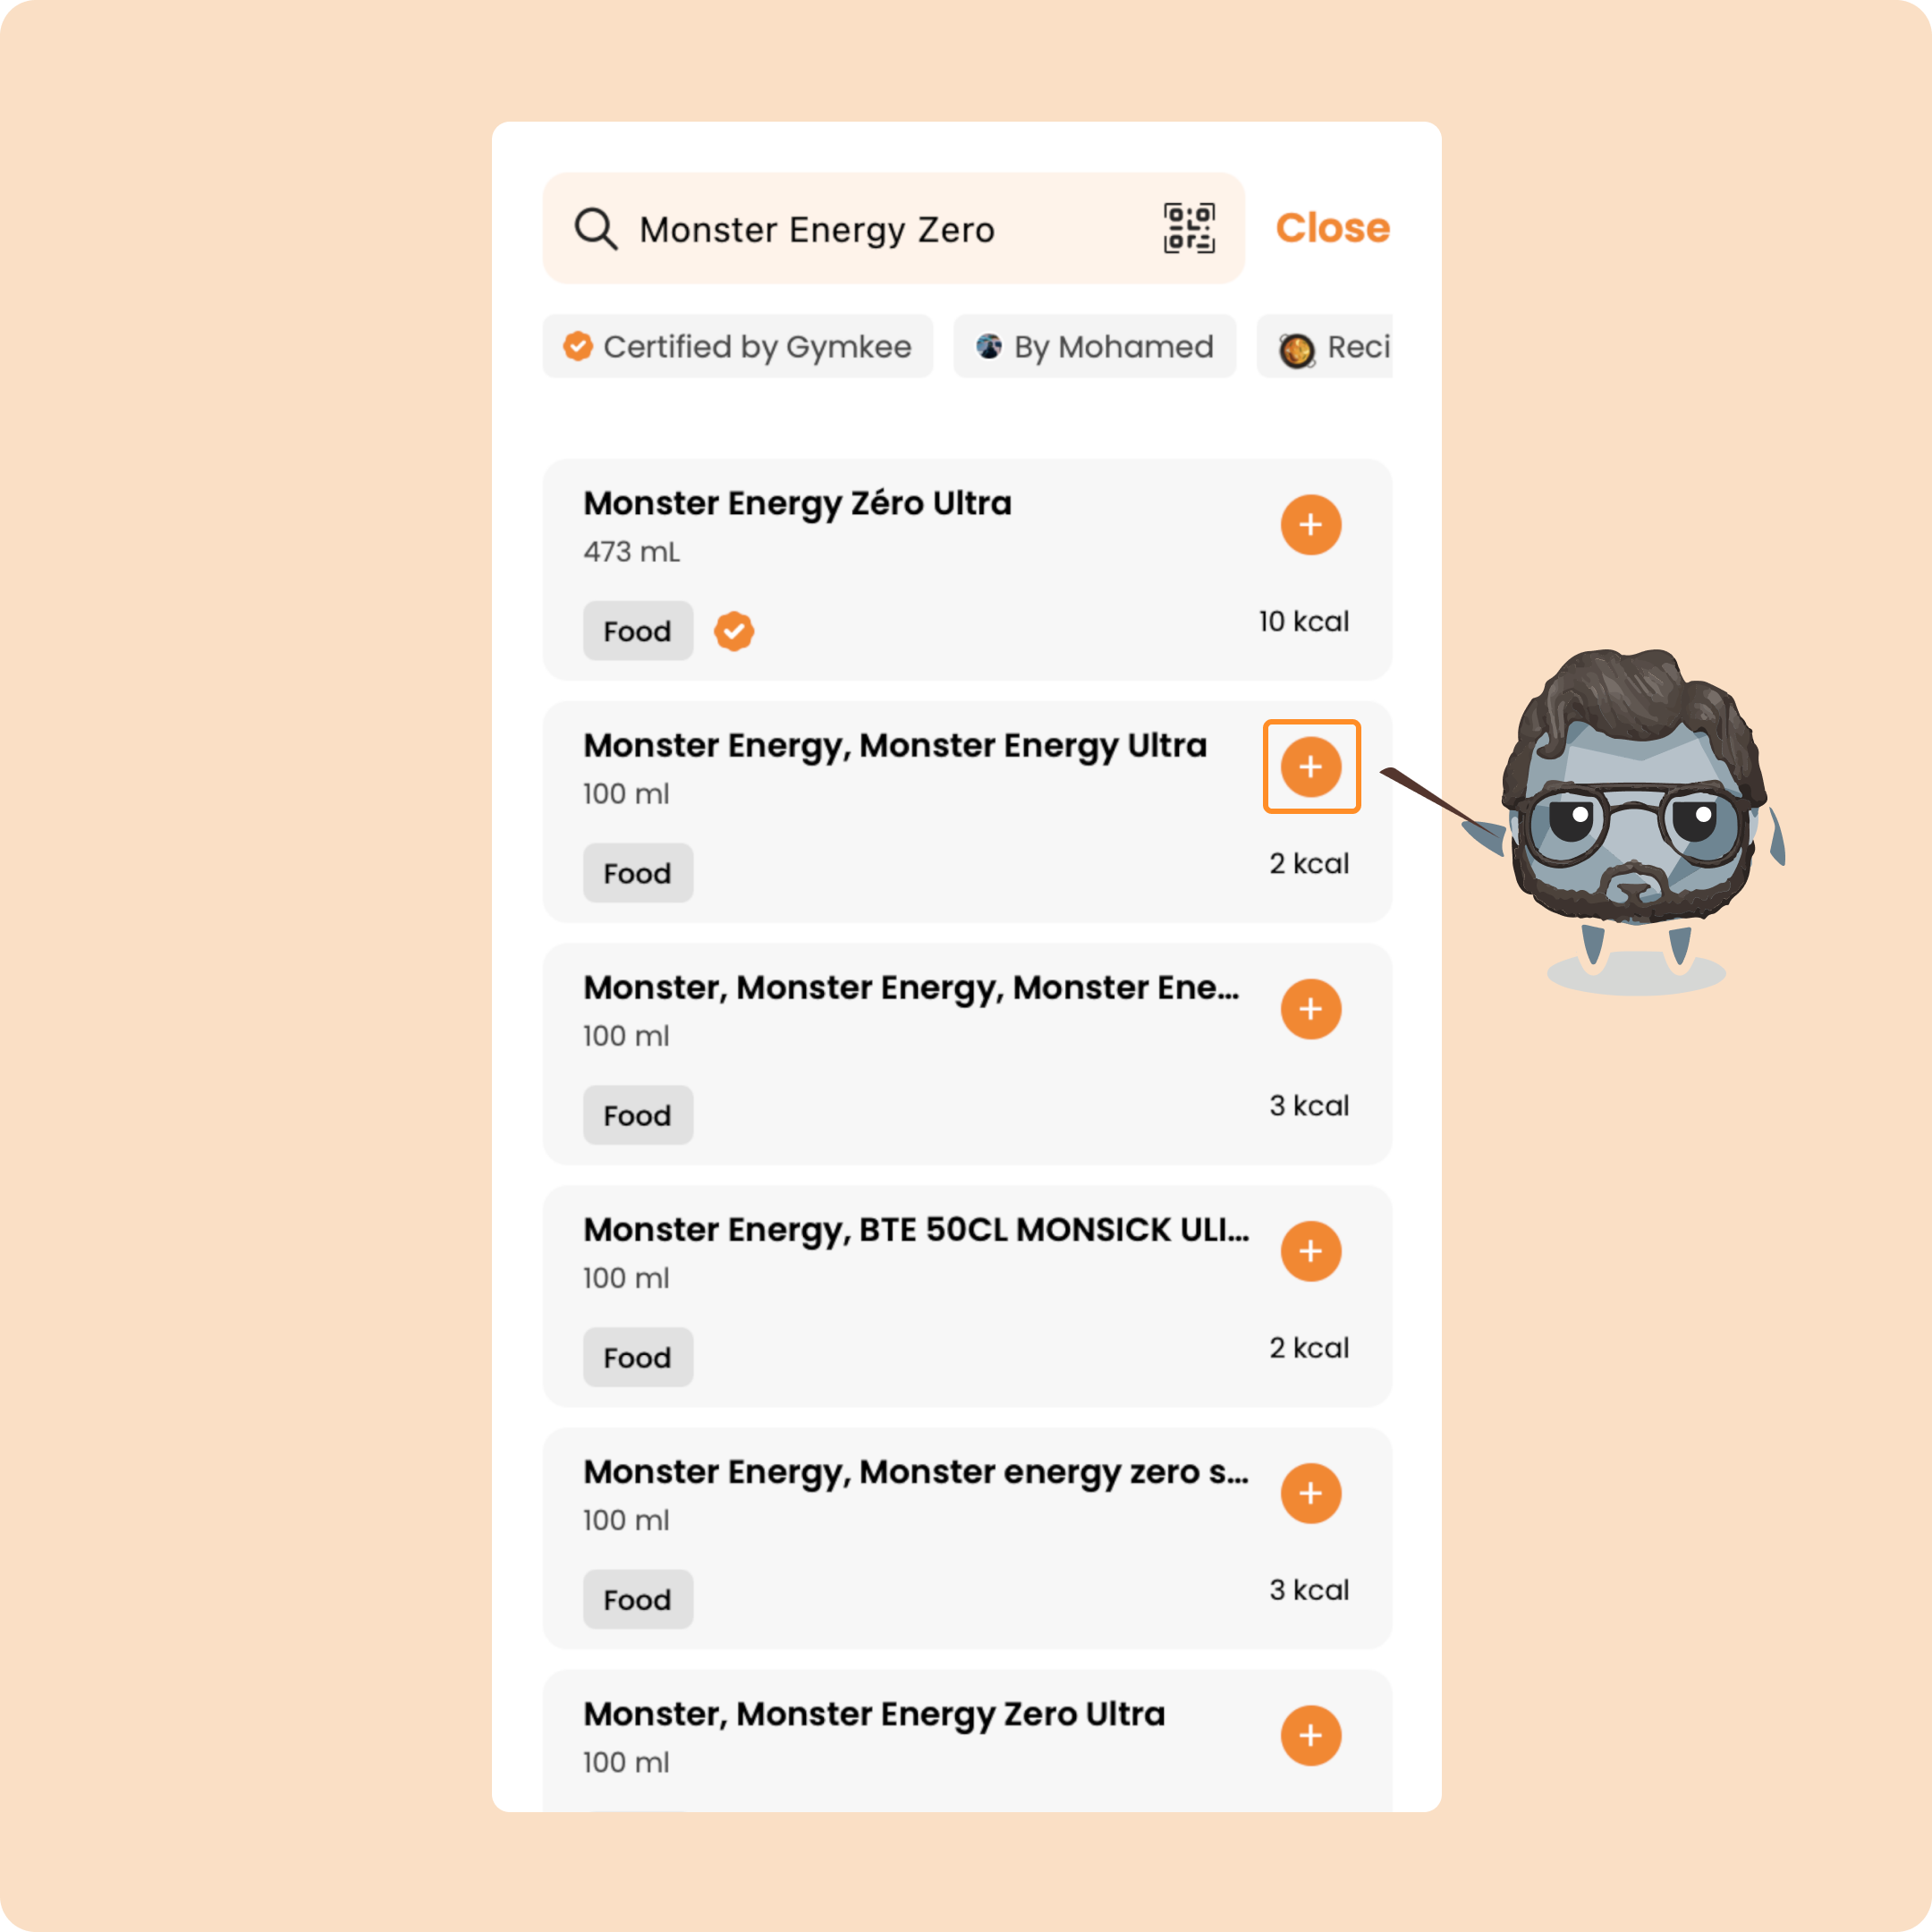
You will be able to modify the value later with the other foods that you will have added in this way.
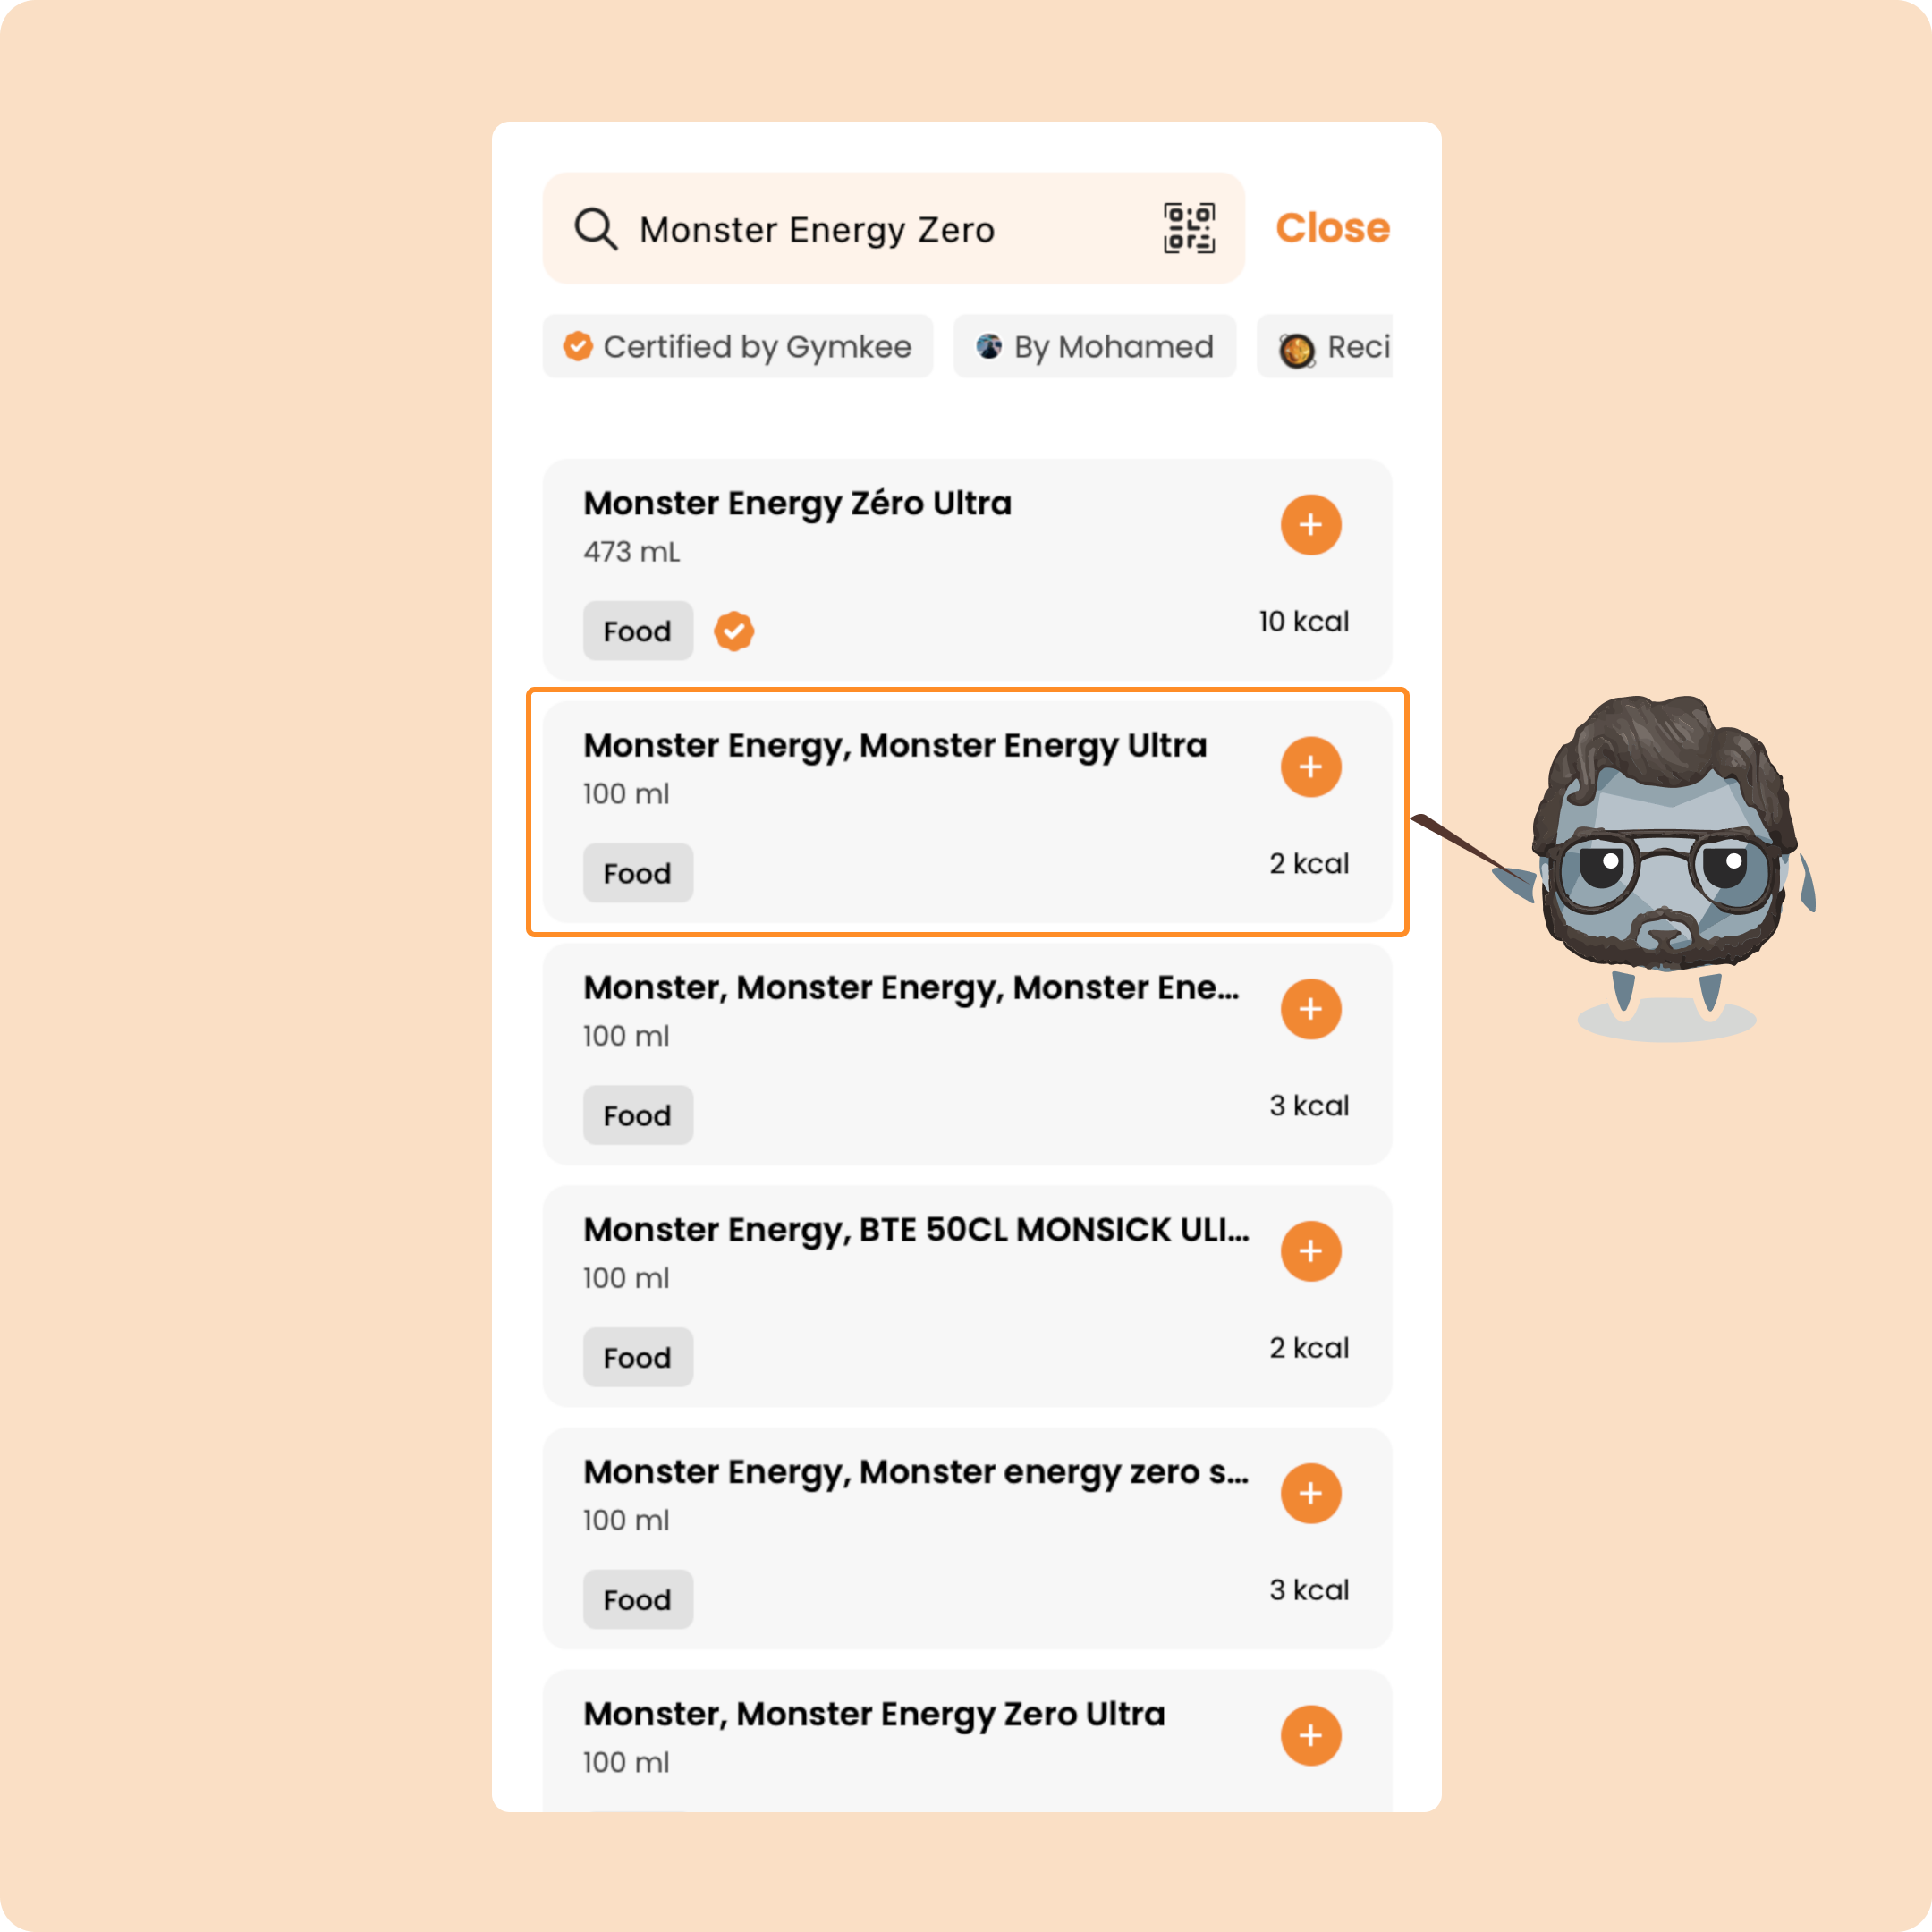
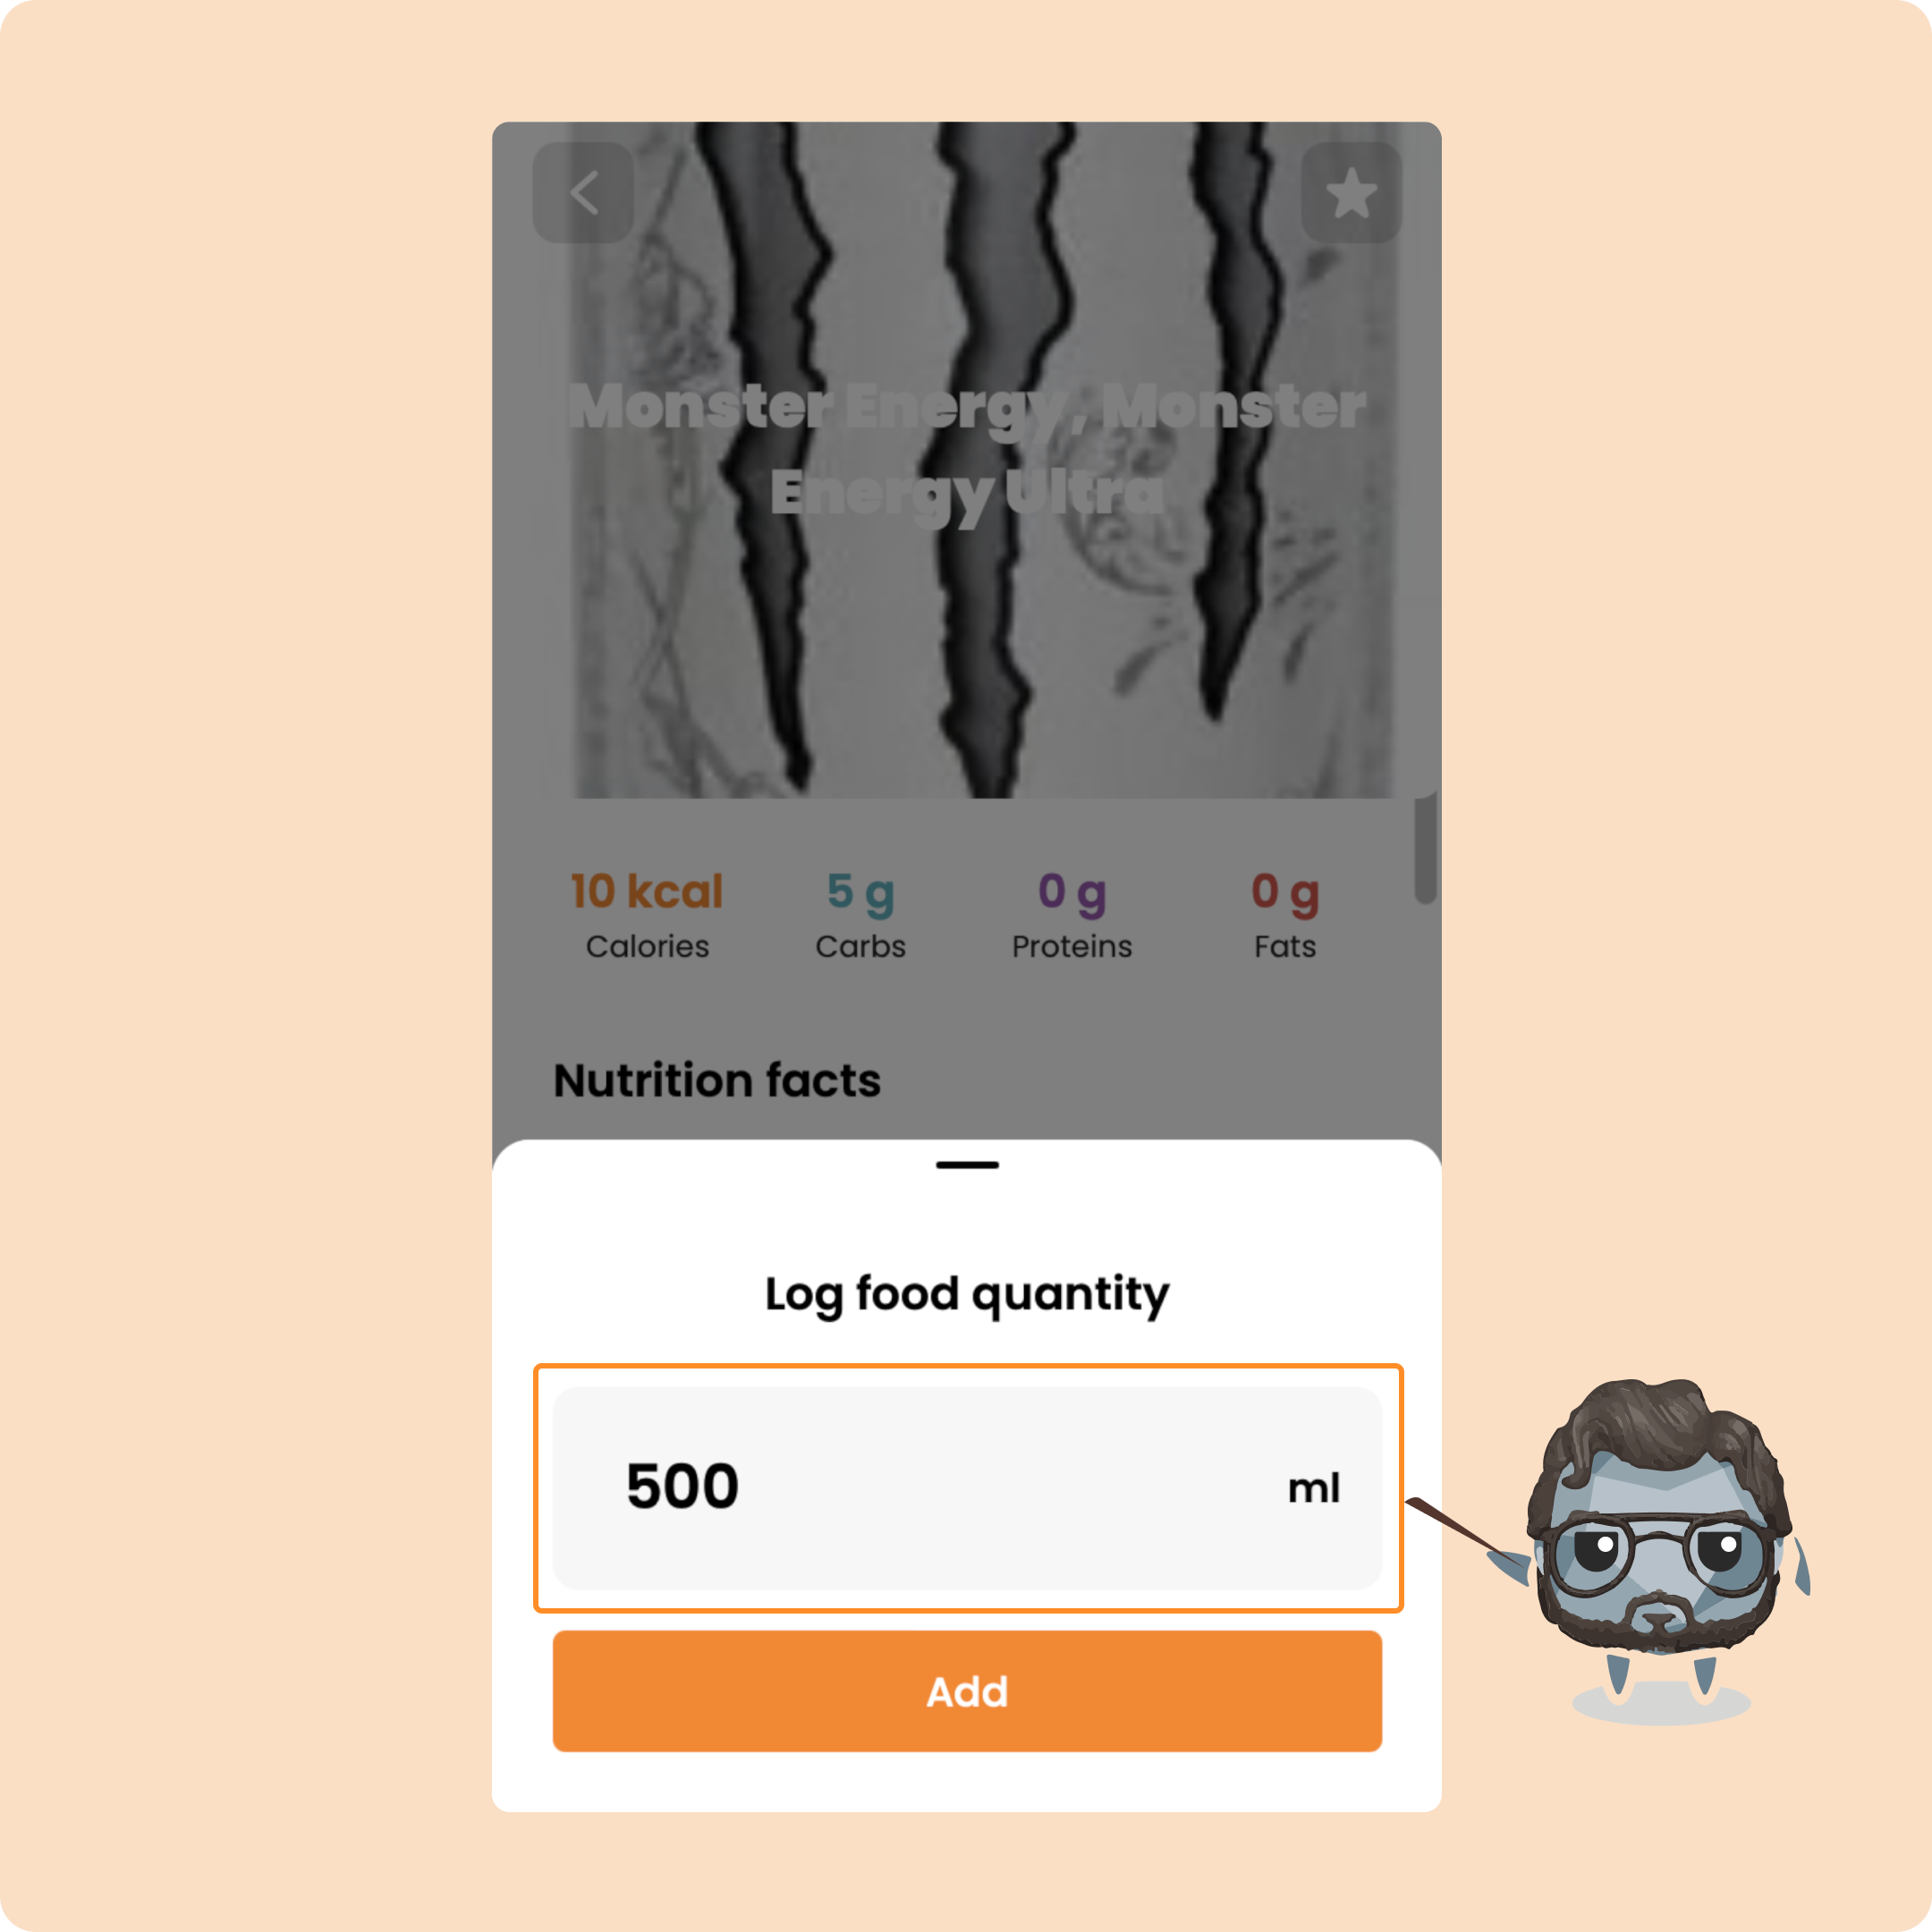
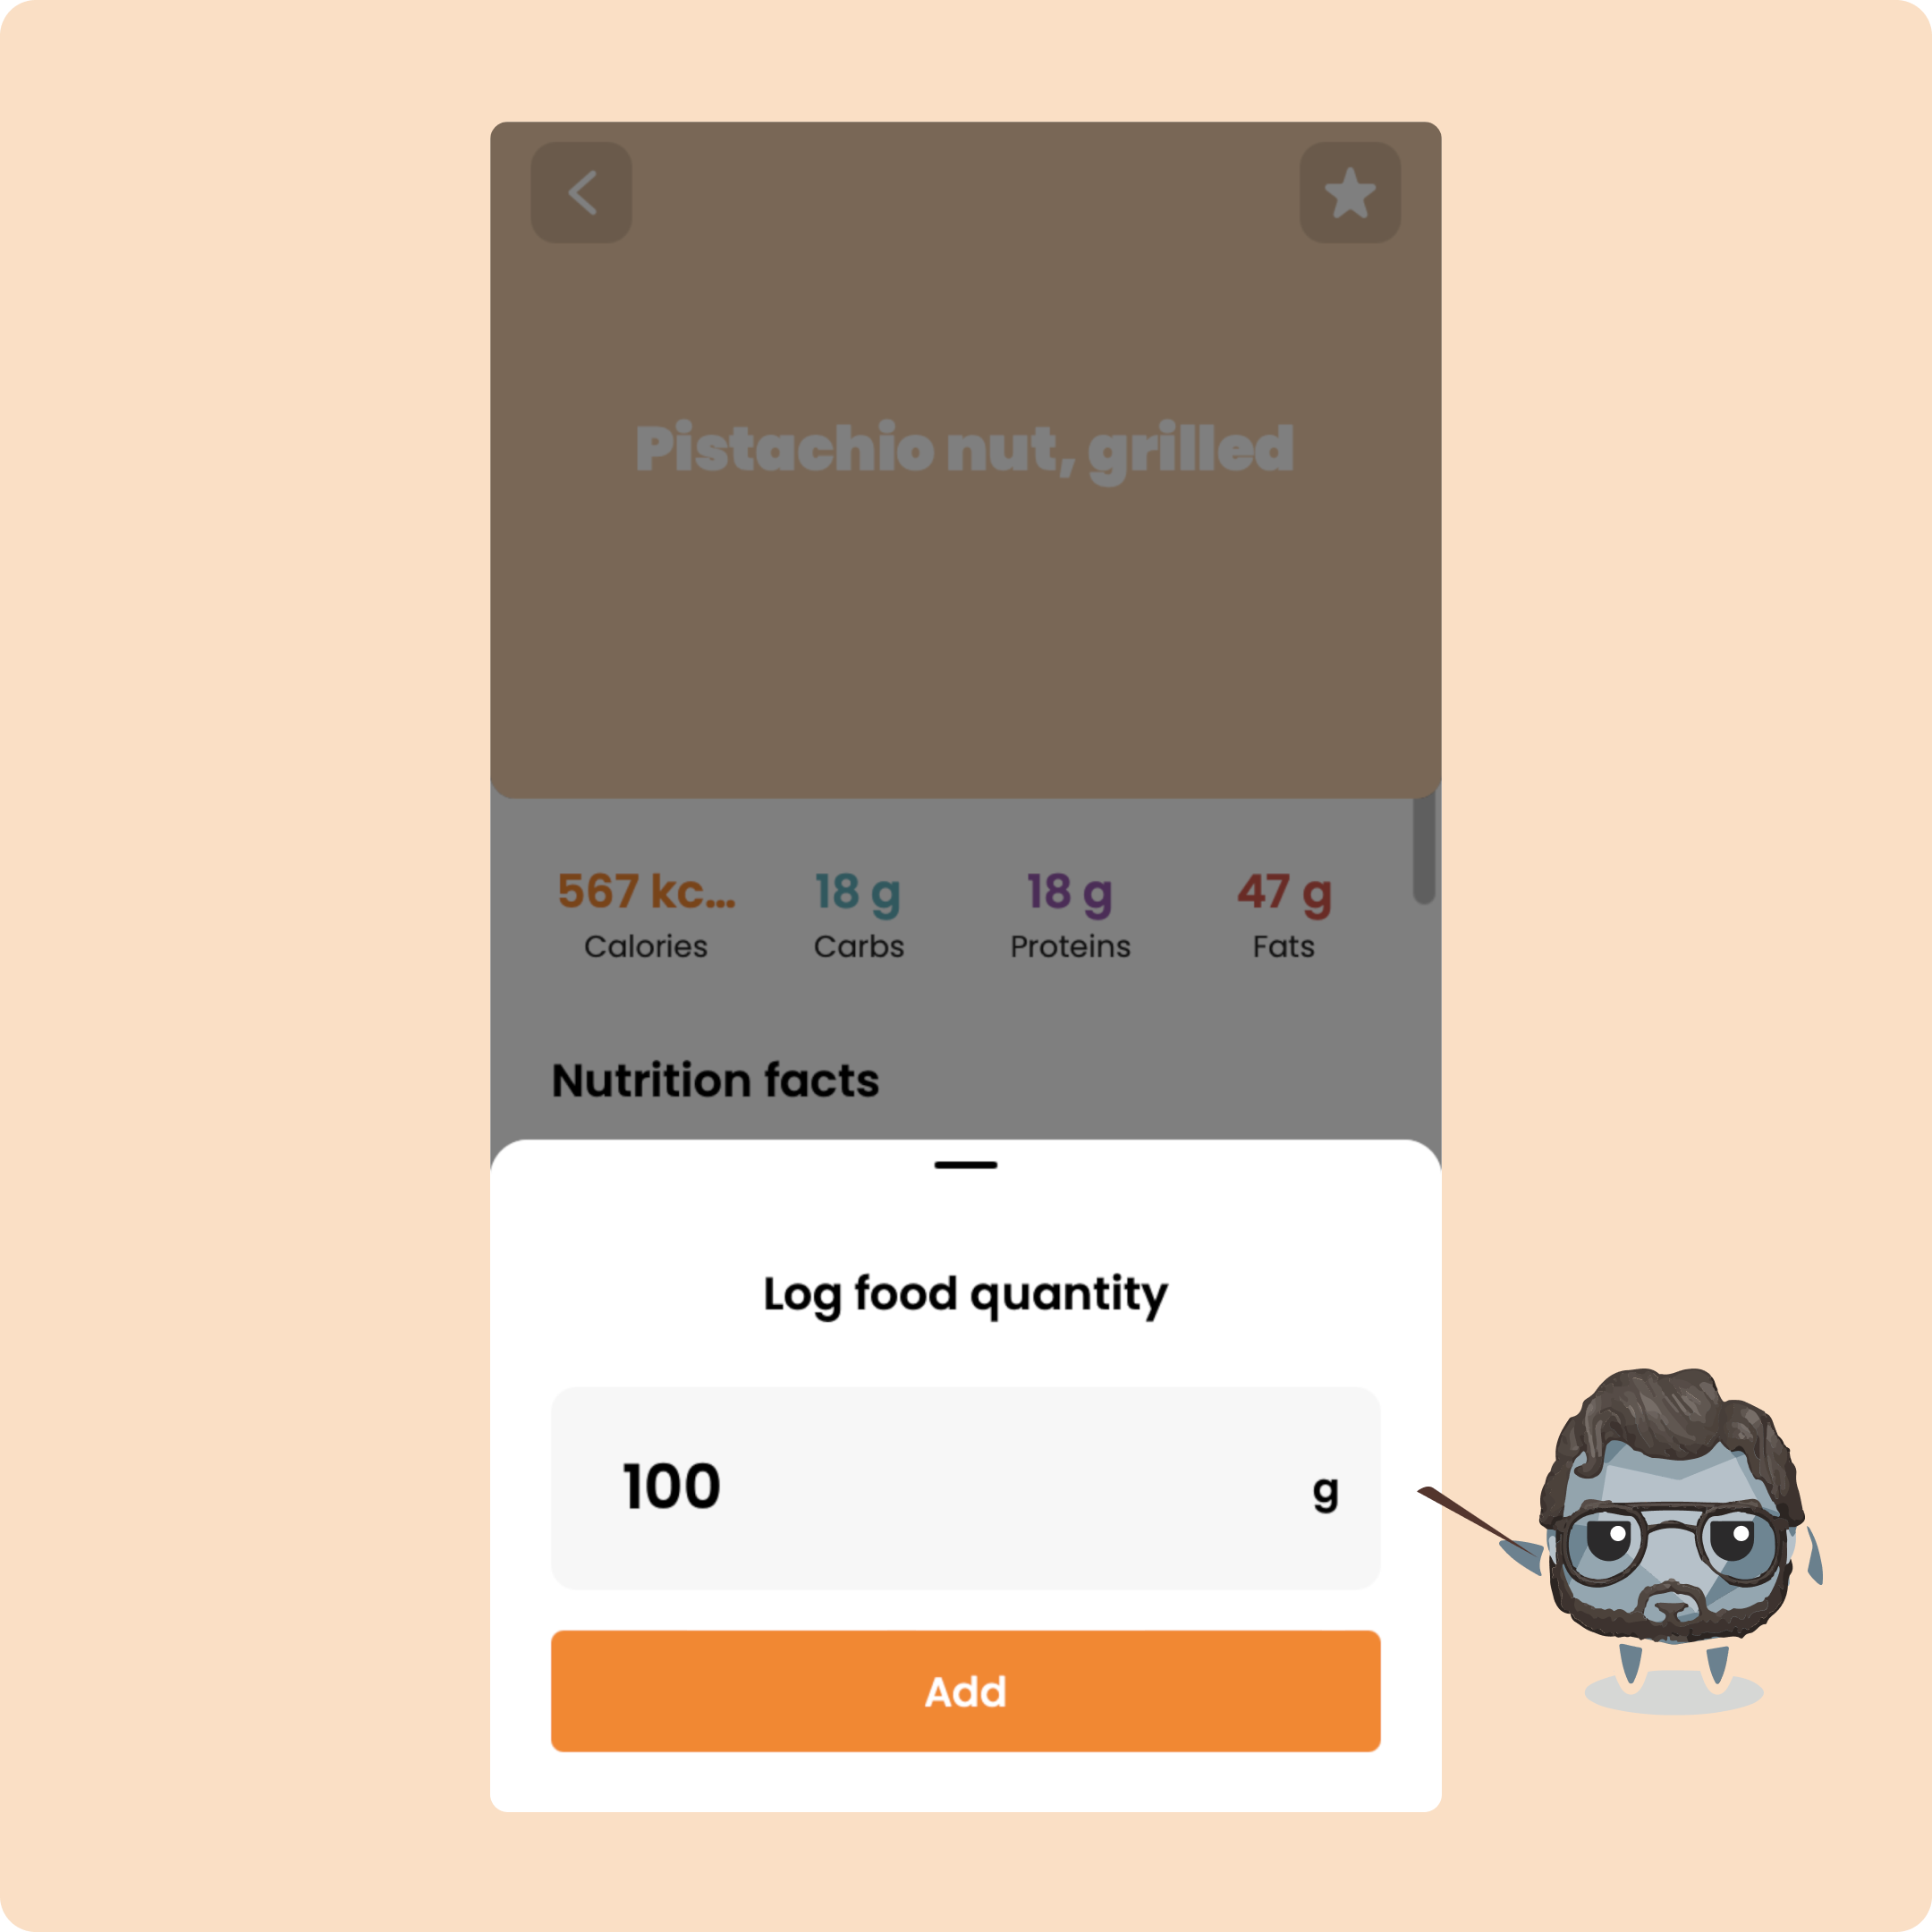
2 – Press on the food and directly enter the correct value consumed
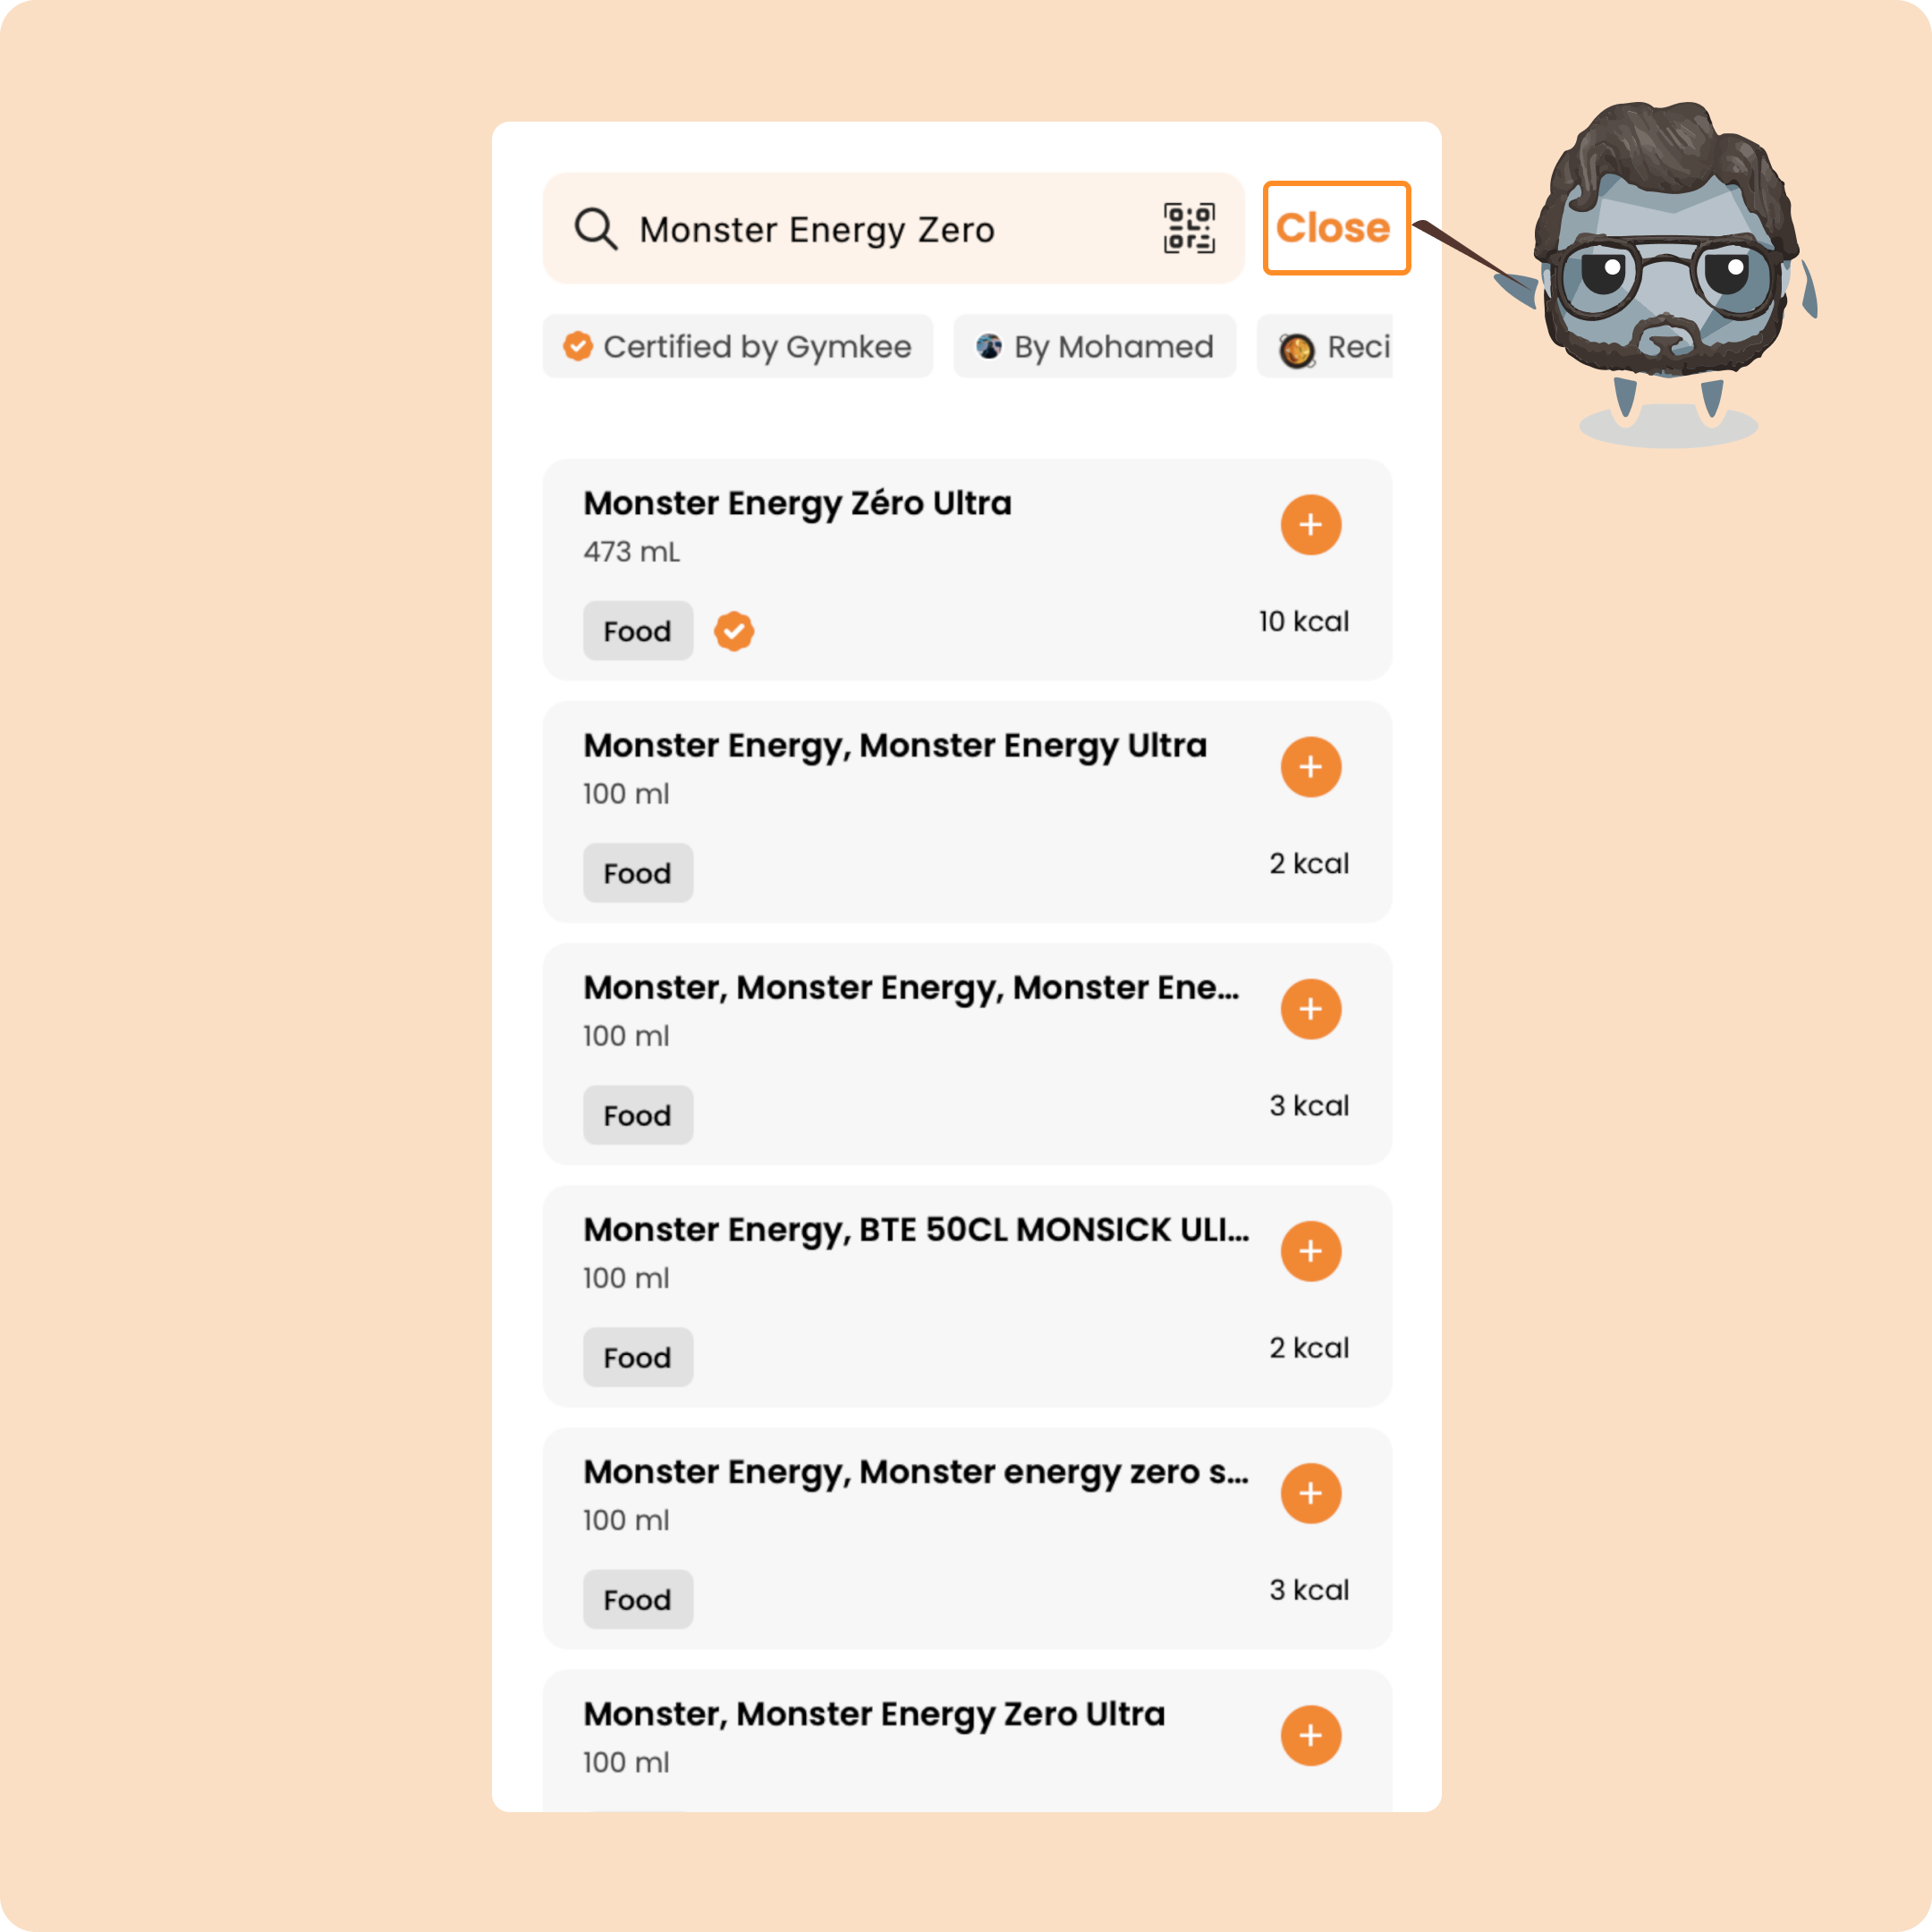
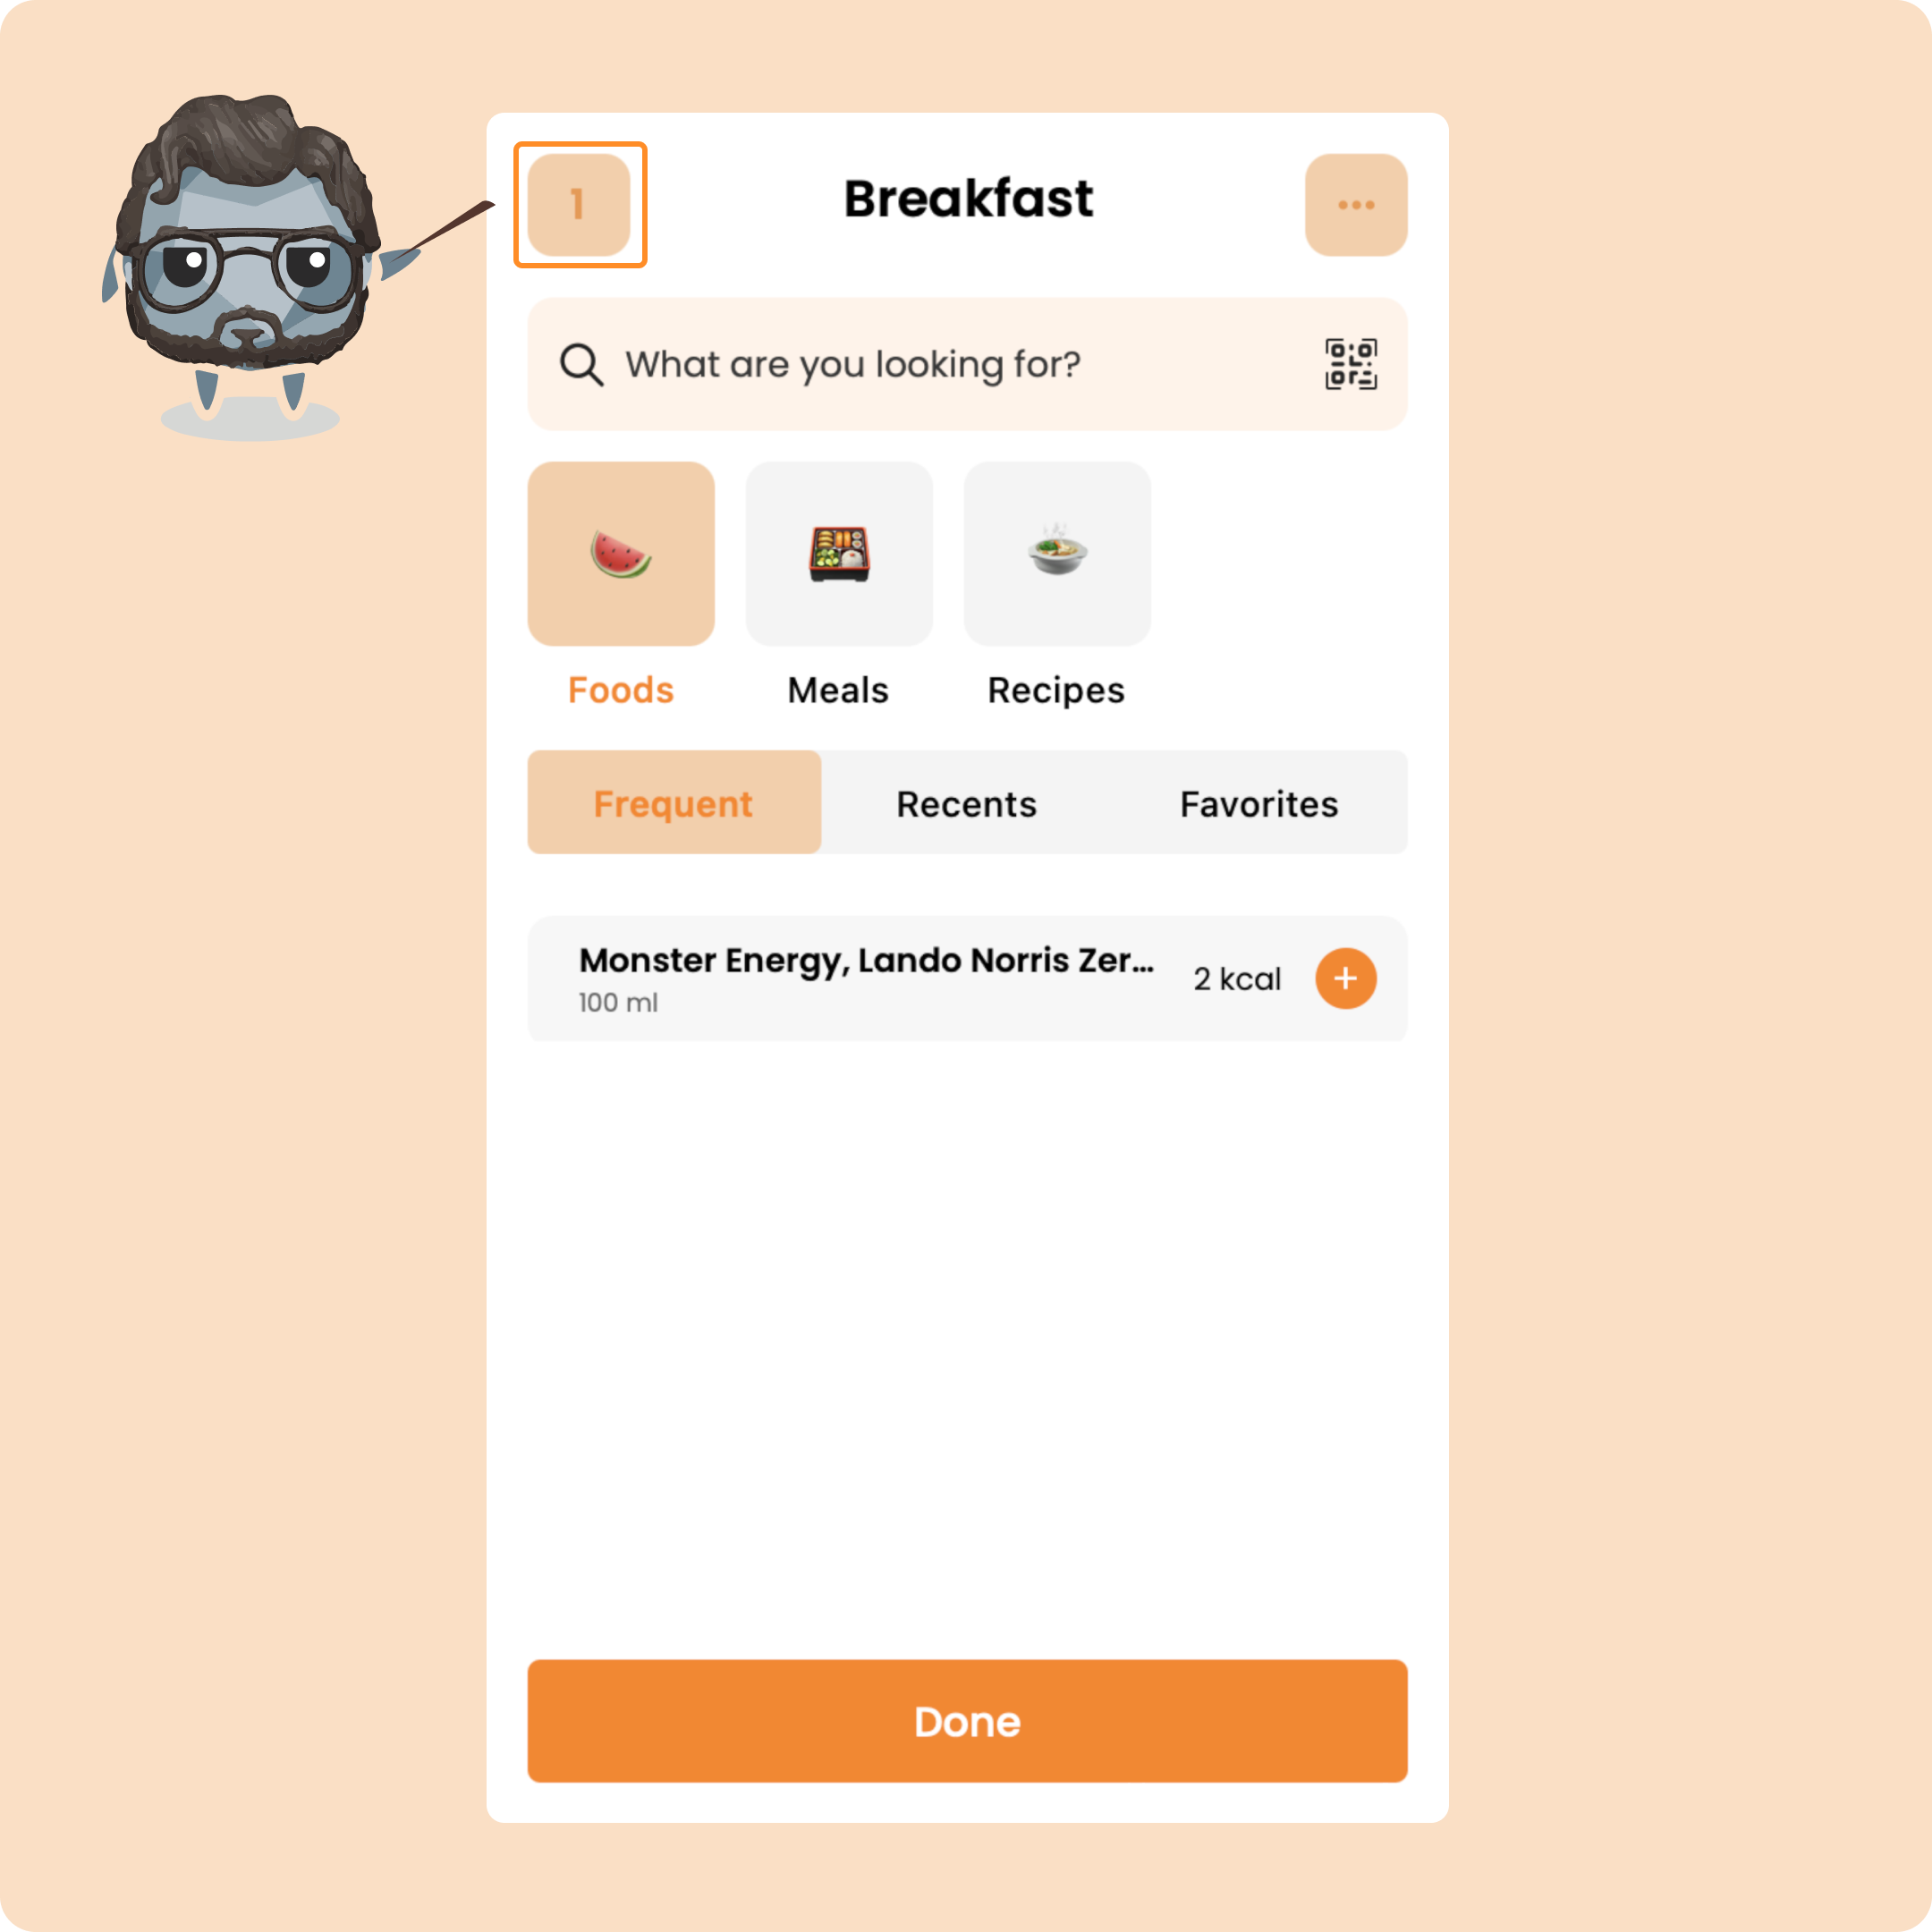
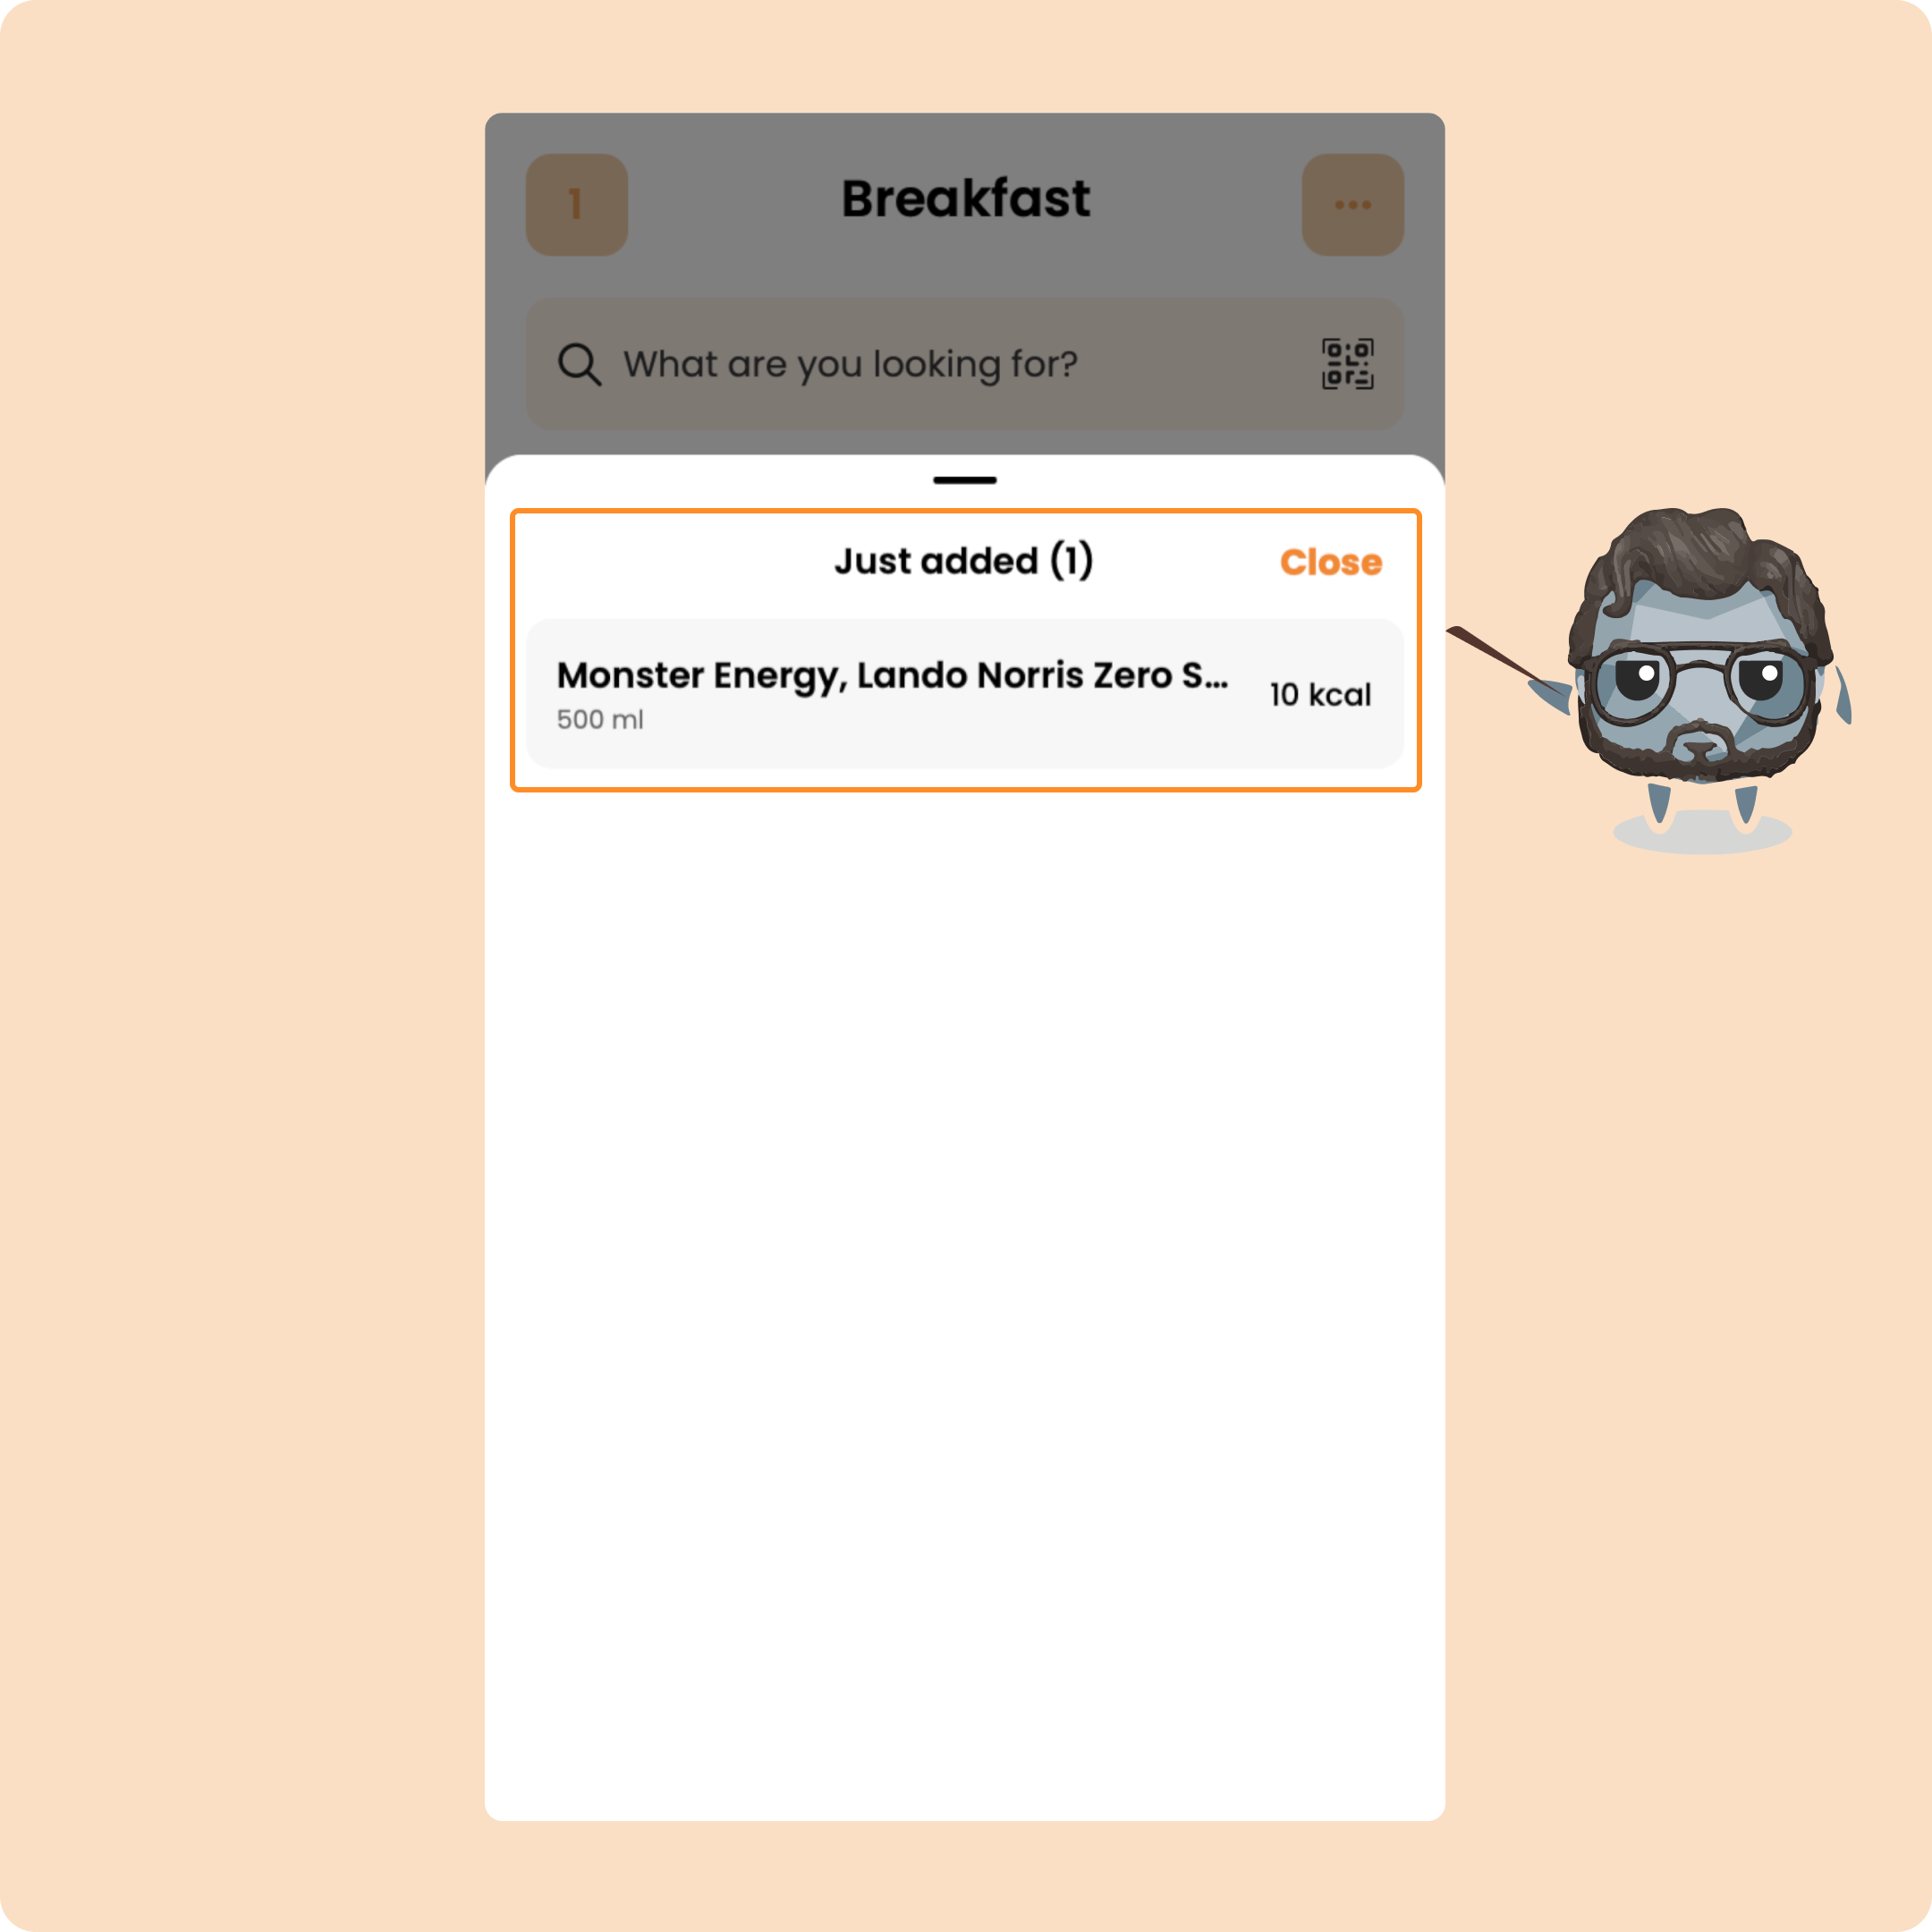
To see the foods/products that you are in the process of adding to your meal, go back to the main screen by clicking on "Close" at the top right
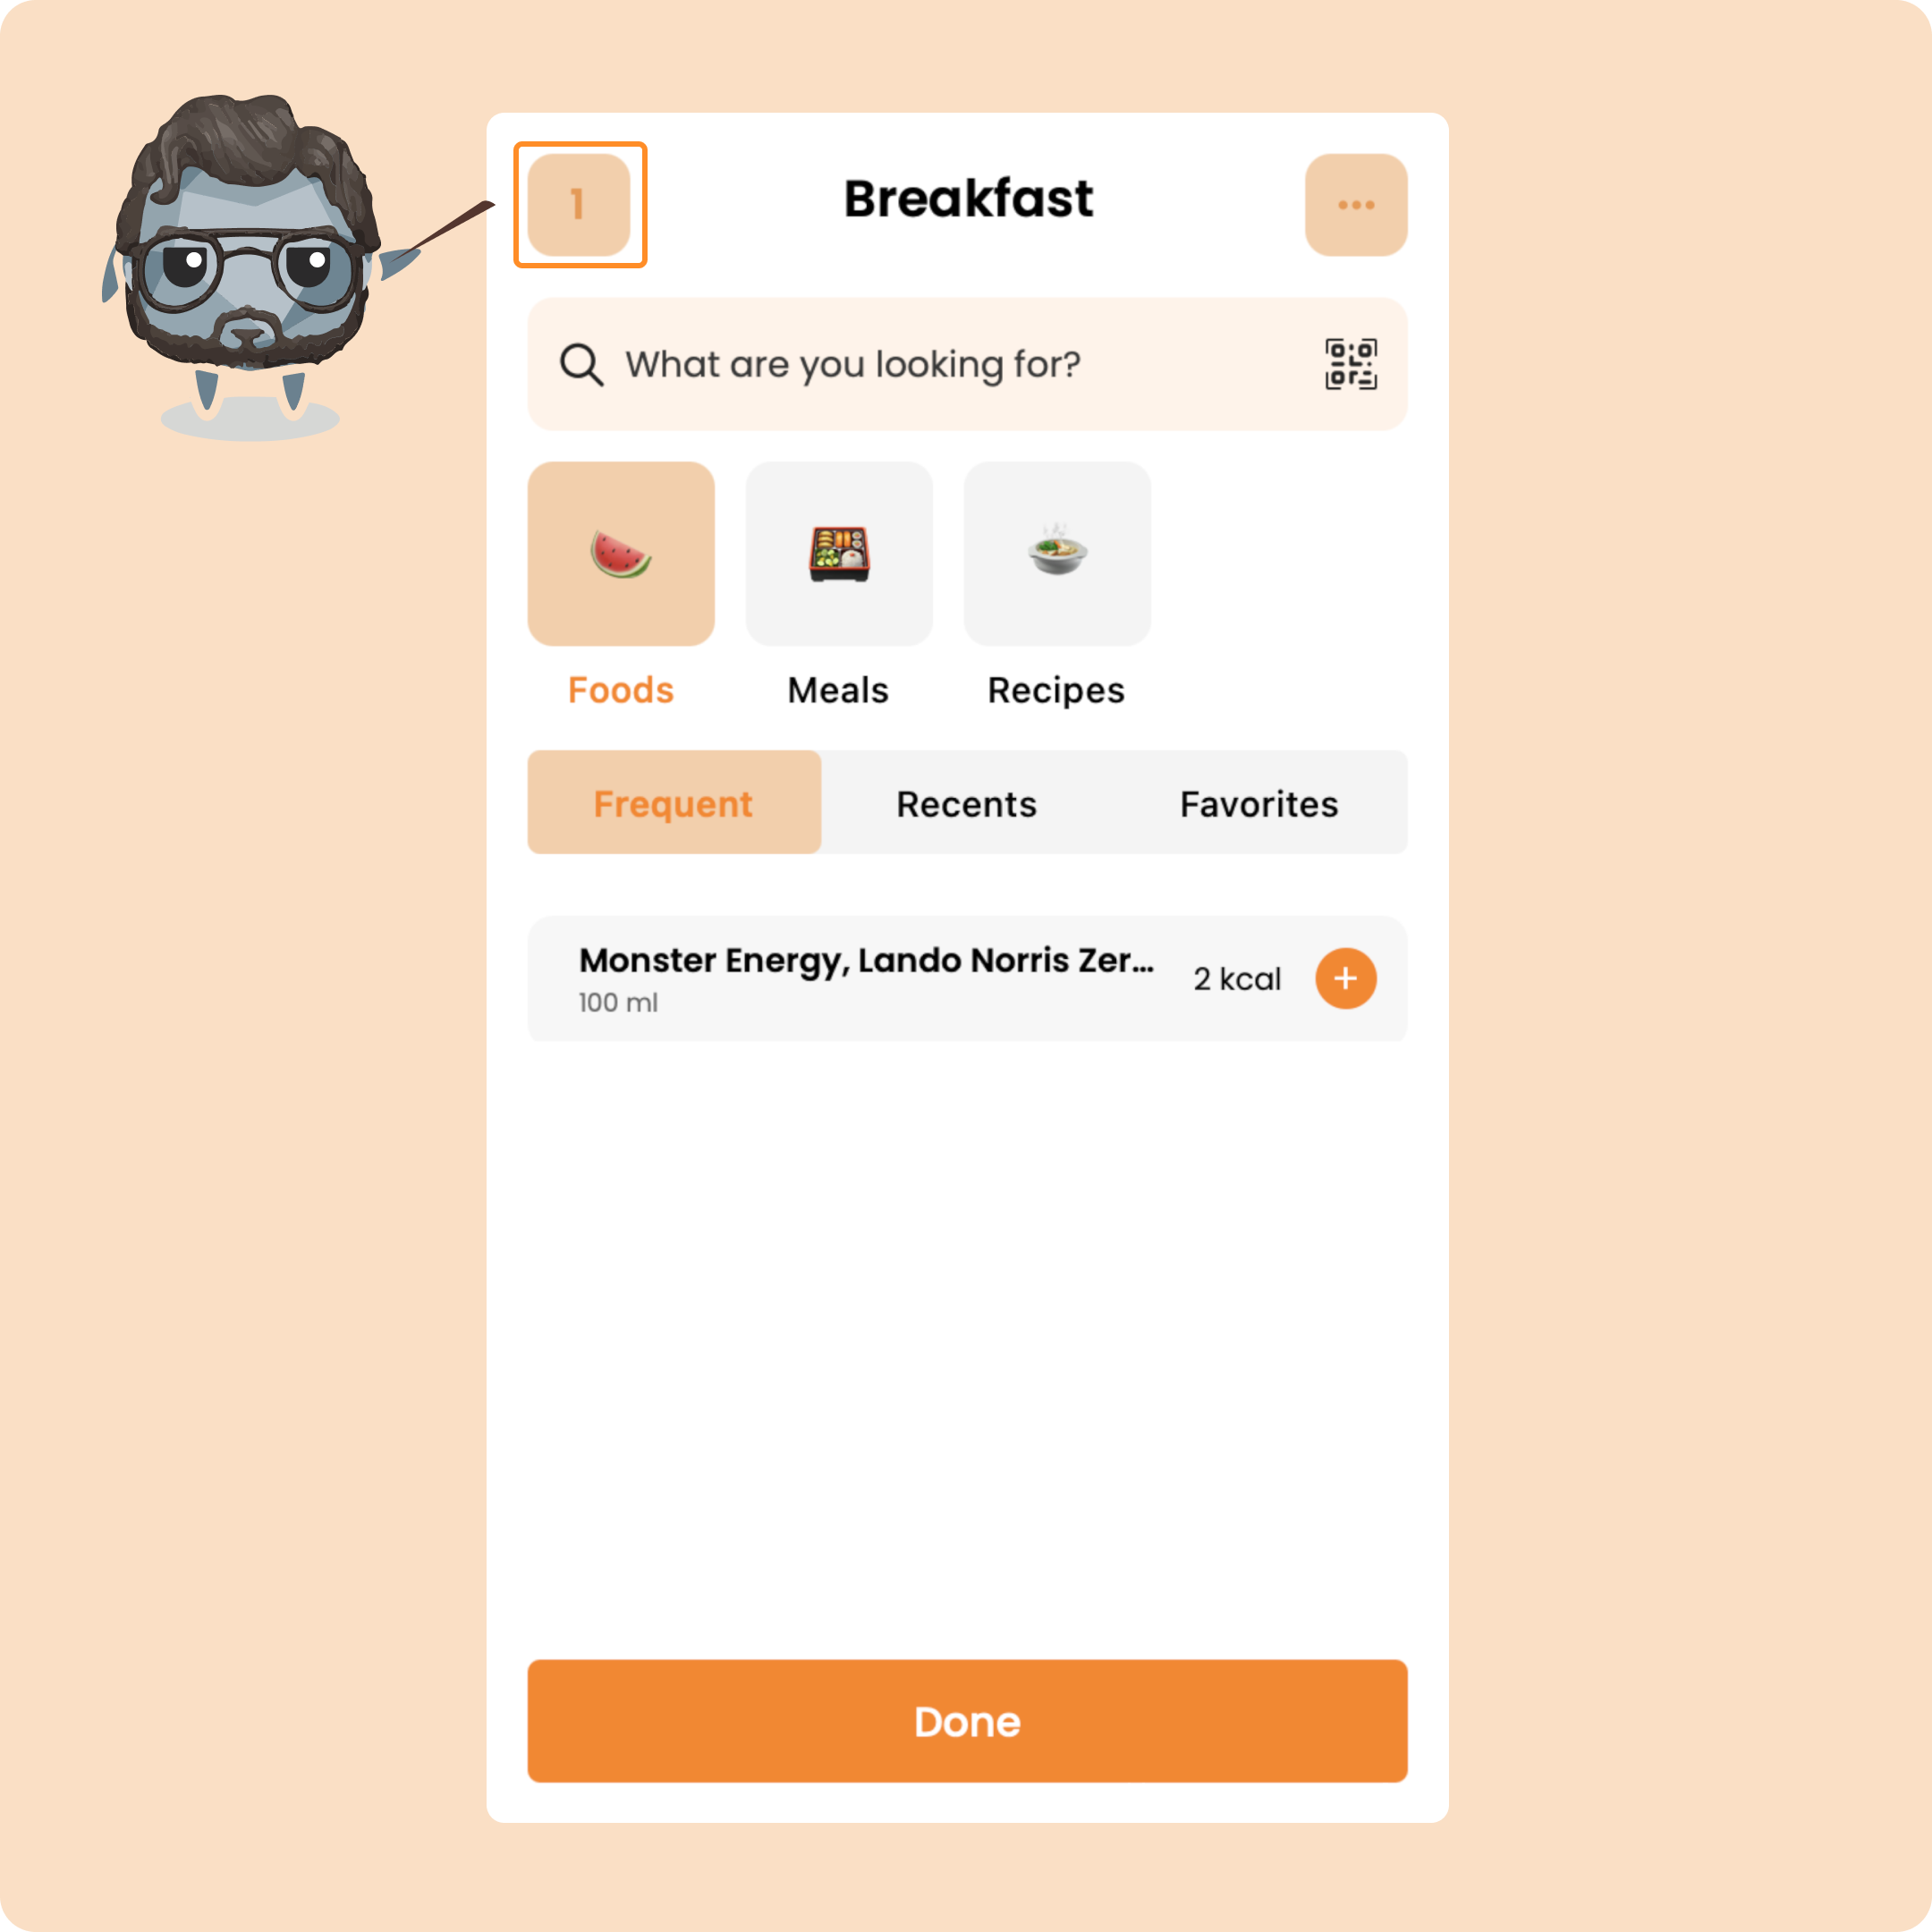
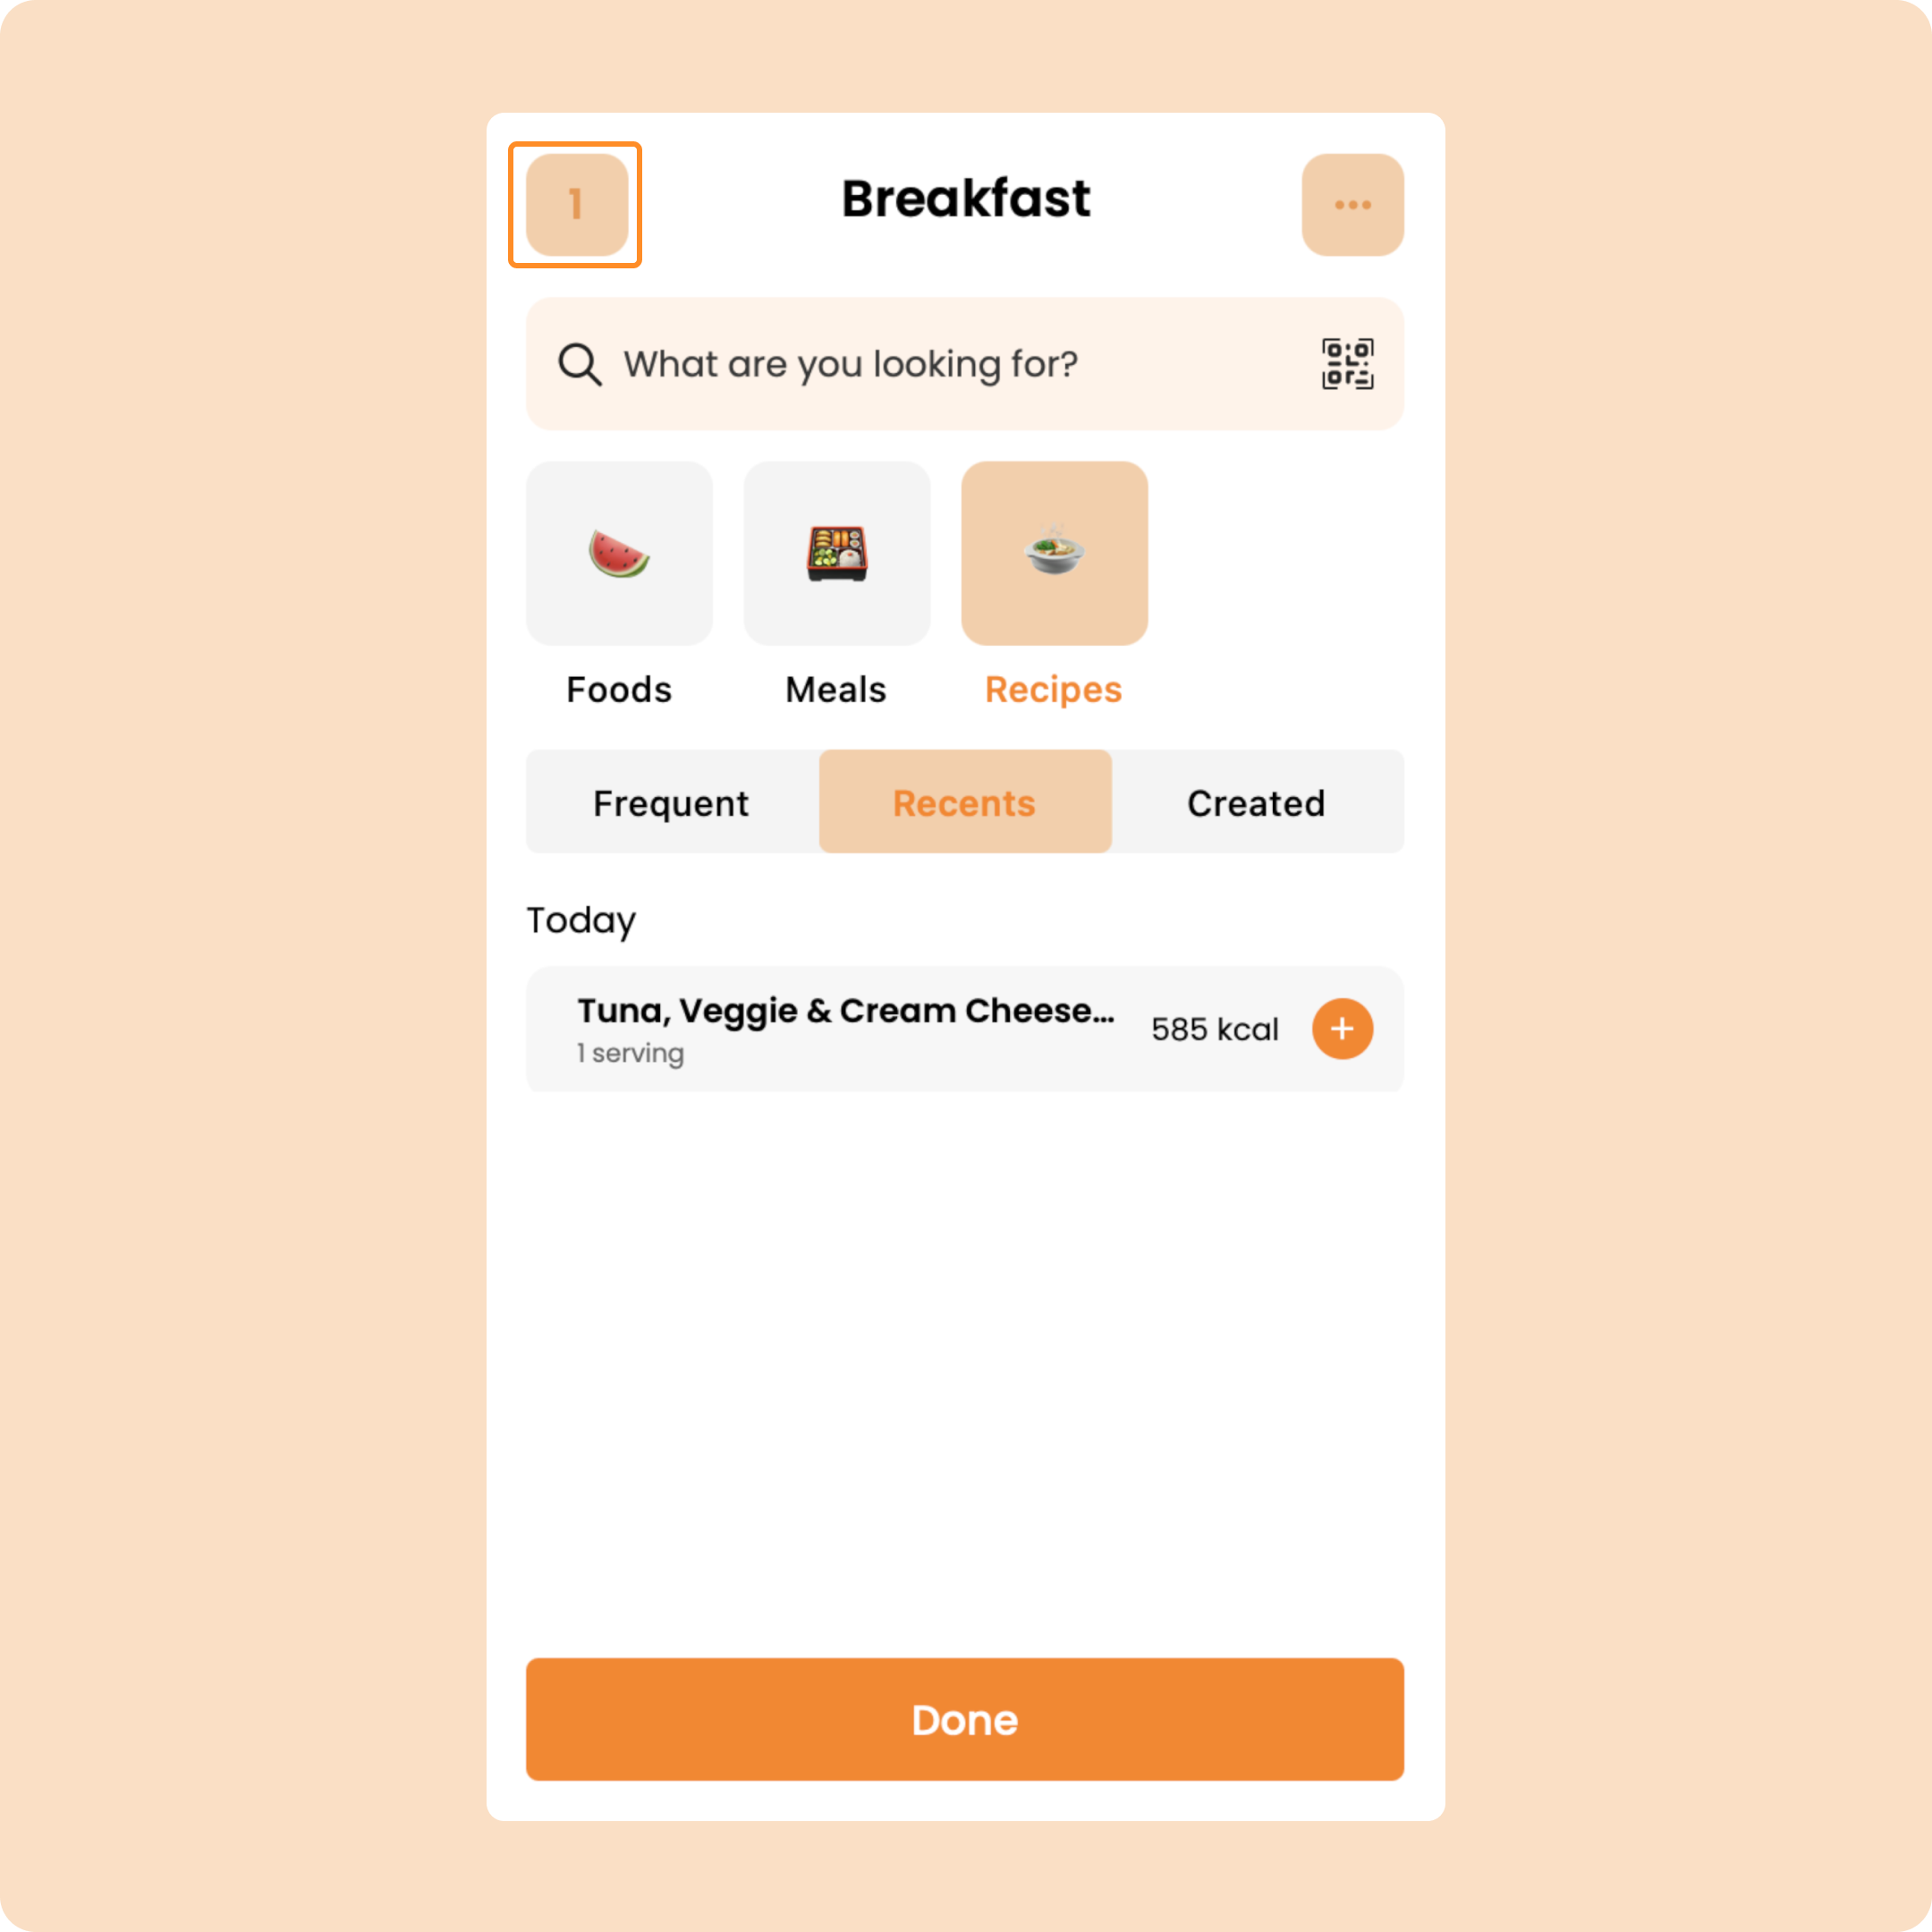
Once on the main screen, you will have a number at the top left with the number of foods/products that you are in the process of adding to your meal.
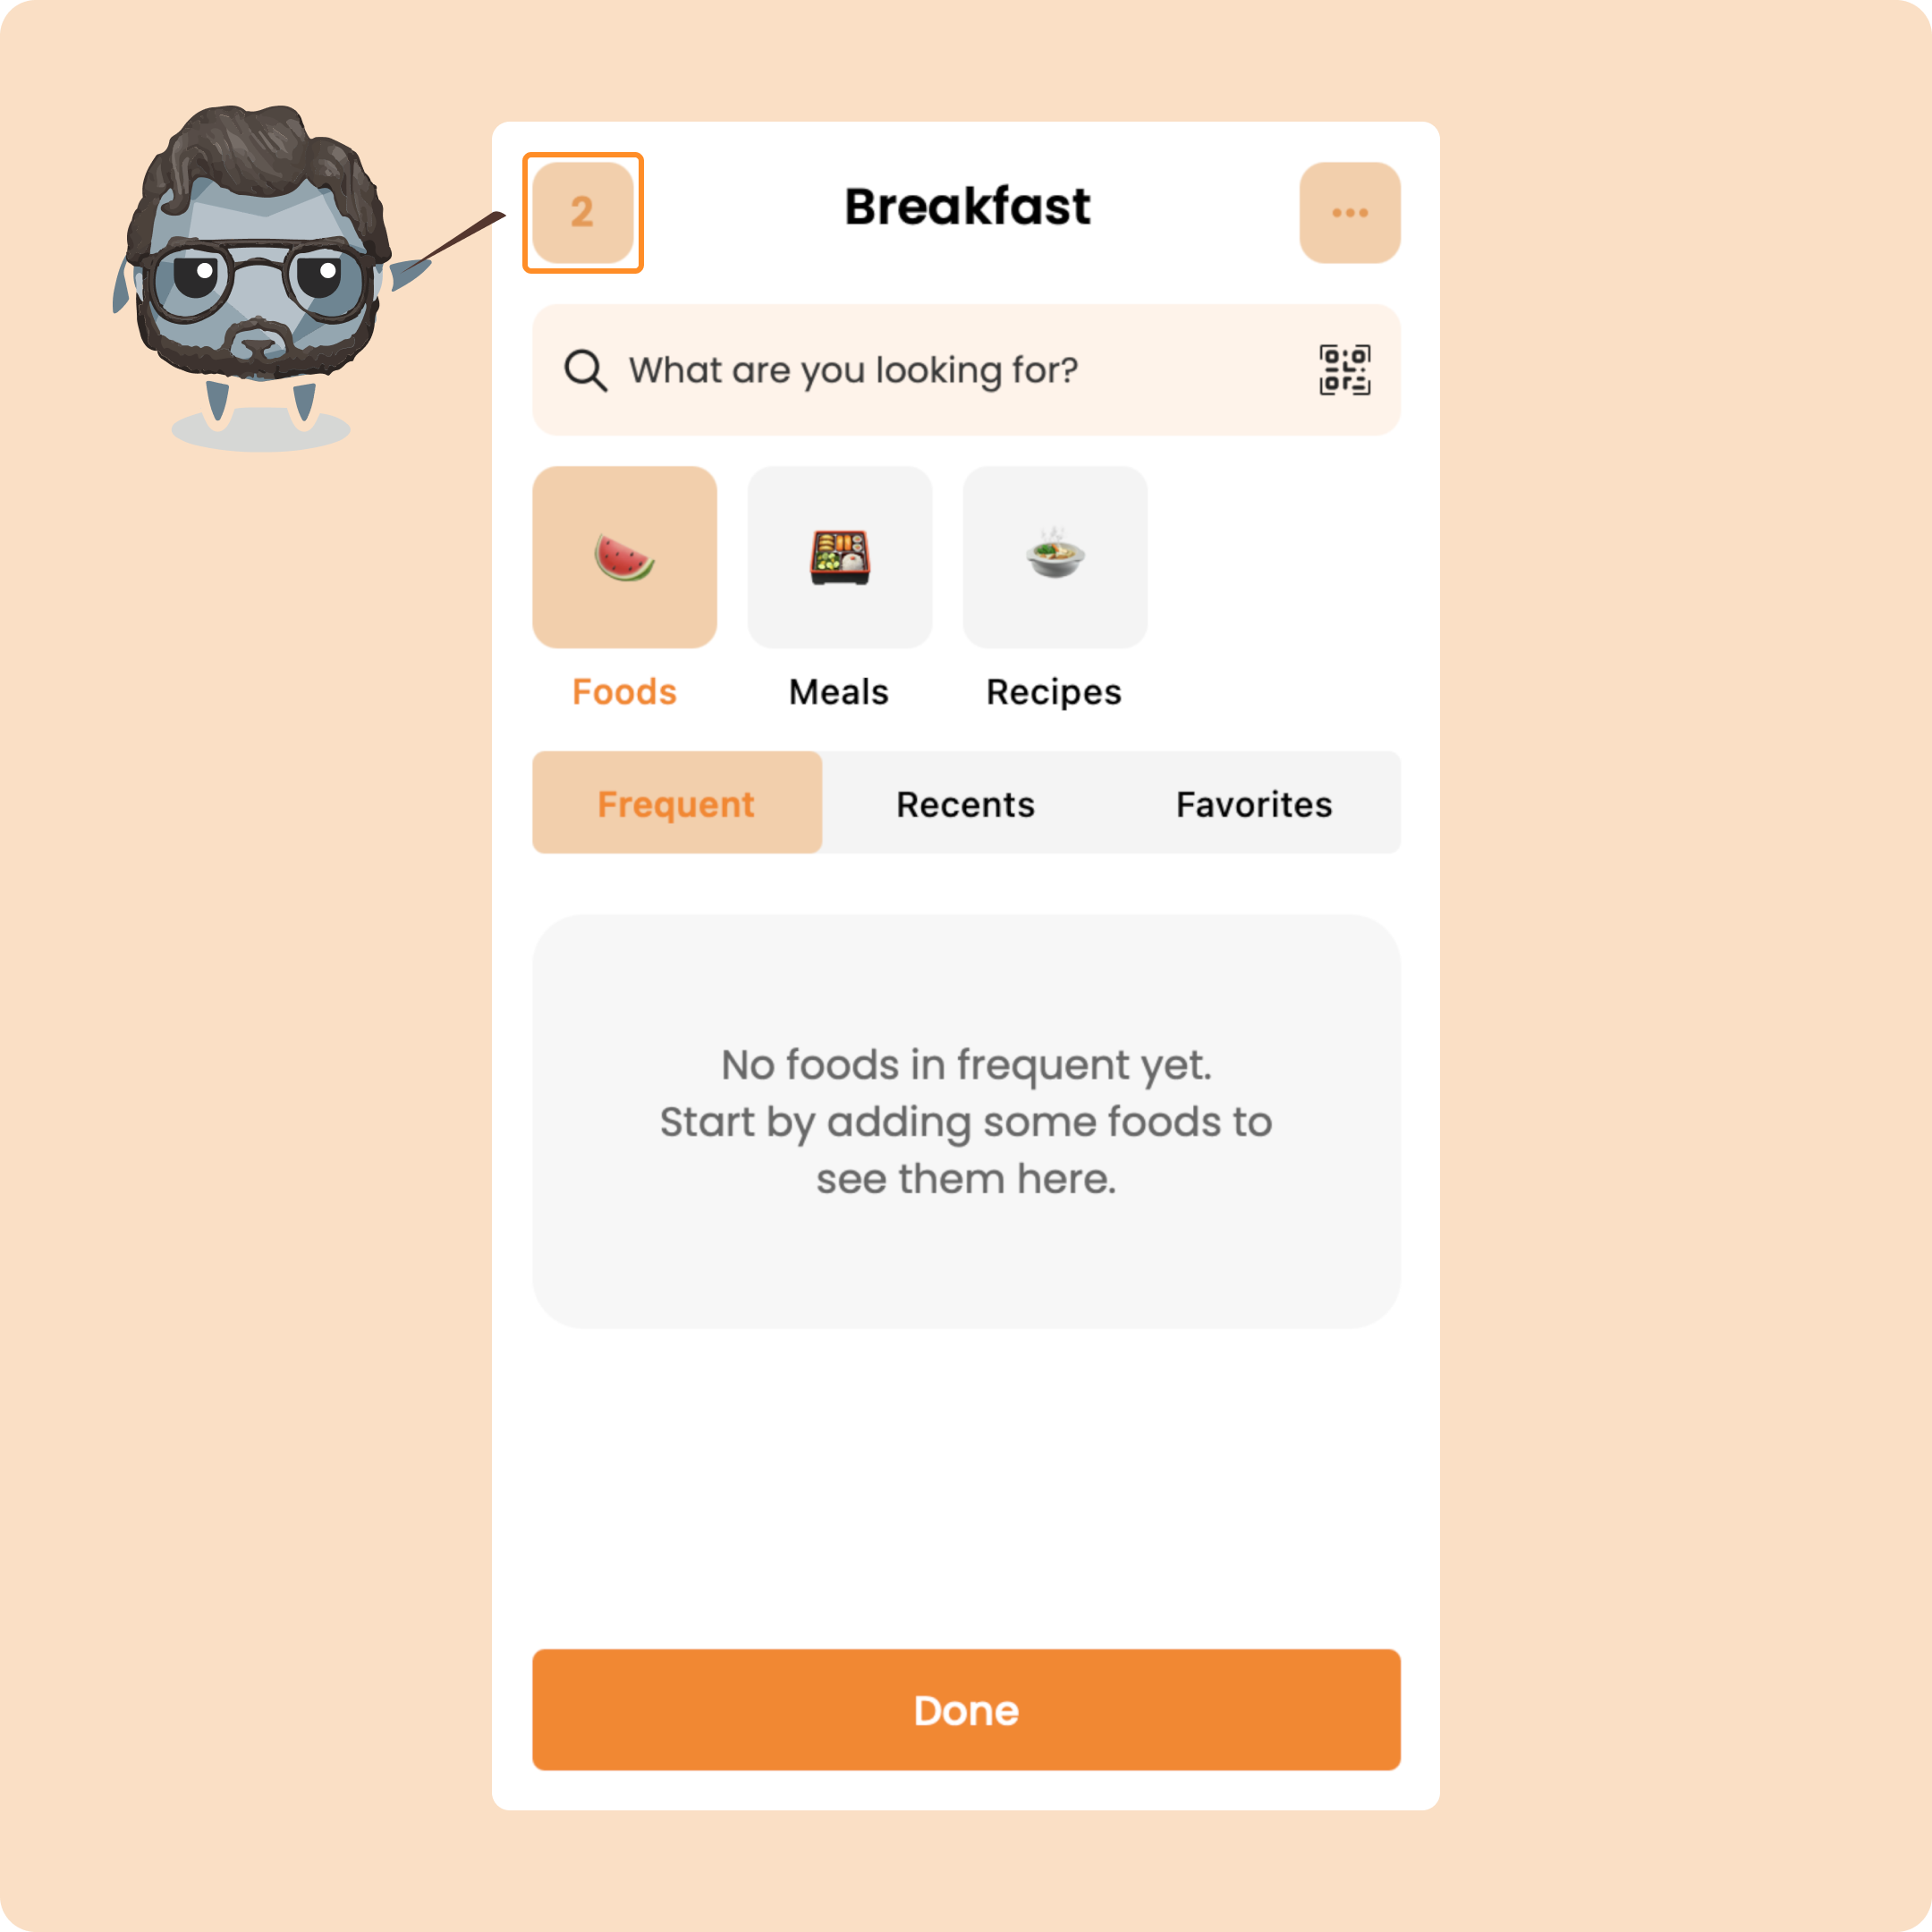
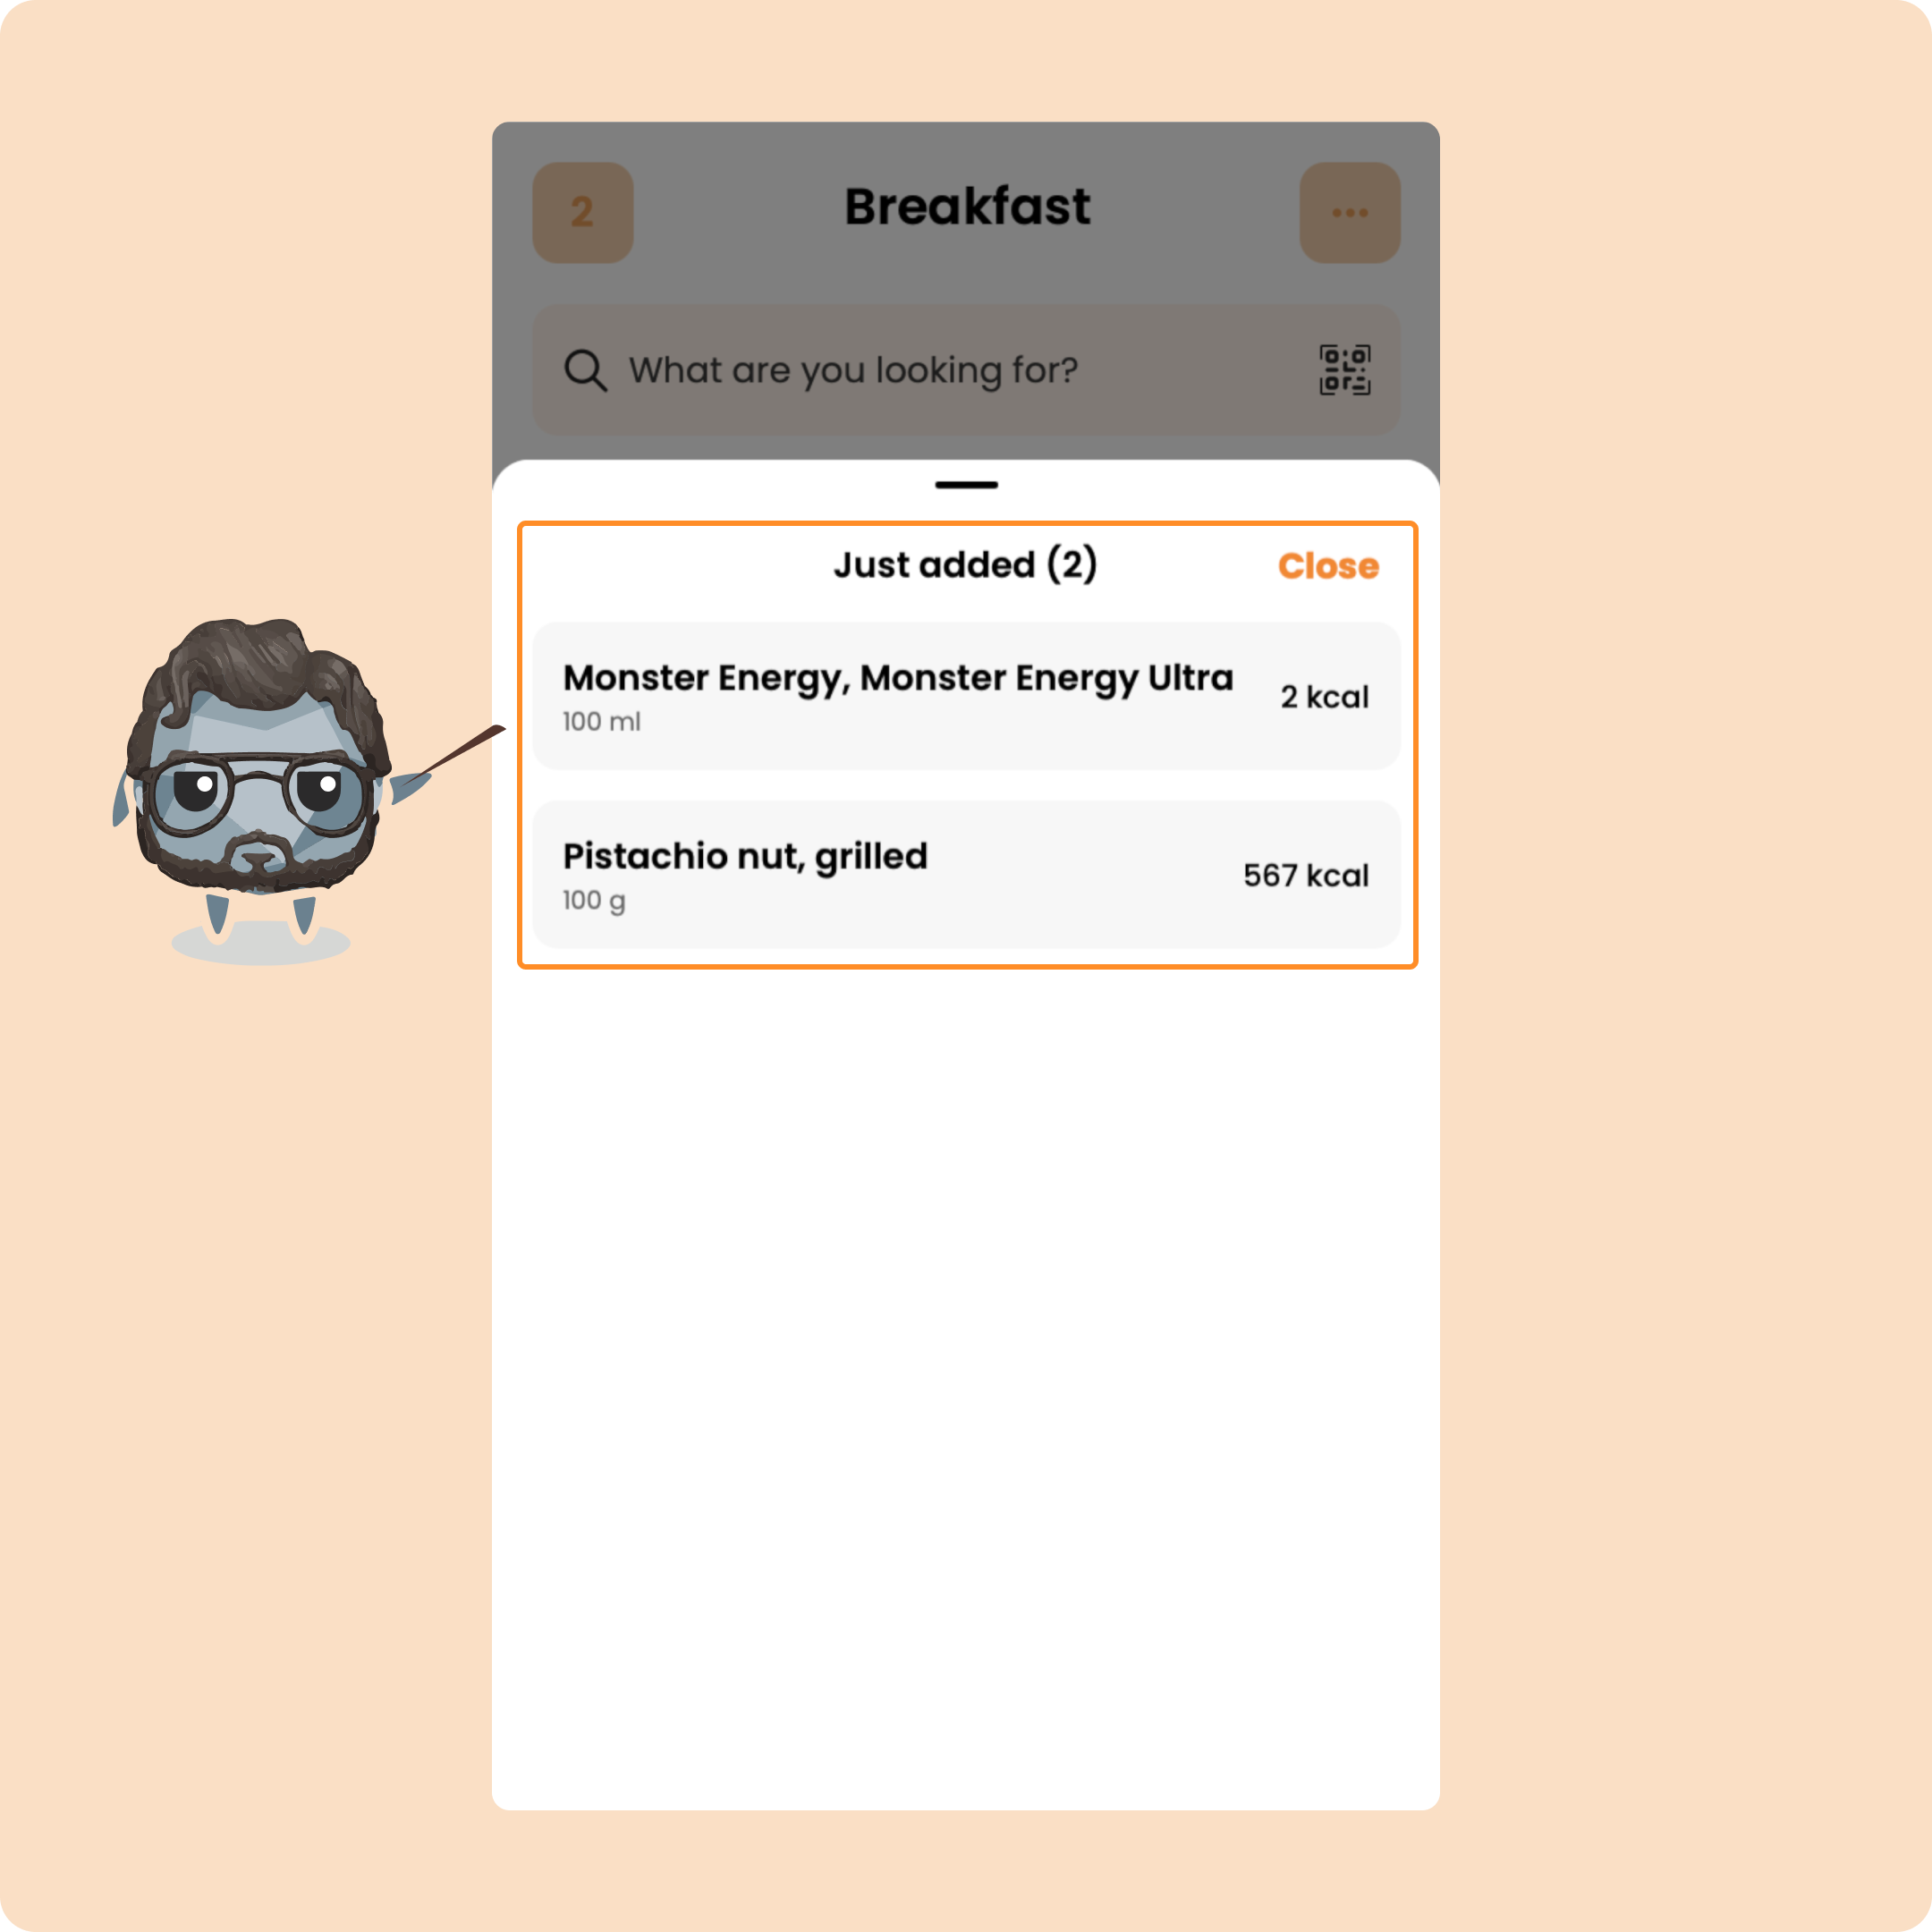
You will just need to press on it to see your foods in order to modify or remove them.
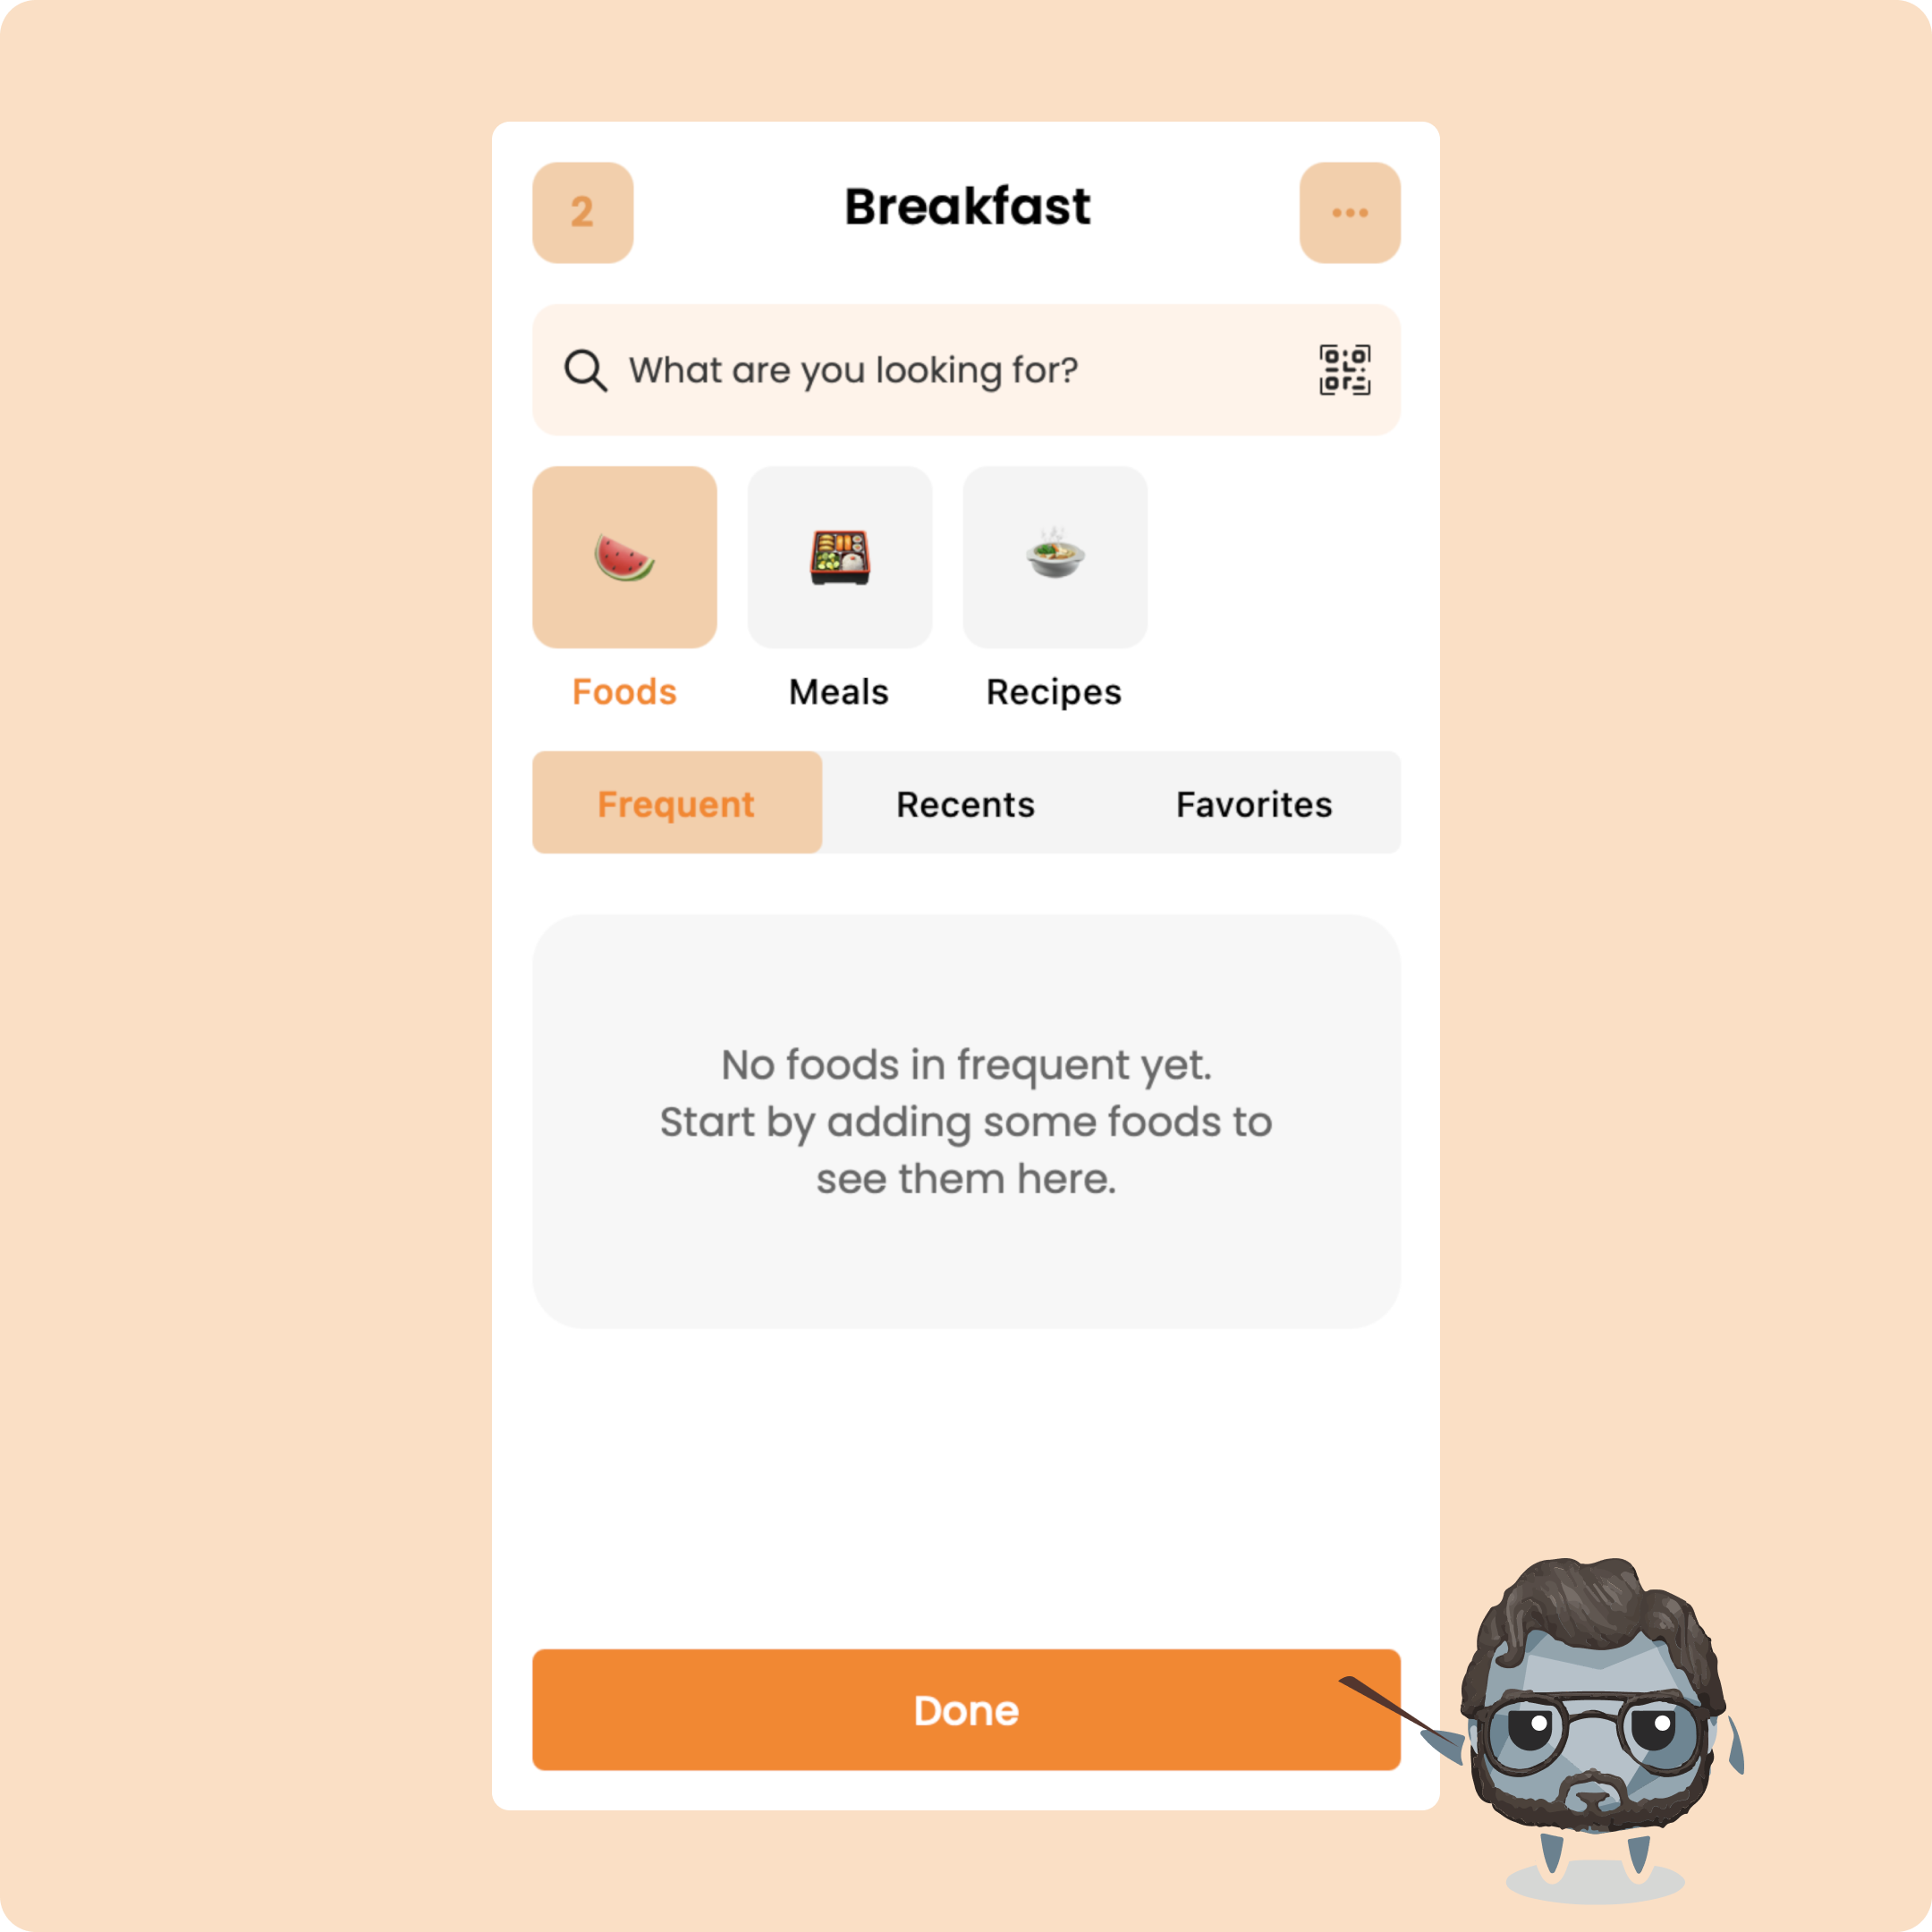
To add the foods to your meal, you just need to click on "Finish"
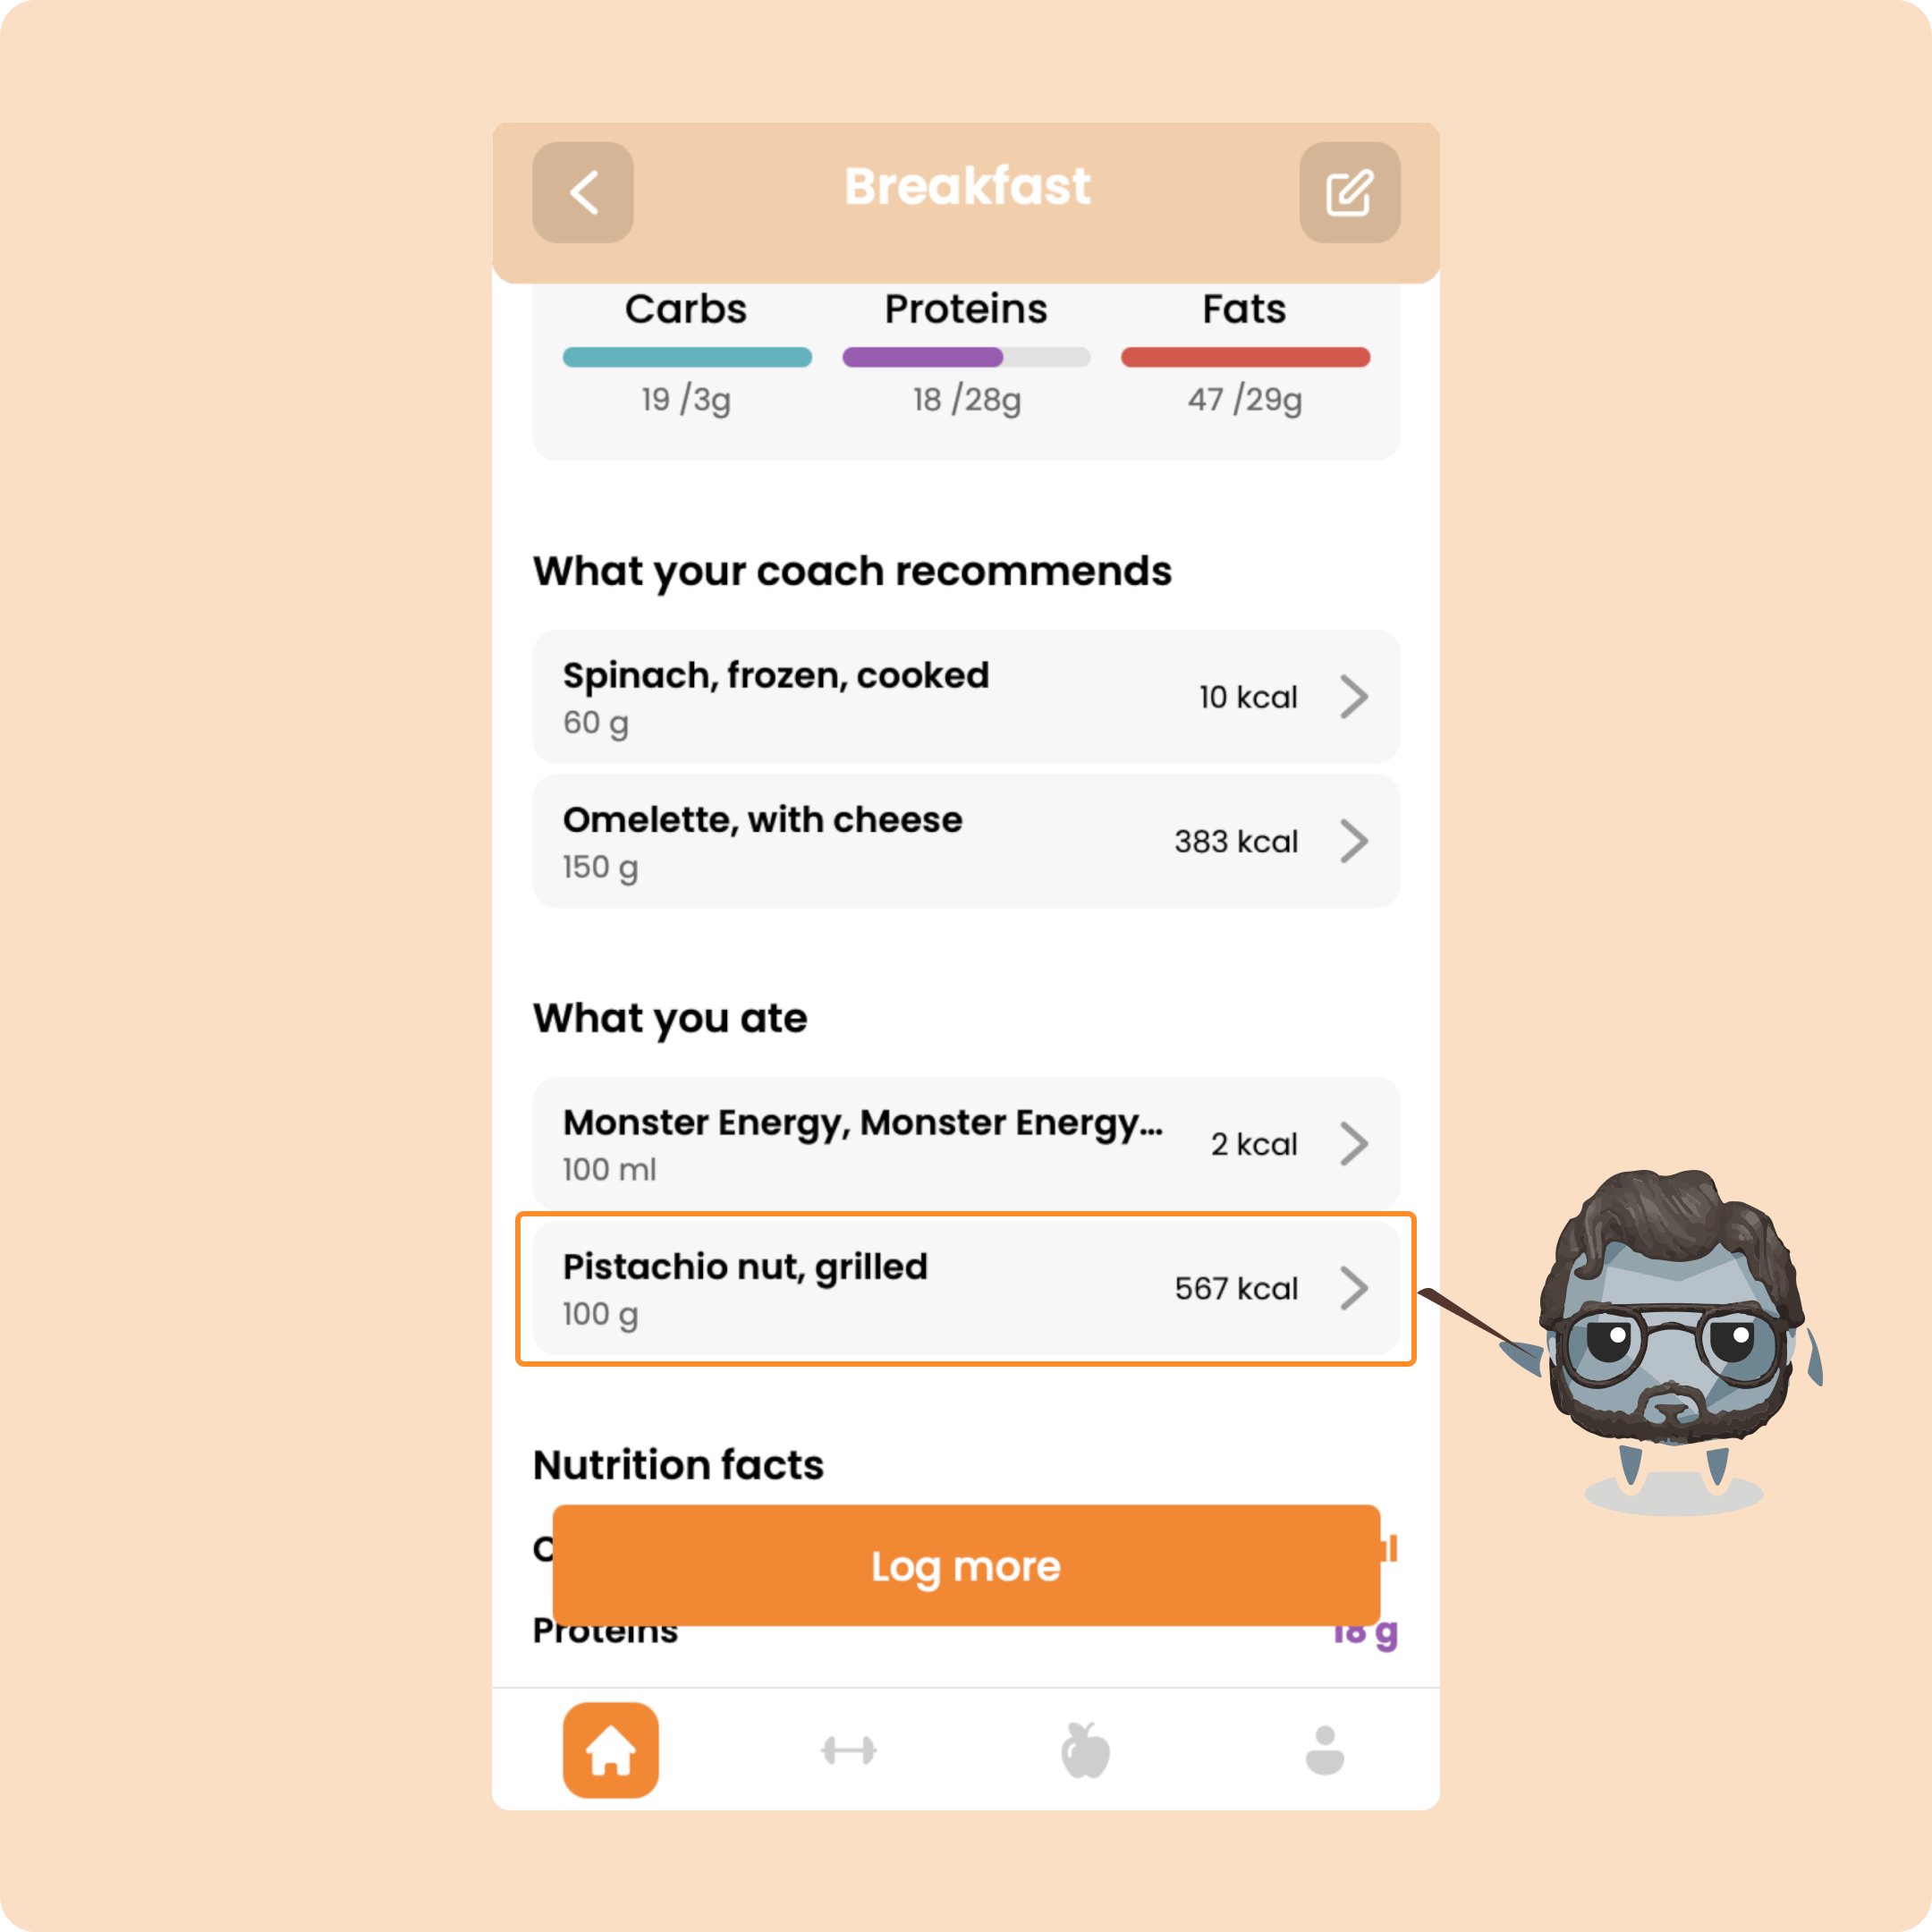
You will find the foods and products added in the section "What you ate"
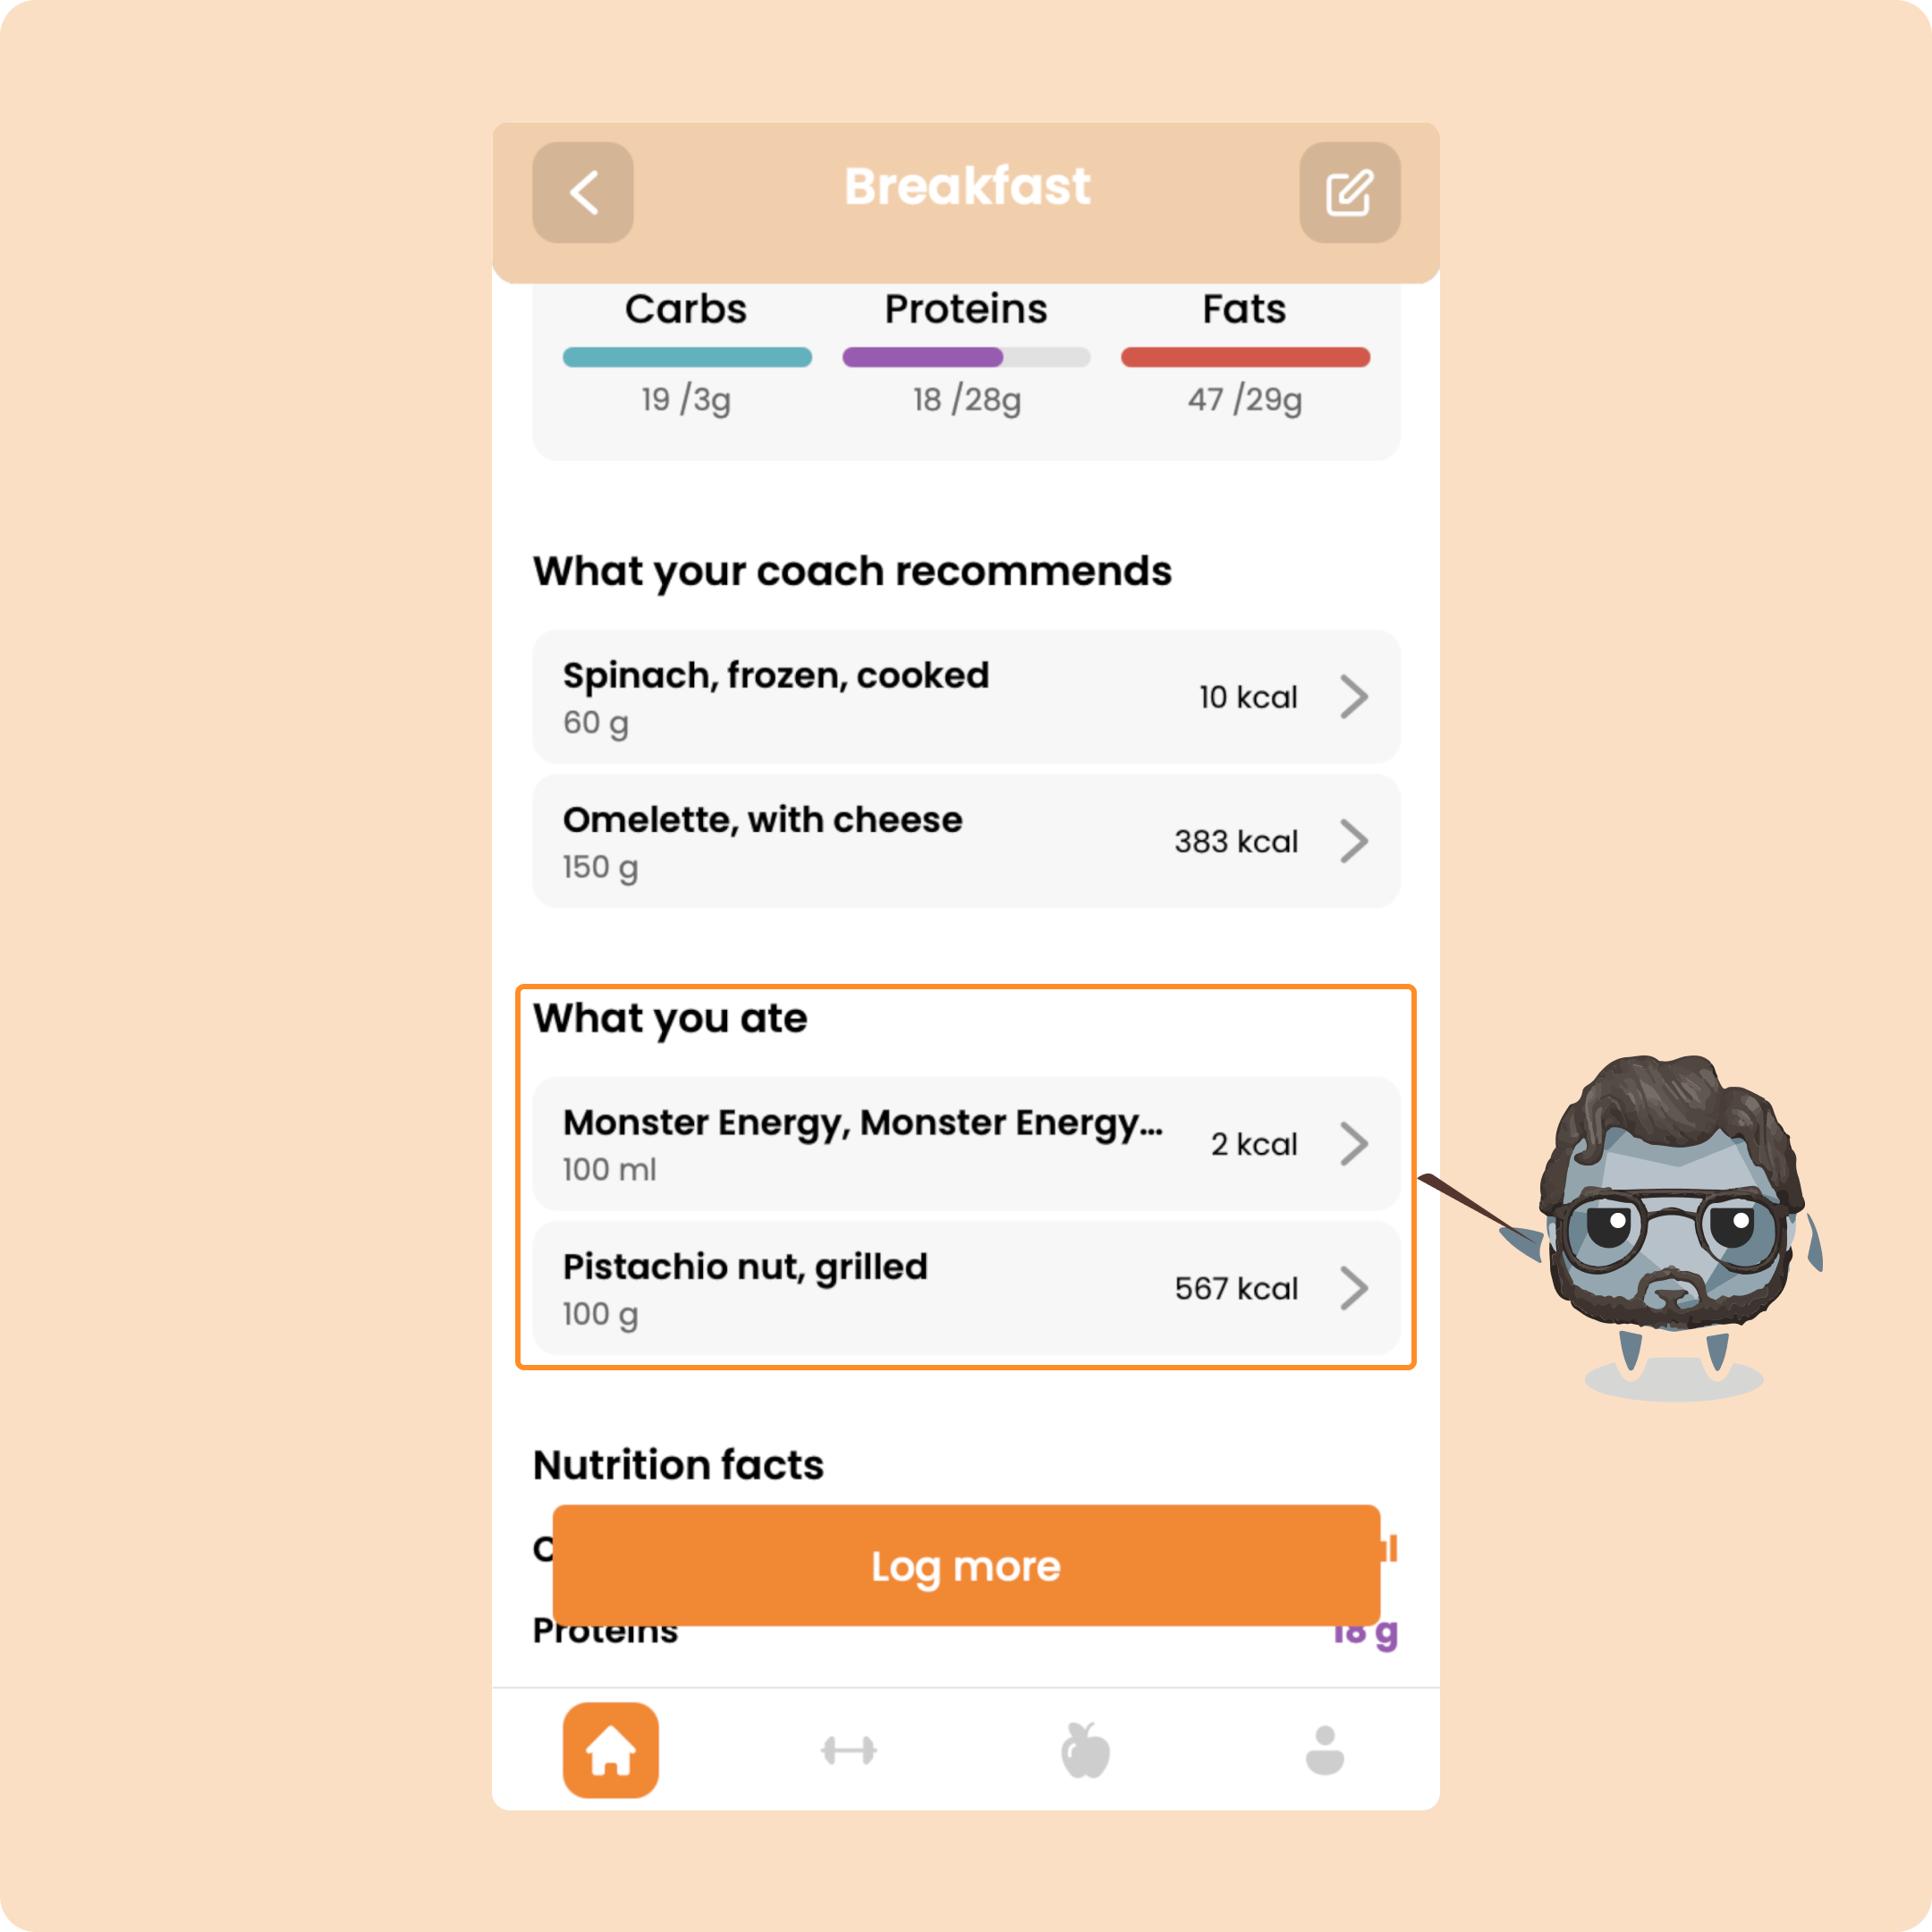
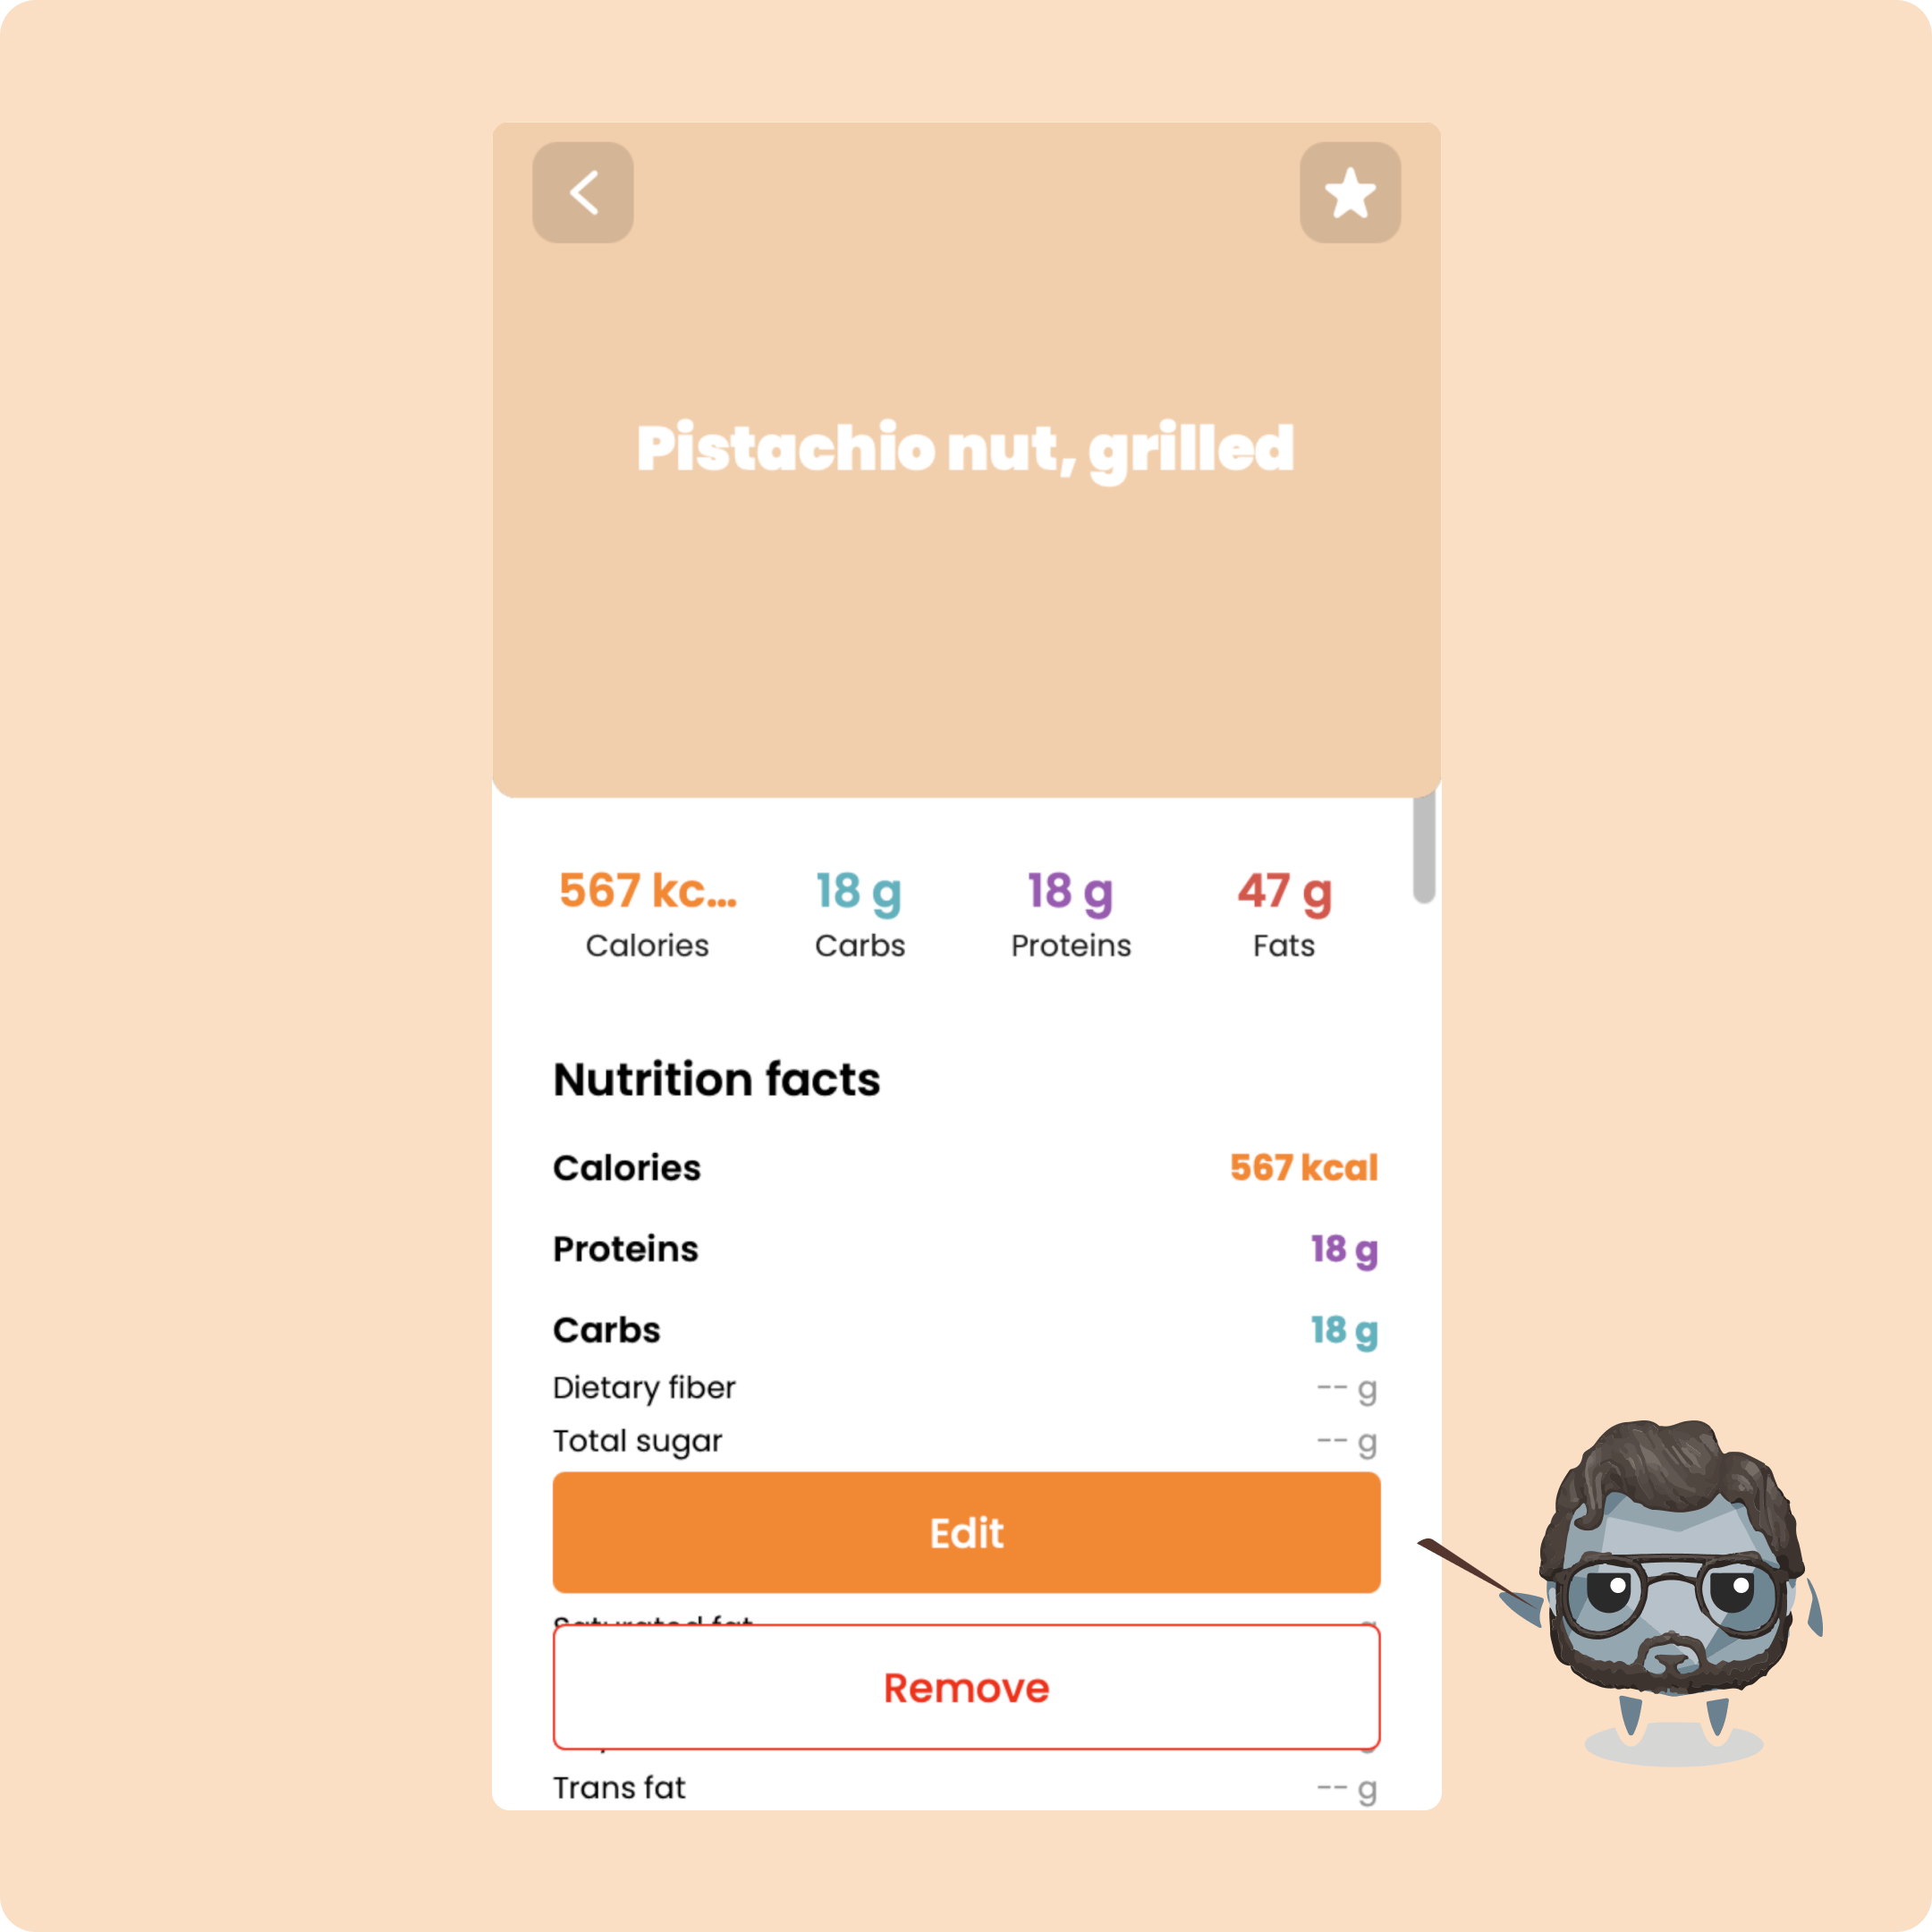
From this page, you will be able to click on a food to modify it... or to delete it.
Scan and log a food/product
Another way to do it is to directly scan your products to log them to your meals.
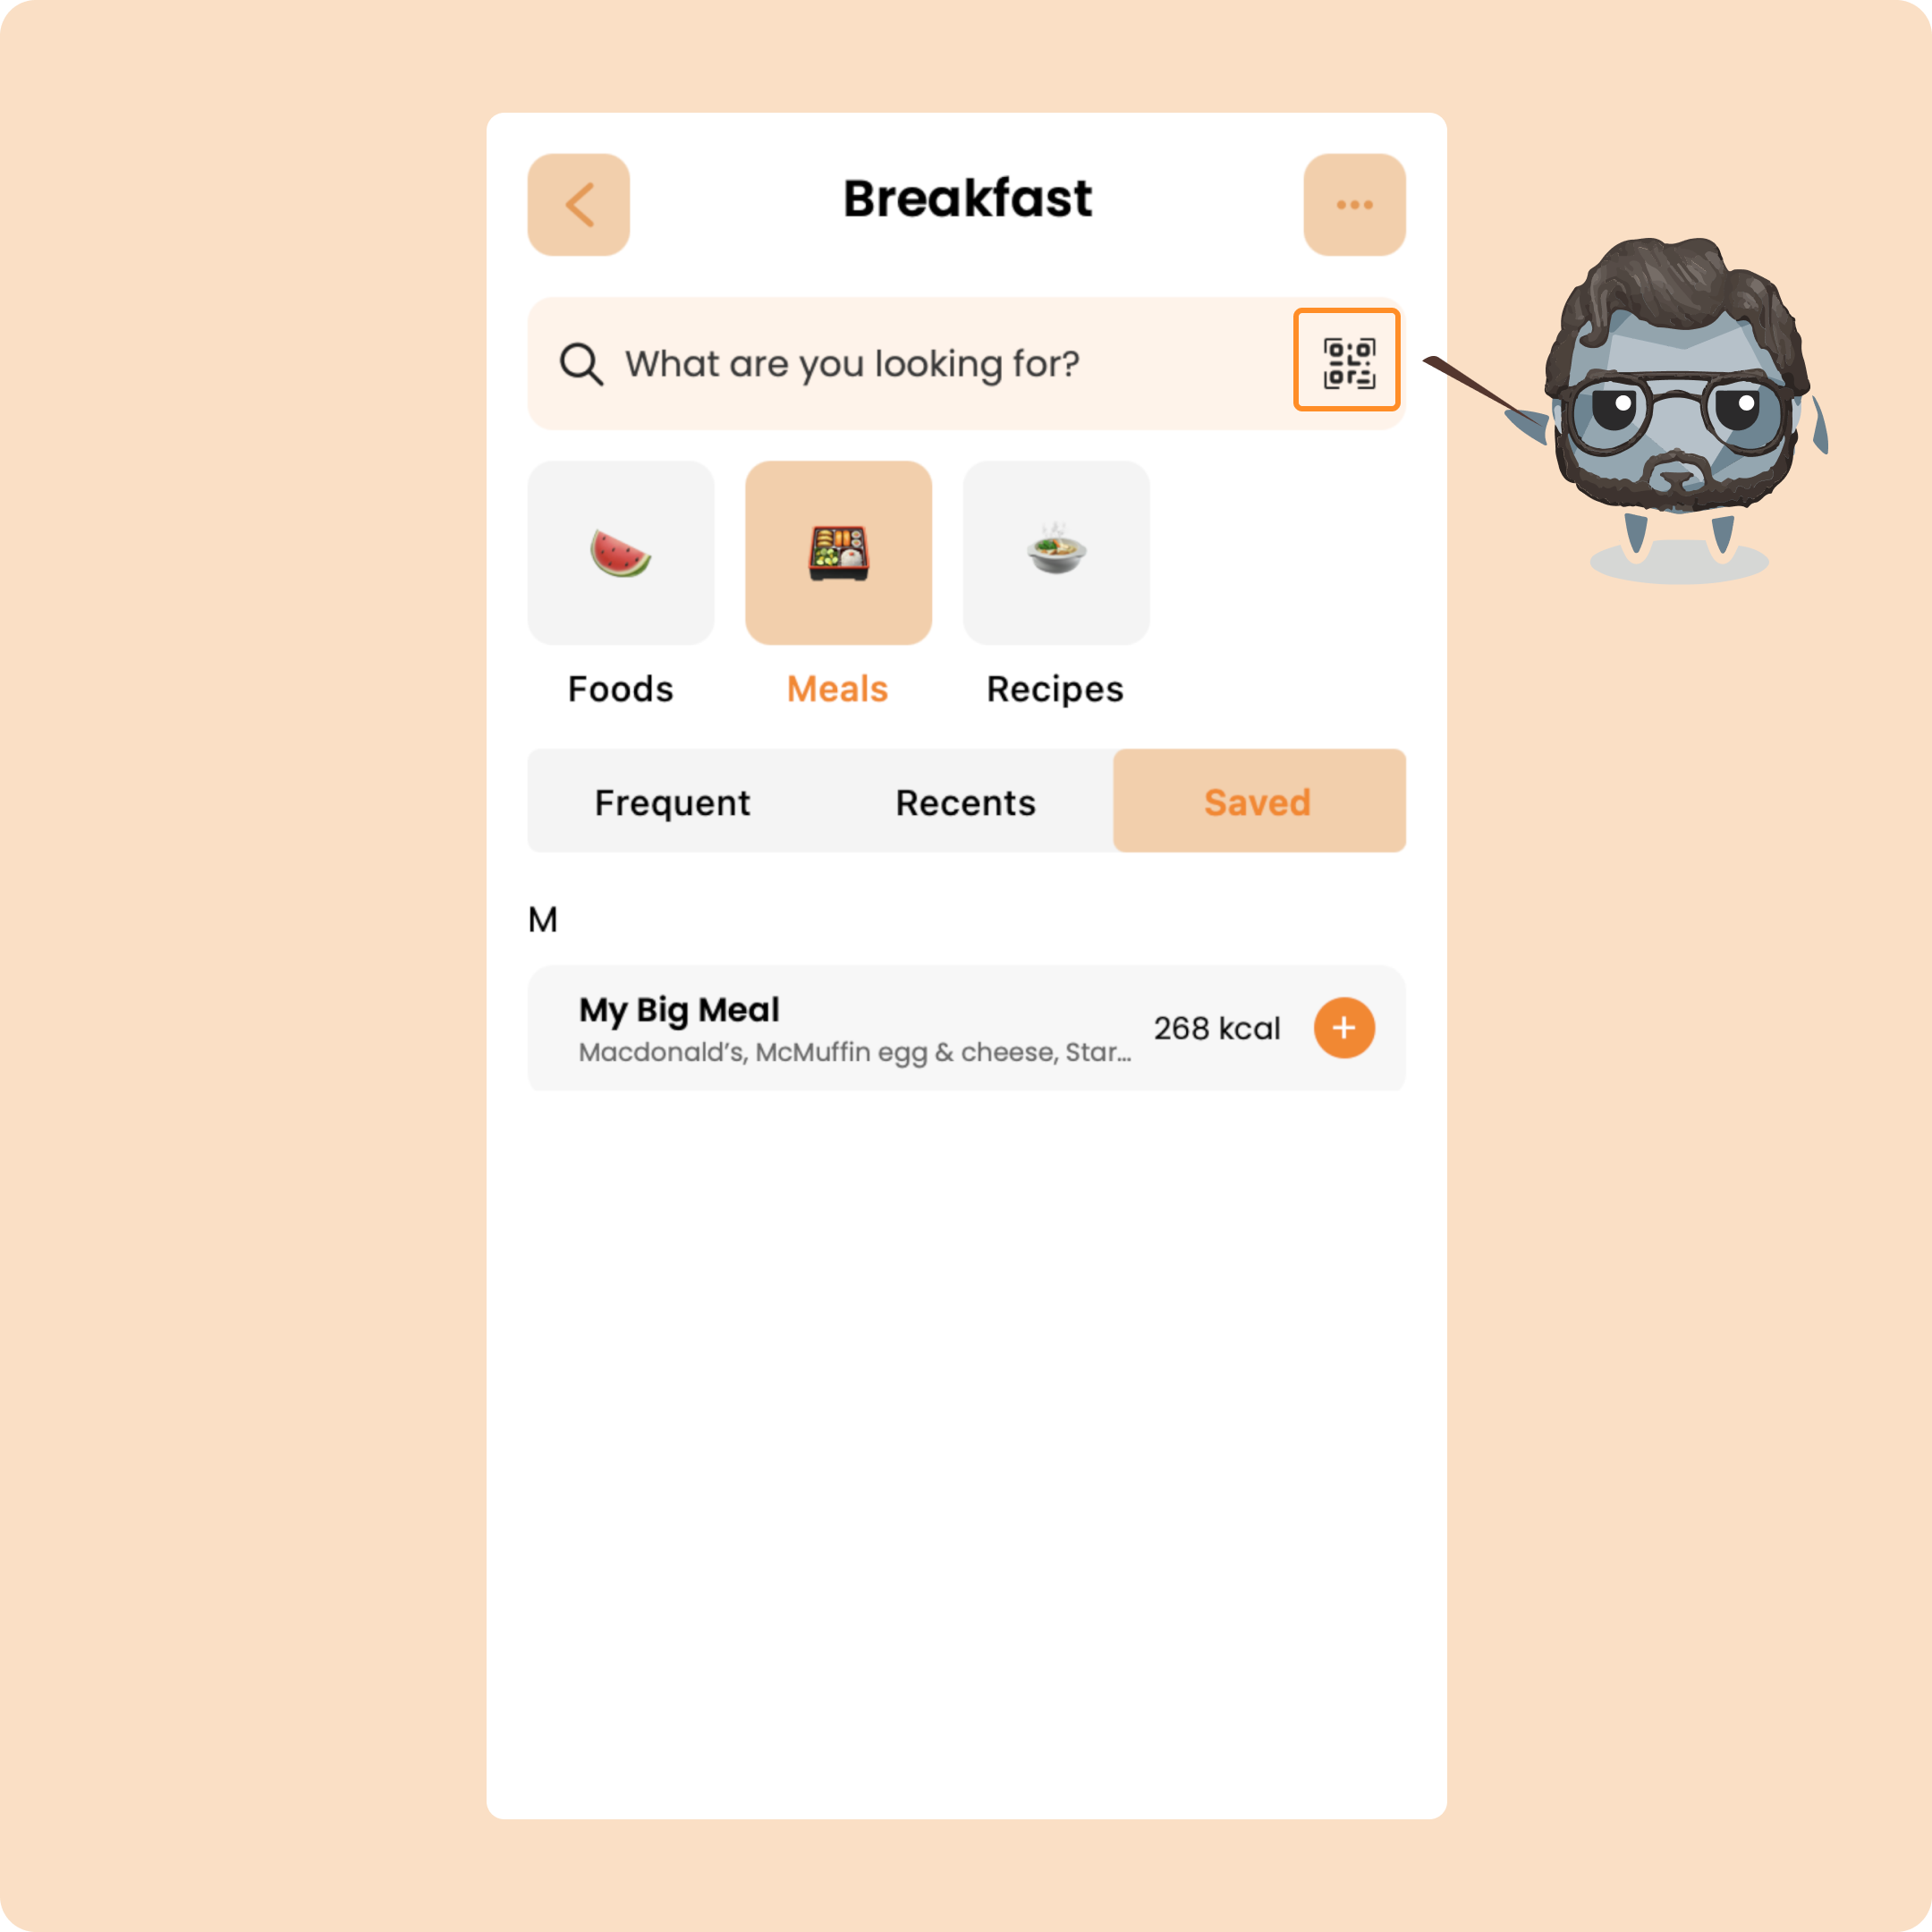
You can open the scan directly here by clicking on the QR code next to the search bar:
Or directly via the quick actions menu at the top right
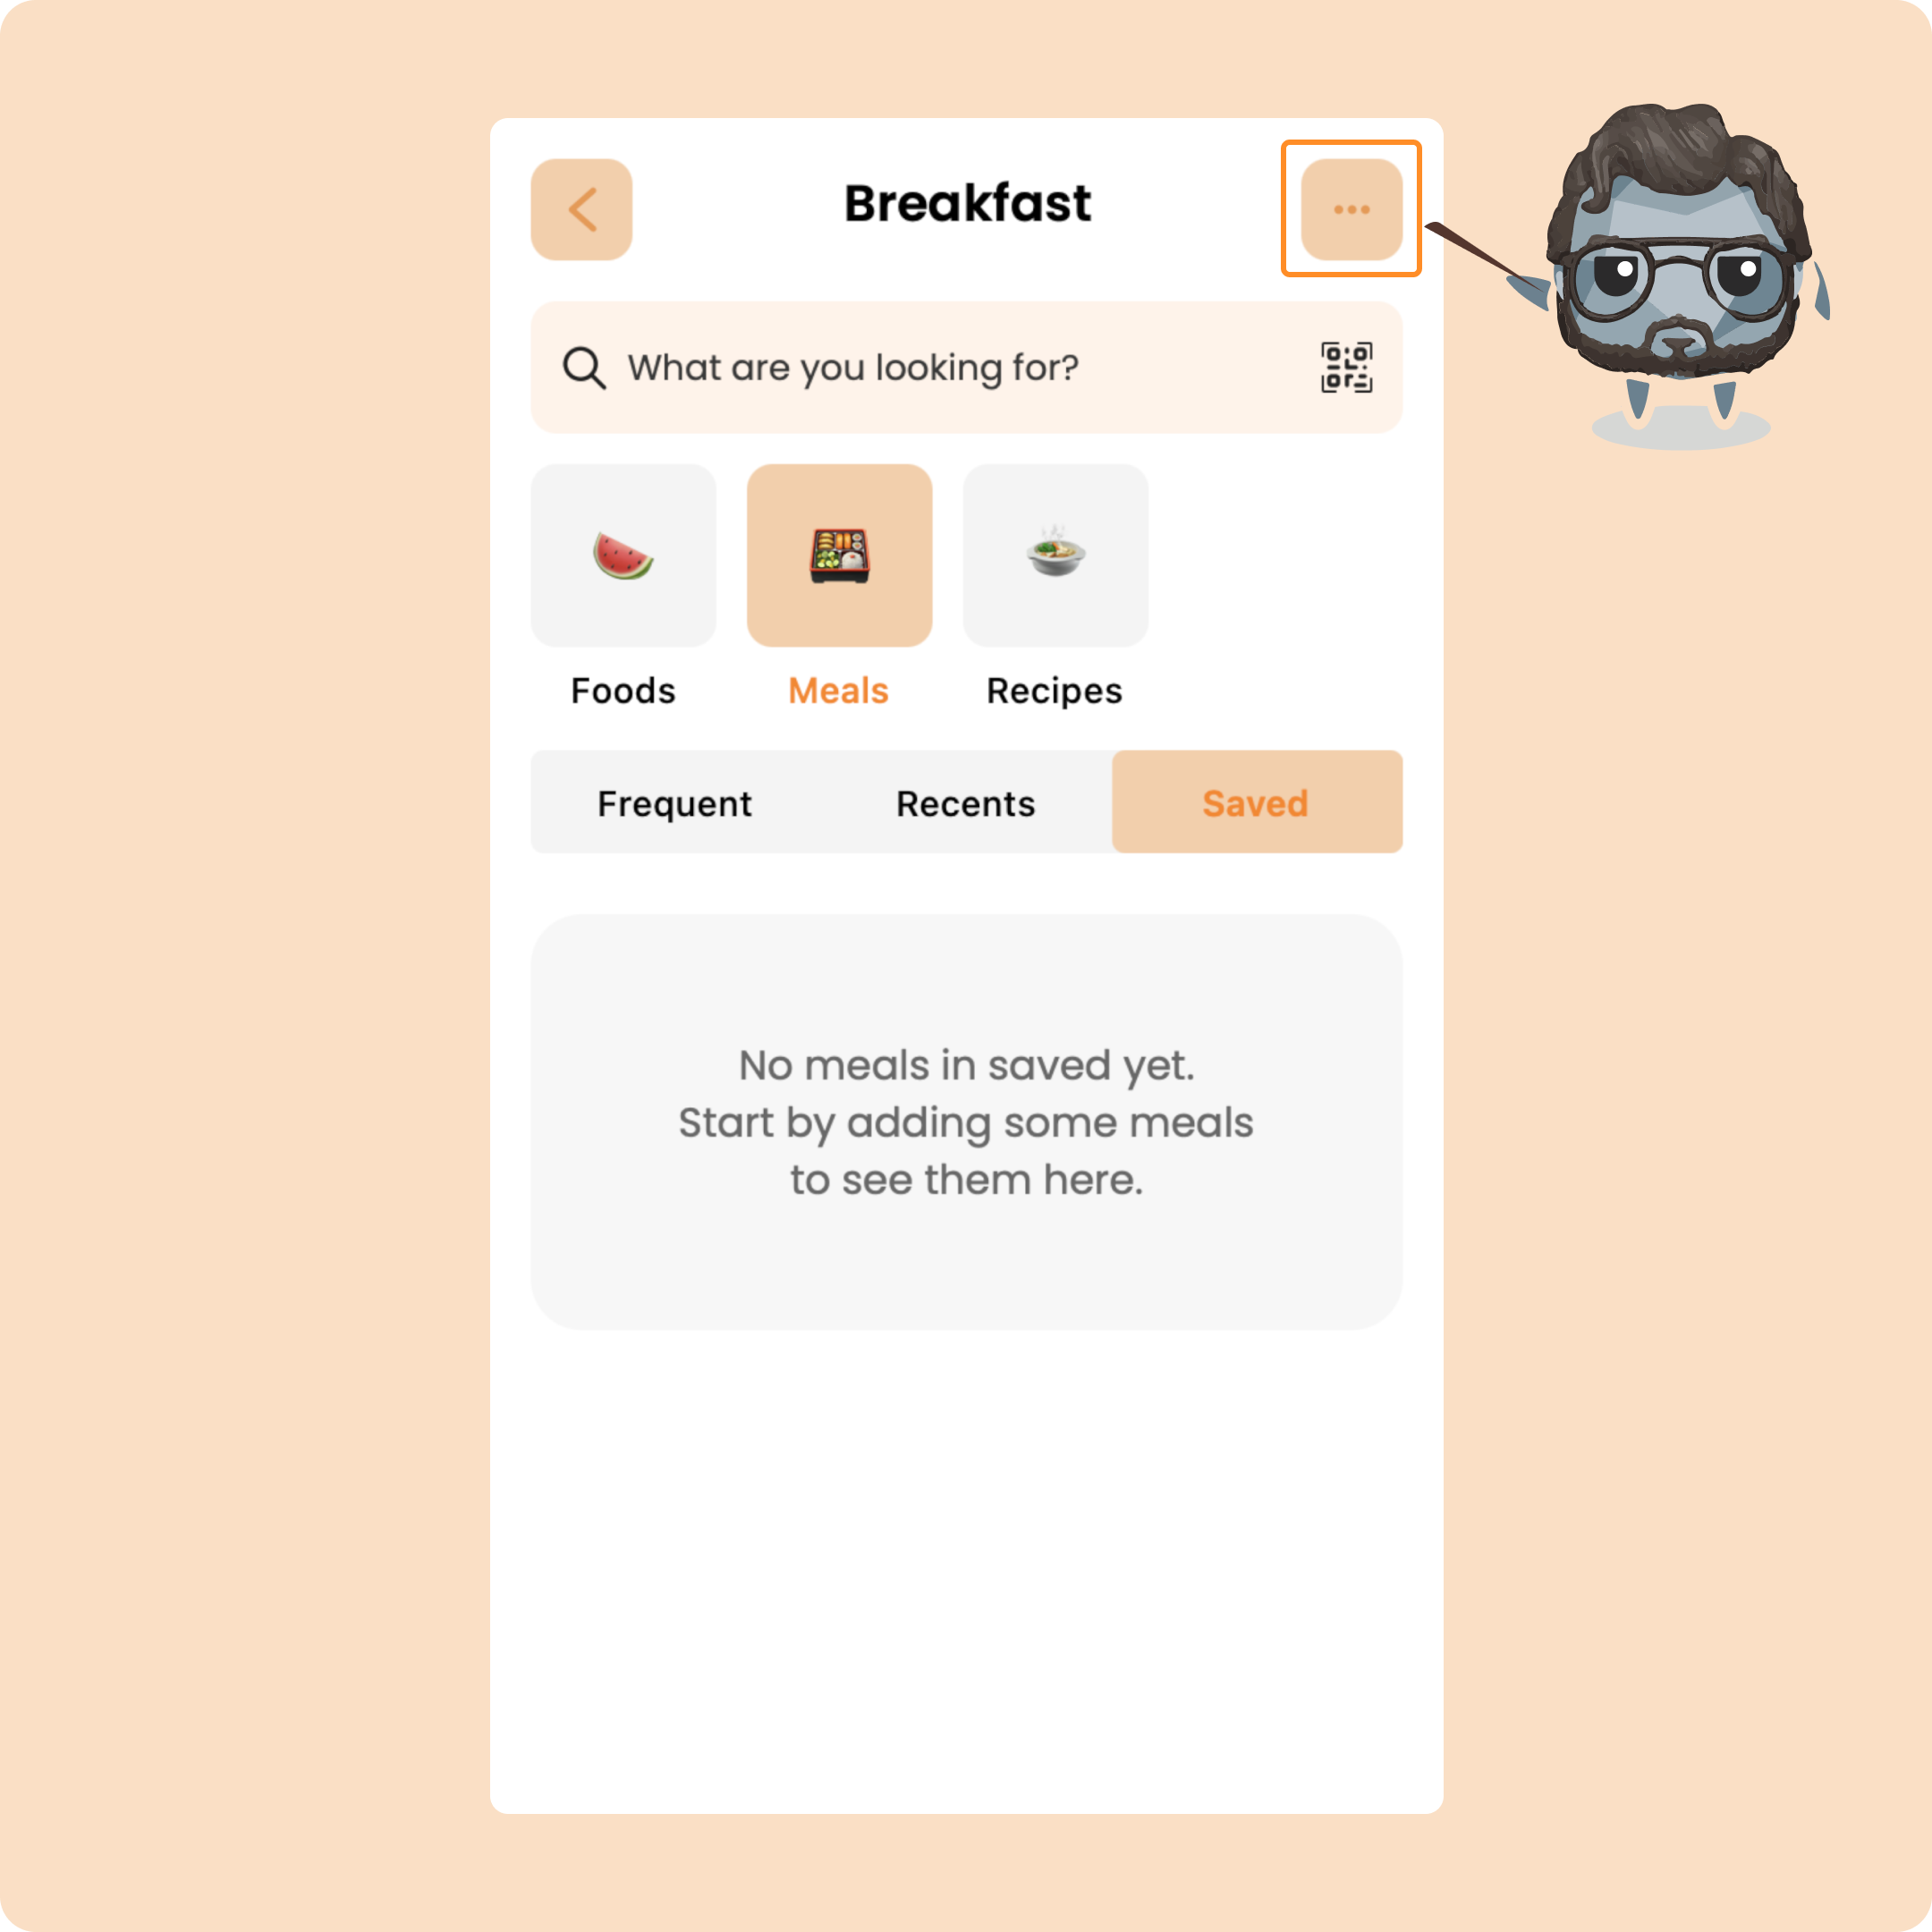
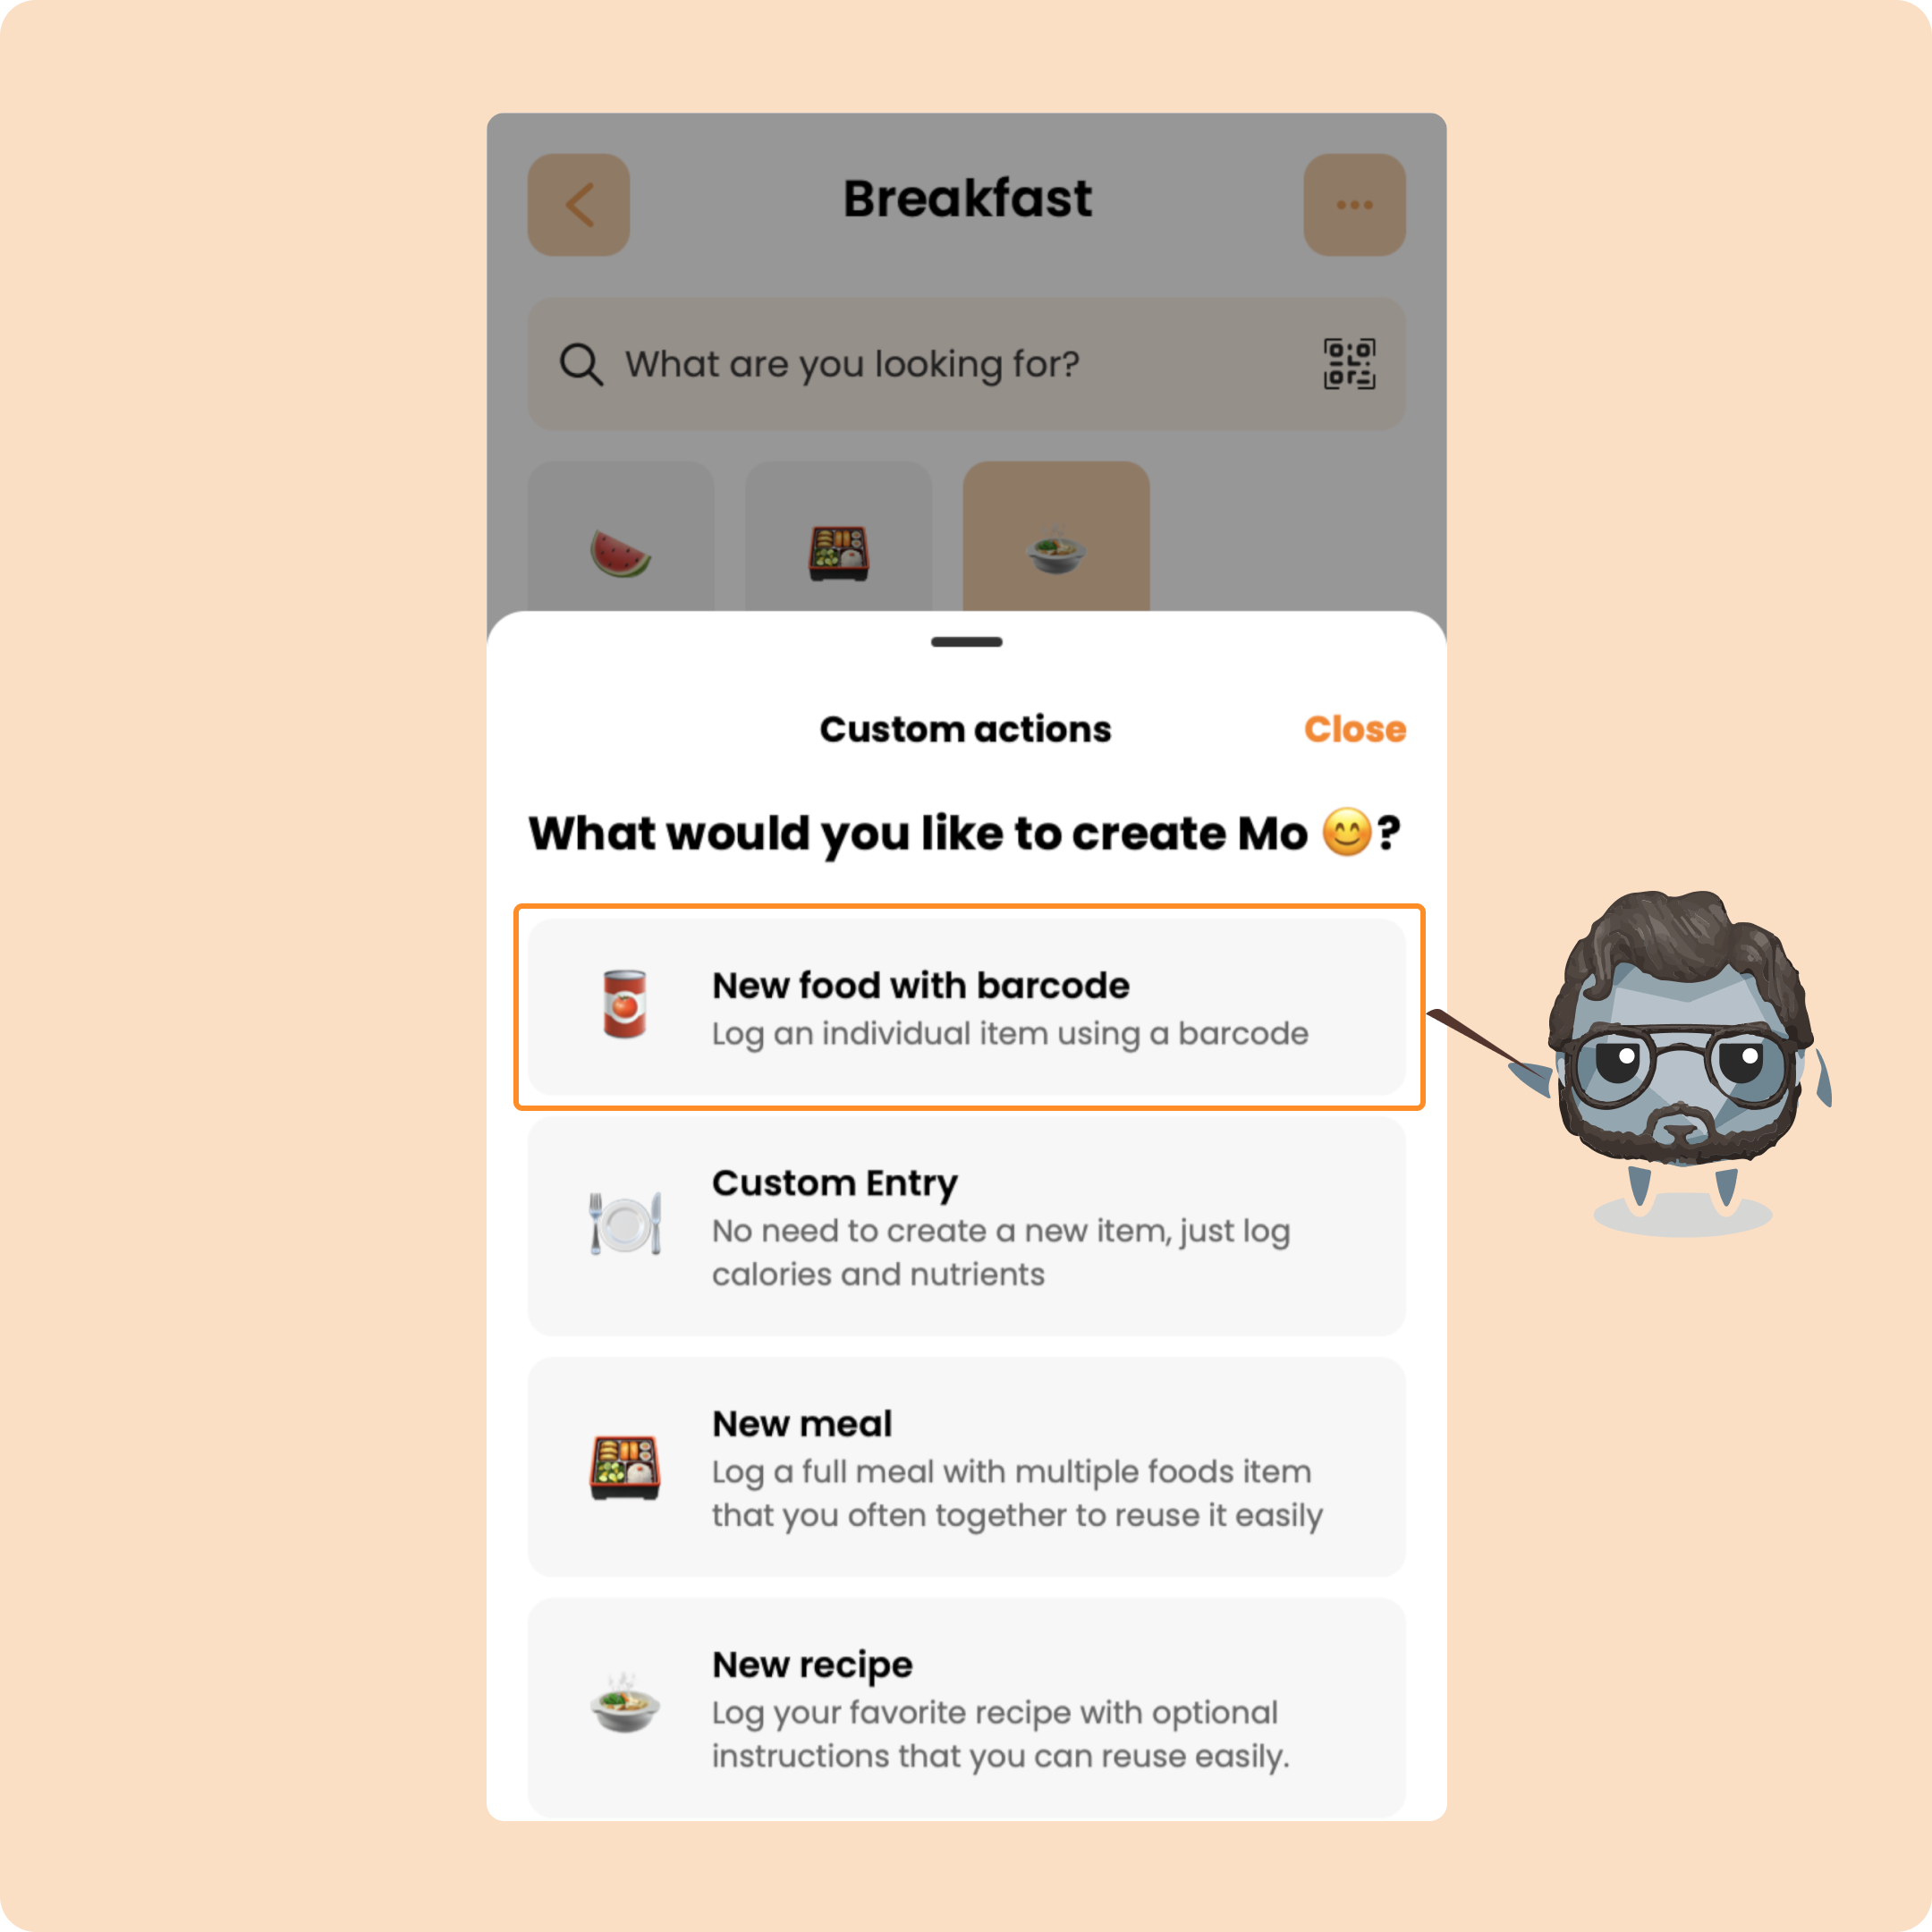
Once you have pressed on it, you will be able to scan your product:
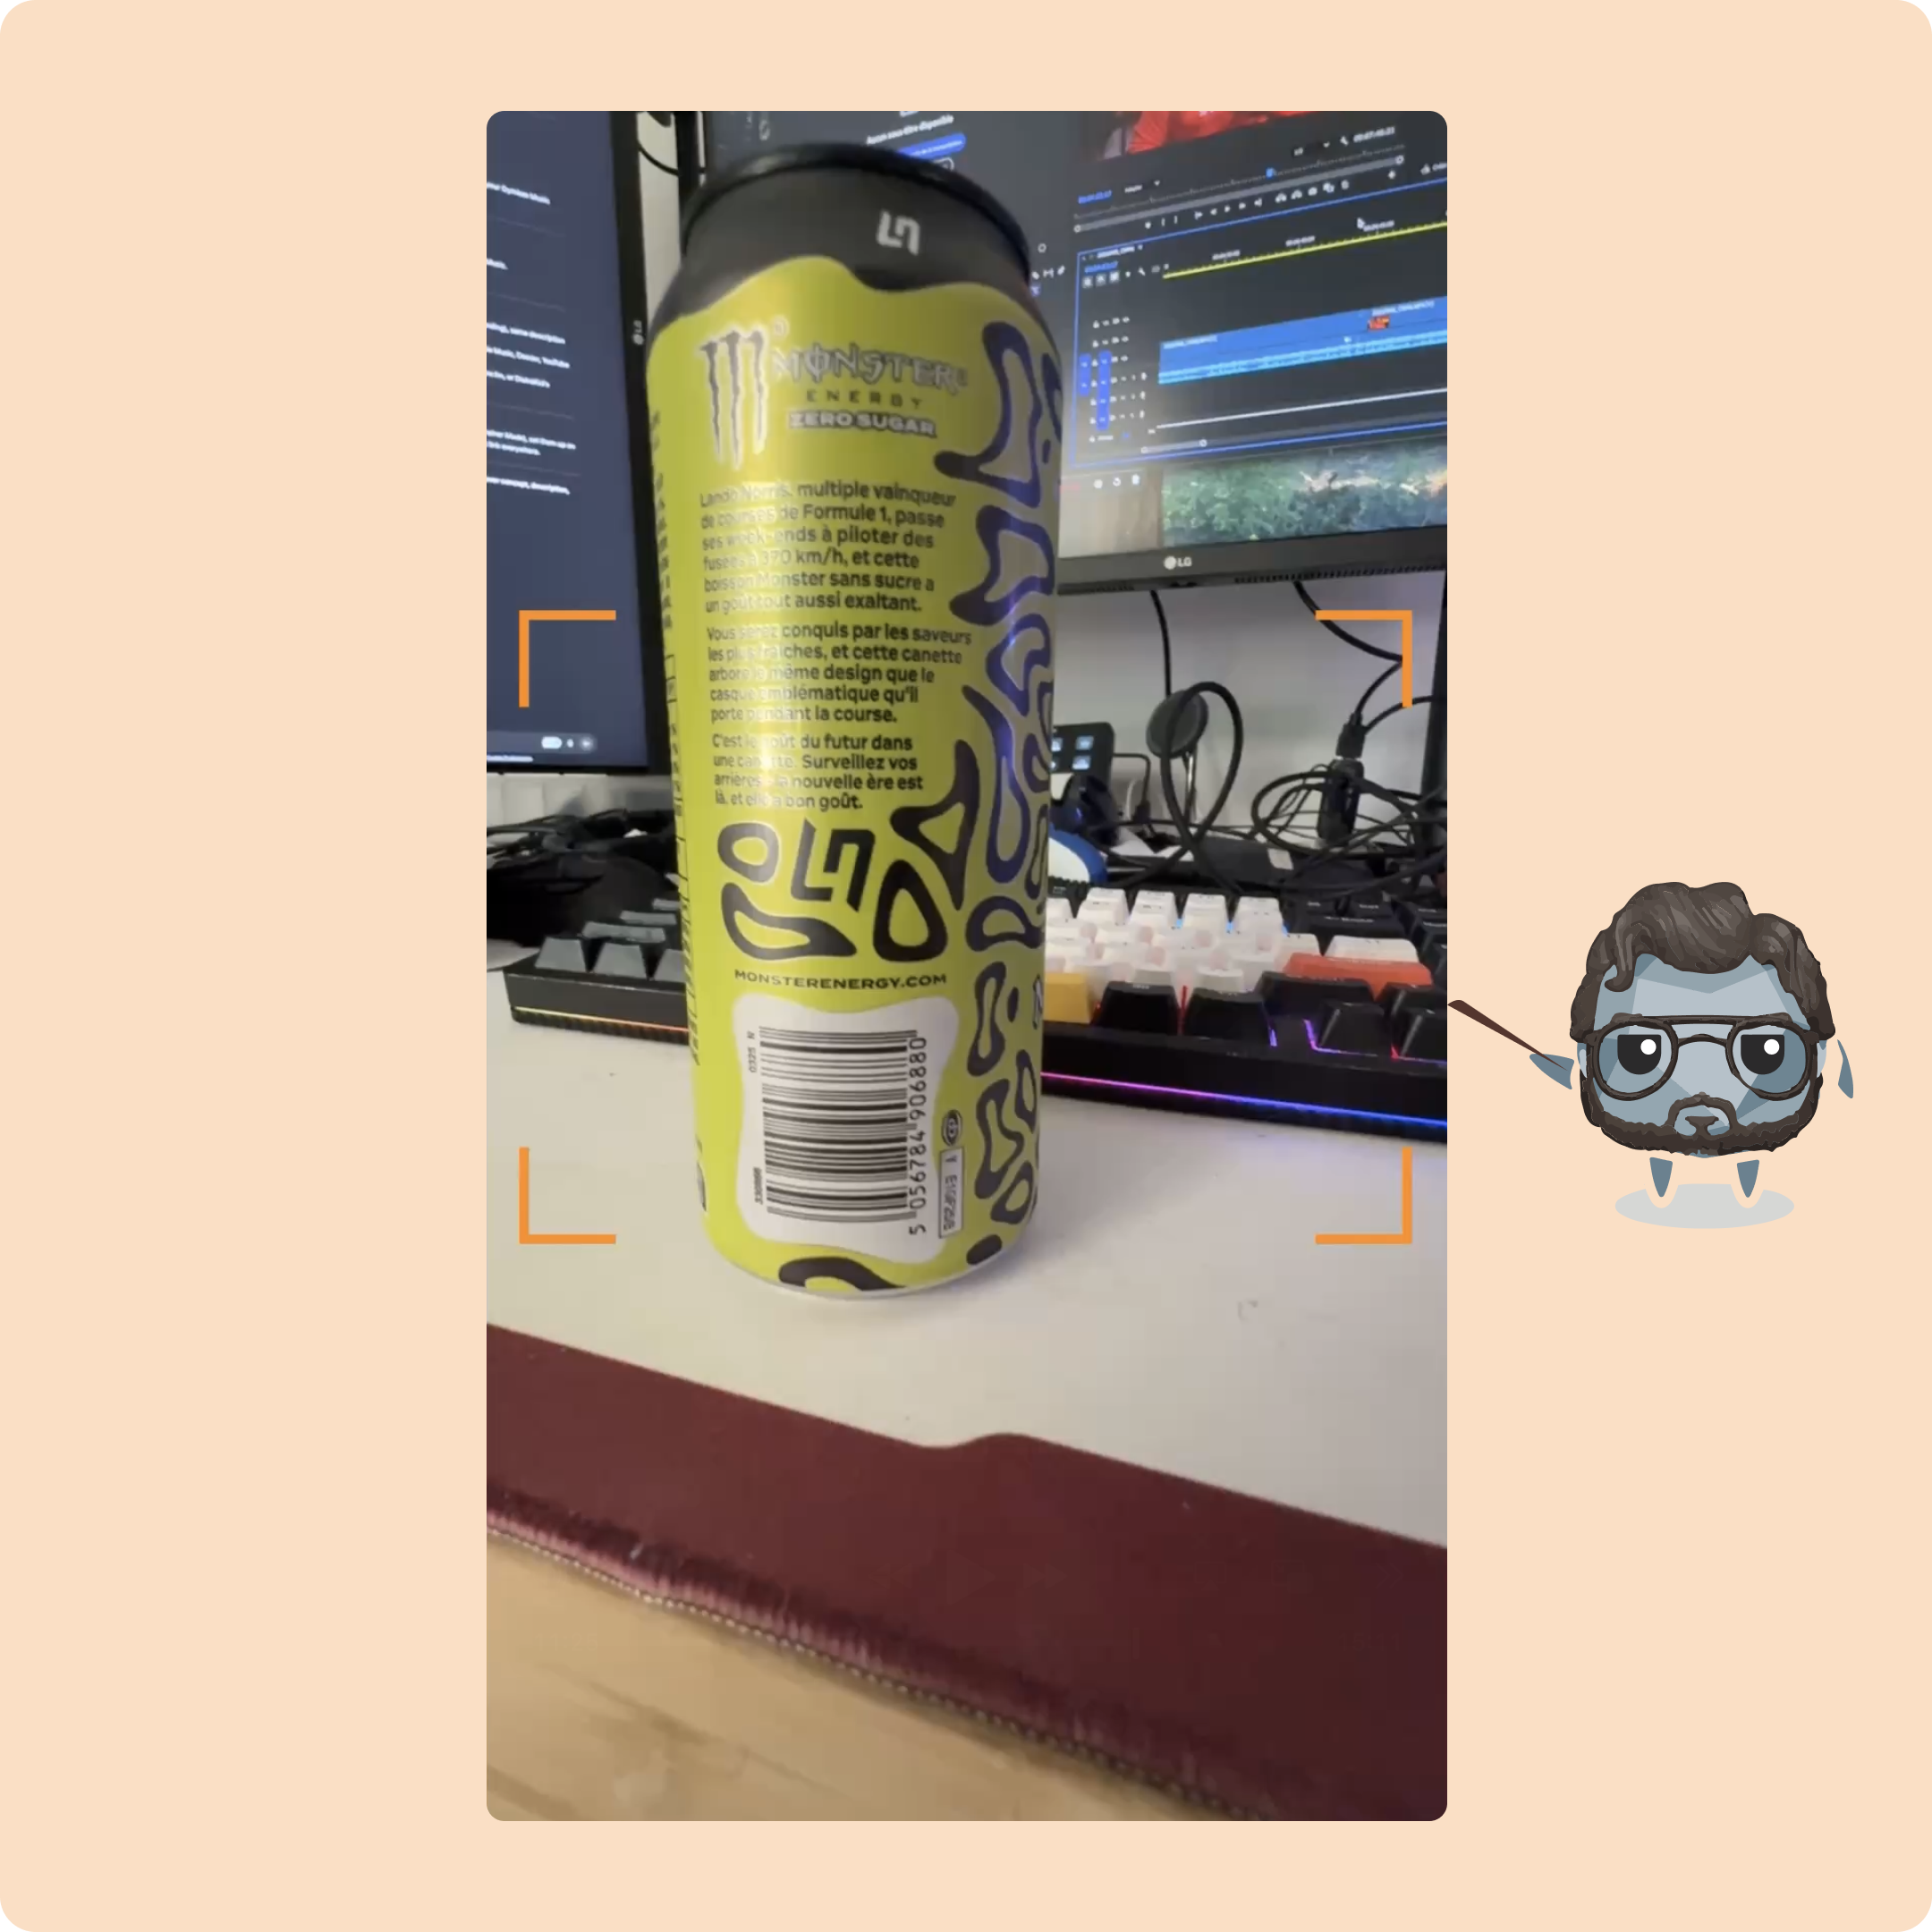
Once scanned, you will be able to adjust the value of what you have consumed
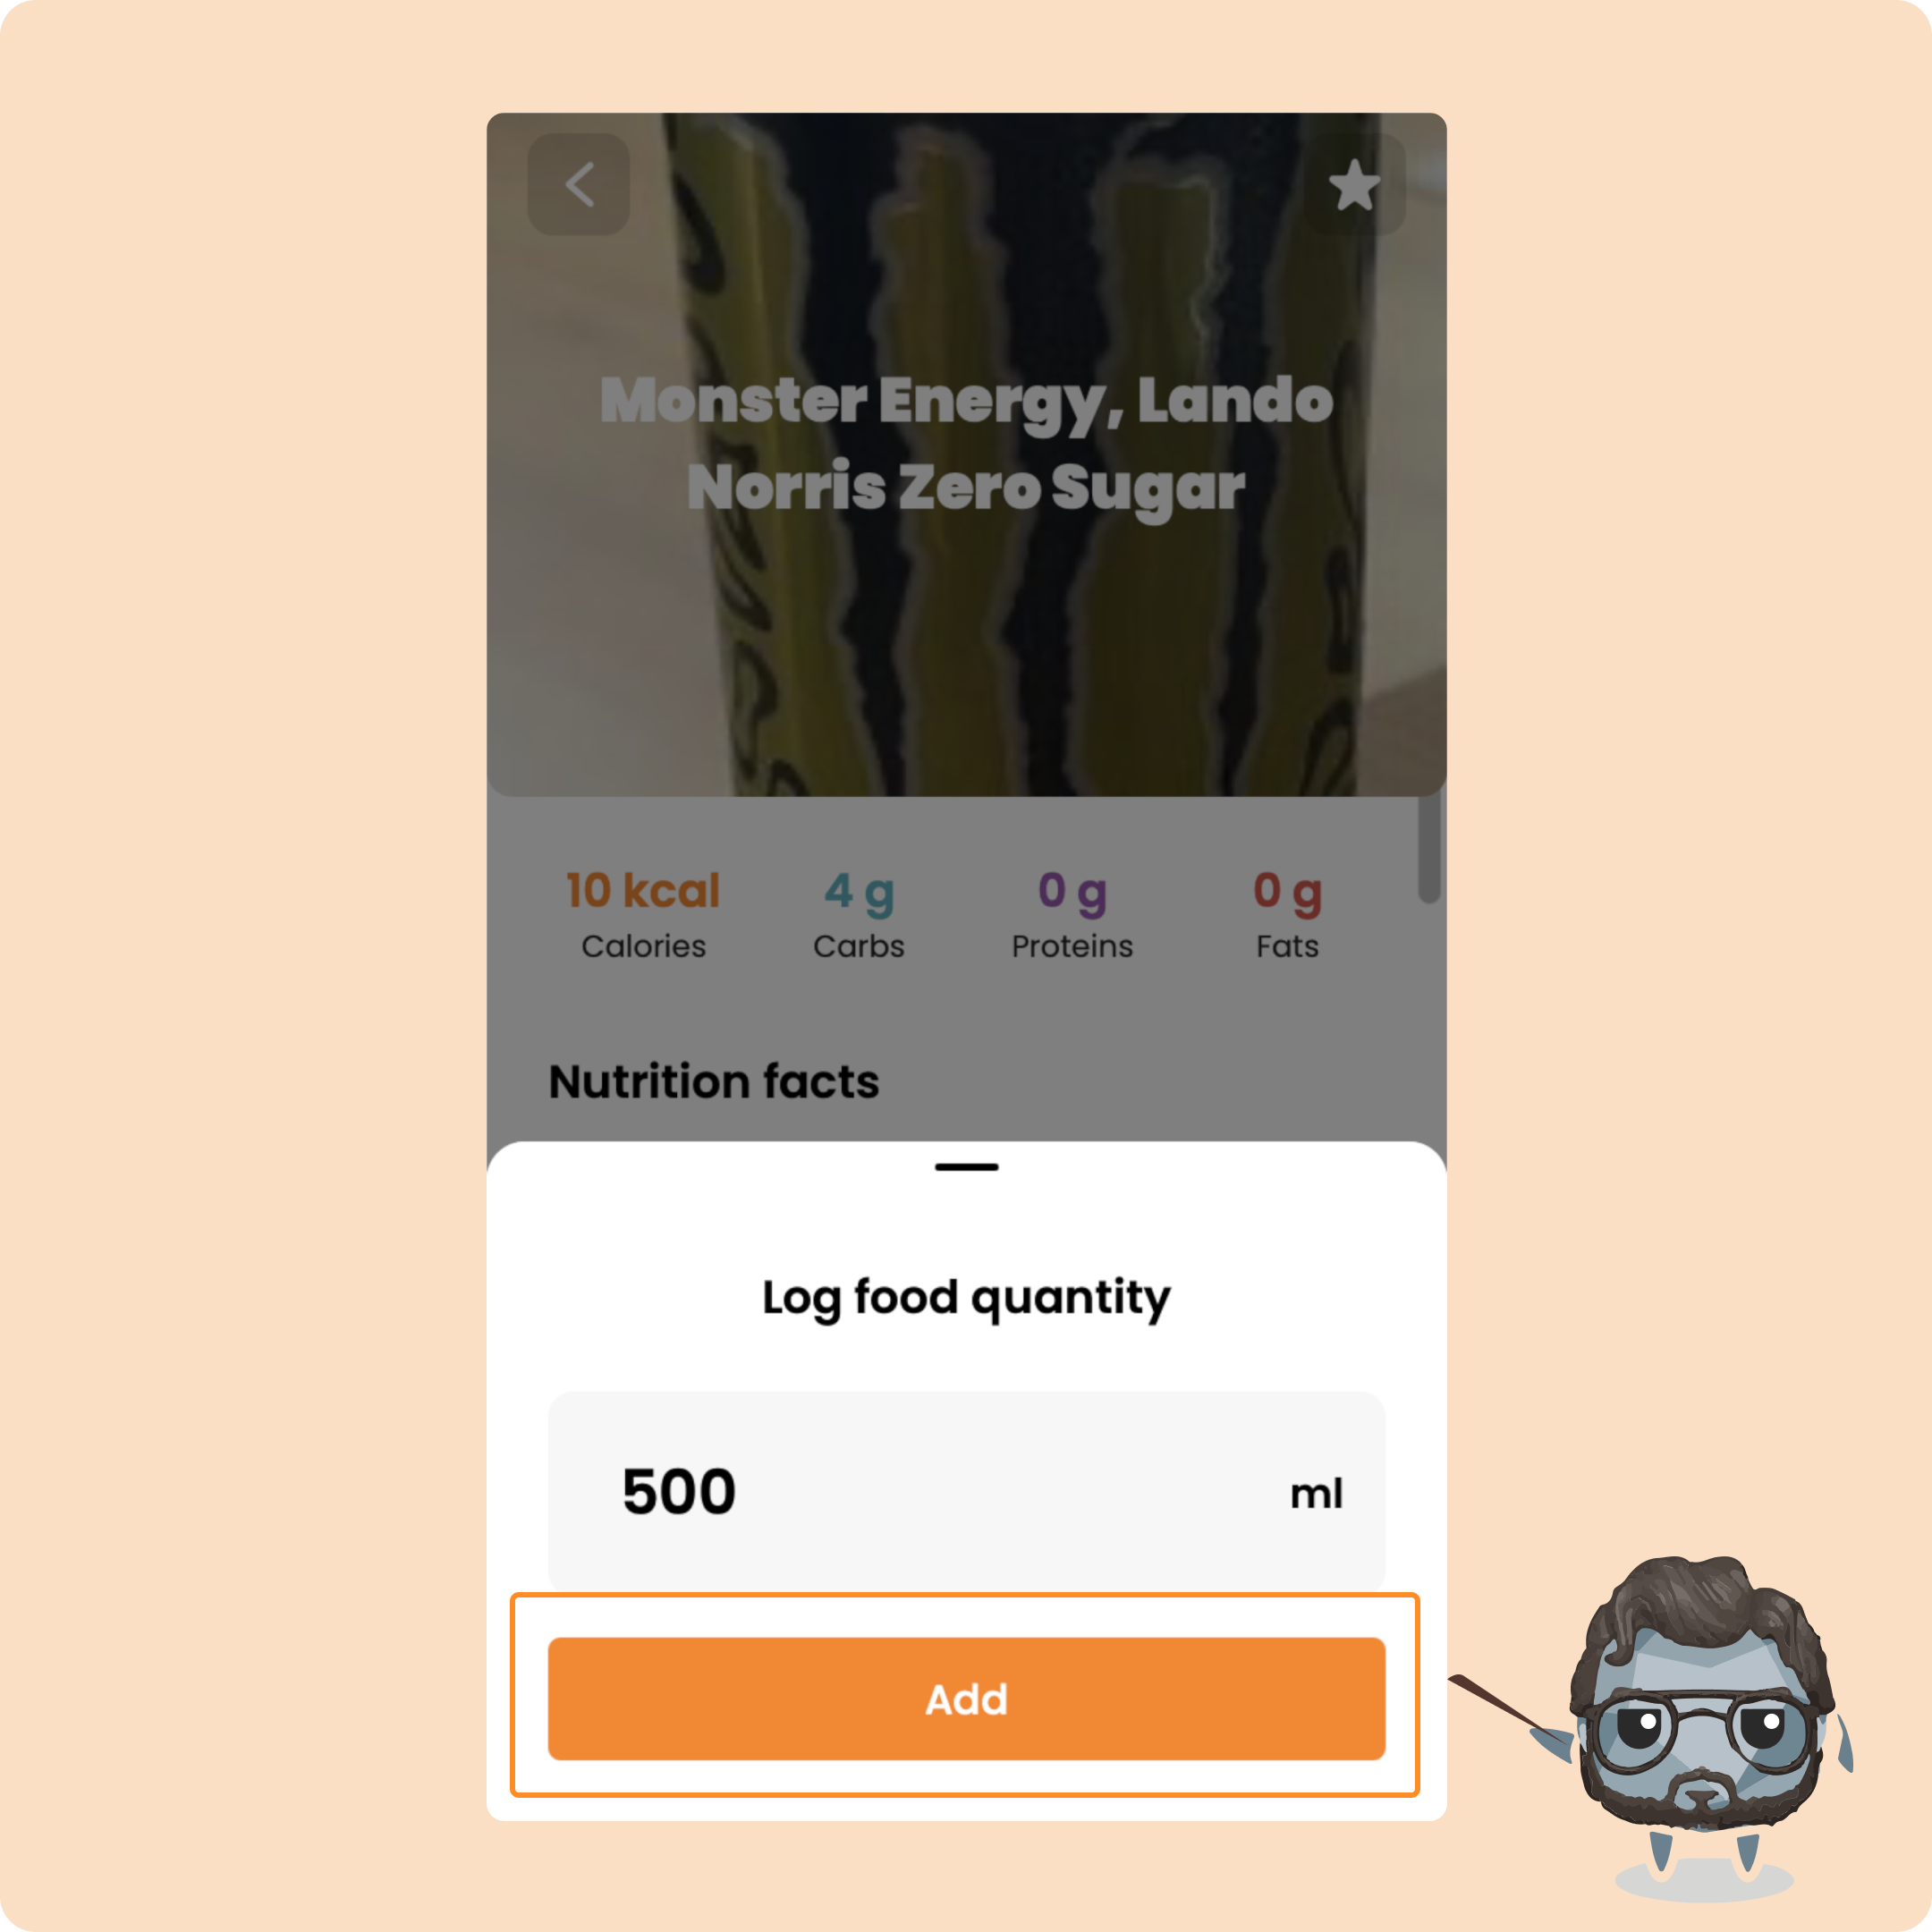
As with a food/product added manually, you will find it here:
Log a complete meal in a meal
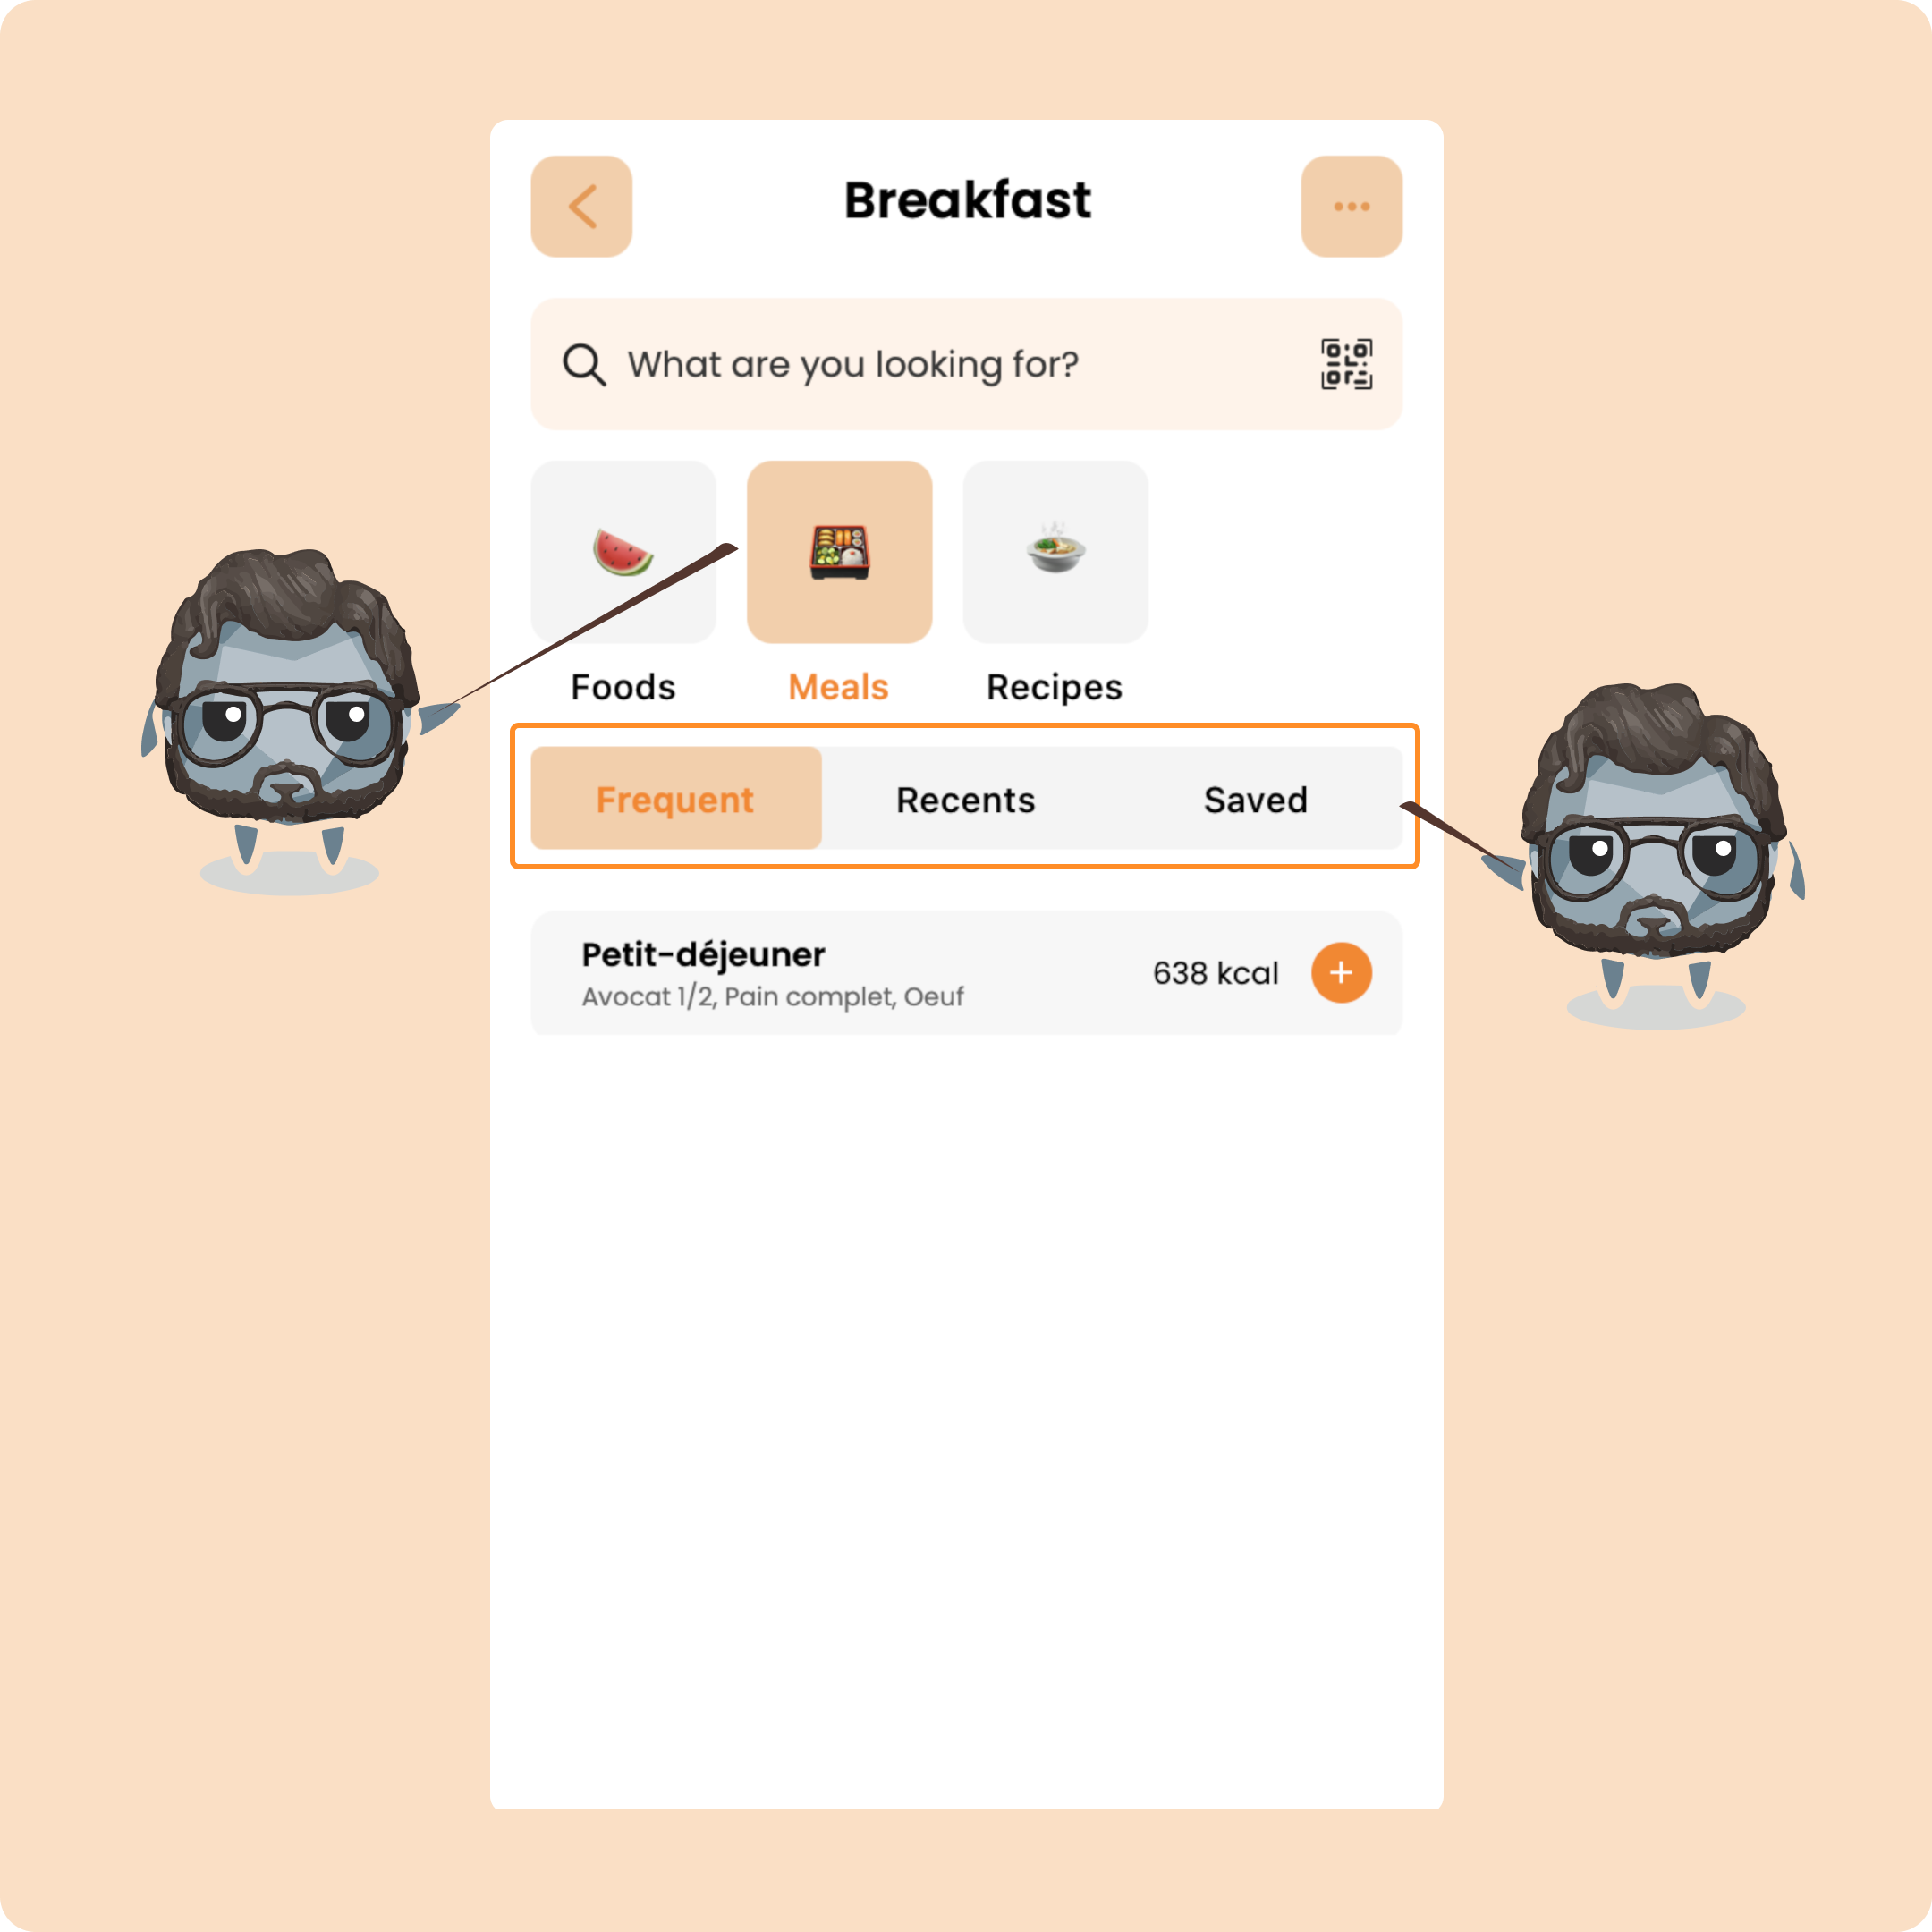
In the meals section, as in the other sections, you will find:
→ Frequent meals (those that you consume most often)
→ Recent meals, classified by today then the last 7 days and 30 last days
→ And finally, the saved ones which are those that you will have created yourself
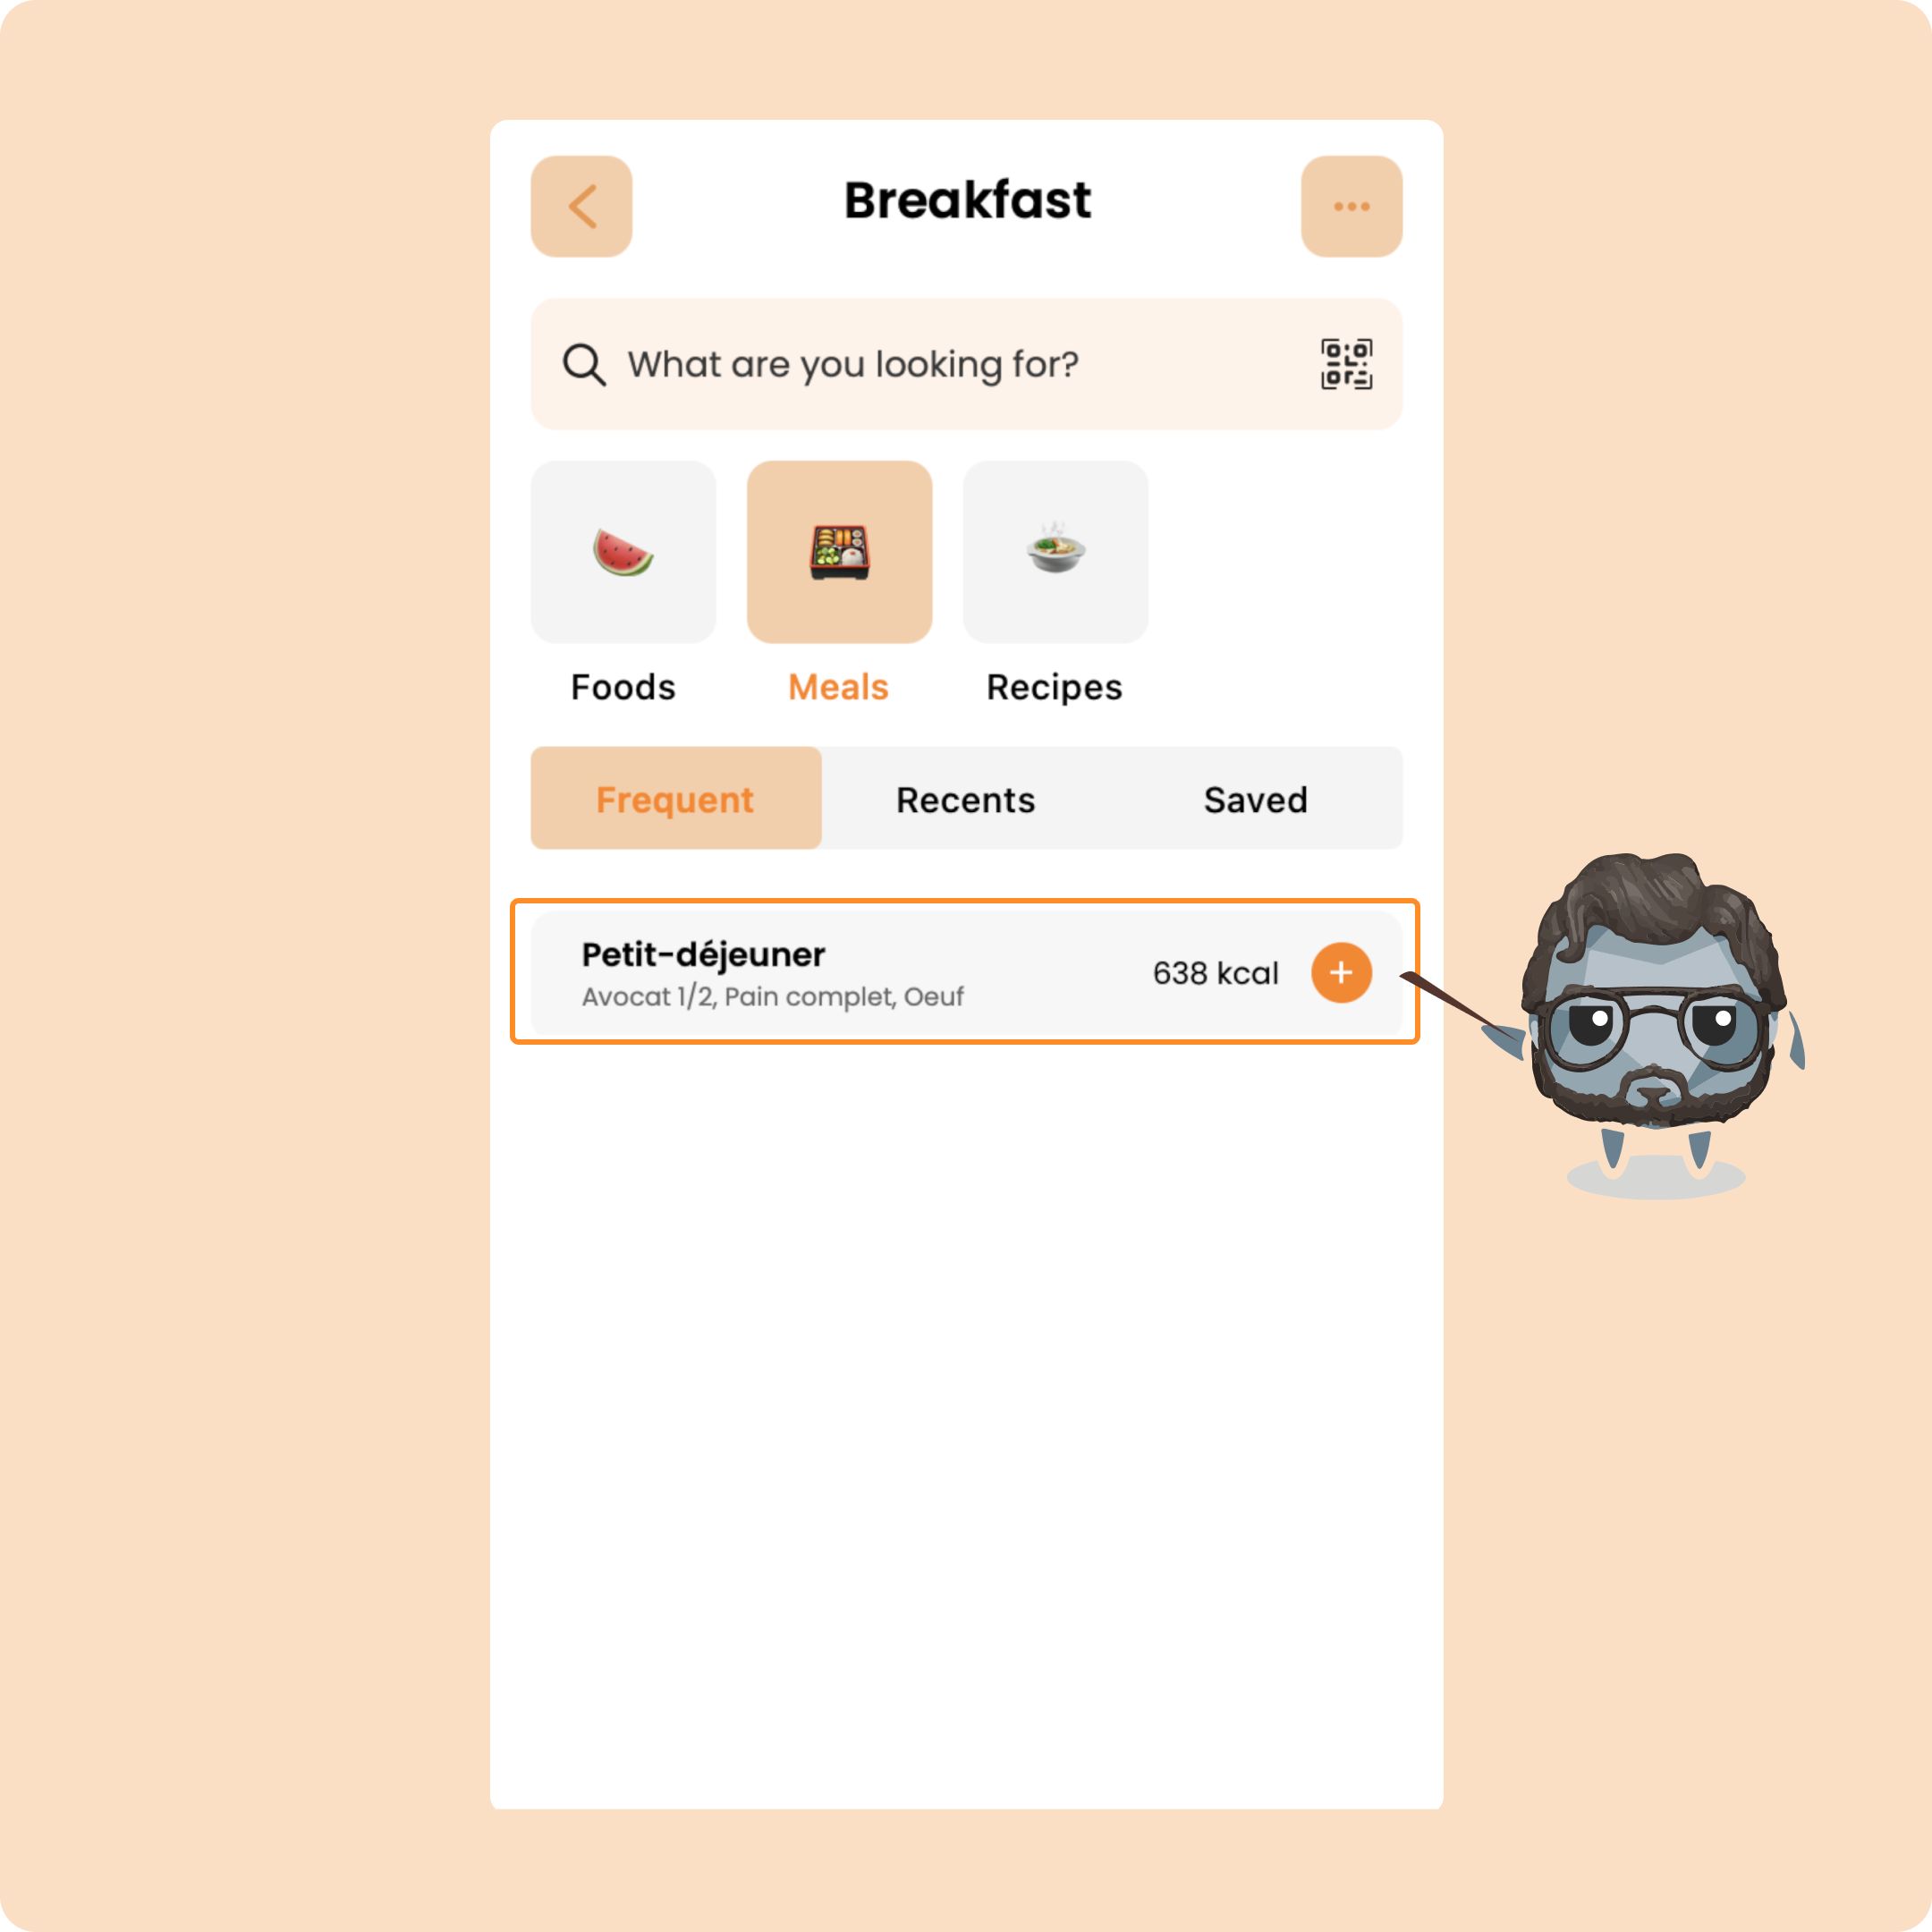
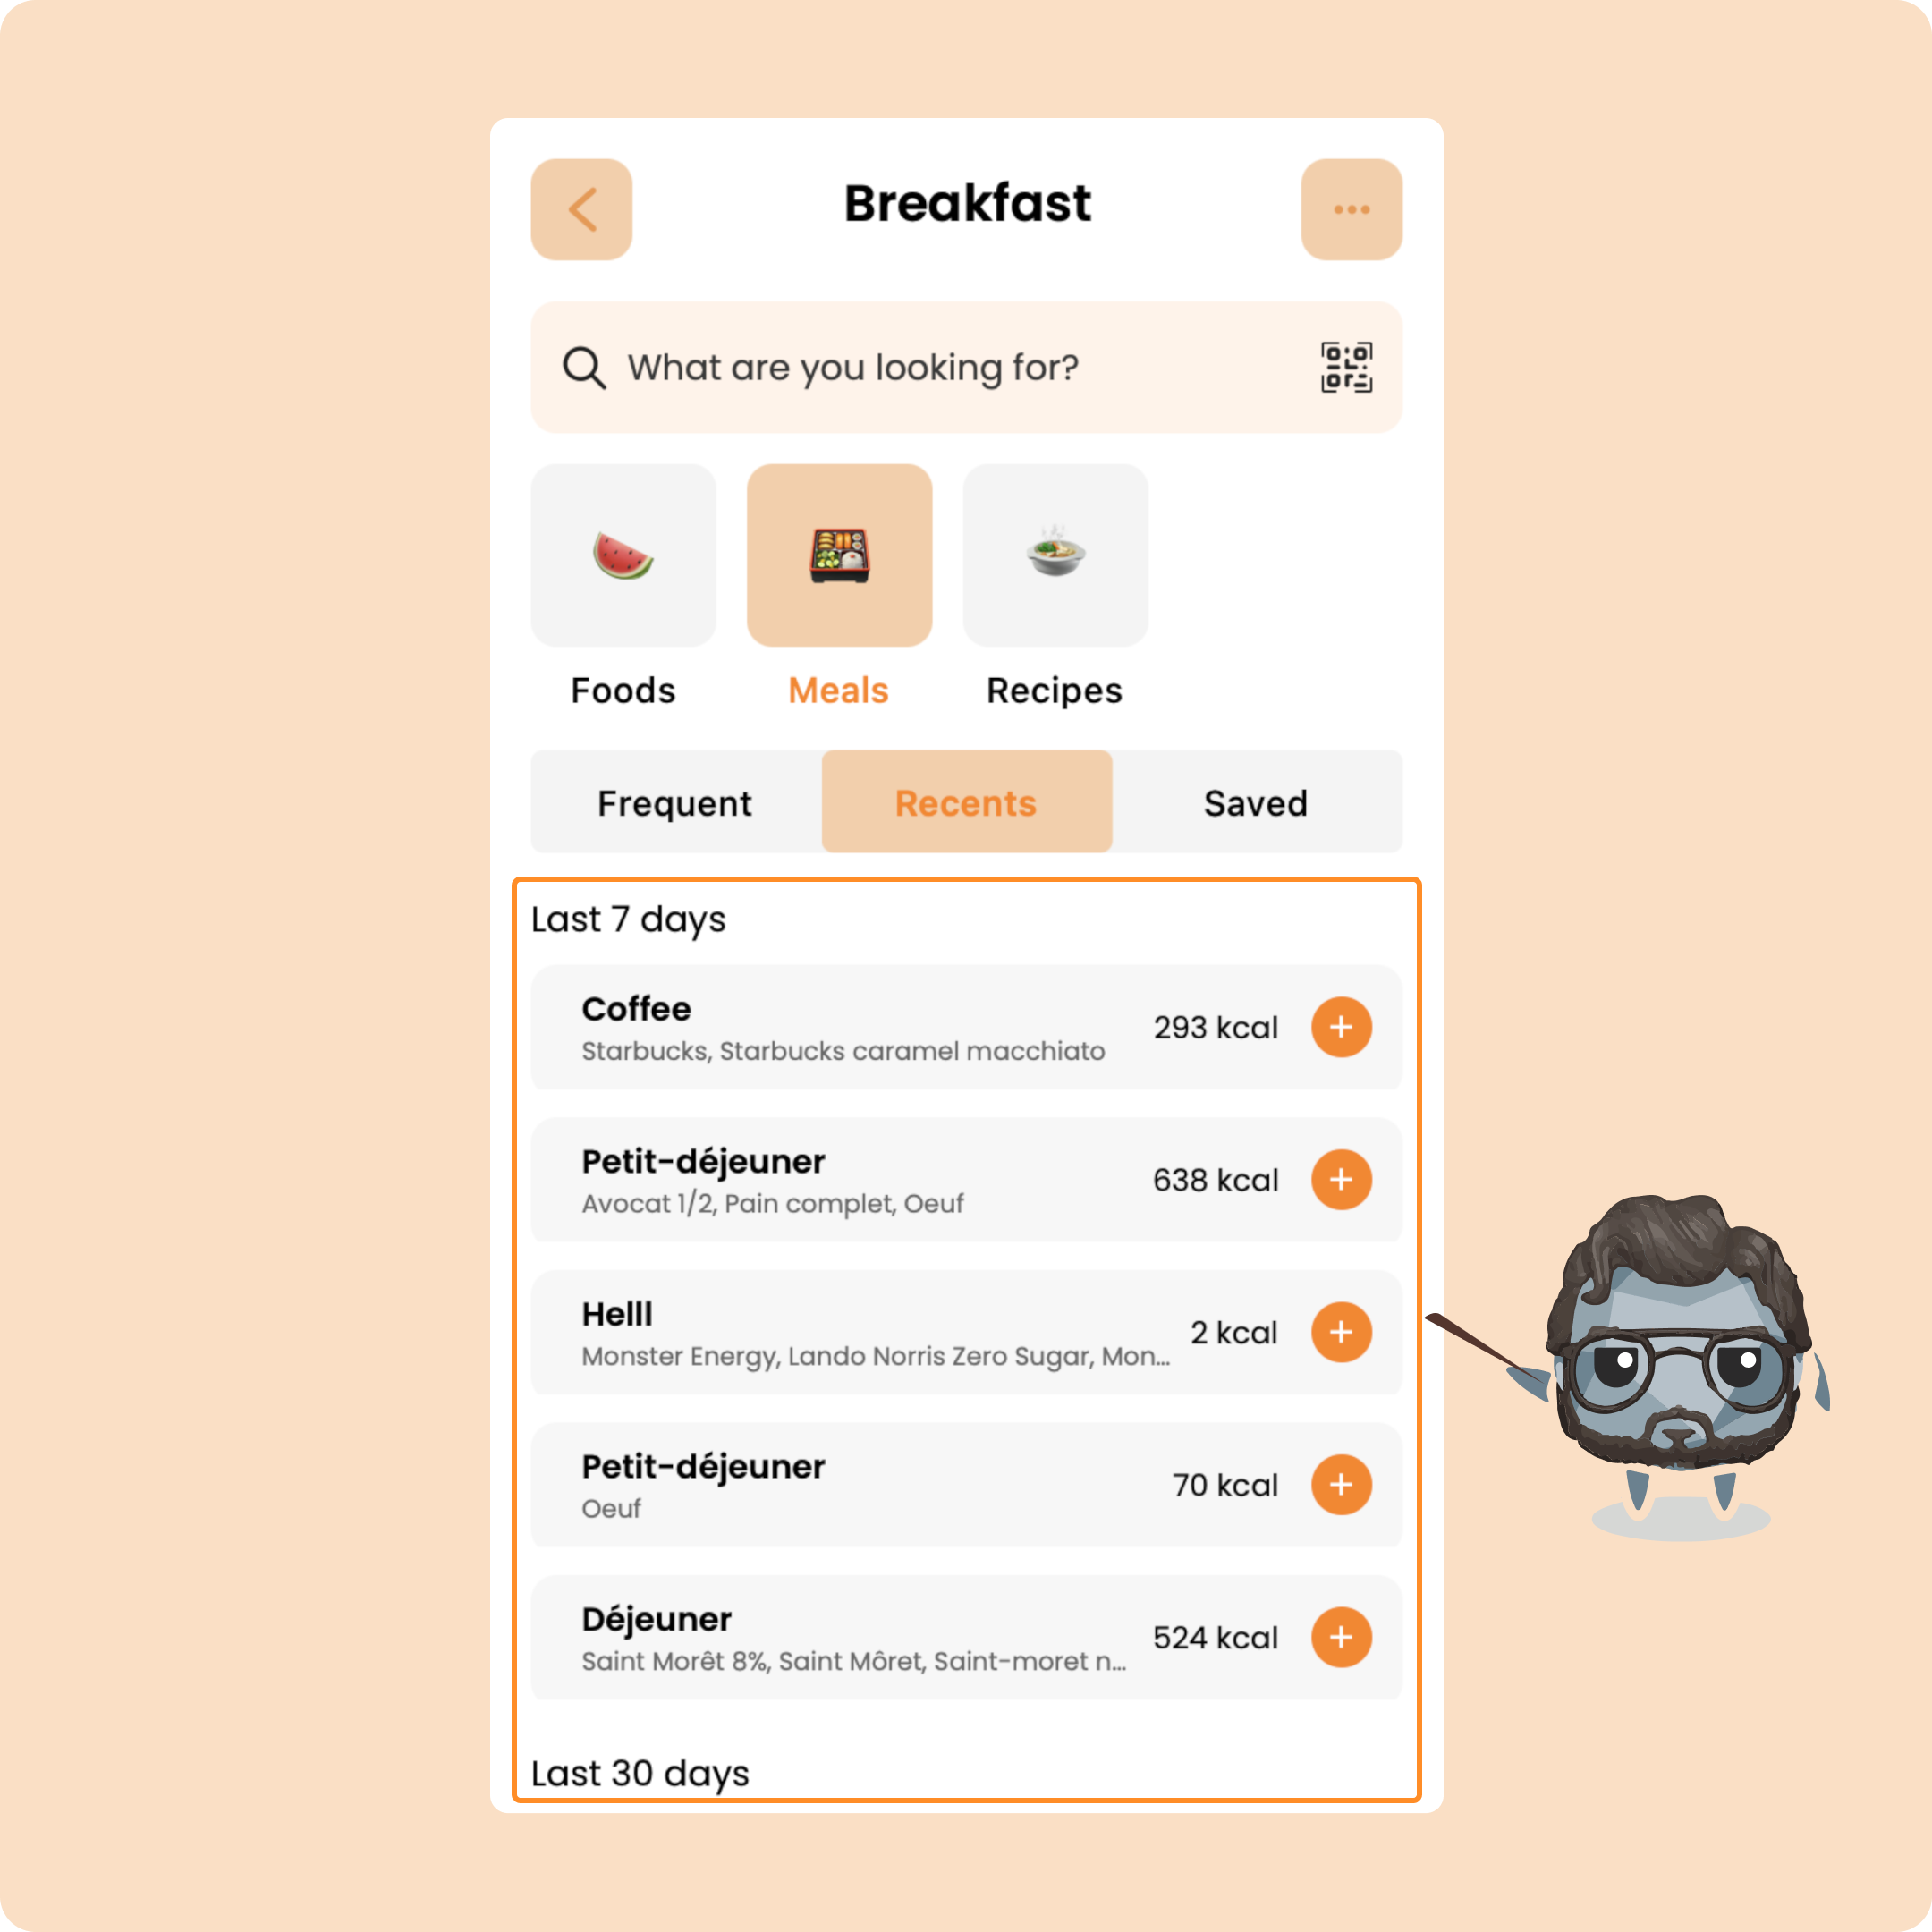
To add a meal to your current meal, you just need to click on it.
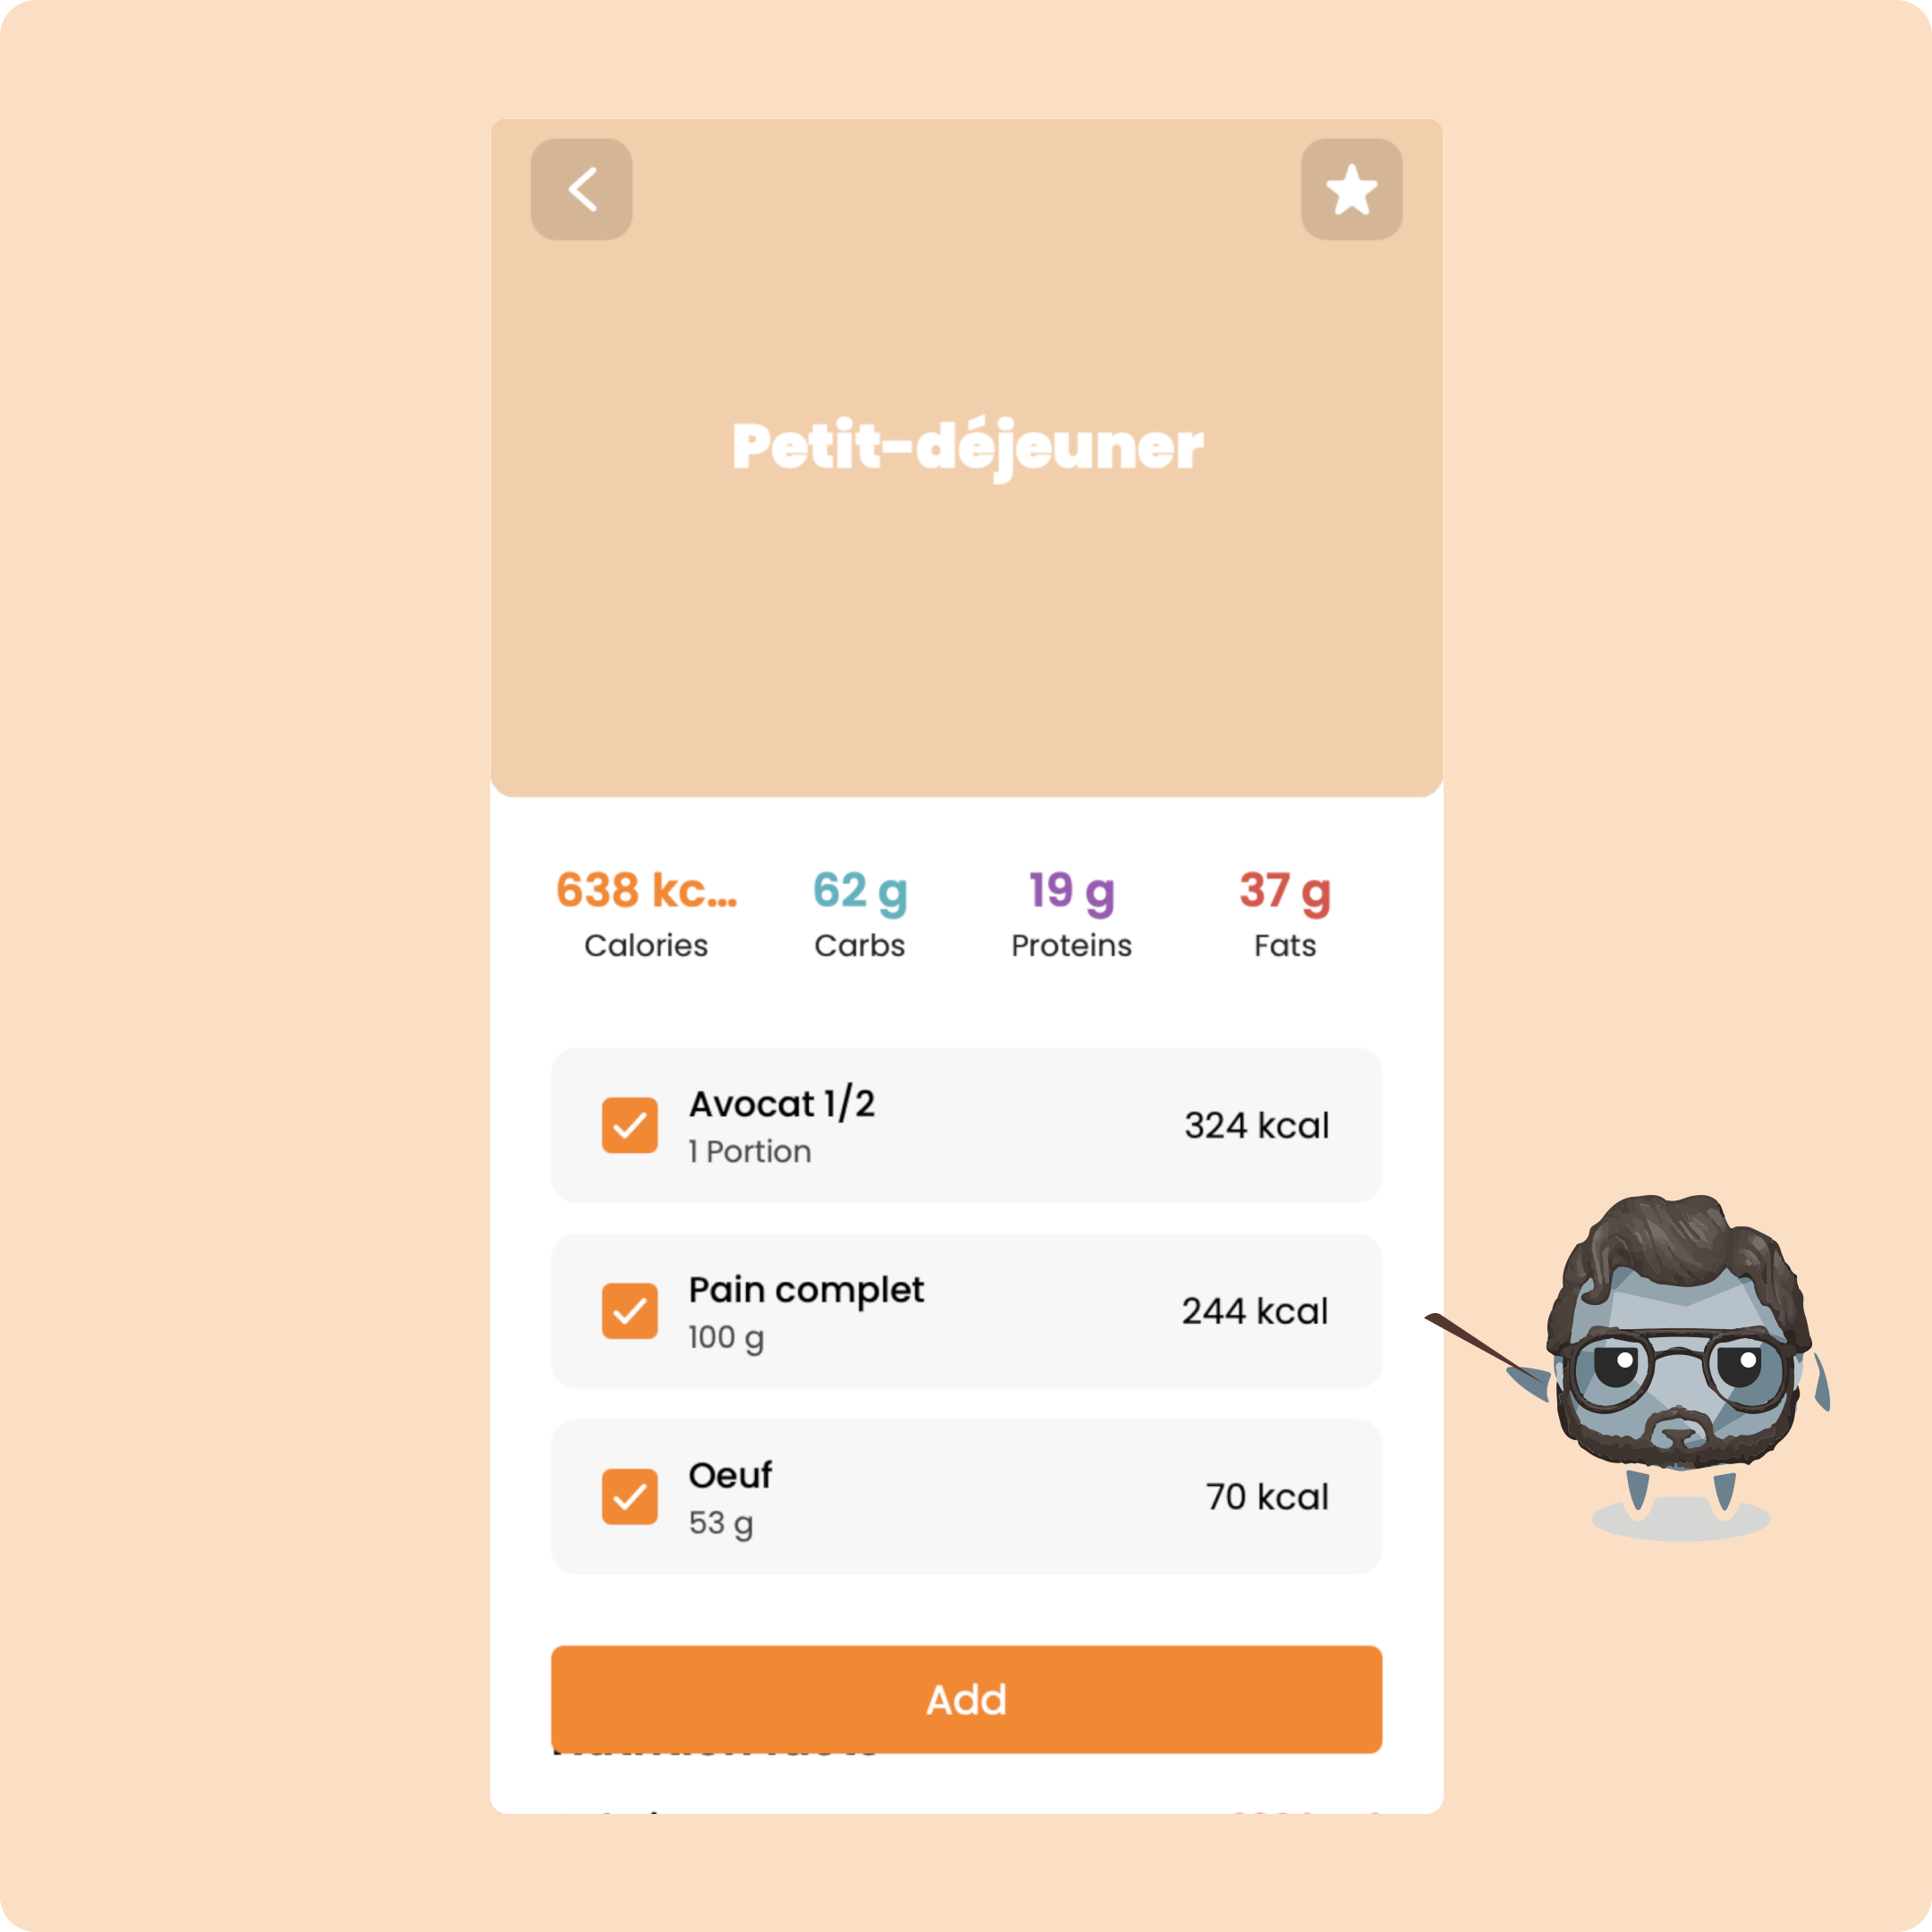
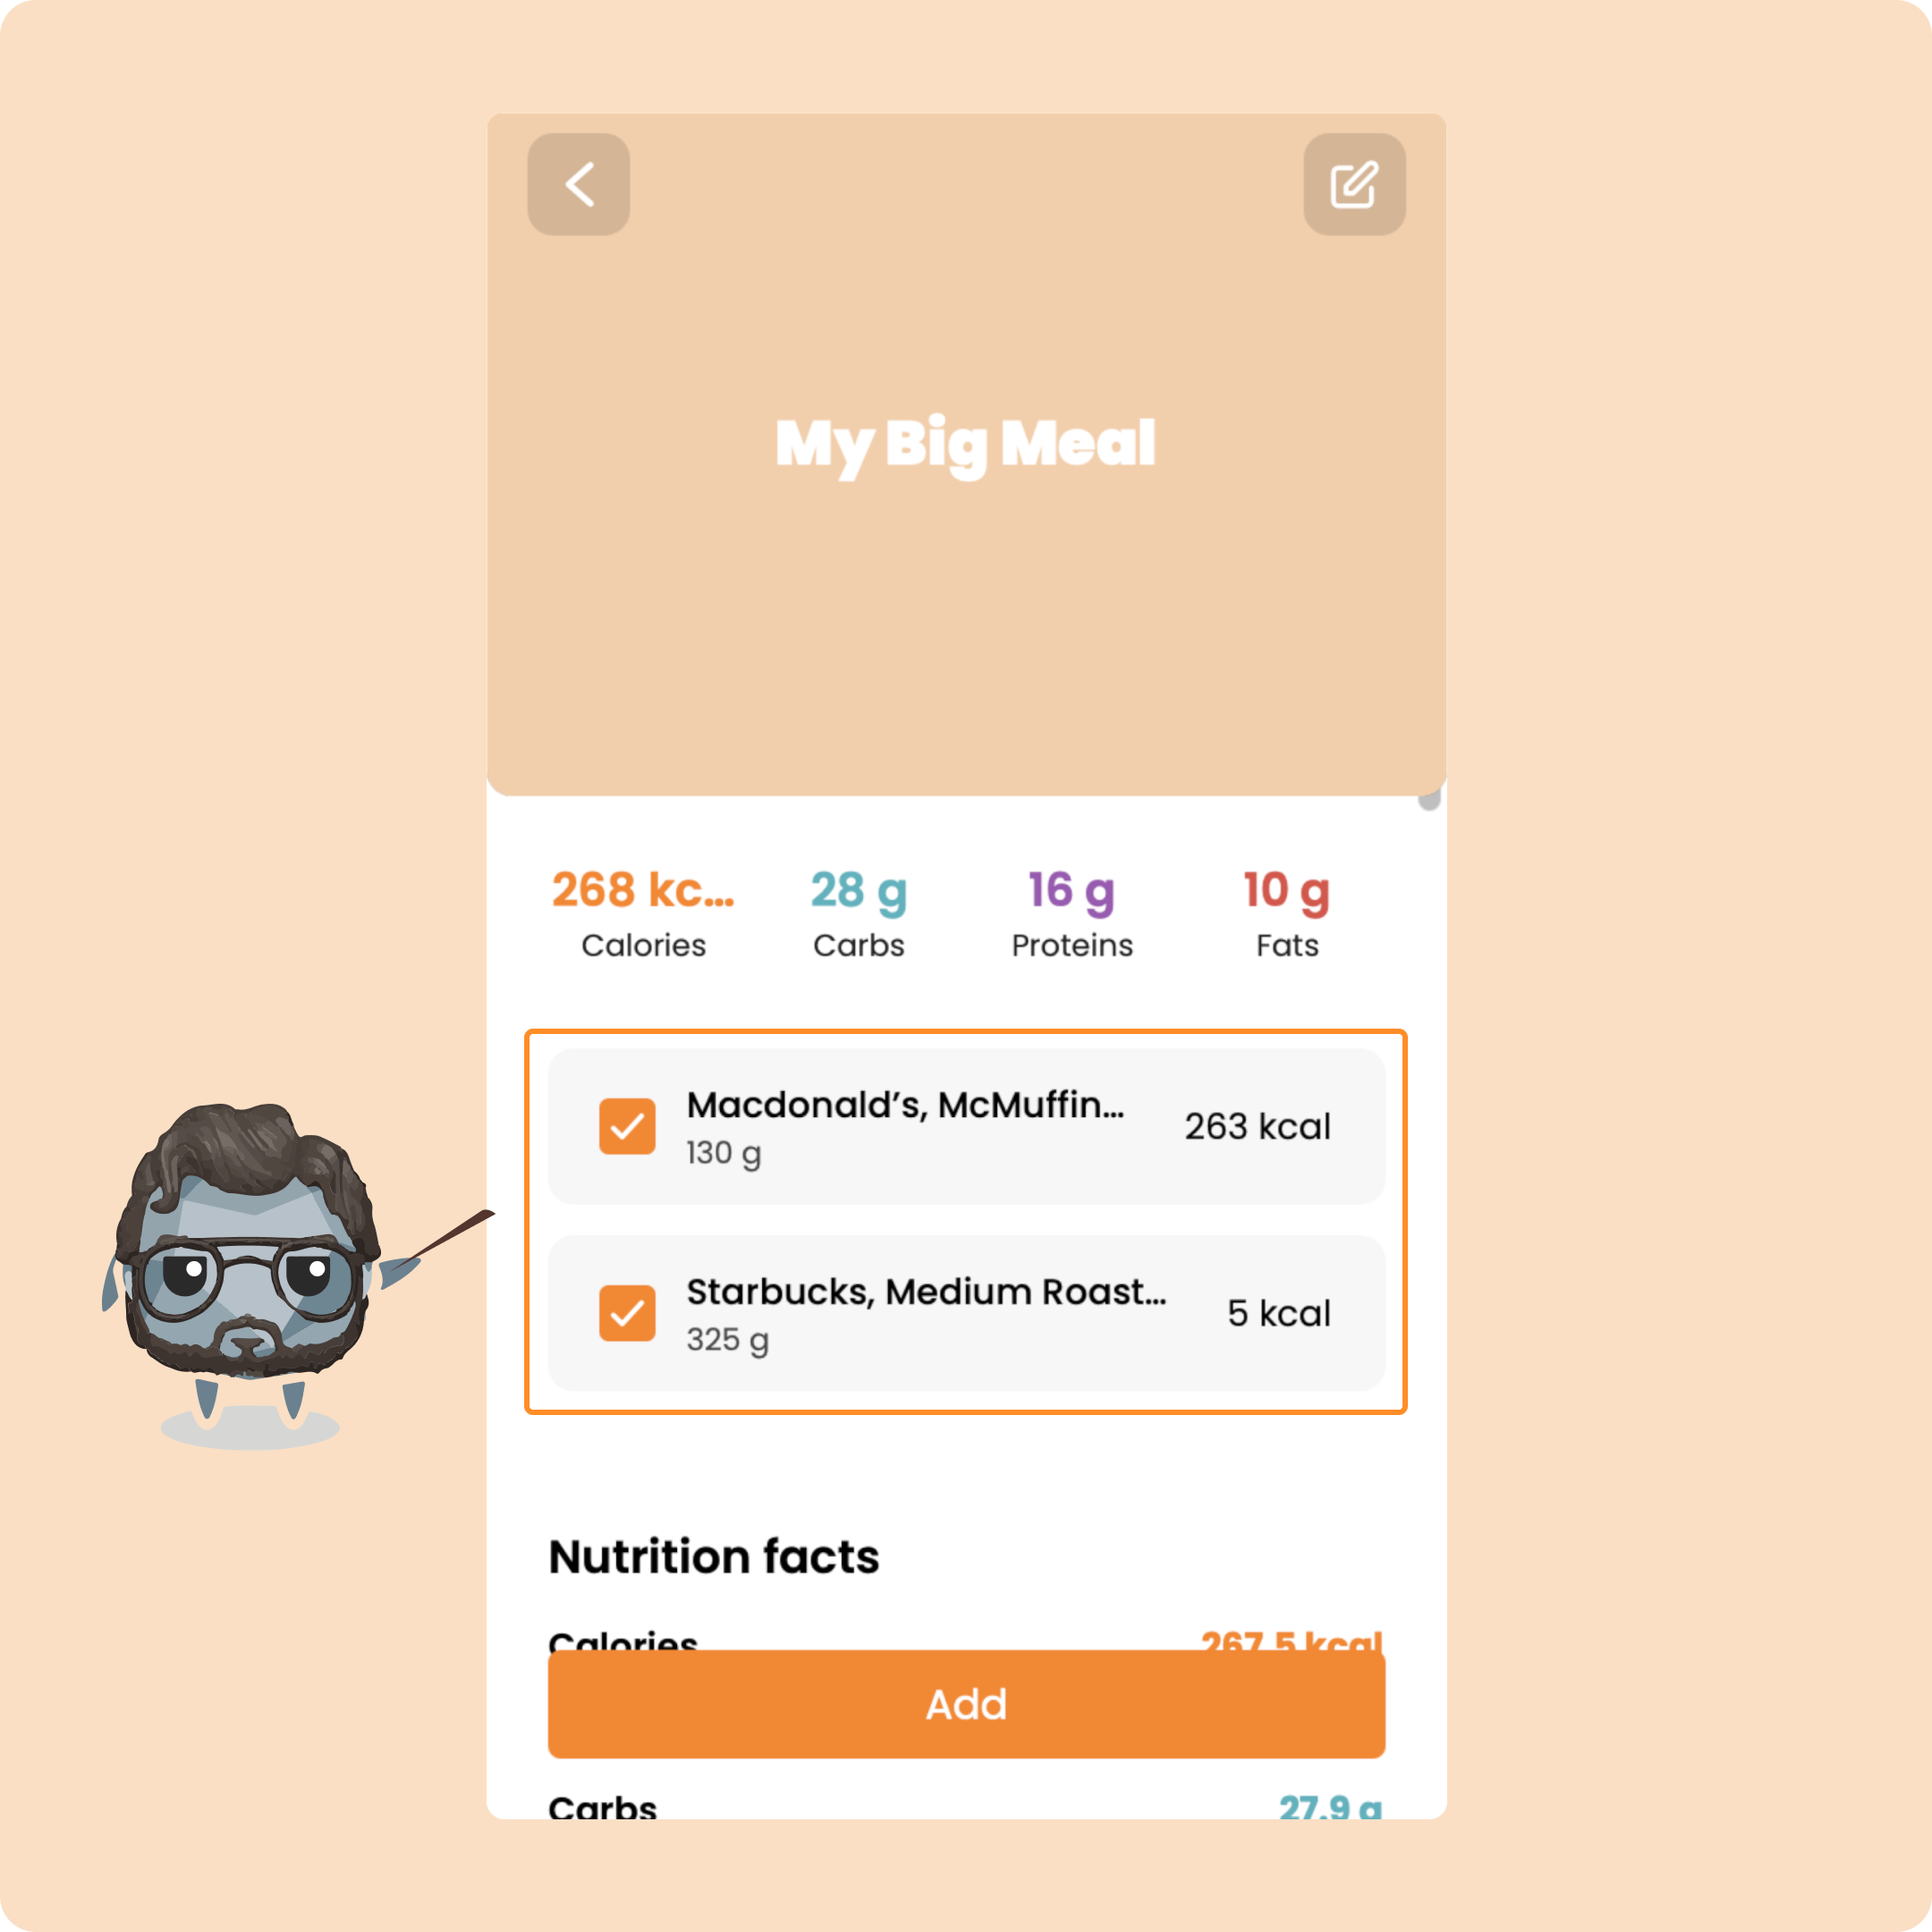
On this page, you will be able to remove the foods that you do not consume and adjust the portions before adding it.
Create your own meals on Gymkee
Since this redesign of the Nutrition section, you have the possibility to create your own meals in order to add them more quickly to your day.
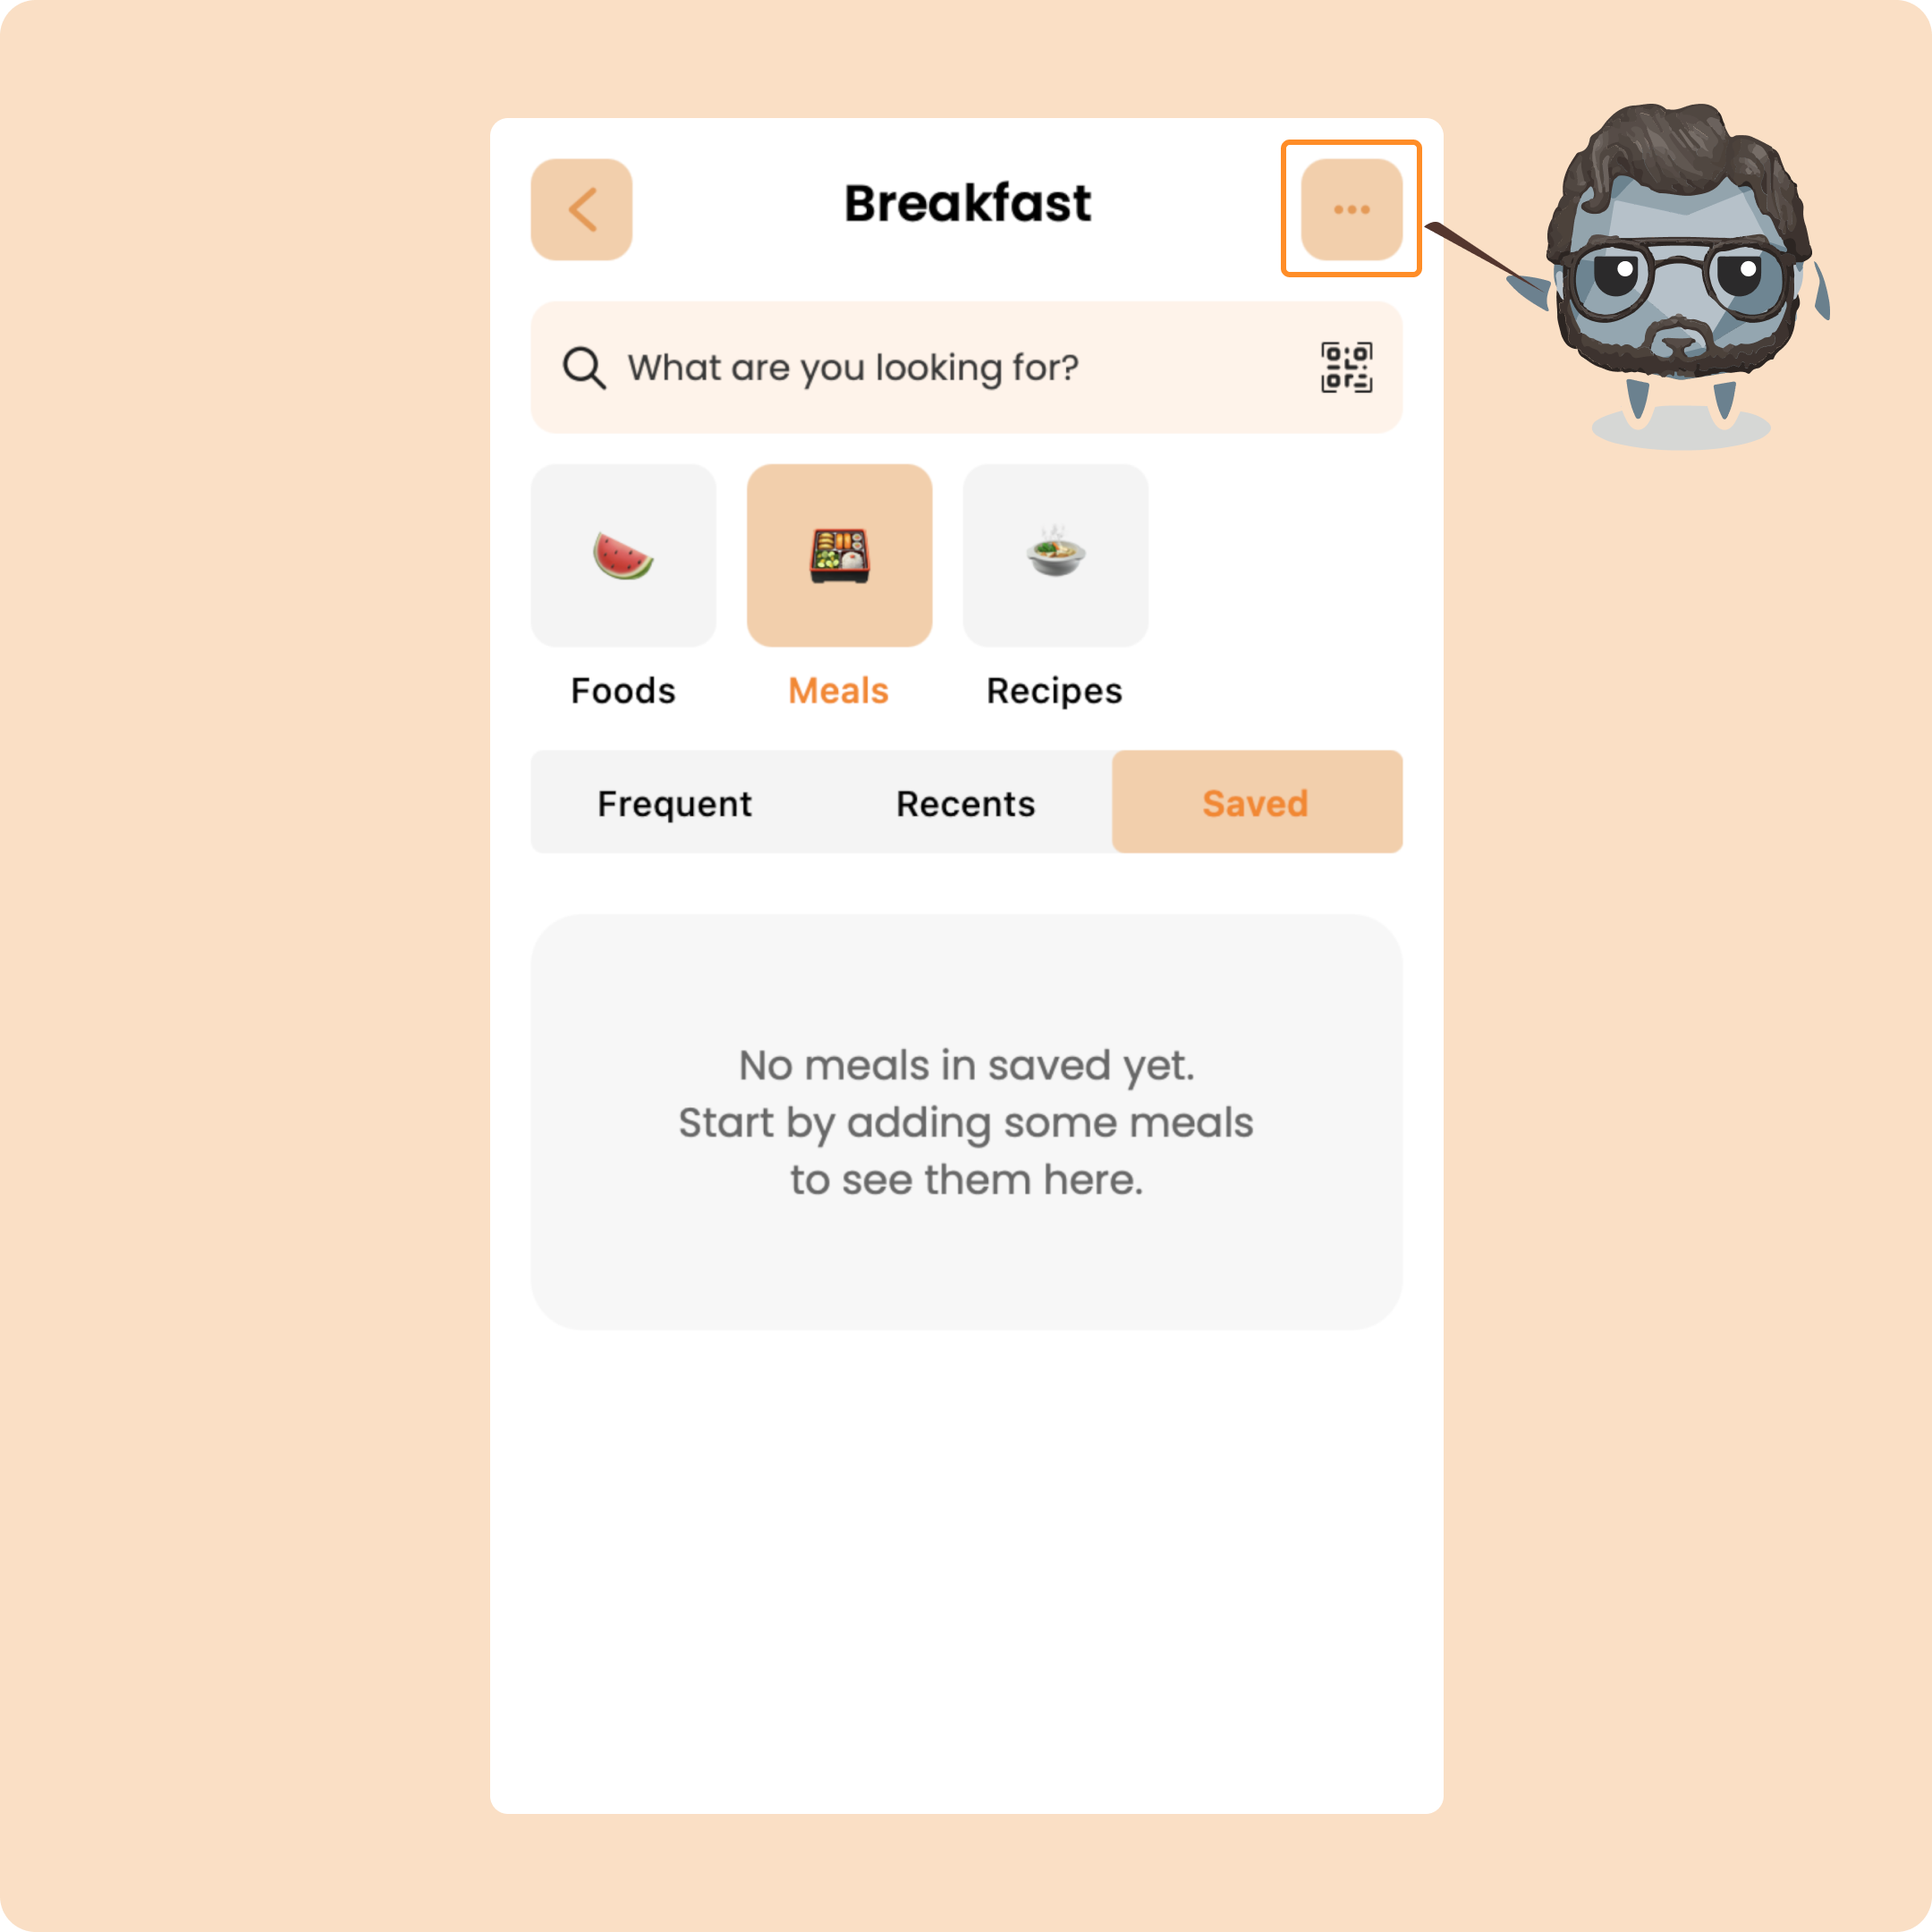
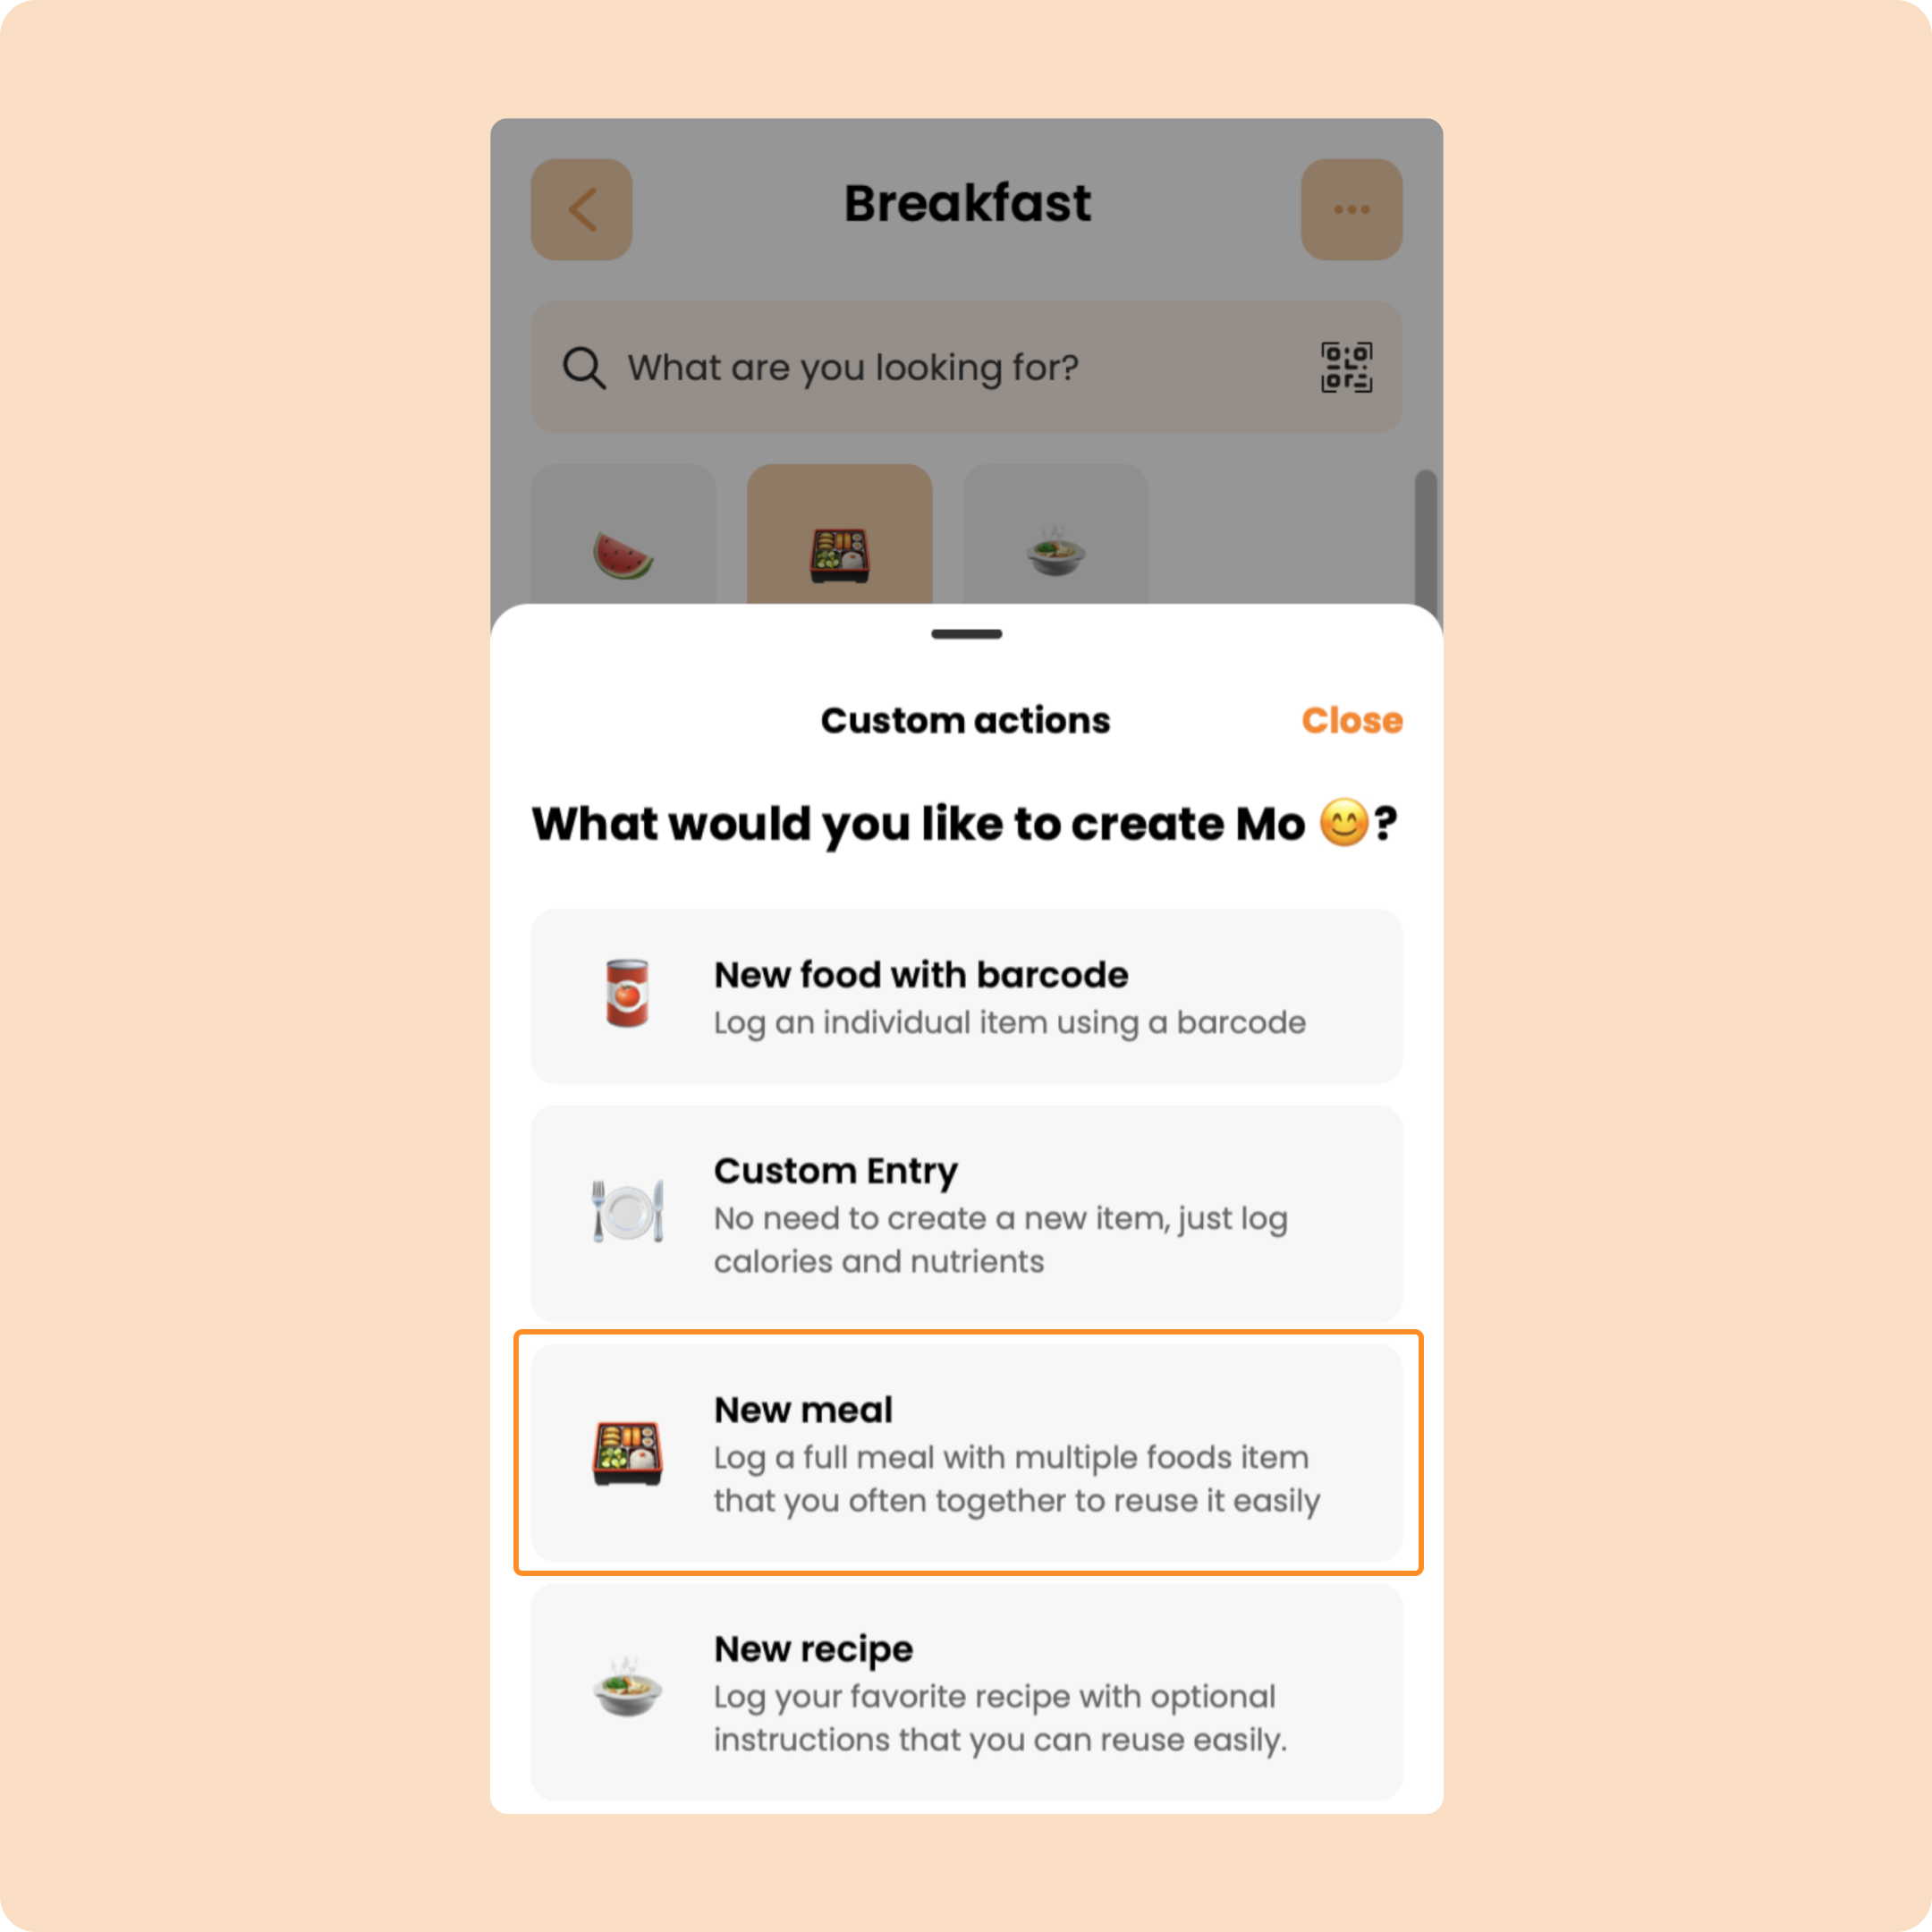
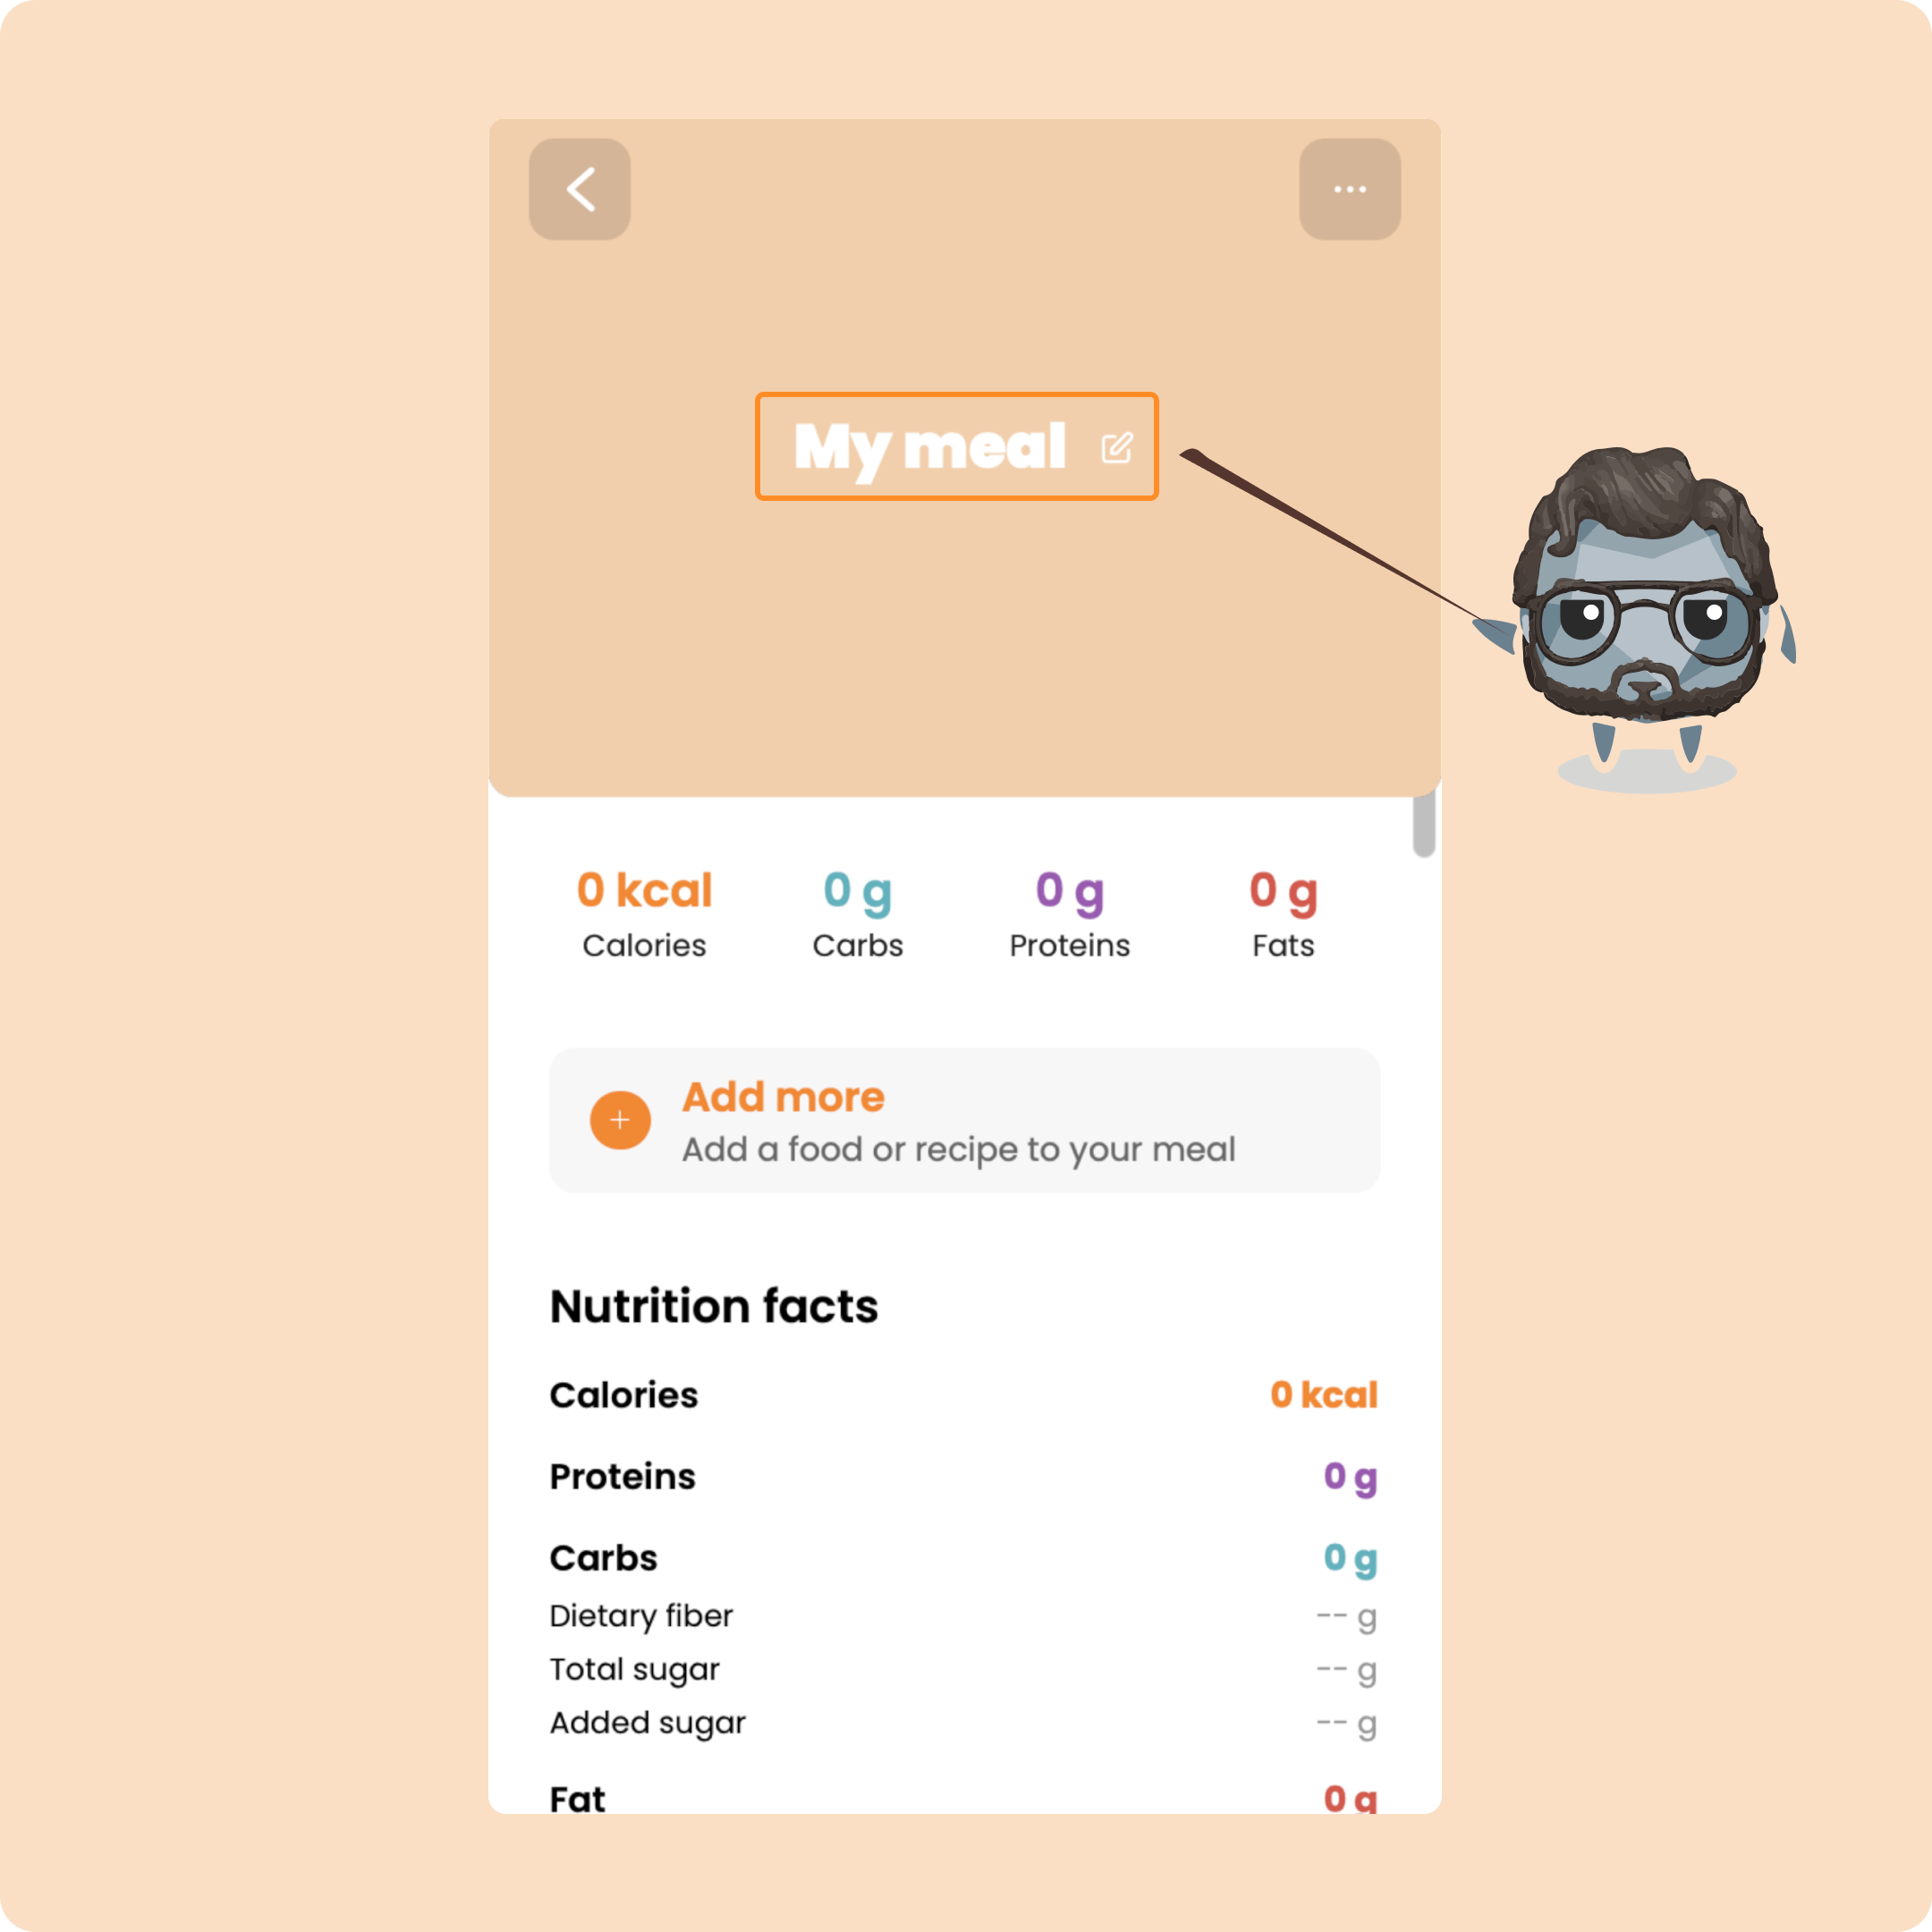
For that, go to the quick actions menu (the 3 little dots at the top right) and select "New meal".
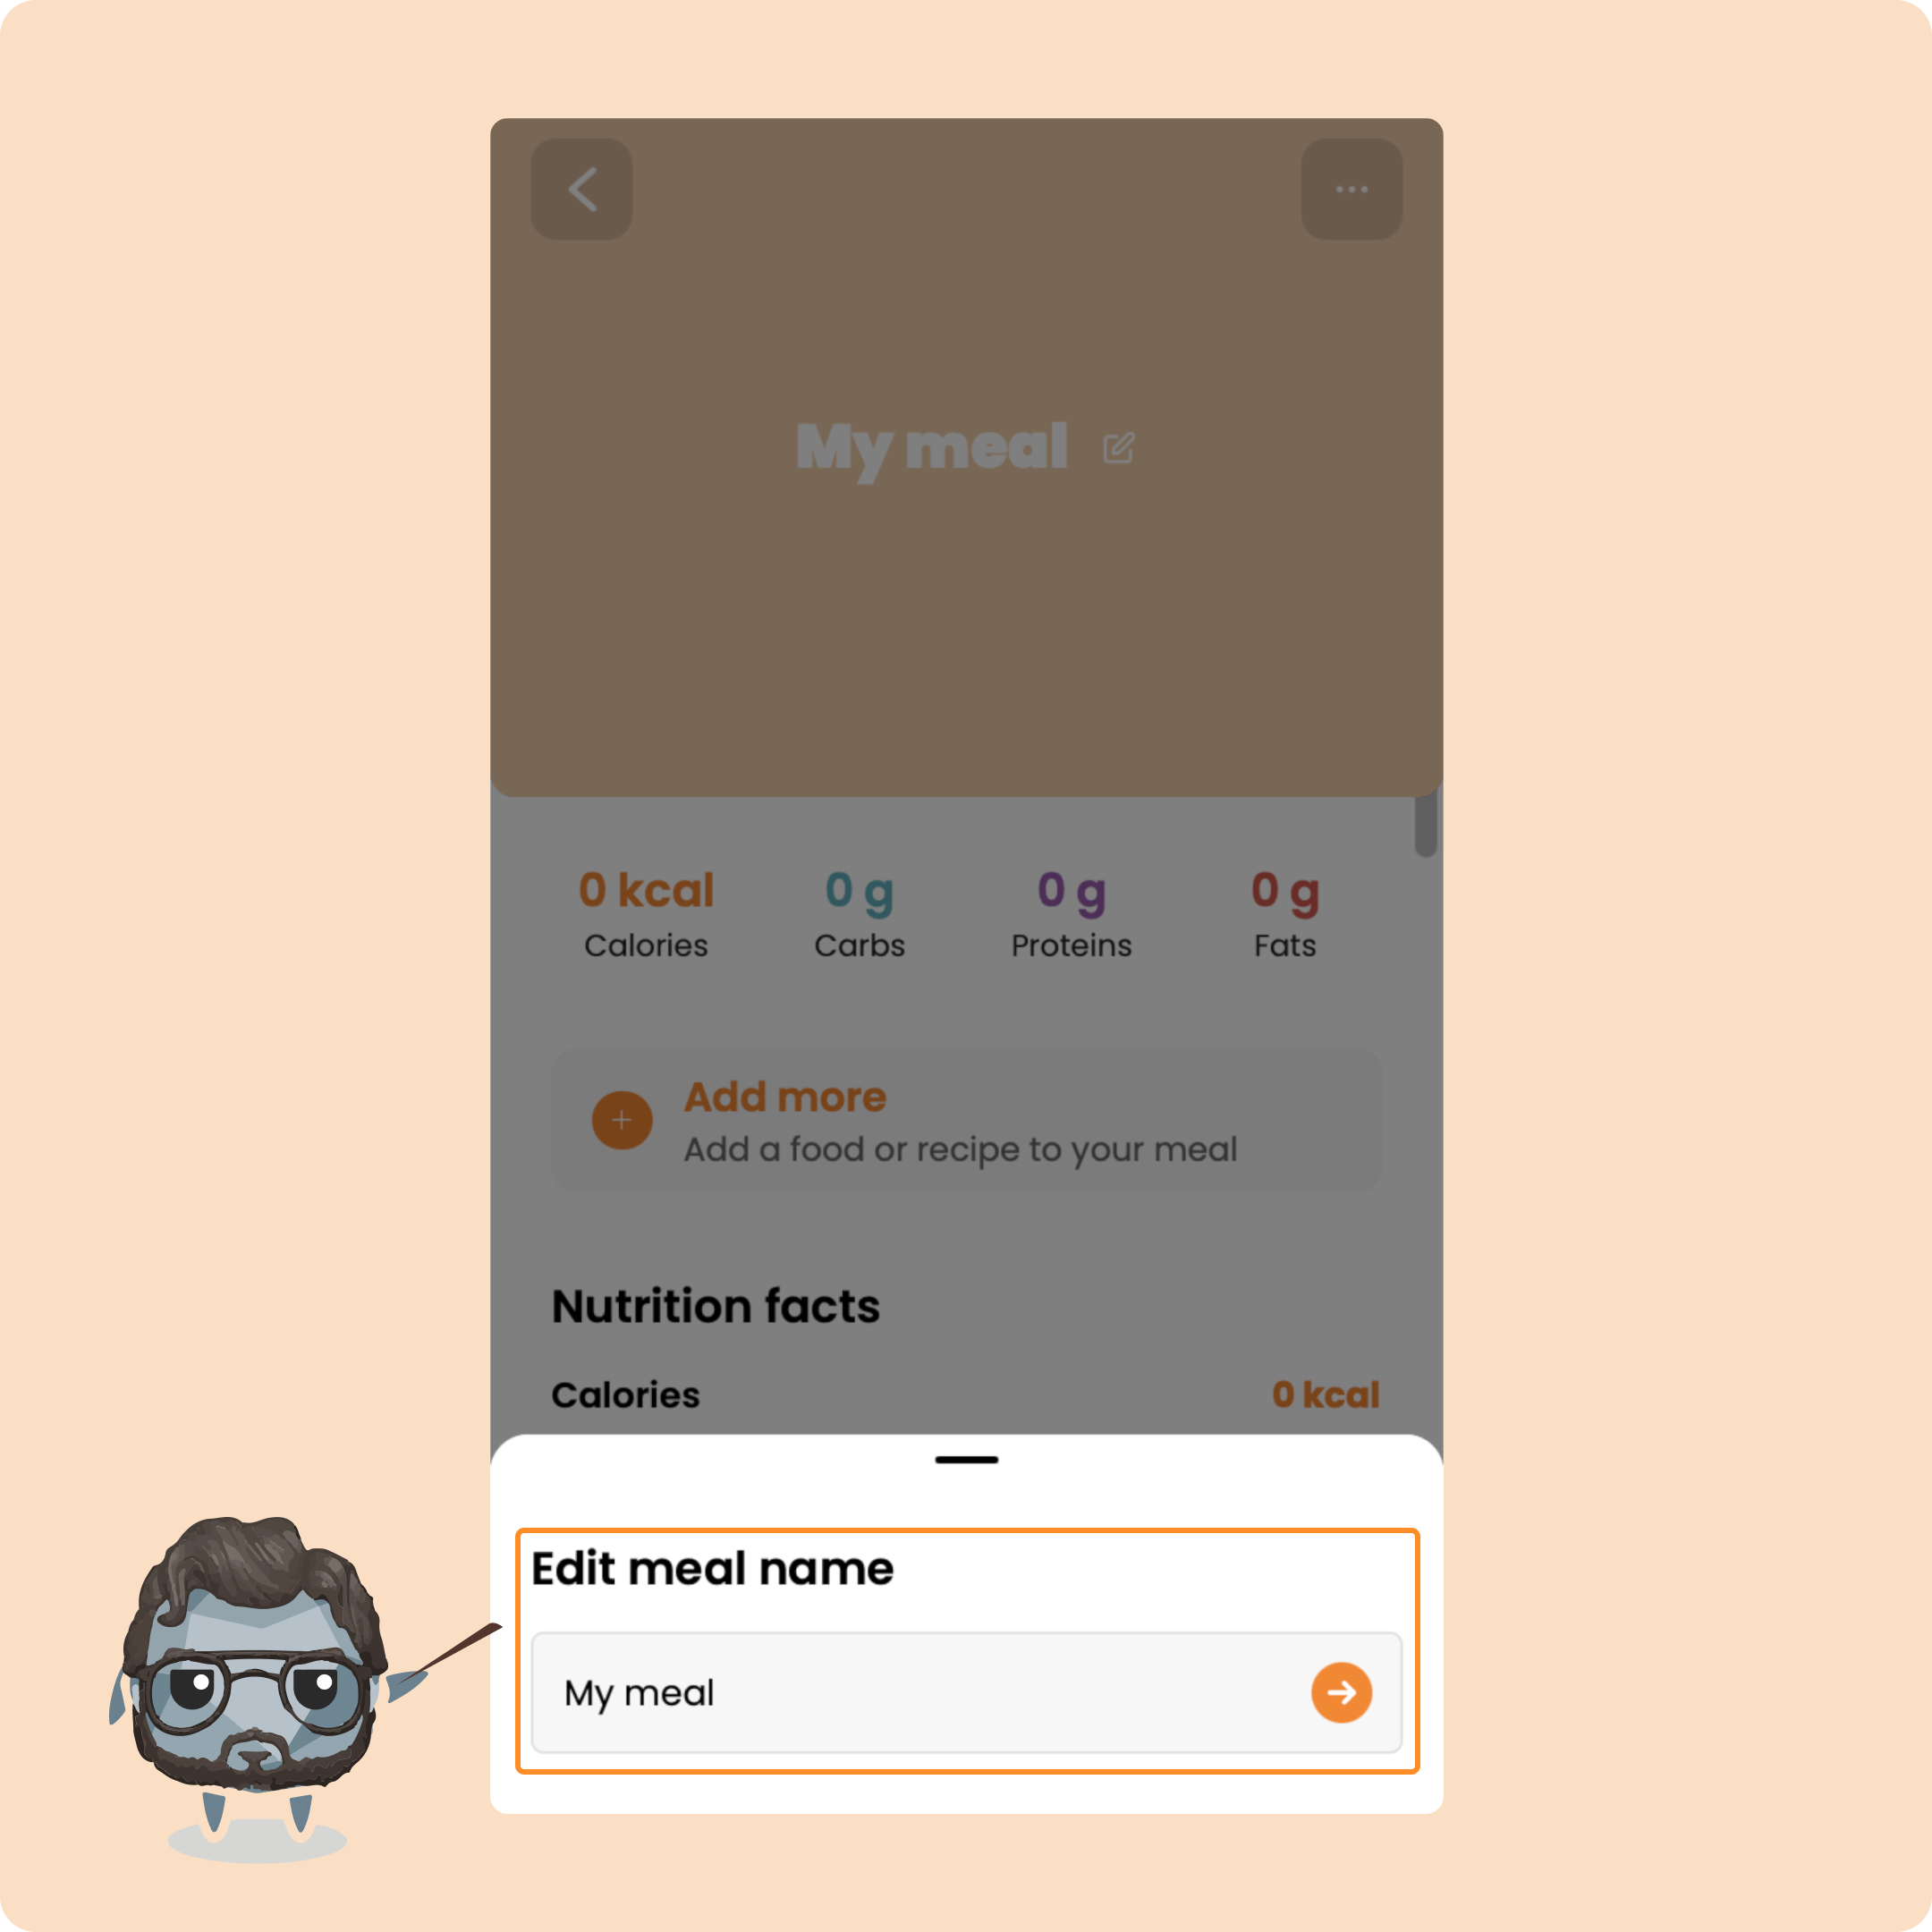
You can give a name to your meal by clicking on "My meal" and modifying what is written.
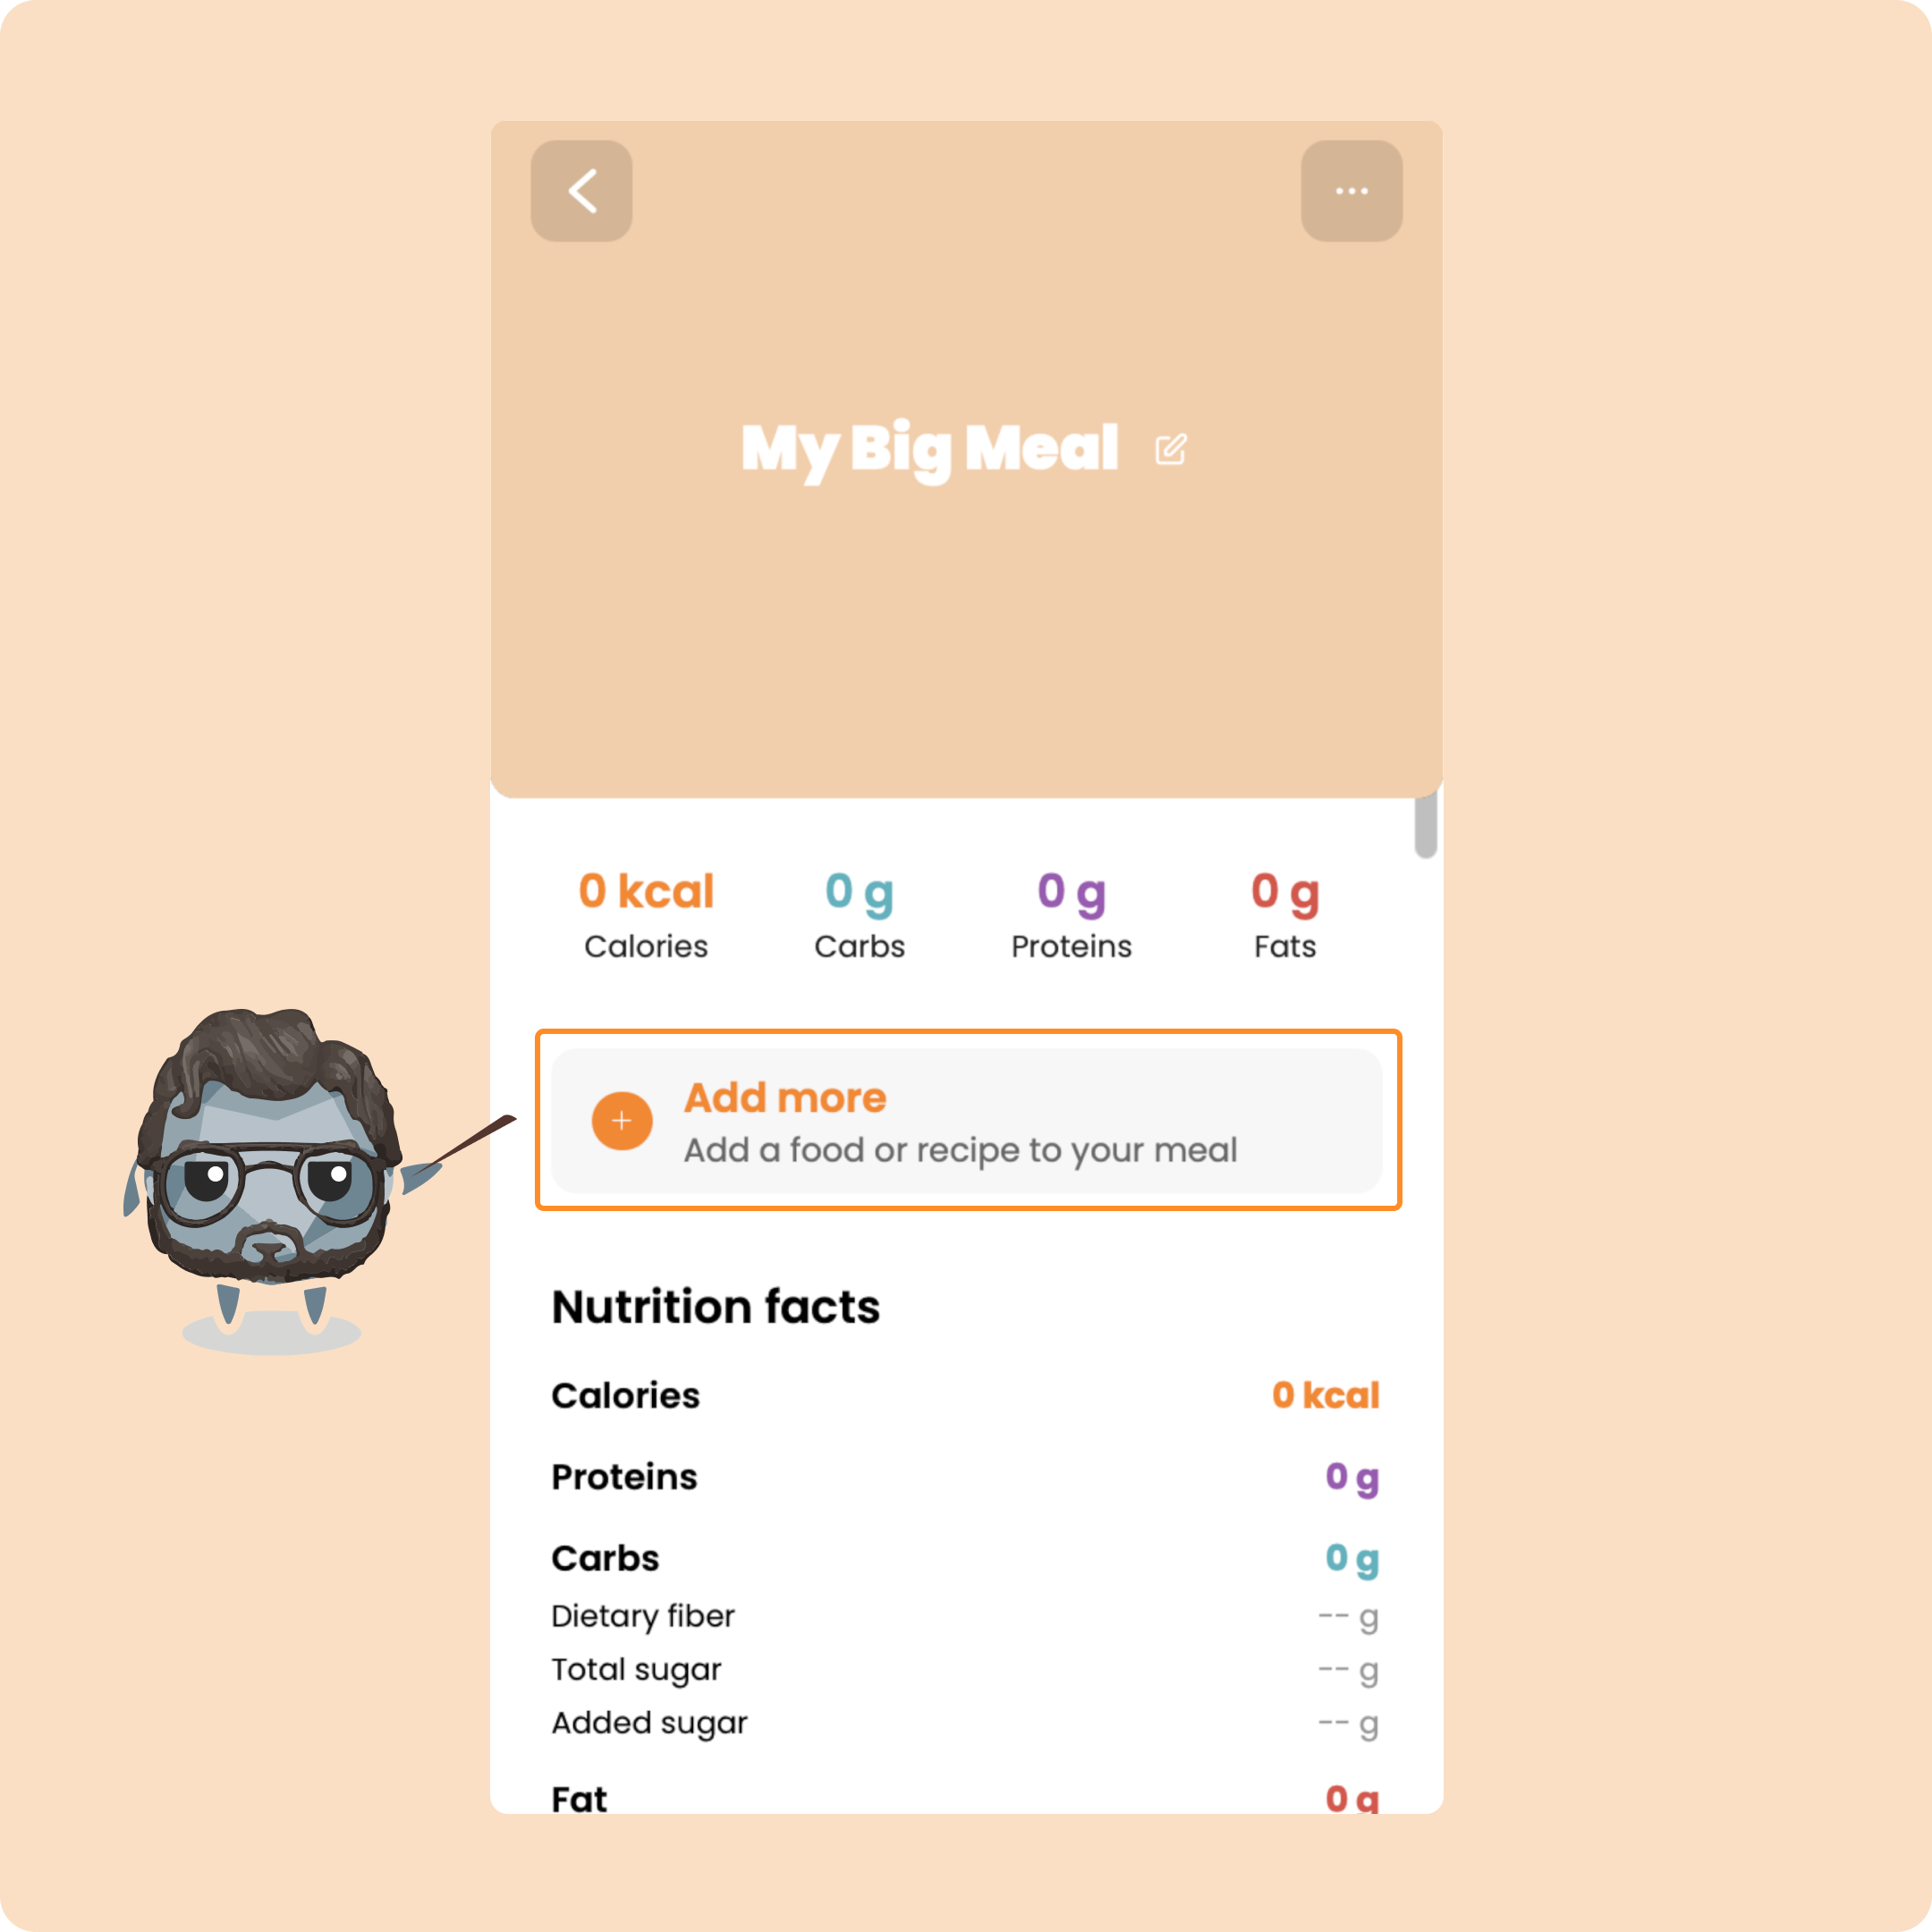
Next, you will be able to add the different foods, products, meals, or recipes to this personalized meal template.
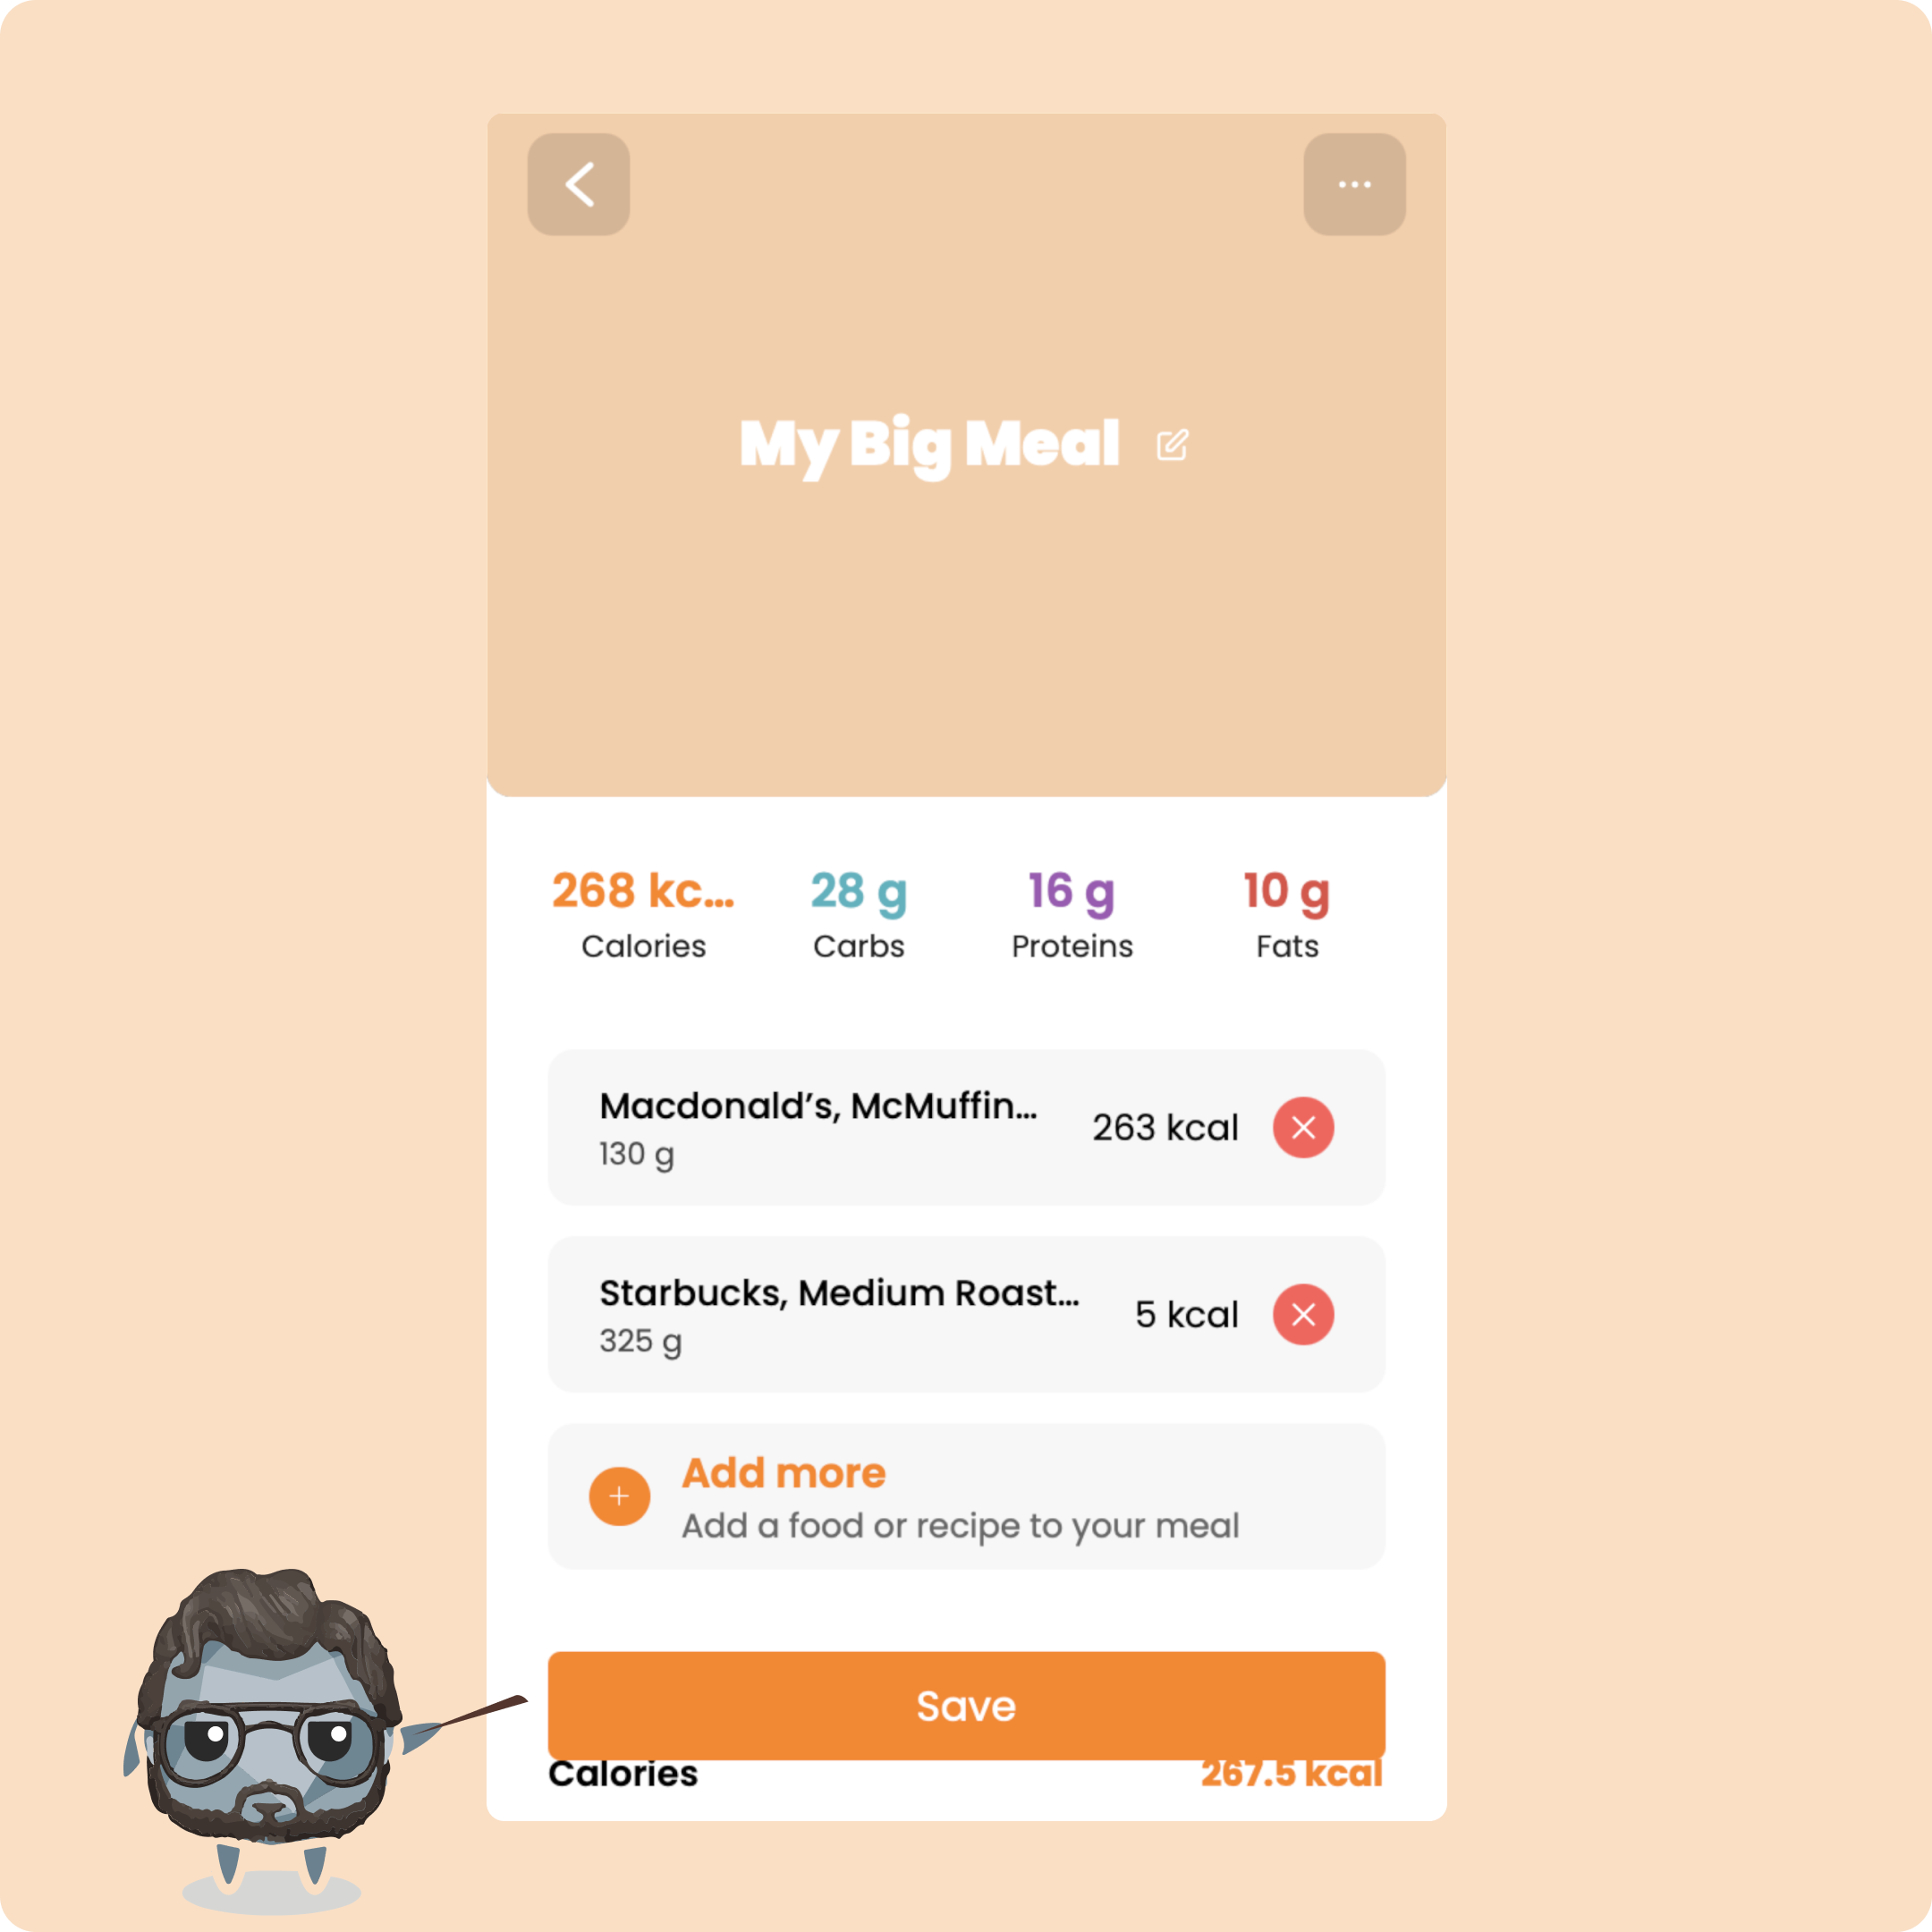
Once you have added the different foods, all you have to do is save it by clicking on the button of the same name.
You will then find the meal in the "Saved" category
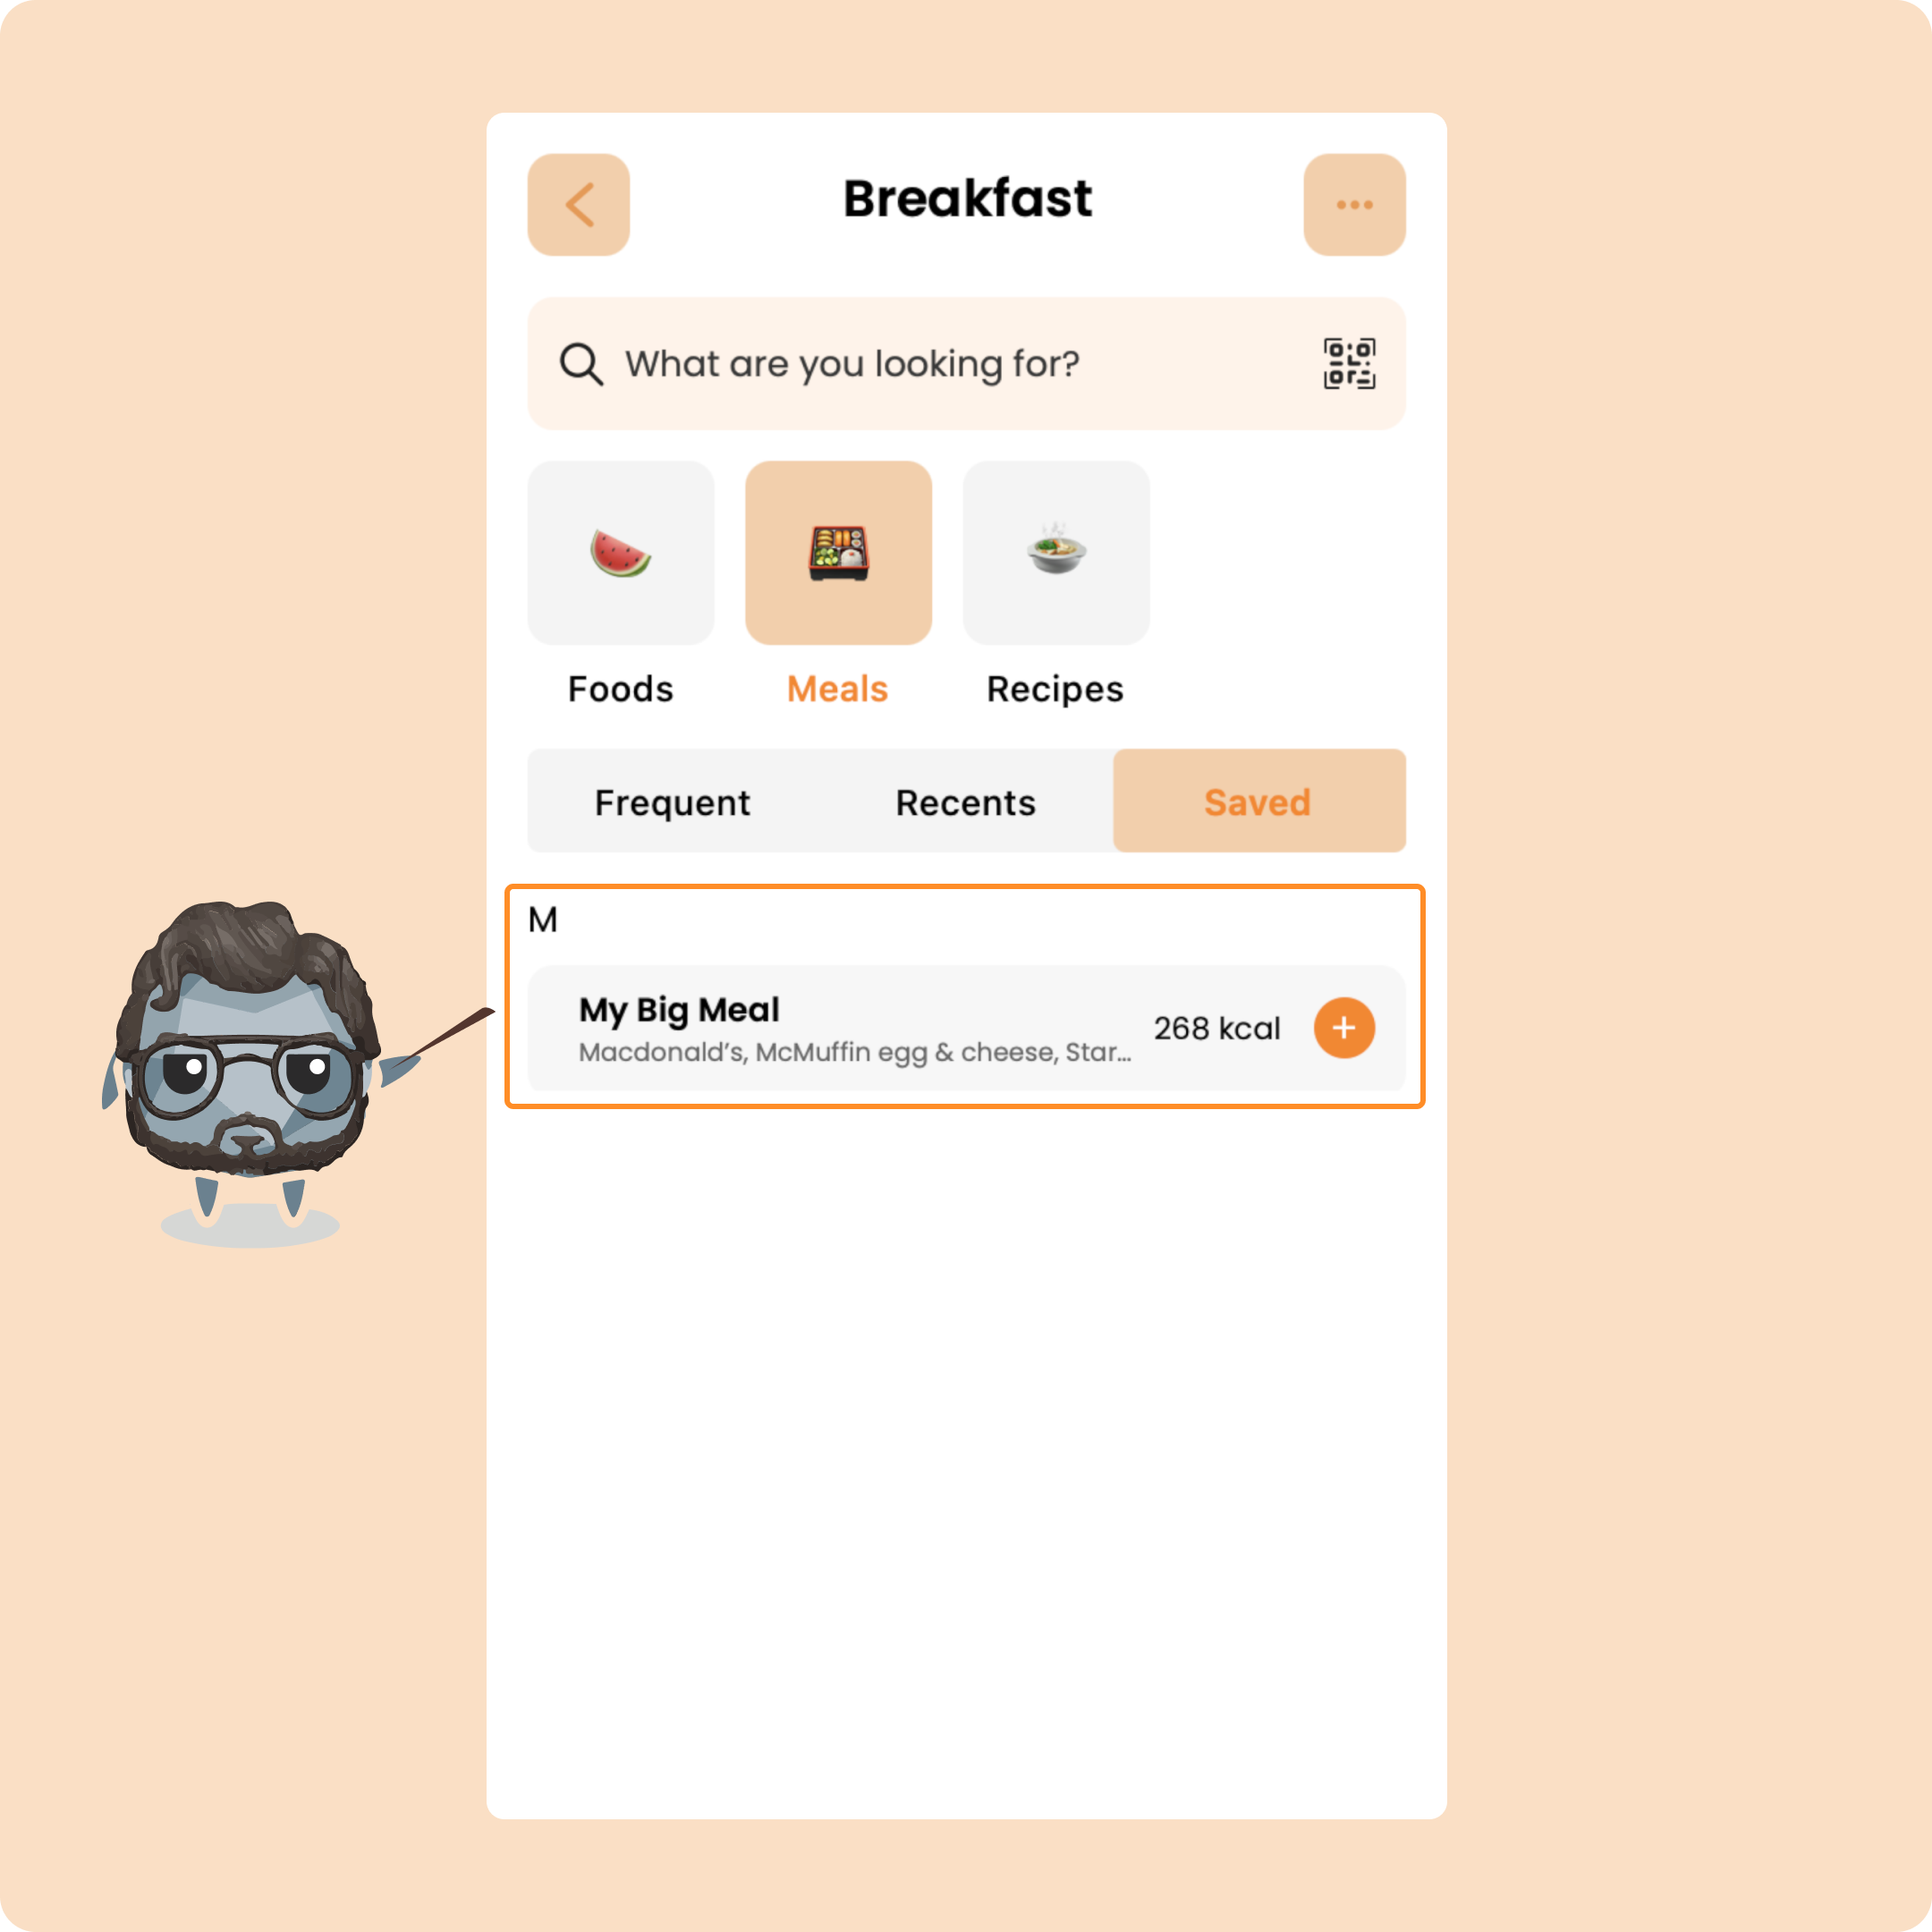
To add it to your current meal, you will just need to click on it, validate the foods that you consume, and confirm the number.
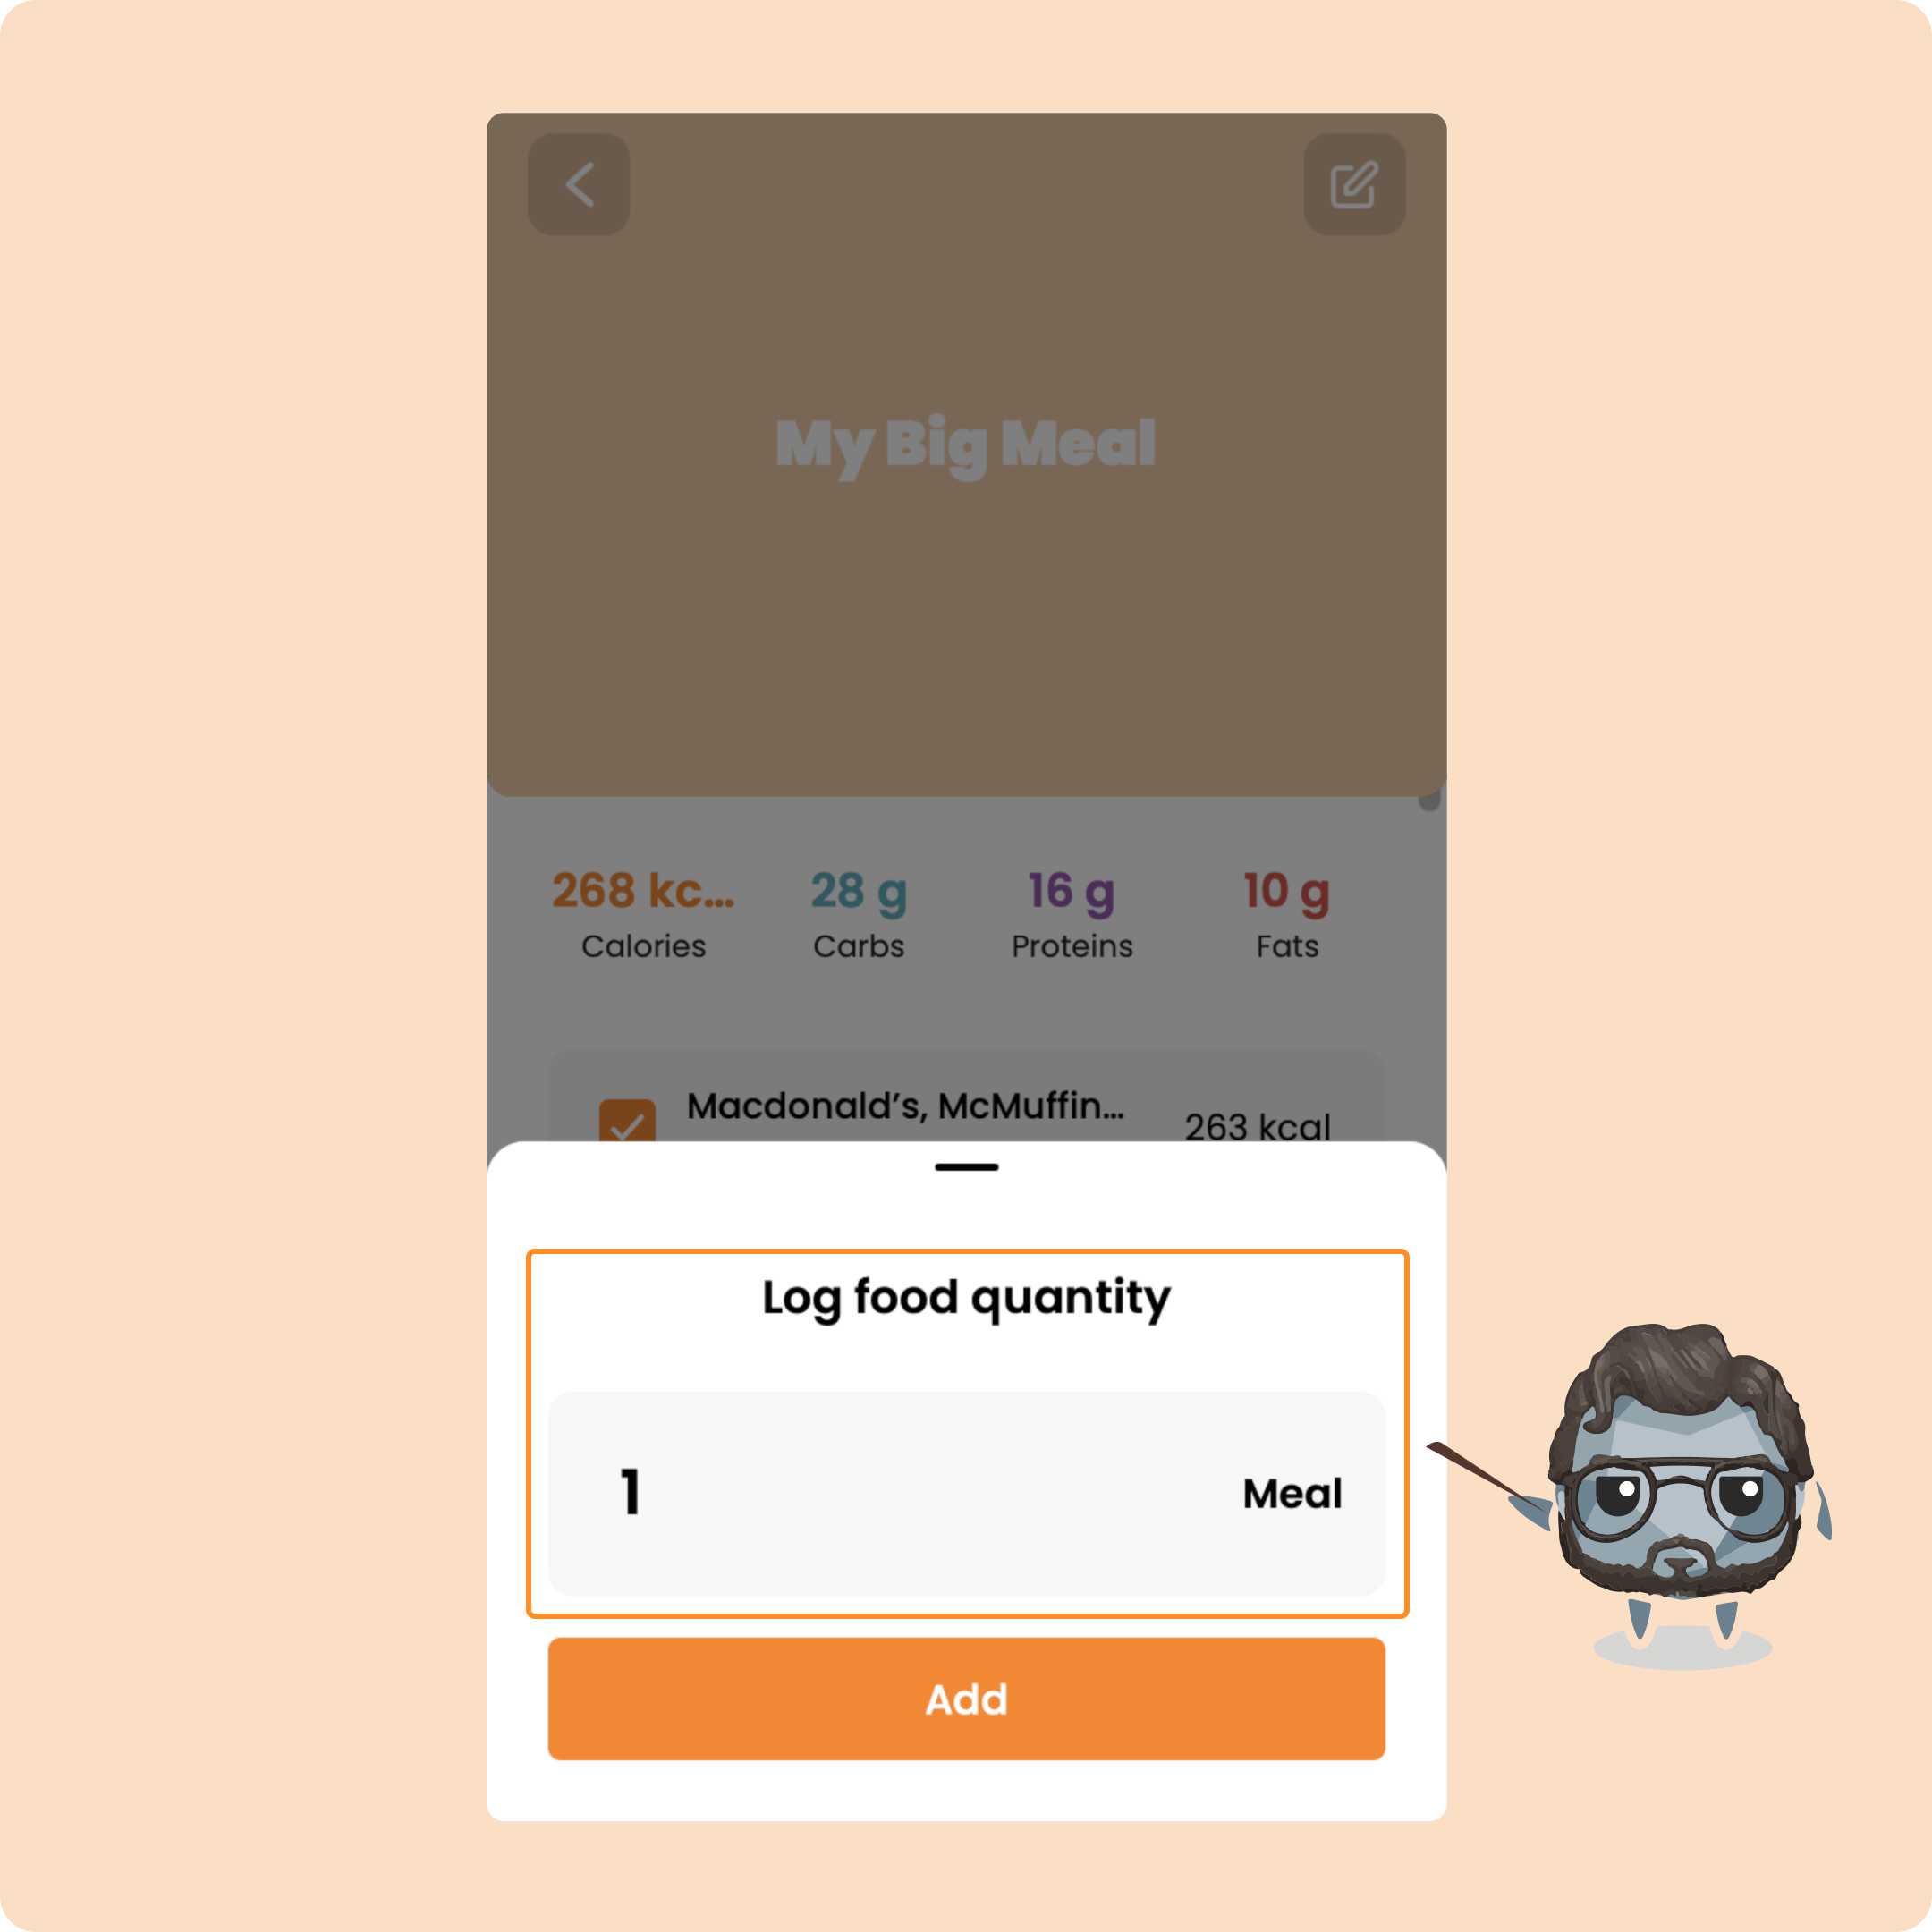
You will then find the foods from the meal in the list of items to add to the meal that you are in the process of logging.
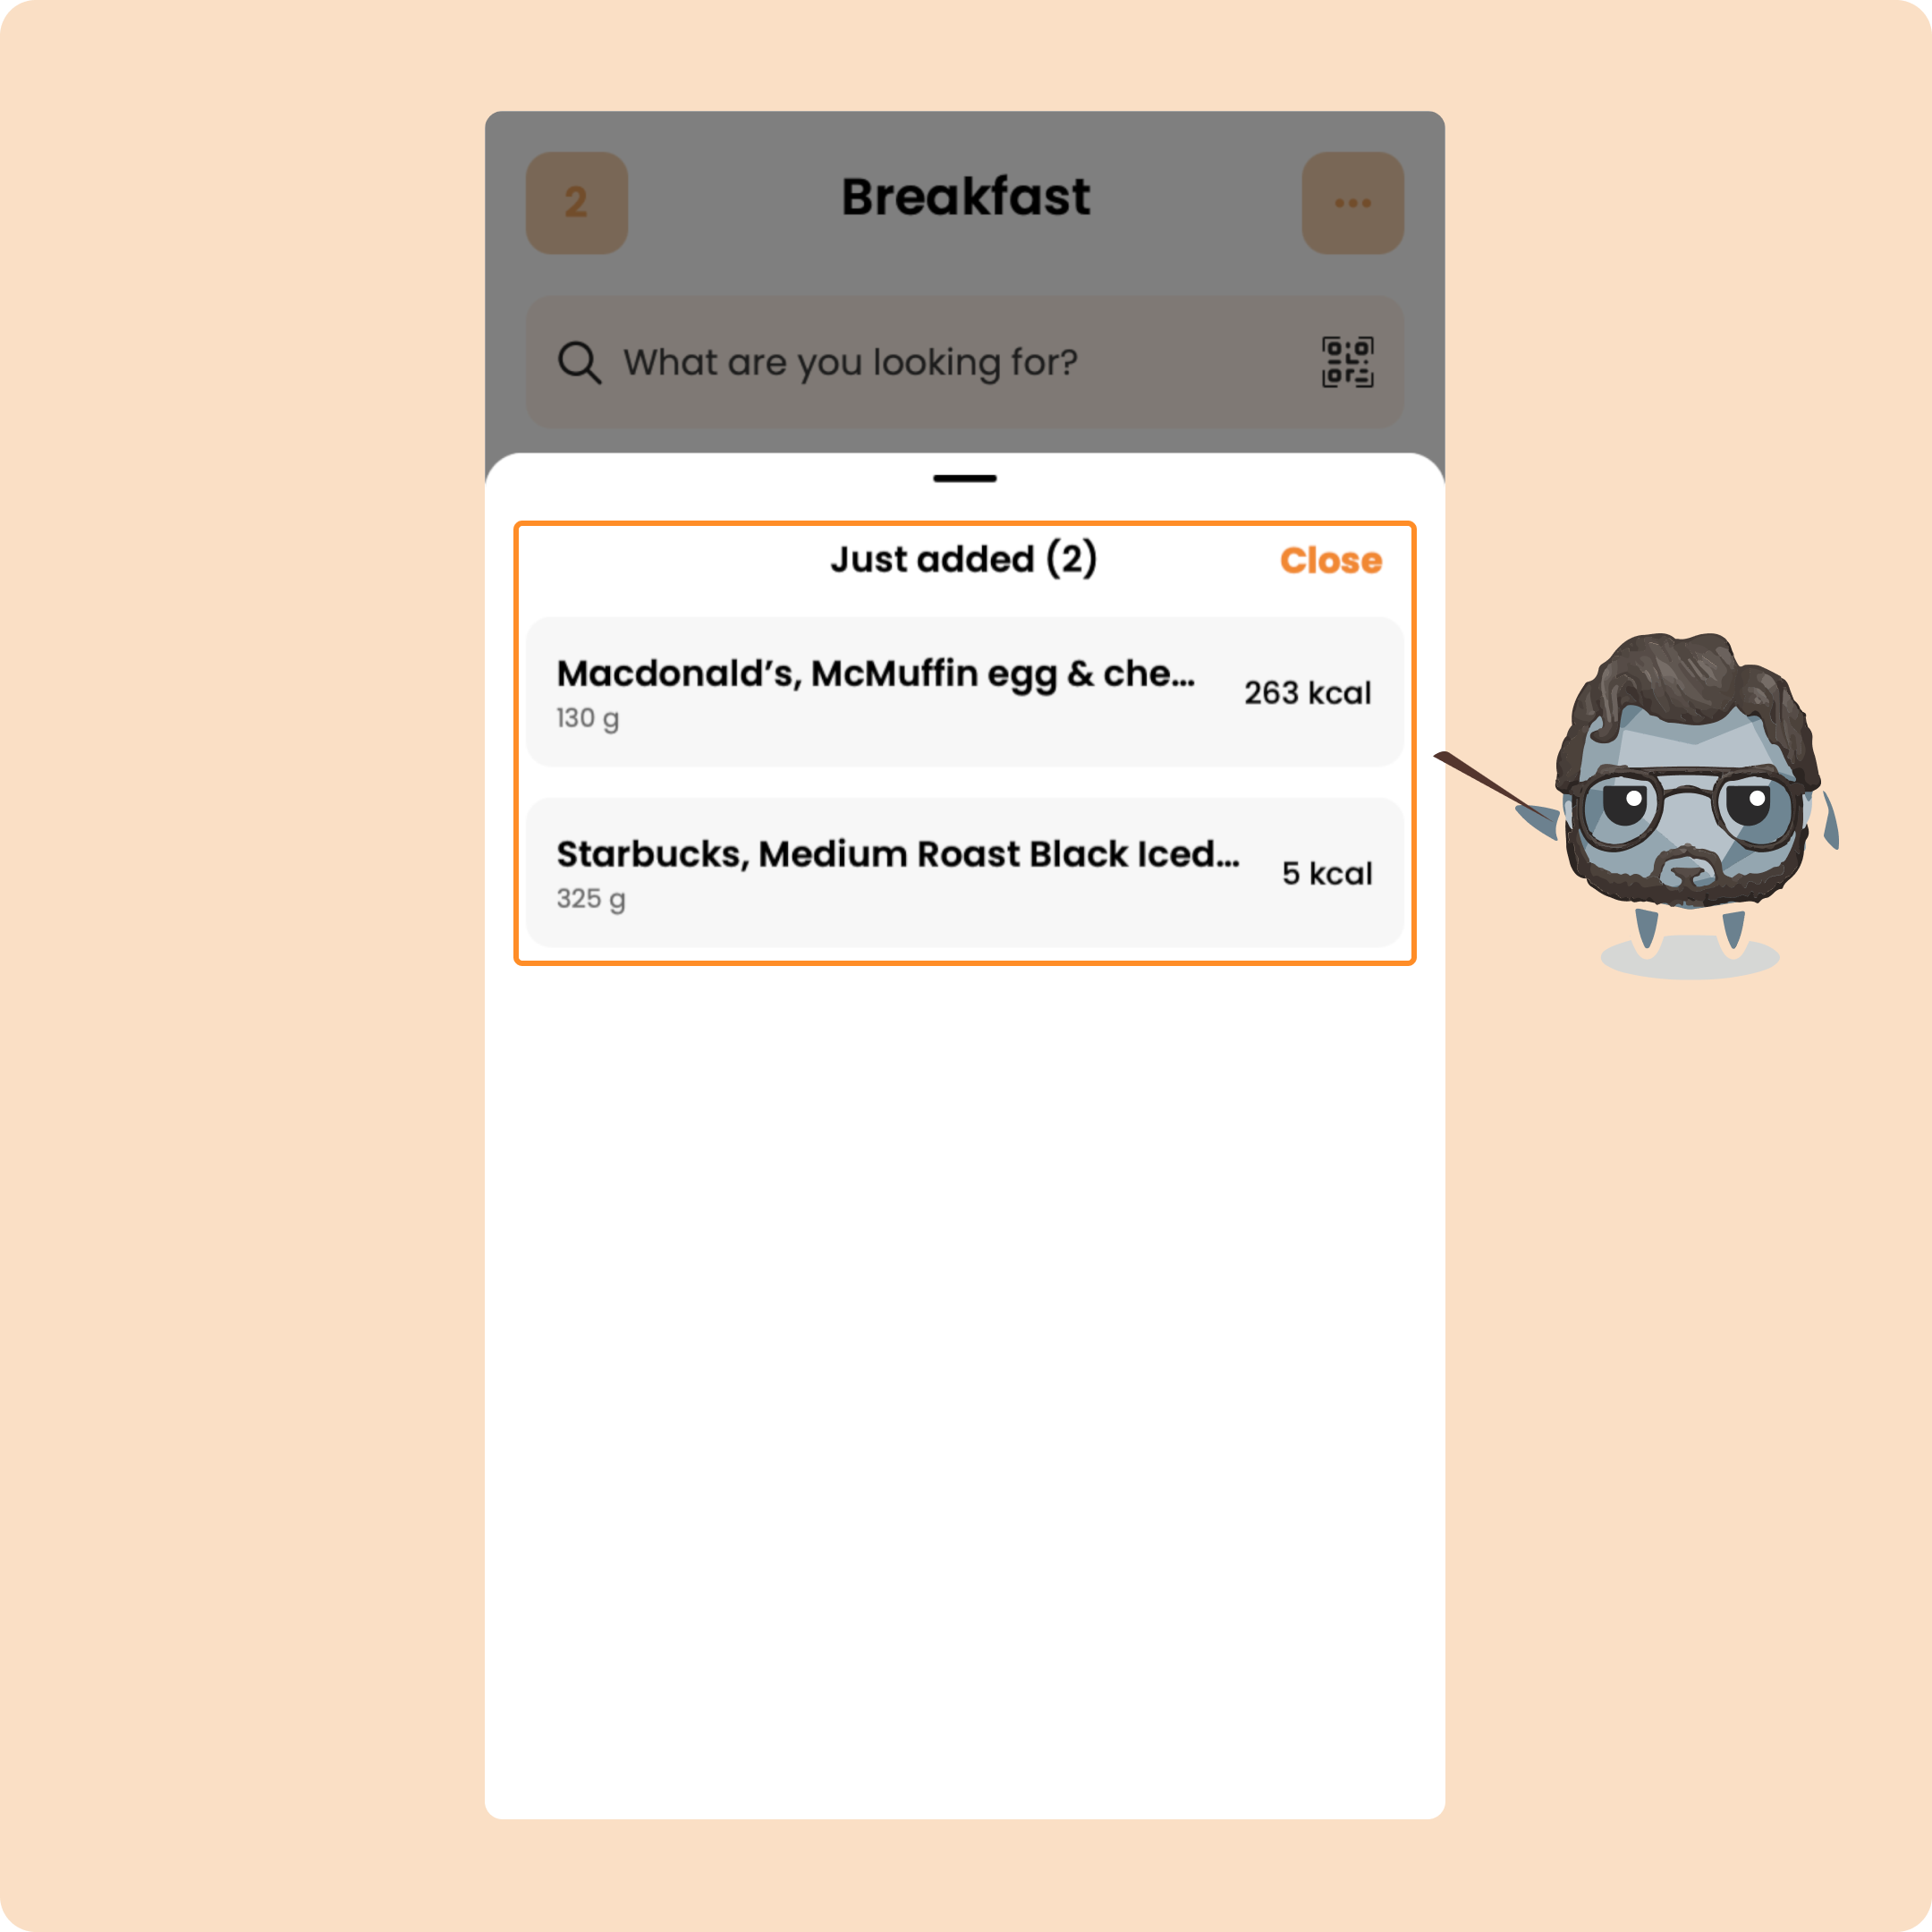
You will find these same foods in the "What you ate" category
Log a meal with the Custom Entry
On Gymkee, you can also log a meal or something that you have consumed without having to go search for the food.
This is to be used when you eat at a restaurant or when you eat in a fast-food place, for example.
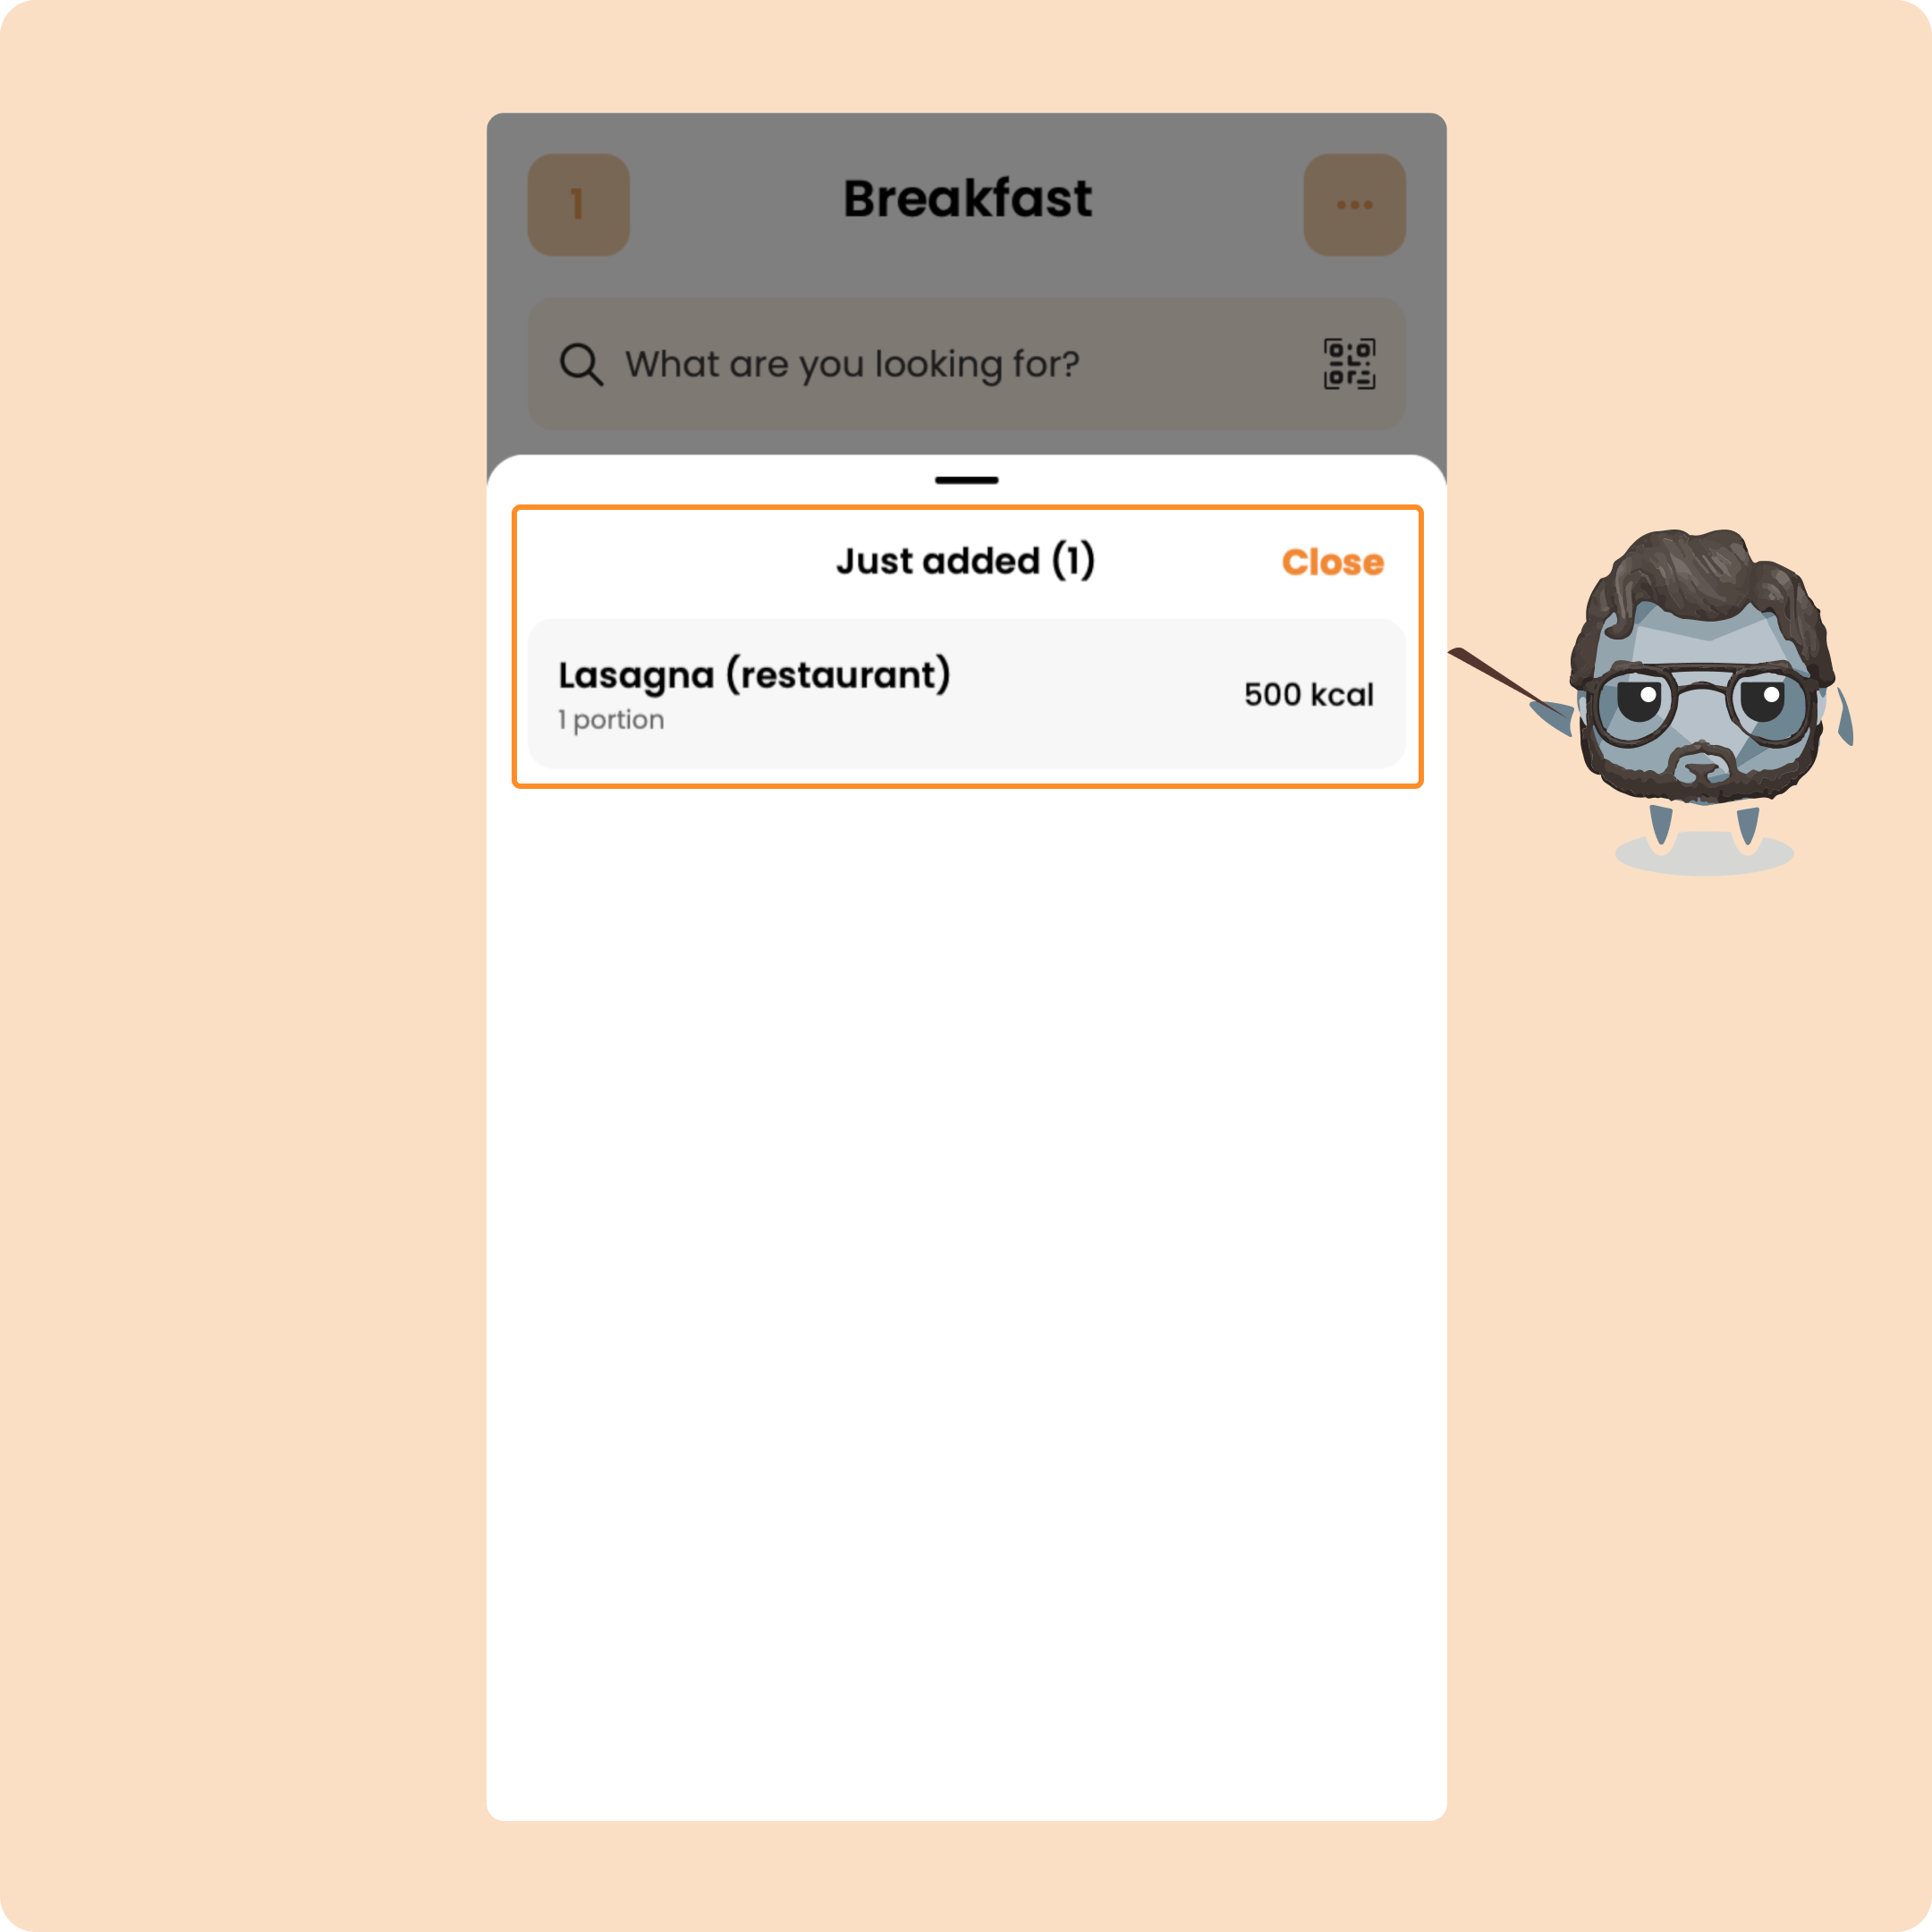
"Custom Entry" allows you to quickly log a meal or a food.
To access it, go to the quick actions menu (3 little dots at the top right) and click on "Custom Entry".
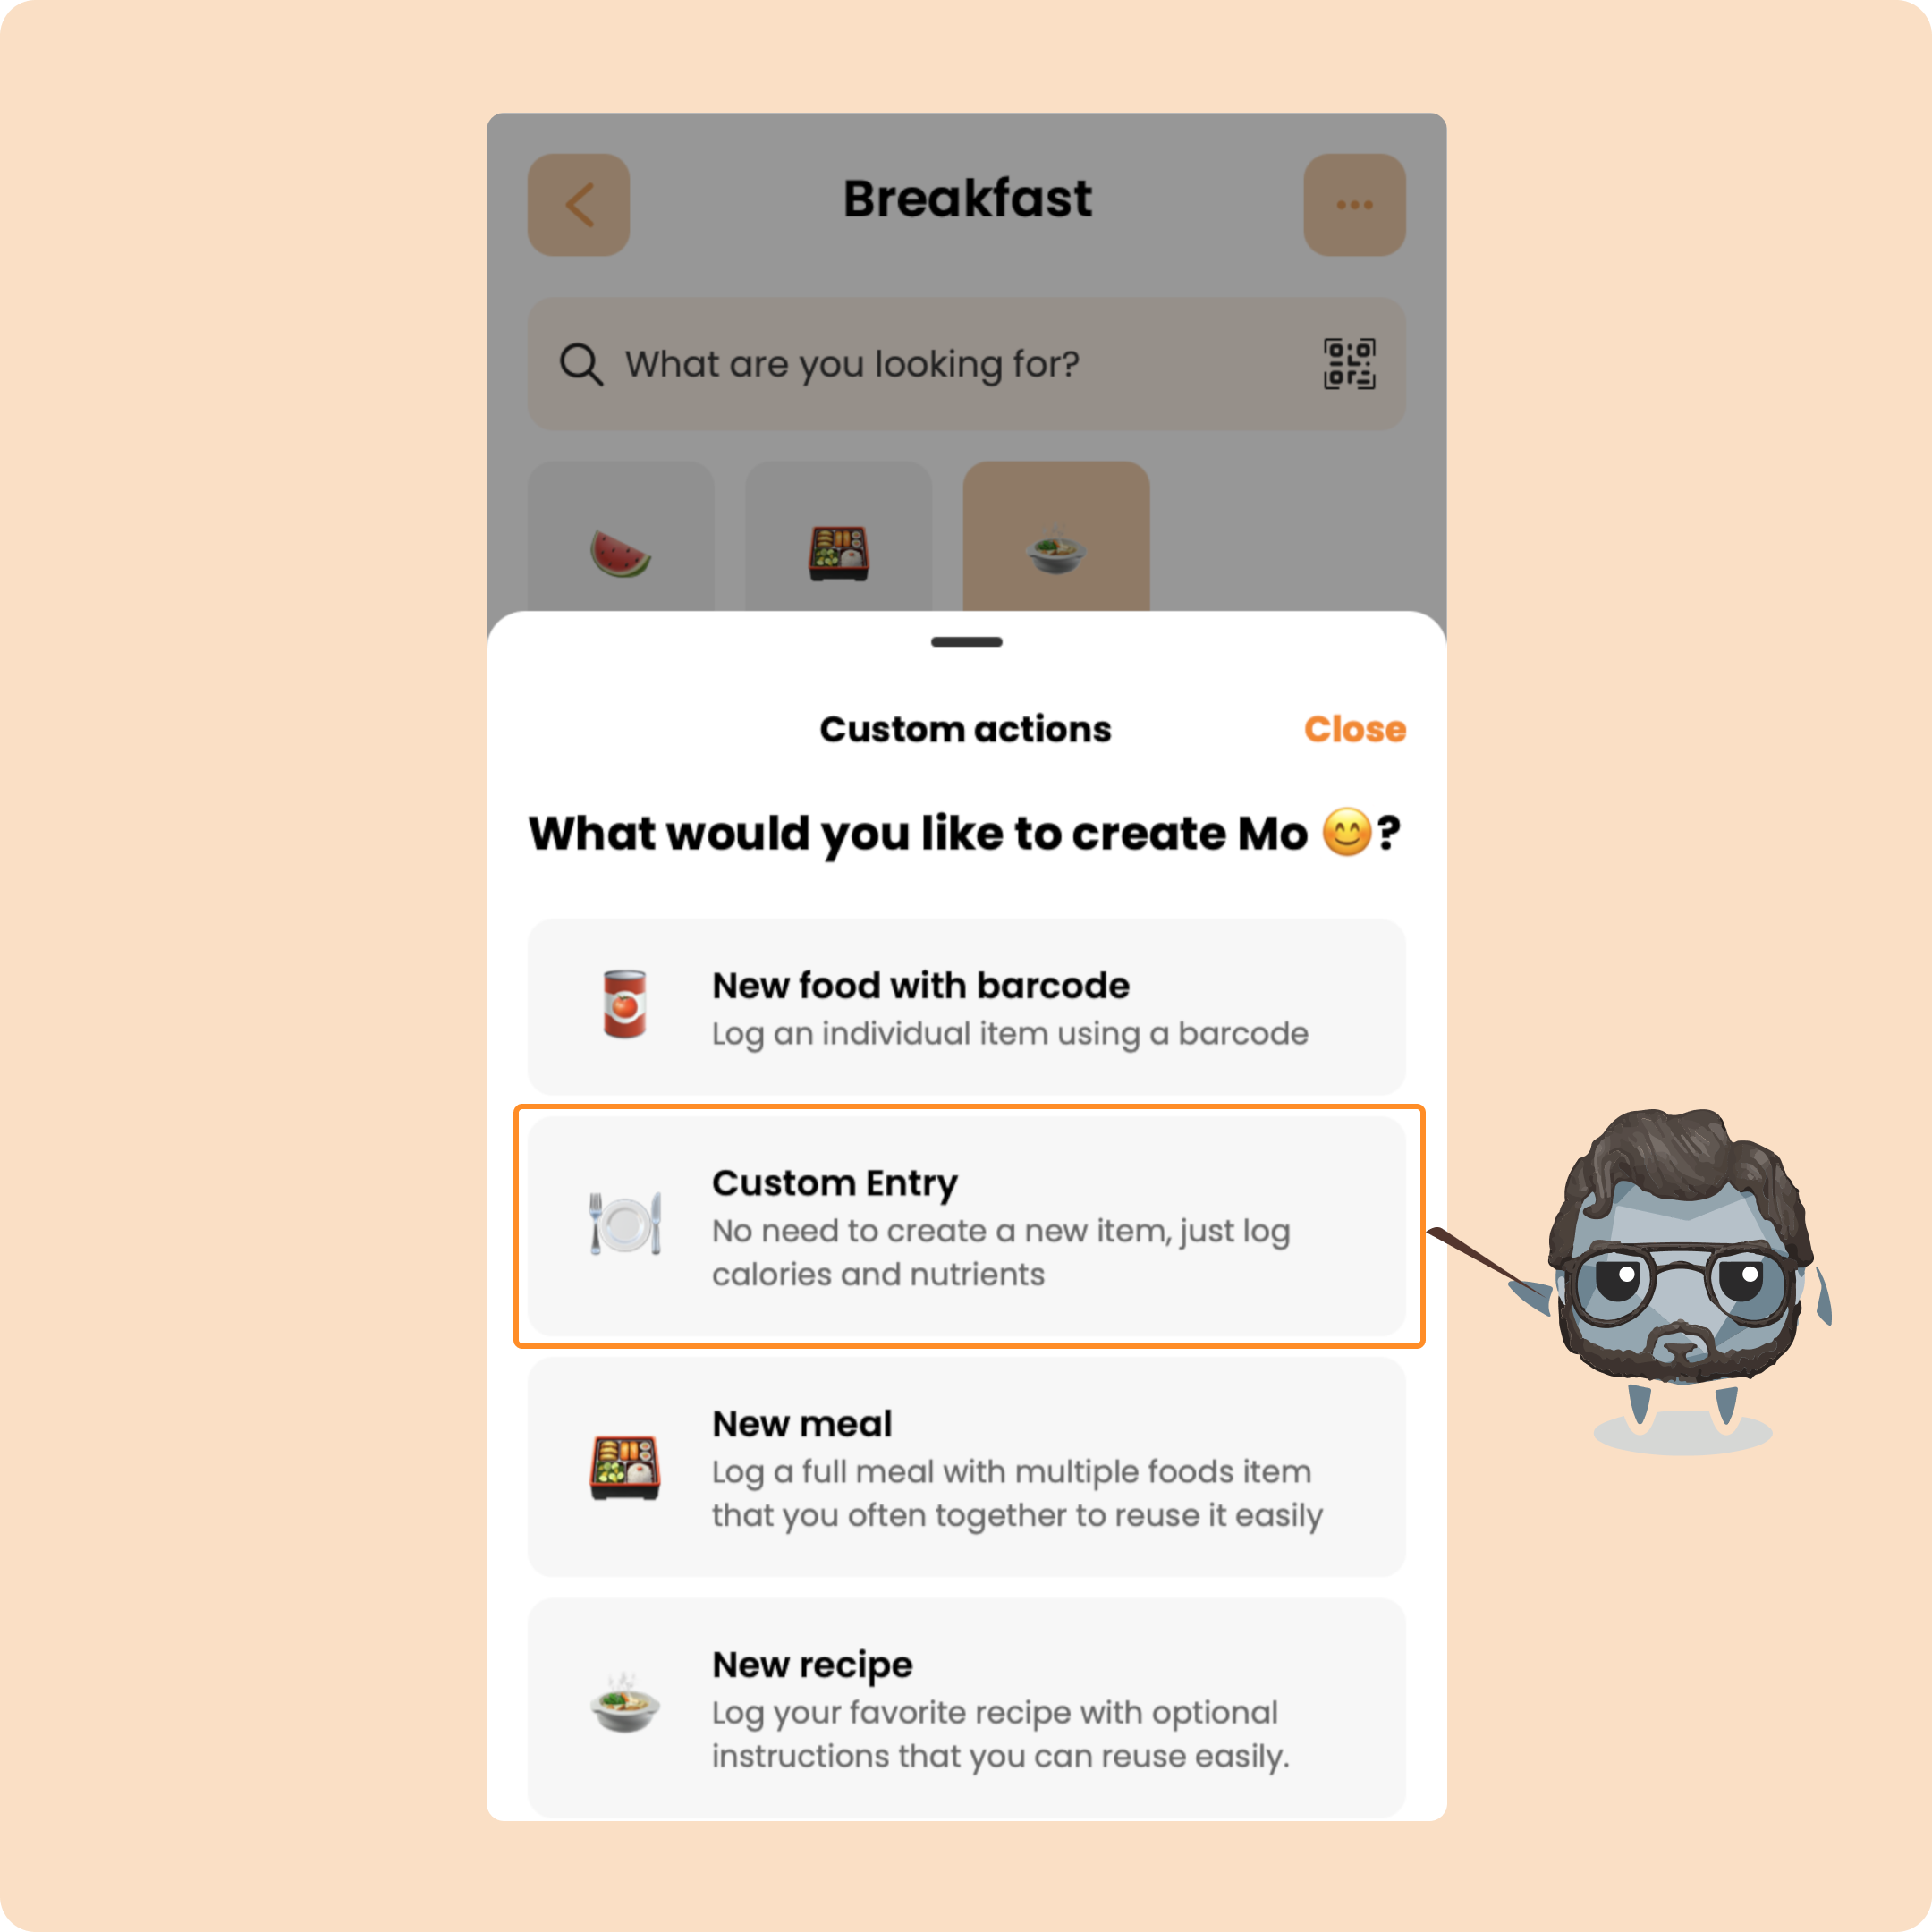
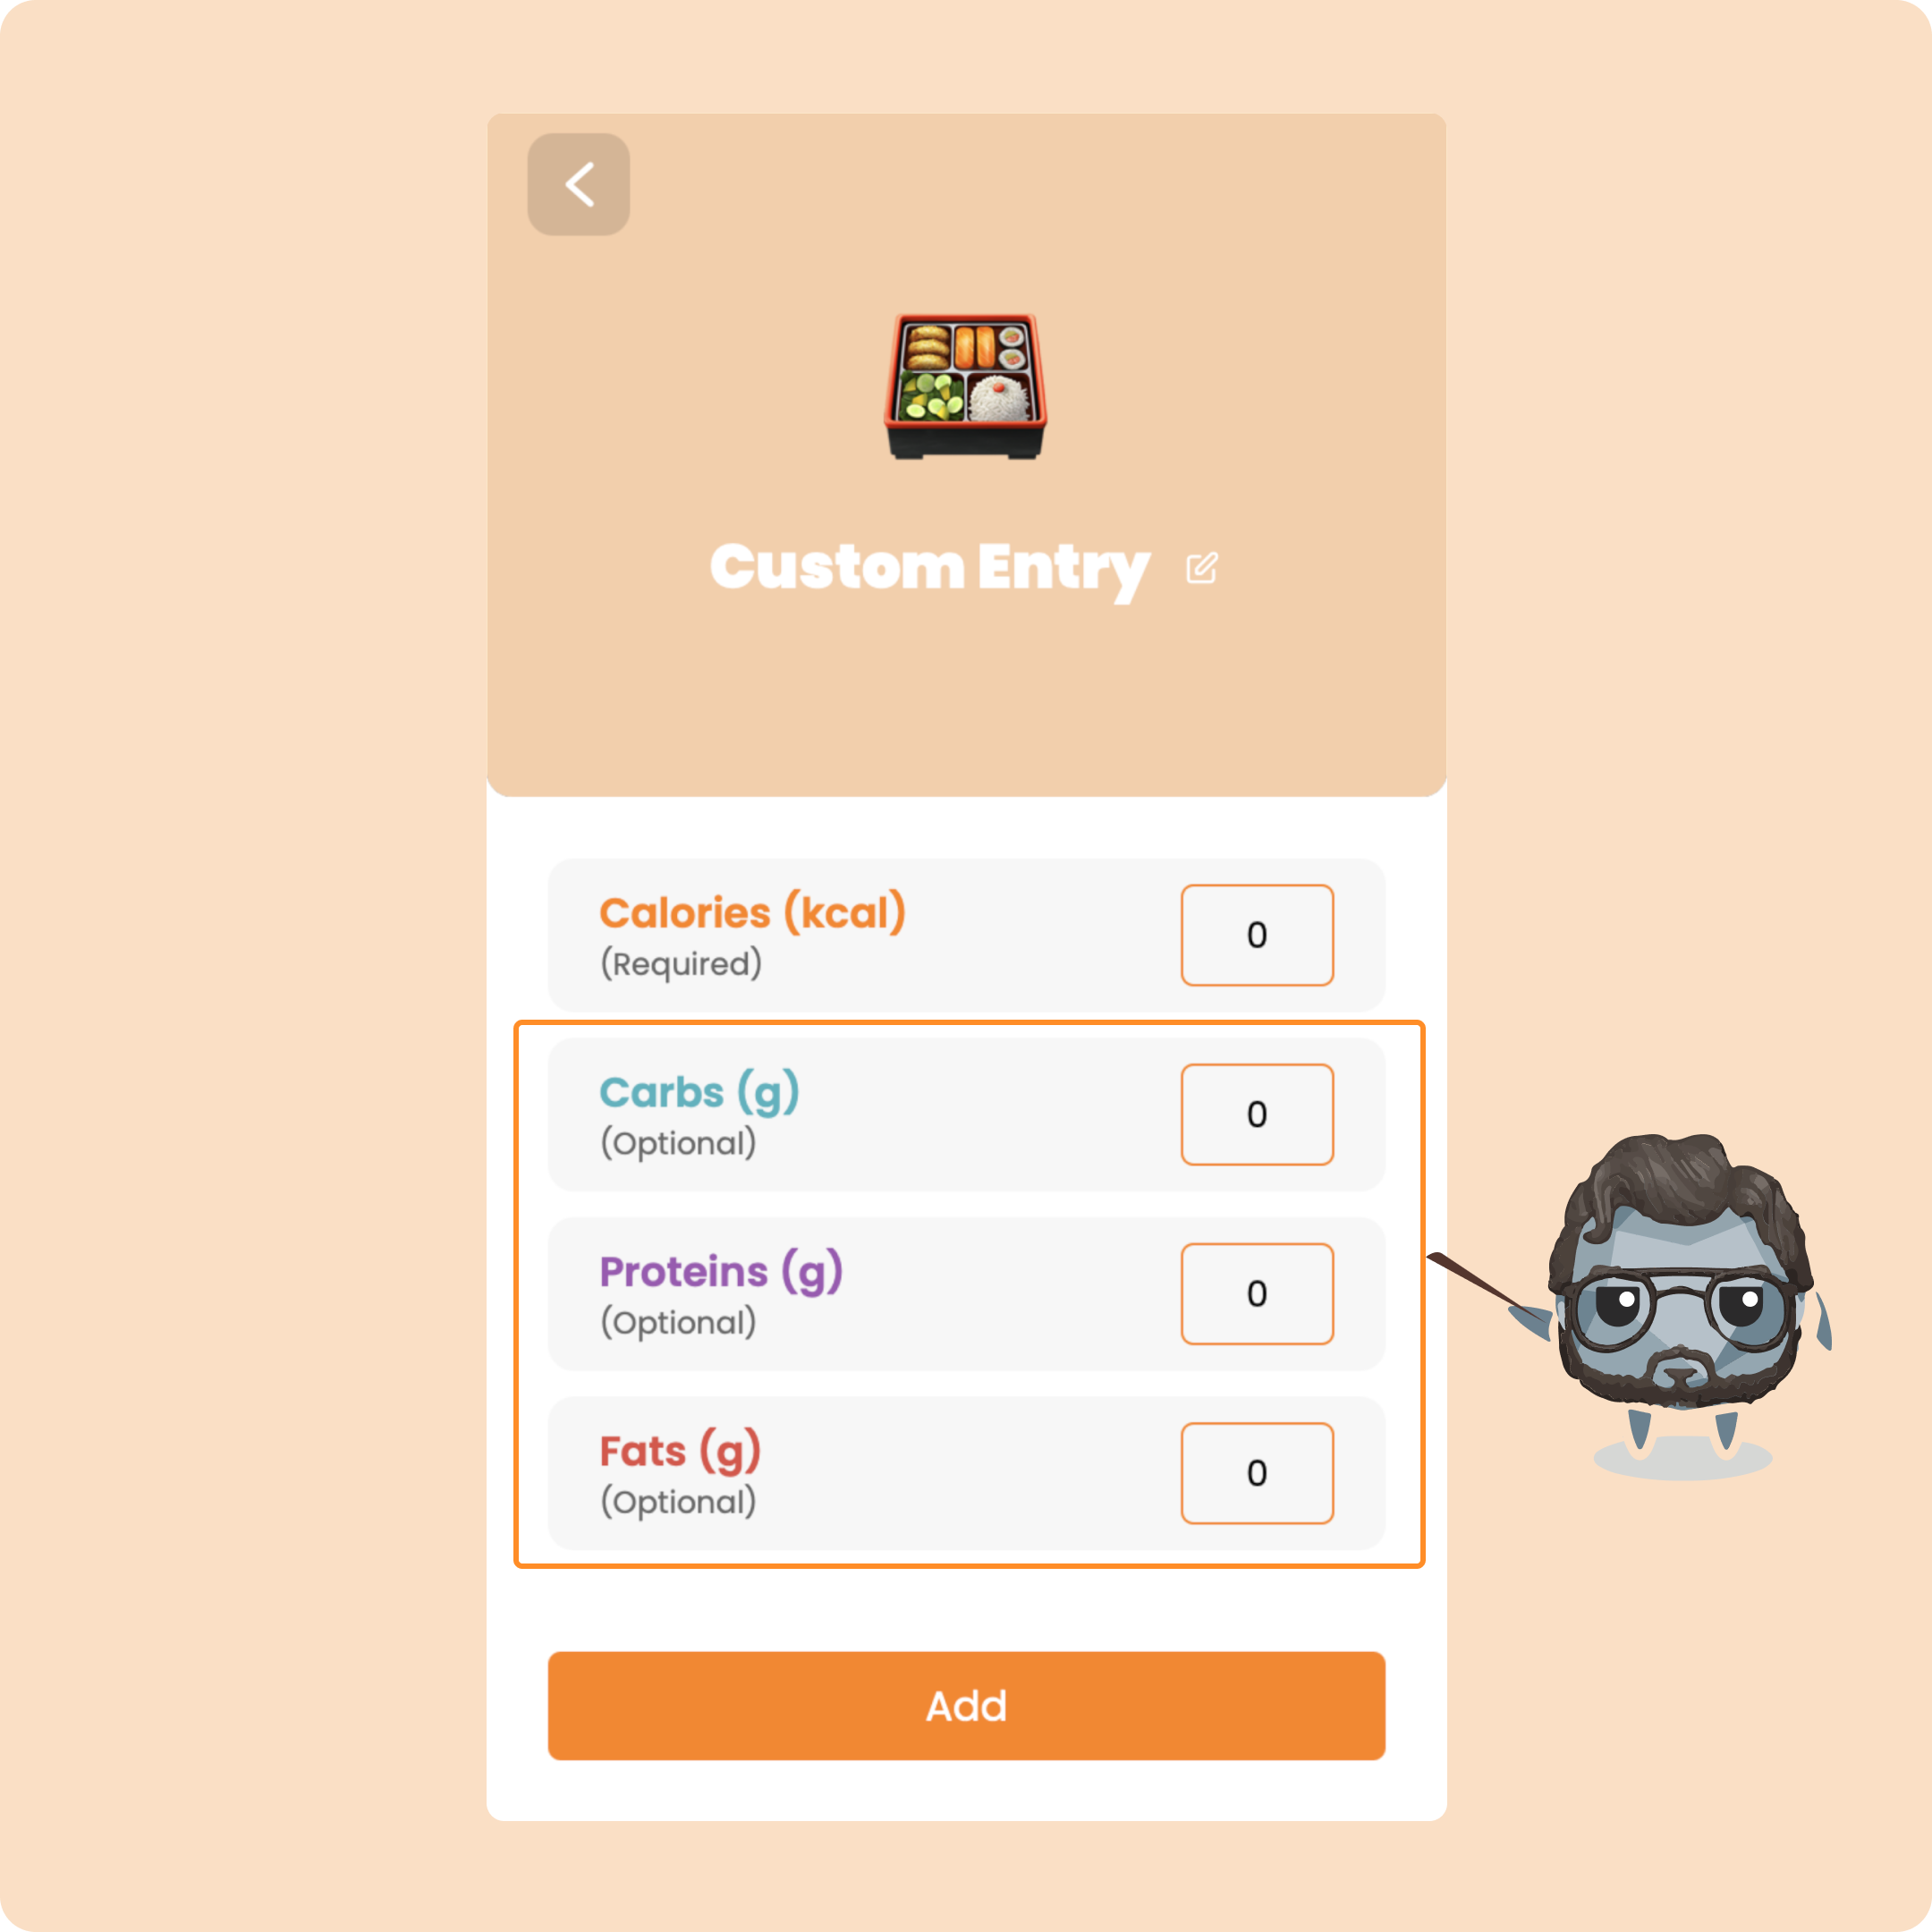
You will then just need to simply enter the requested elements
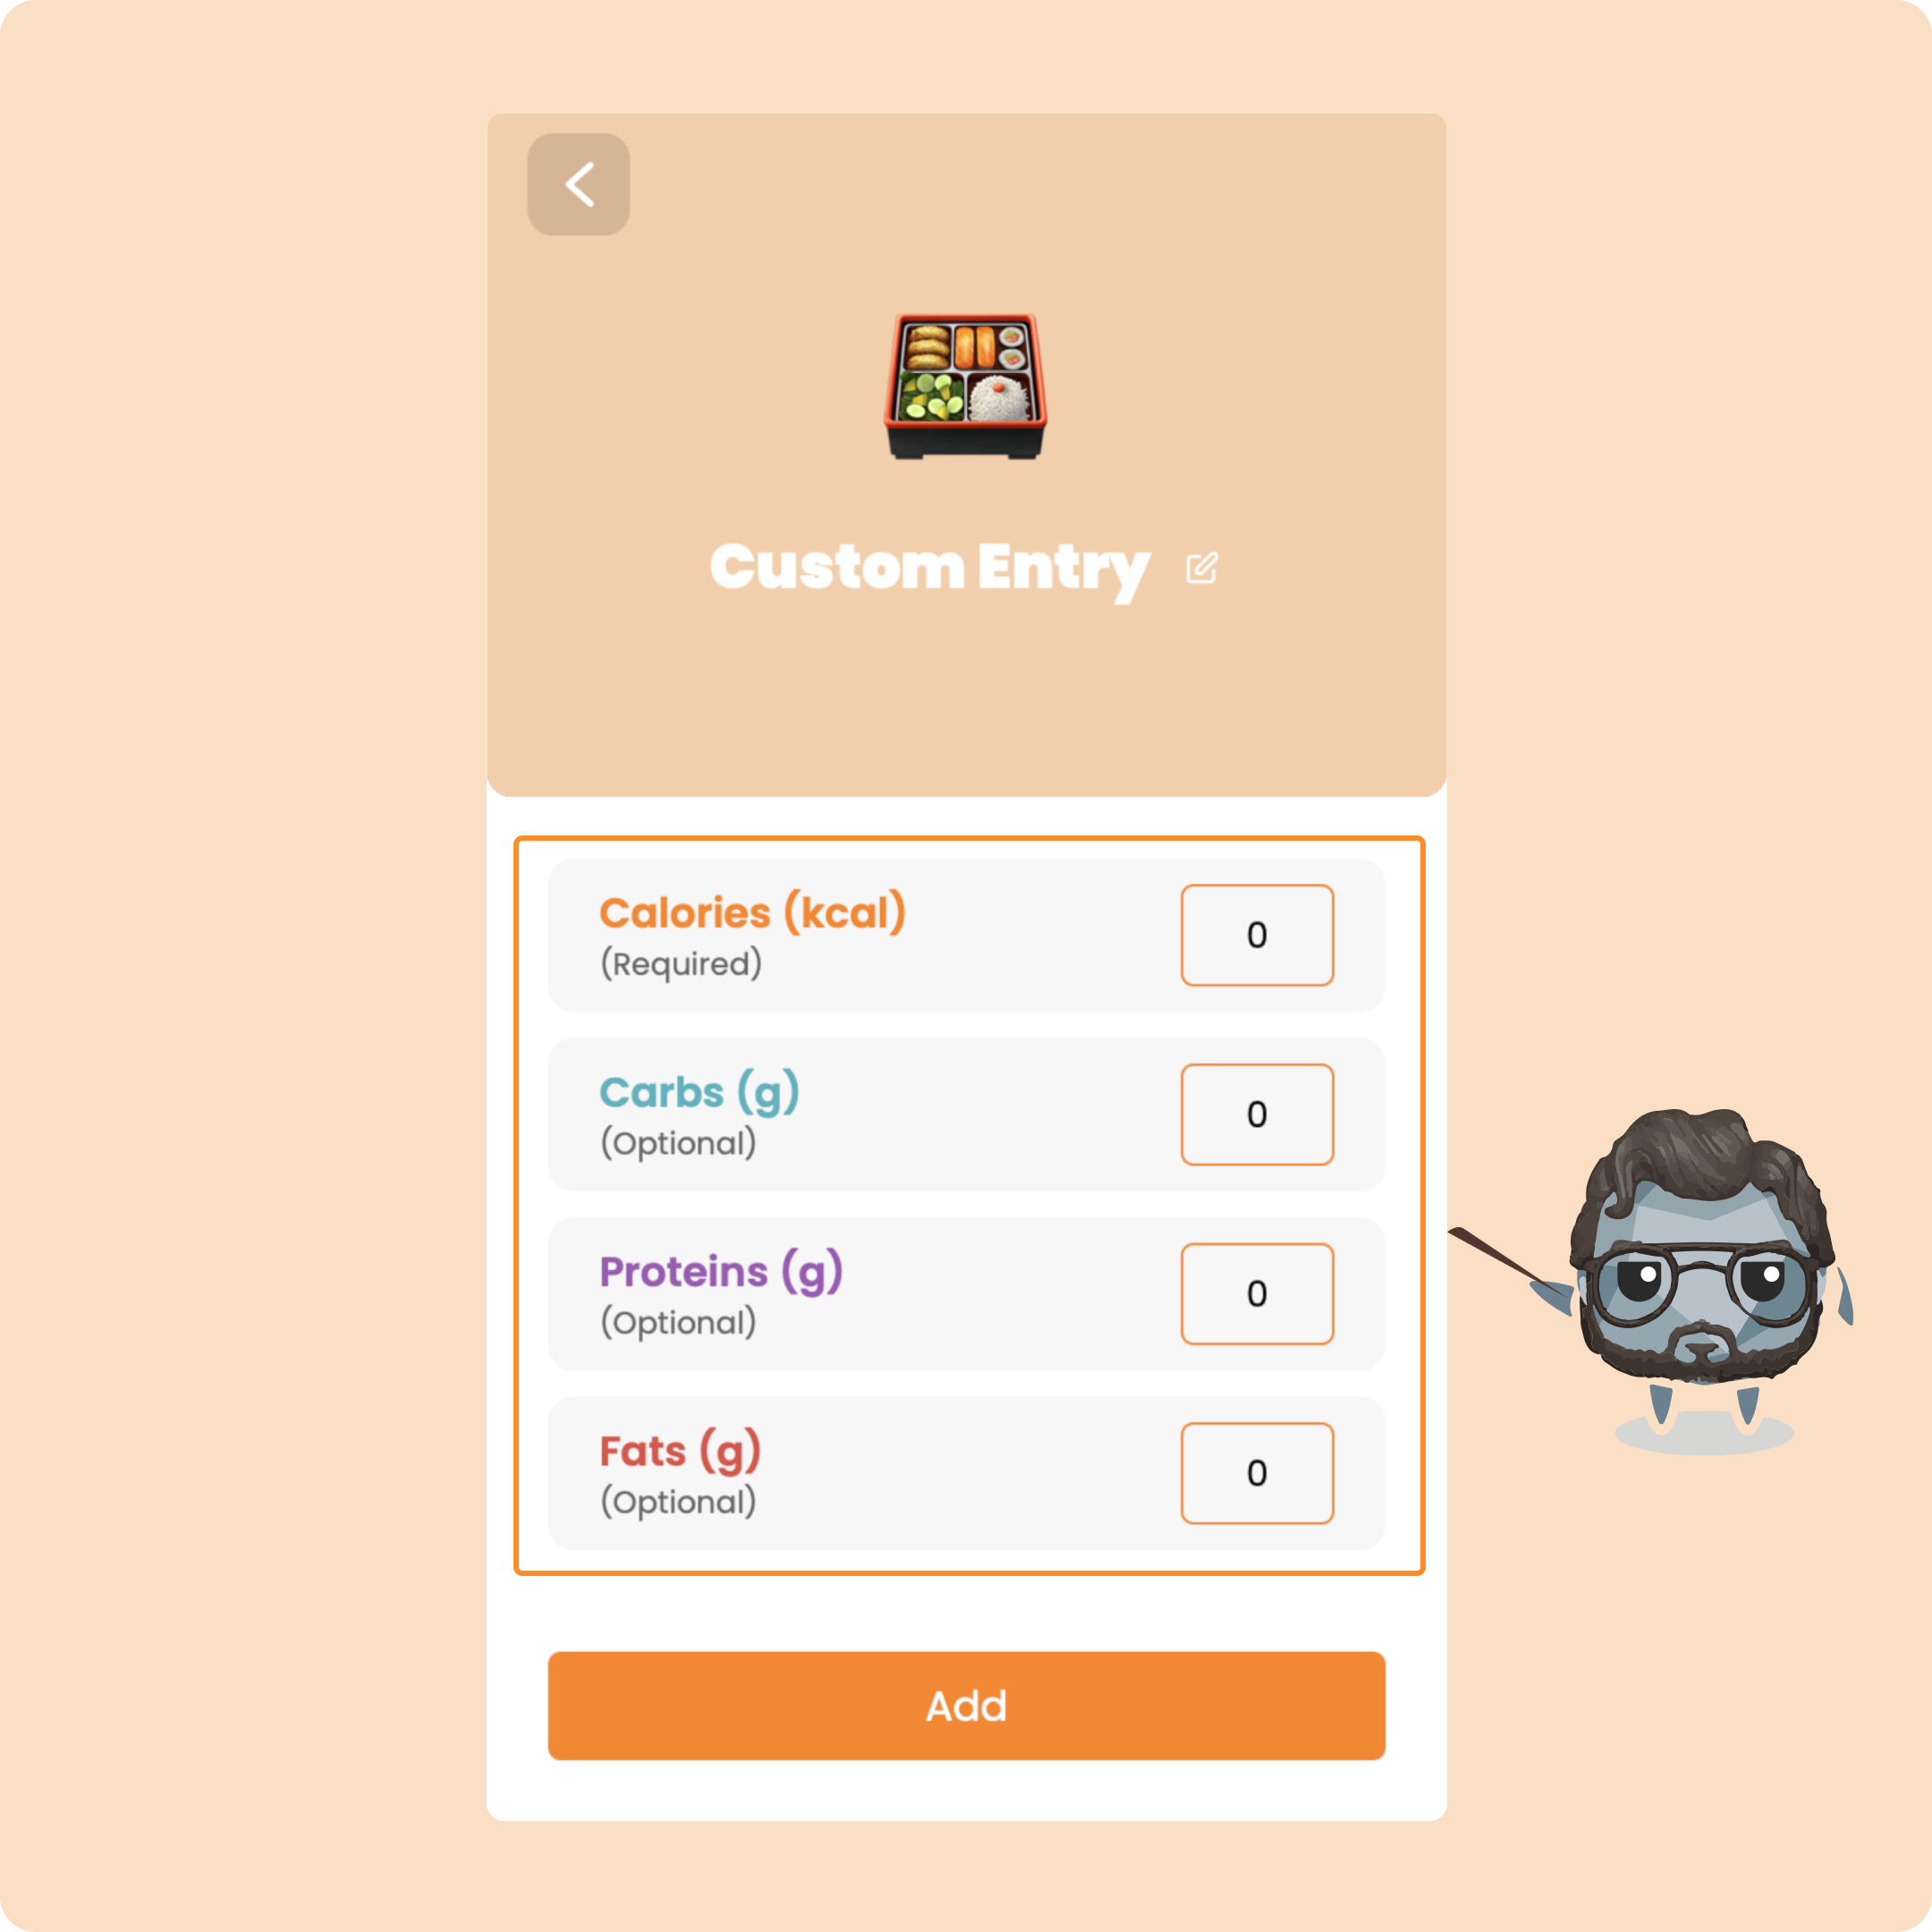
Only "Calories" are mandatory, the others are optional.
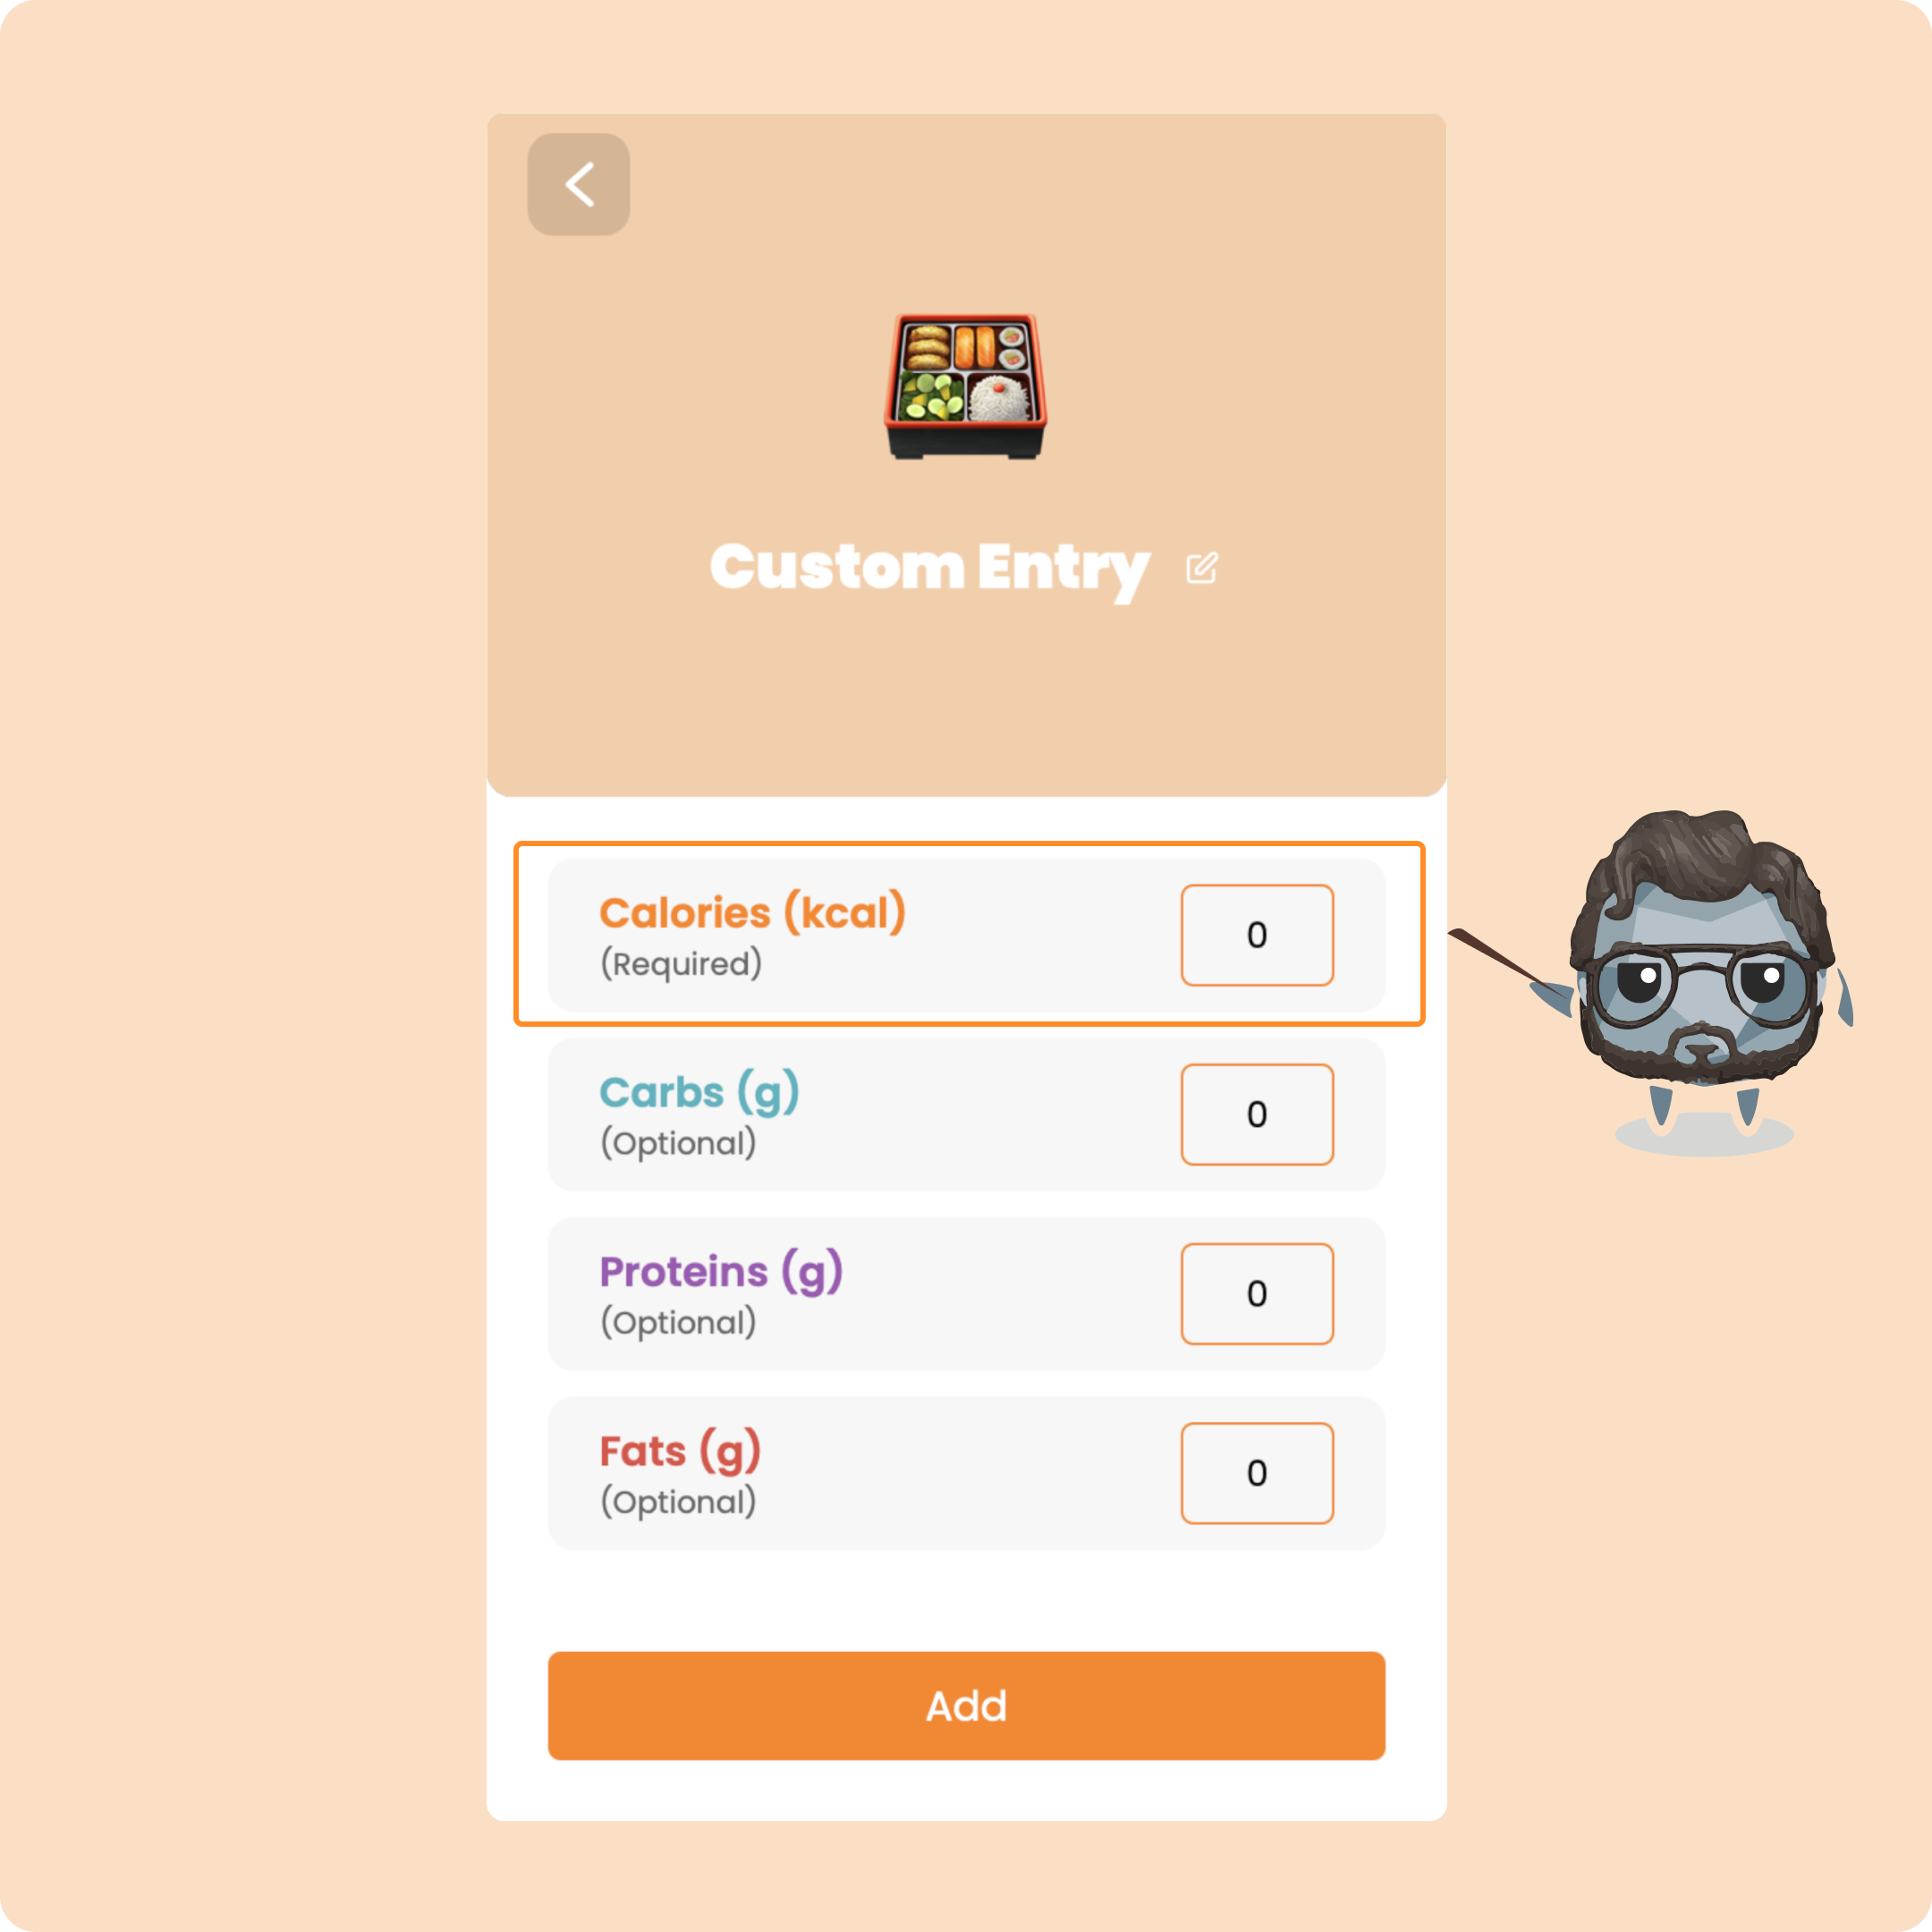
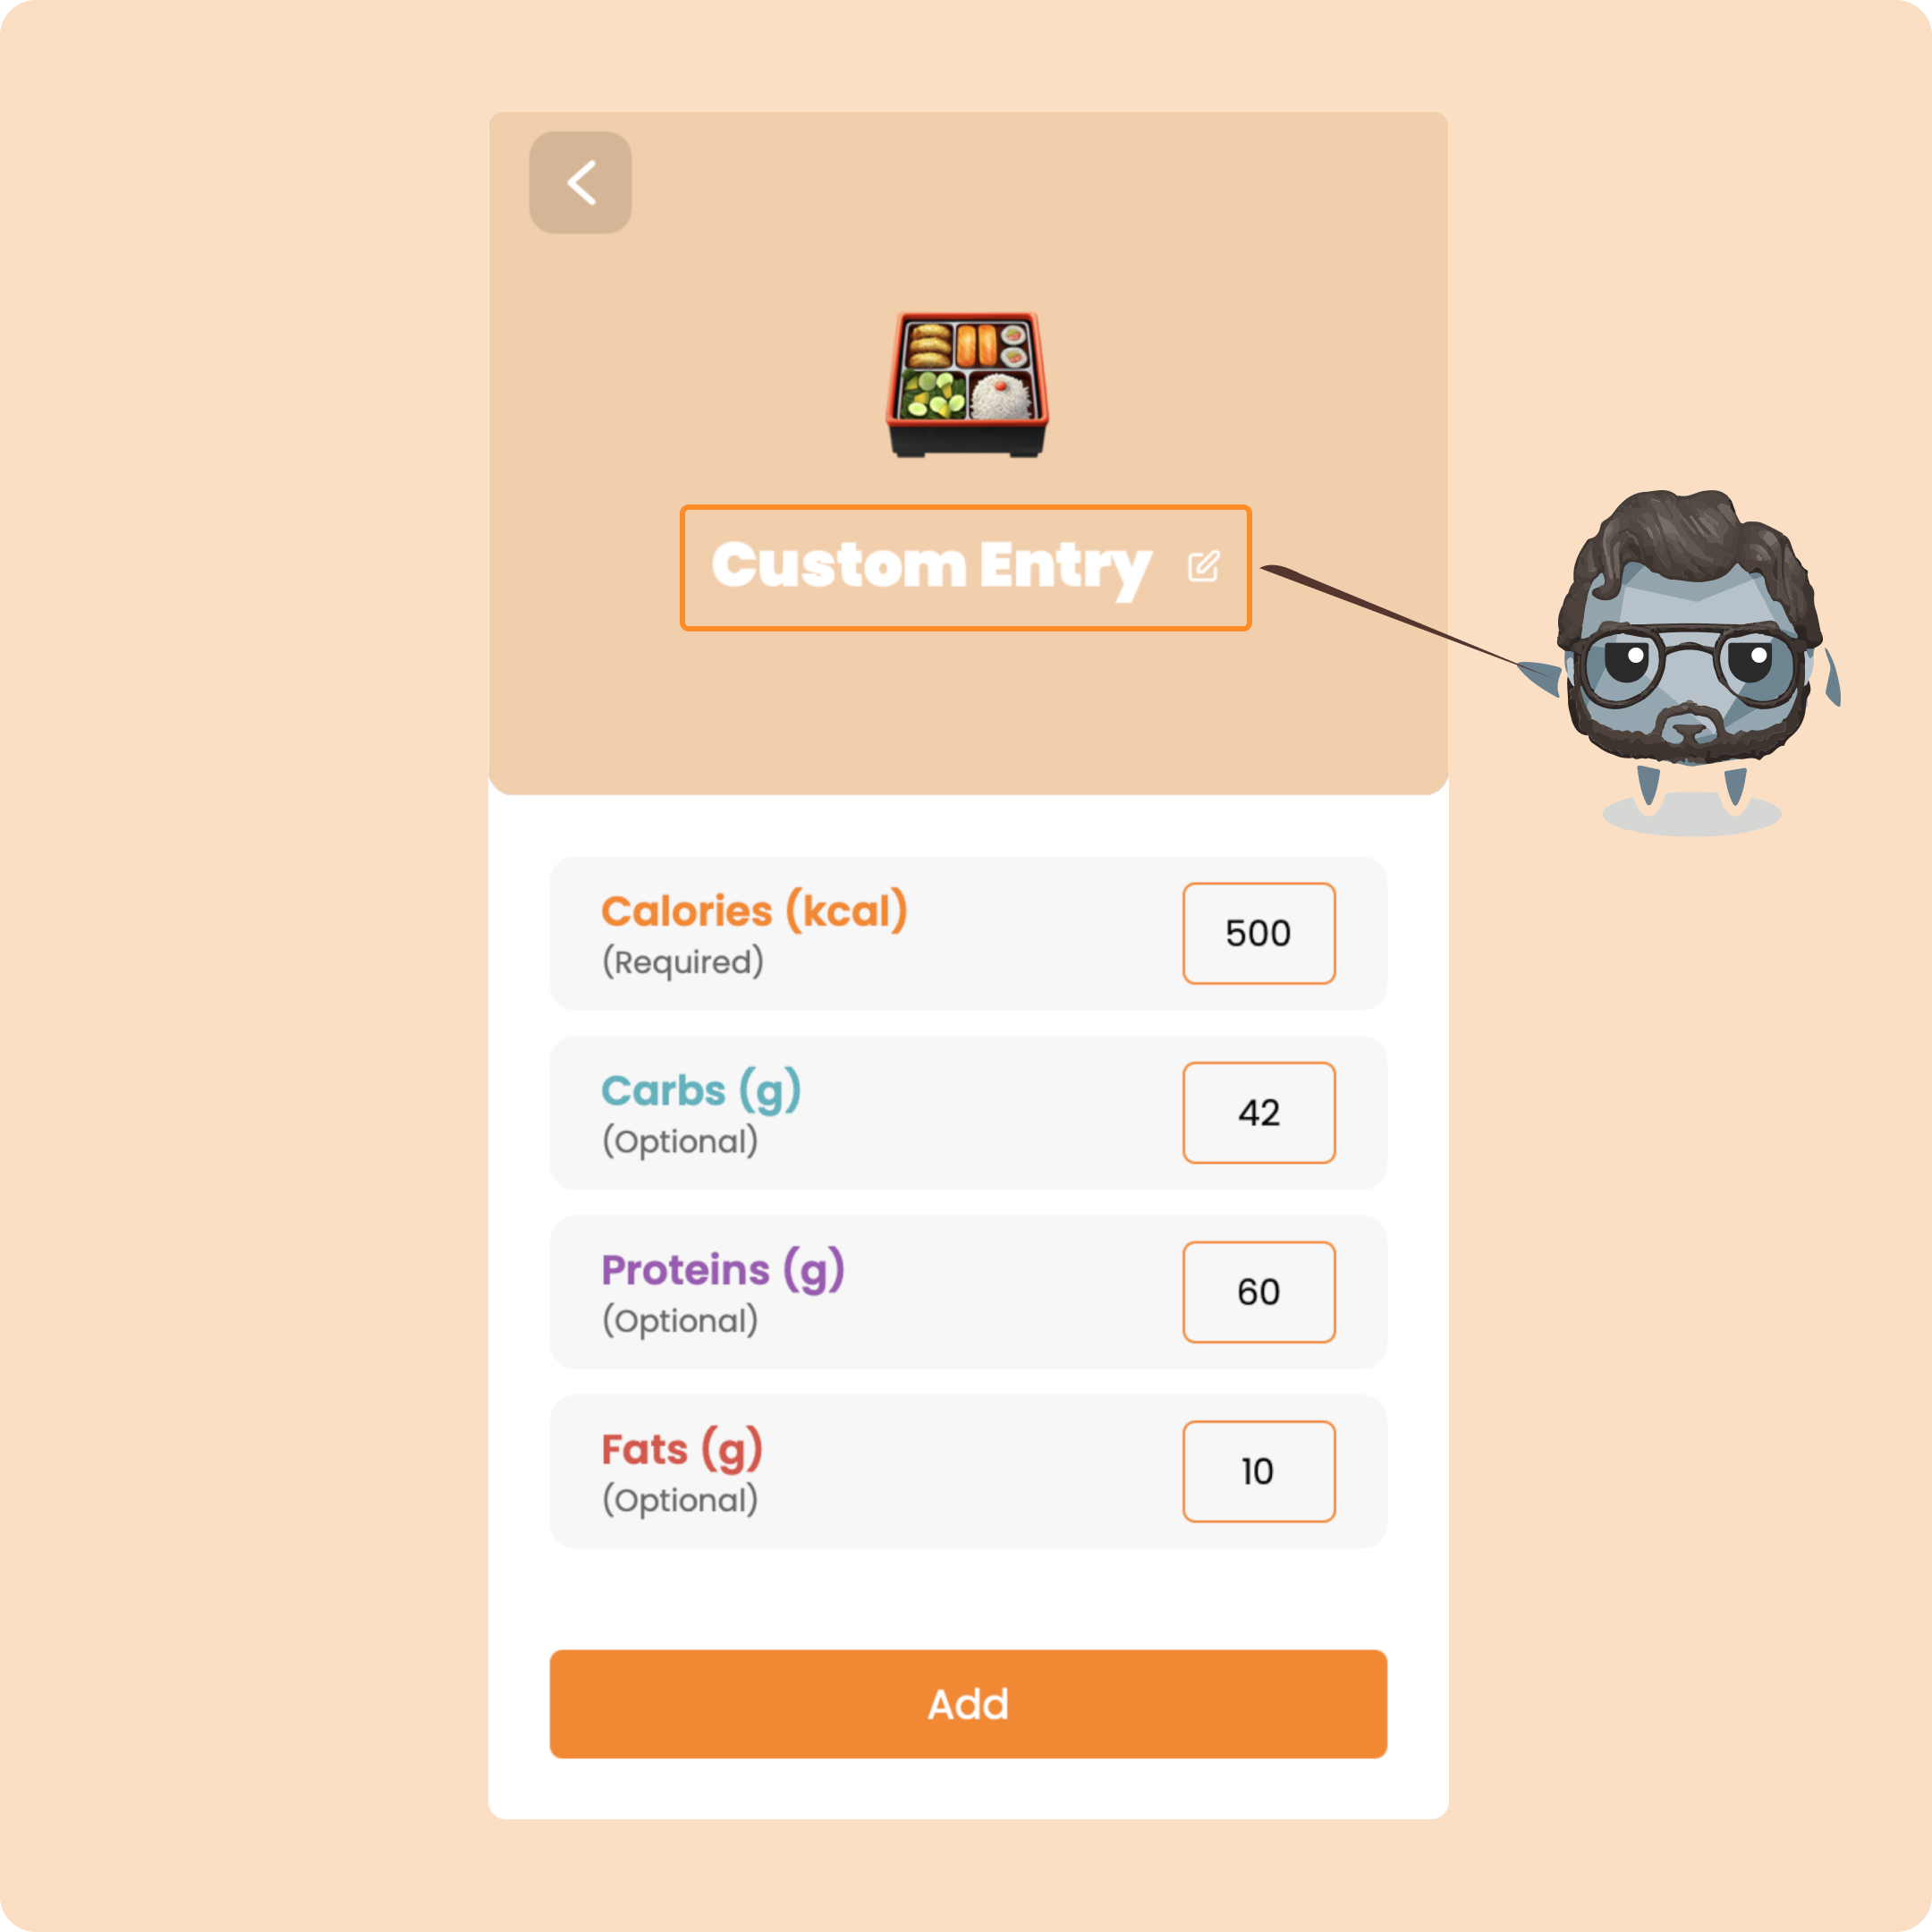
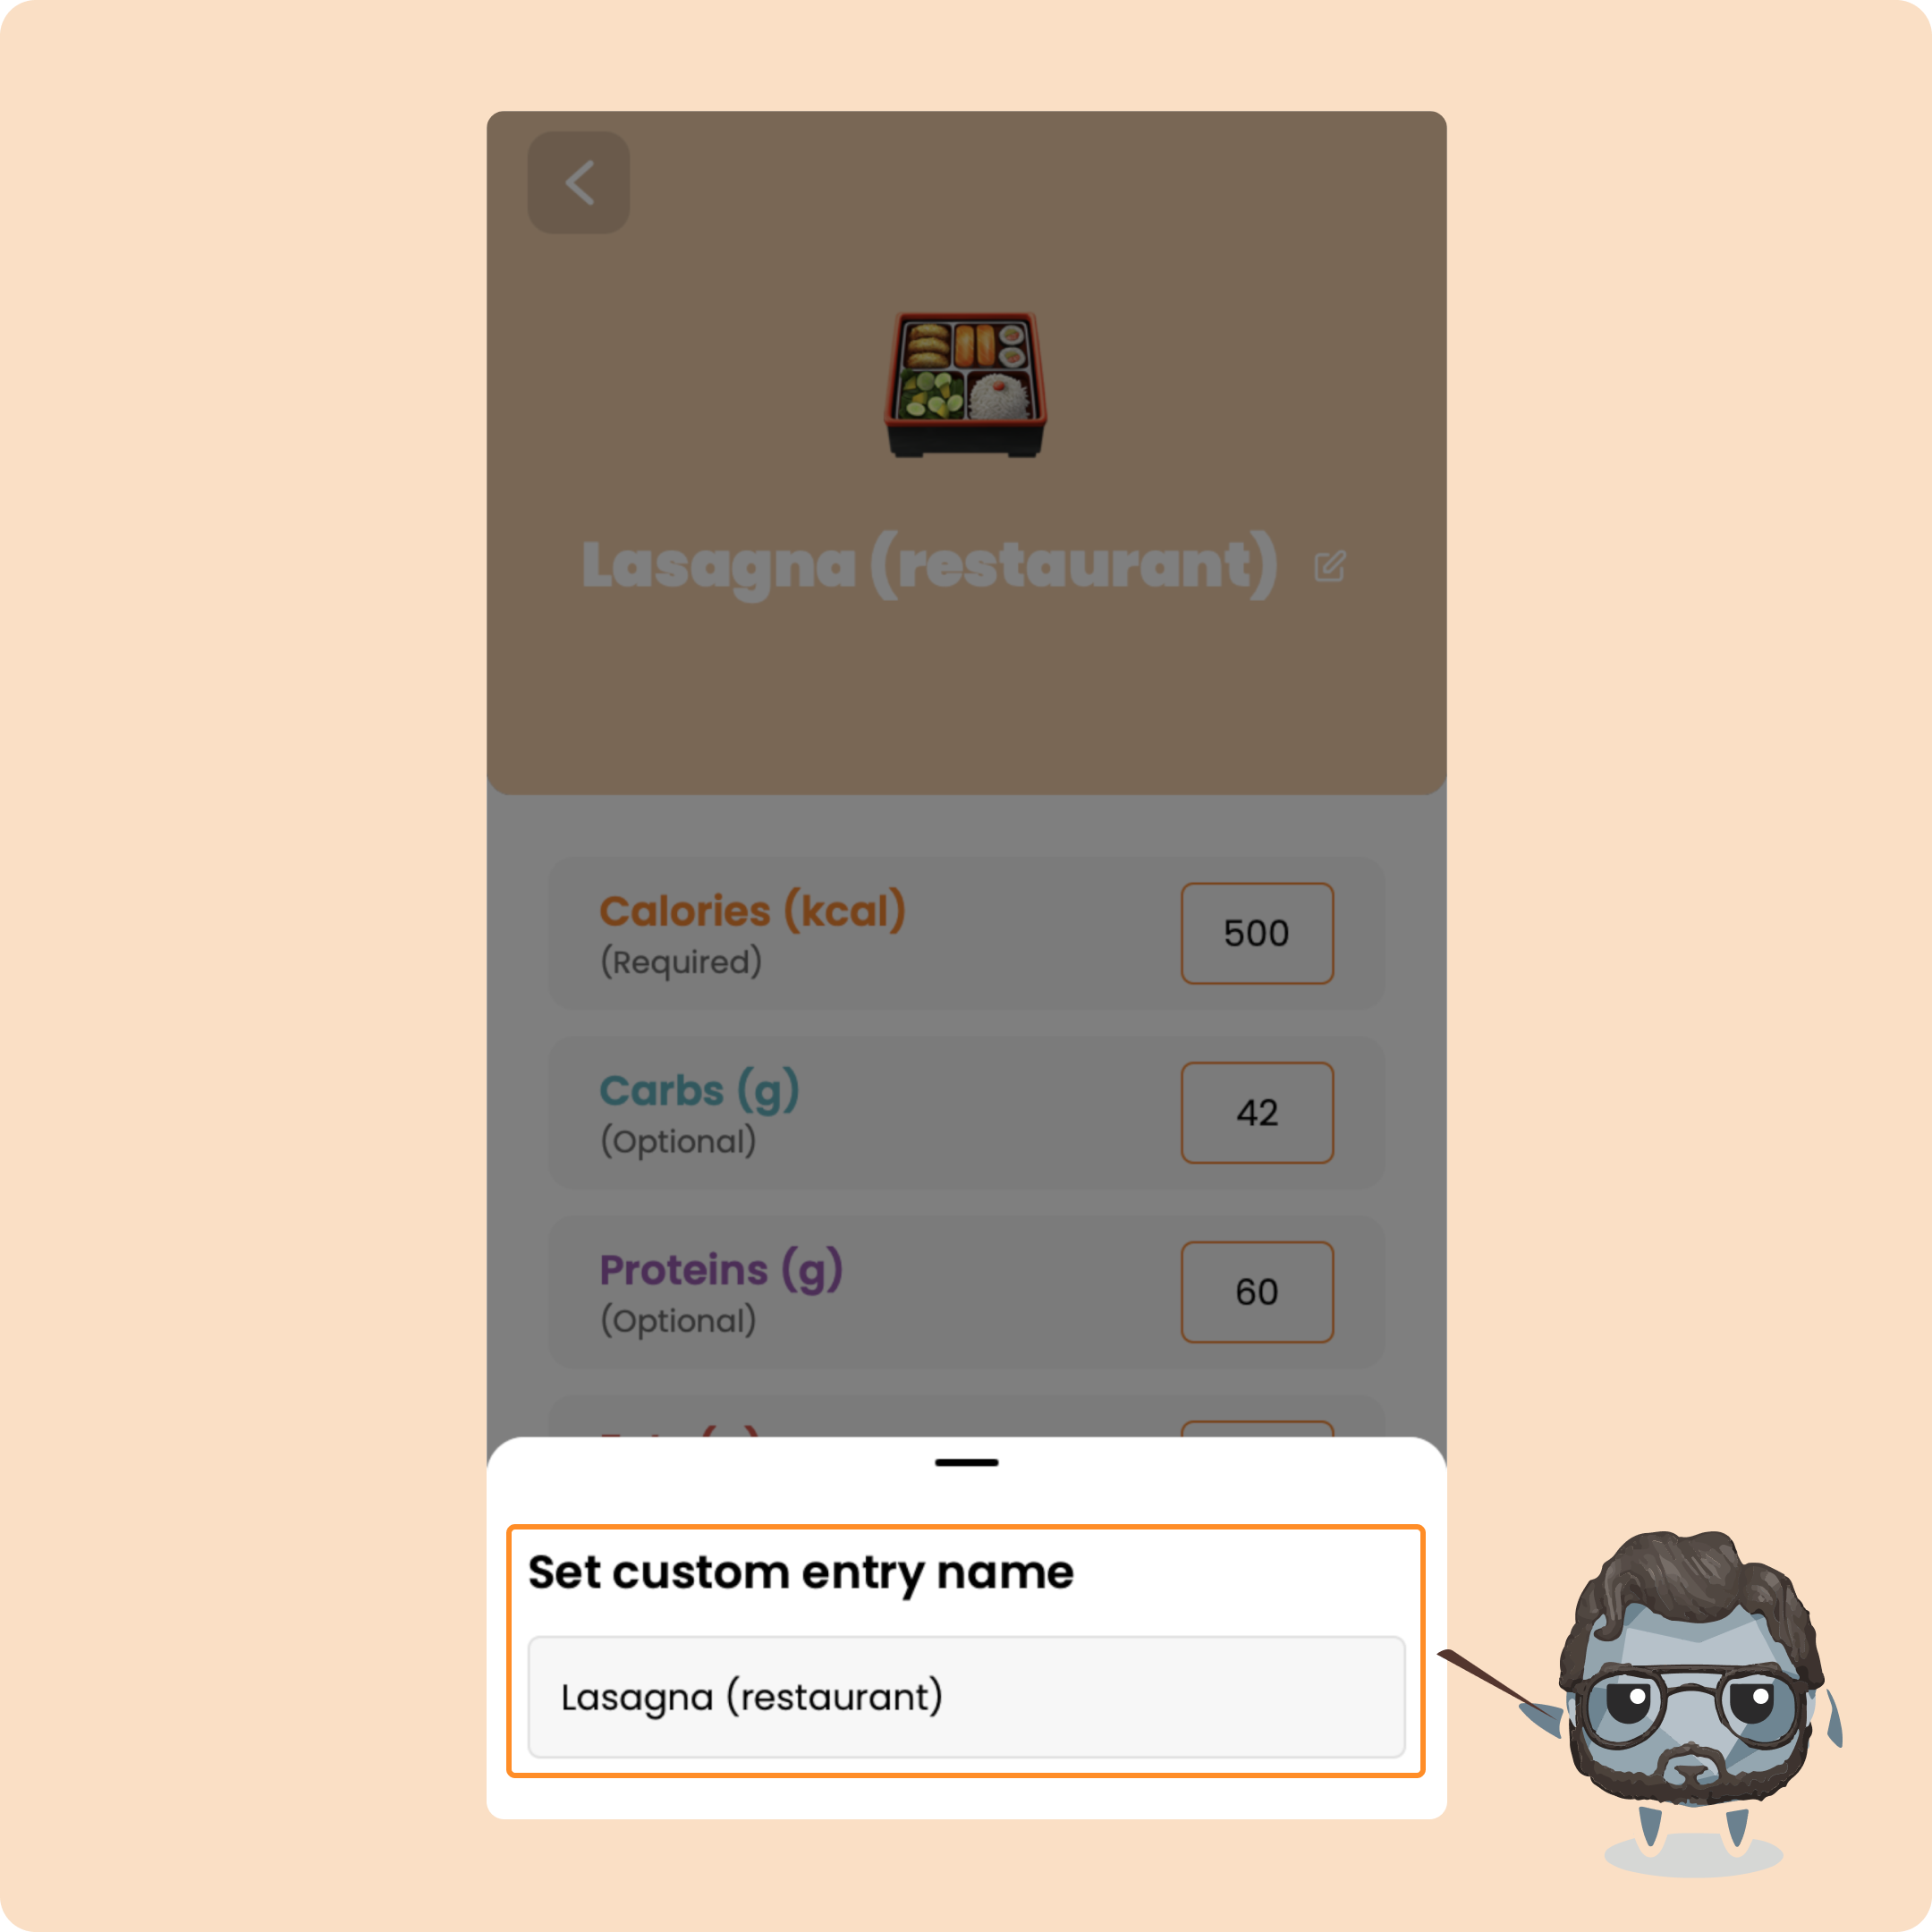
You can also name your custom entry before adding it
Then, as with a regular food, you will find what you entered in your list of foods.
Log a recipe on Gymkee
The last way to log something in your meals is to use the recipe section.
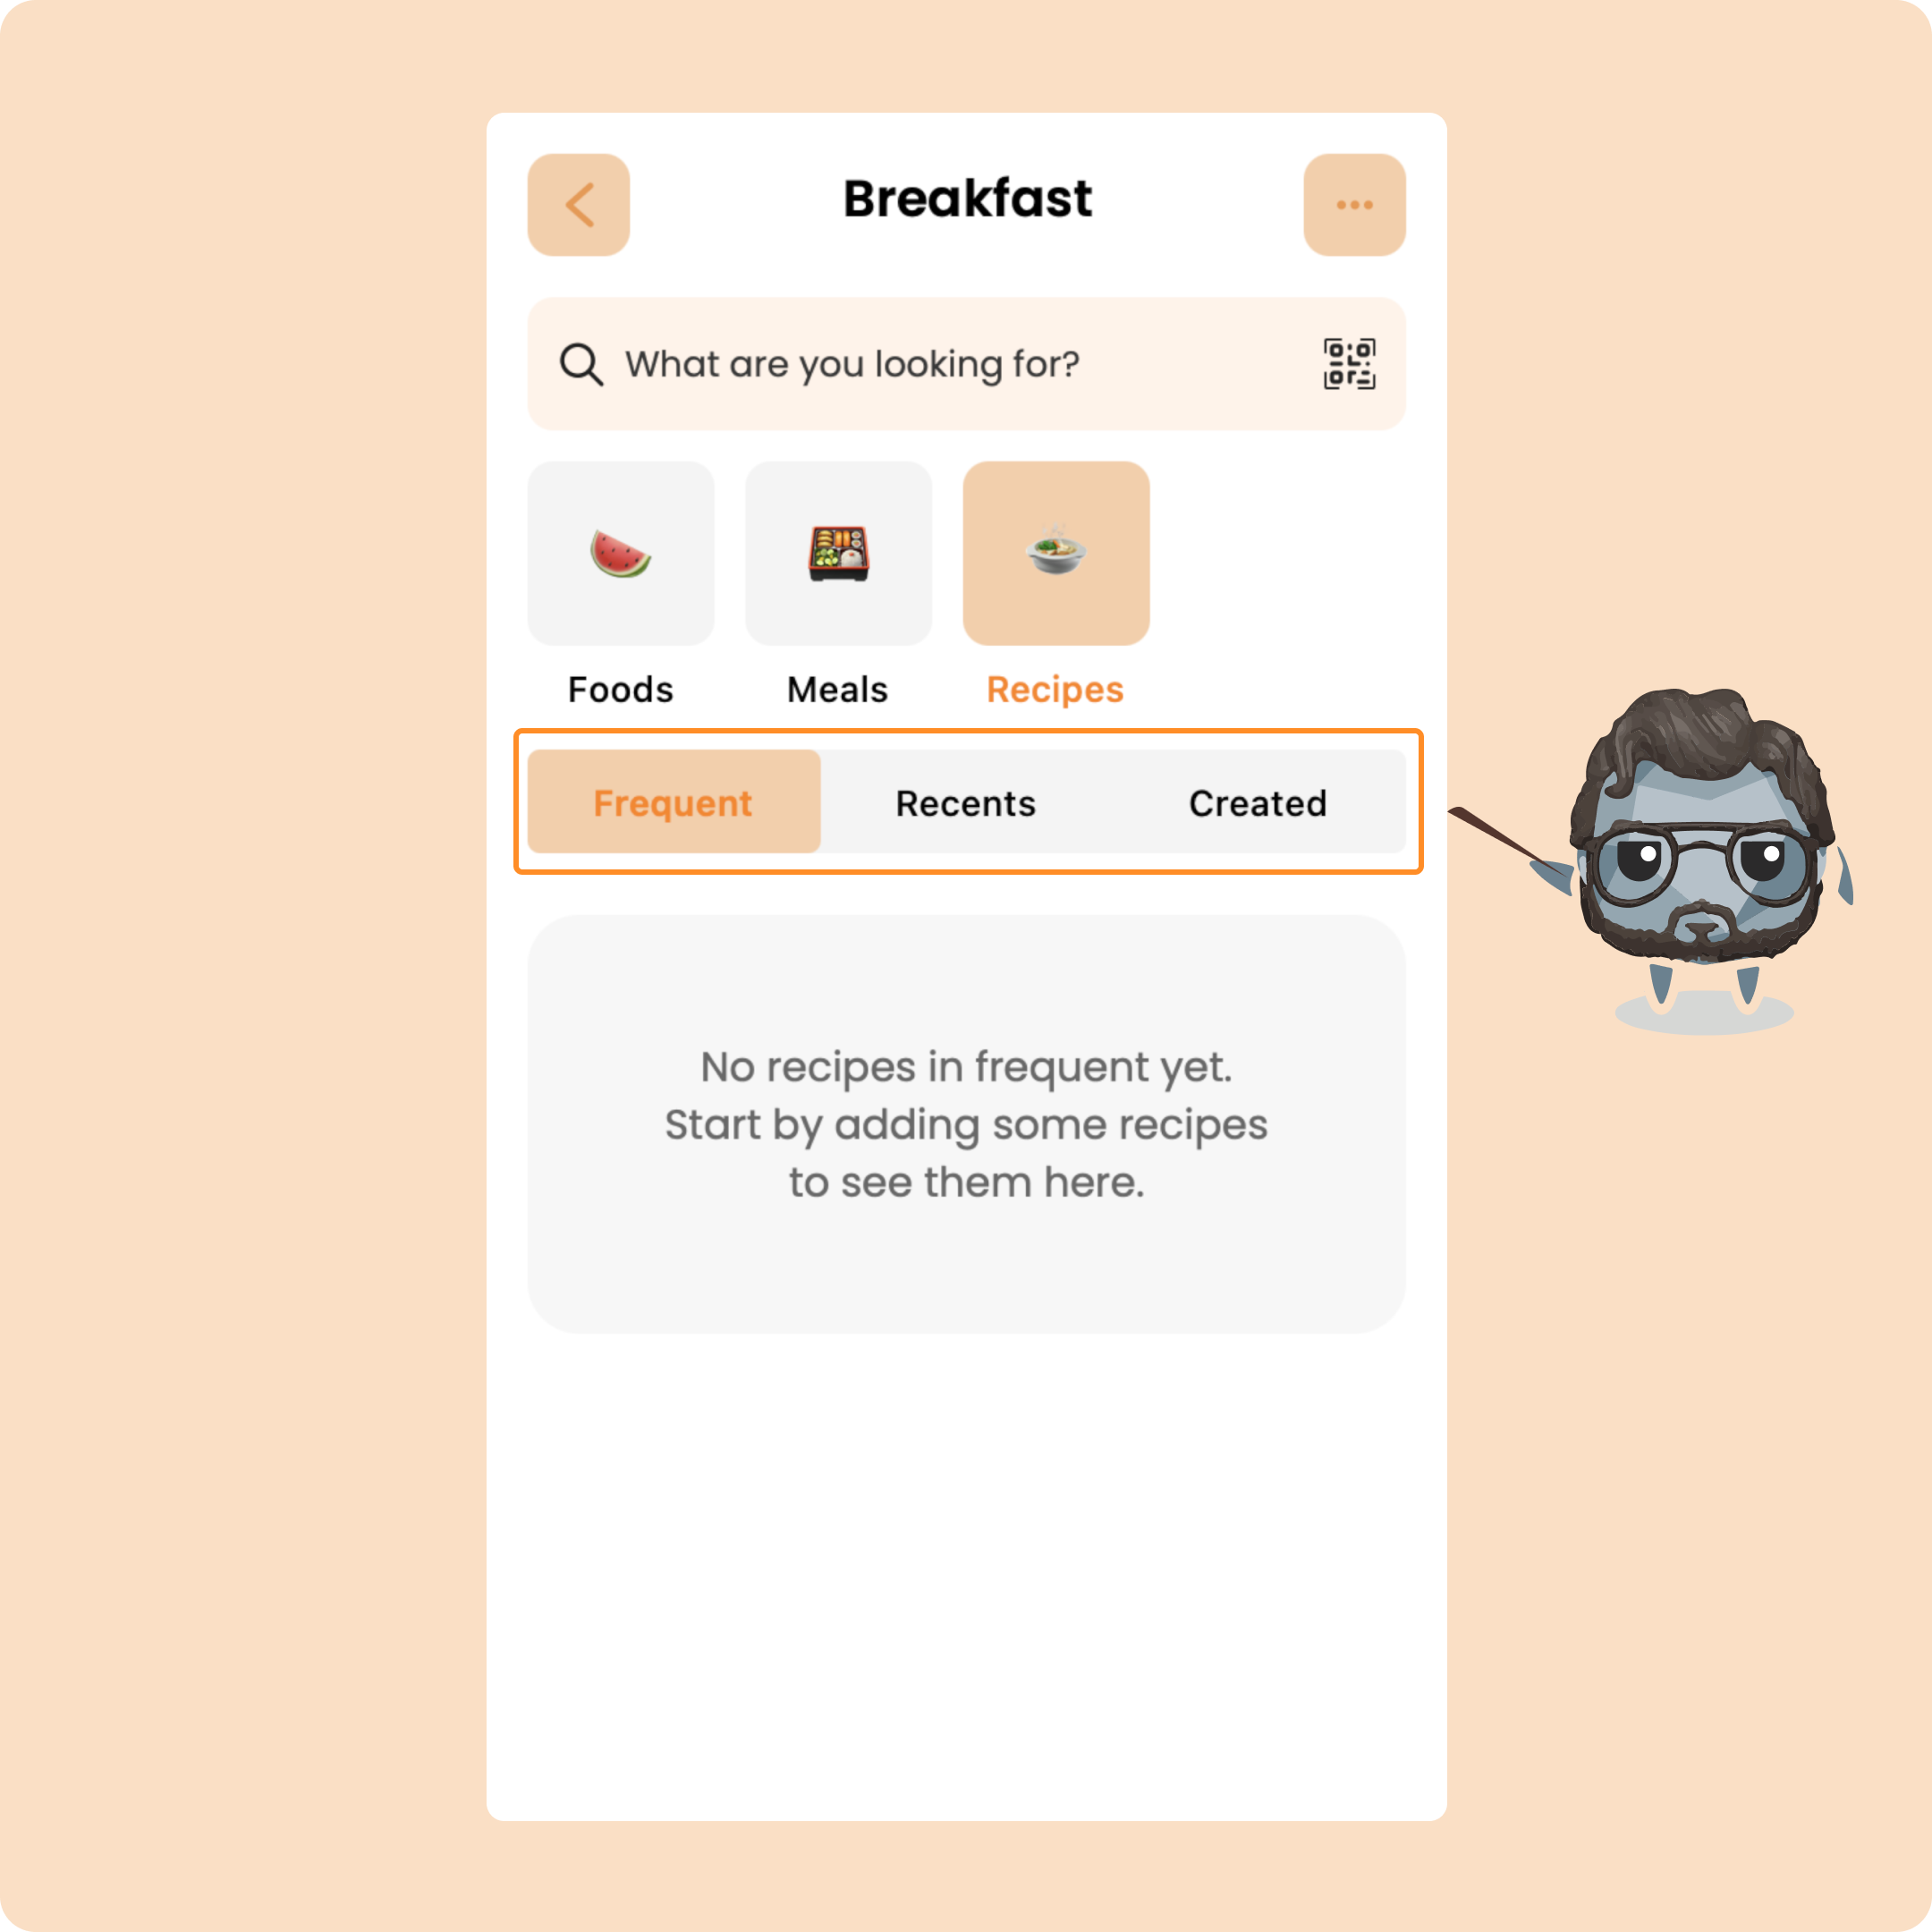
In this category, organized in the same way as the others, you will find the healthy recipes added by your coach, by Gymkee, as well as, recently, those that you will have added yourself.
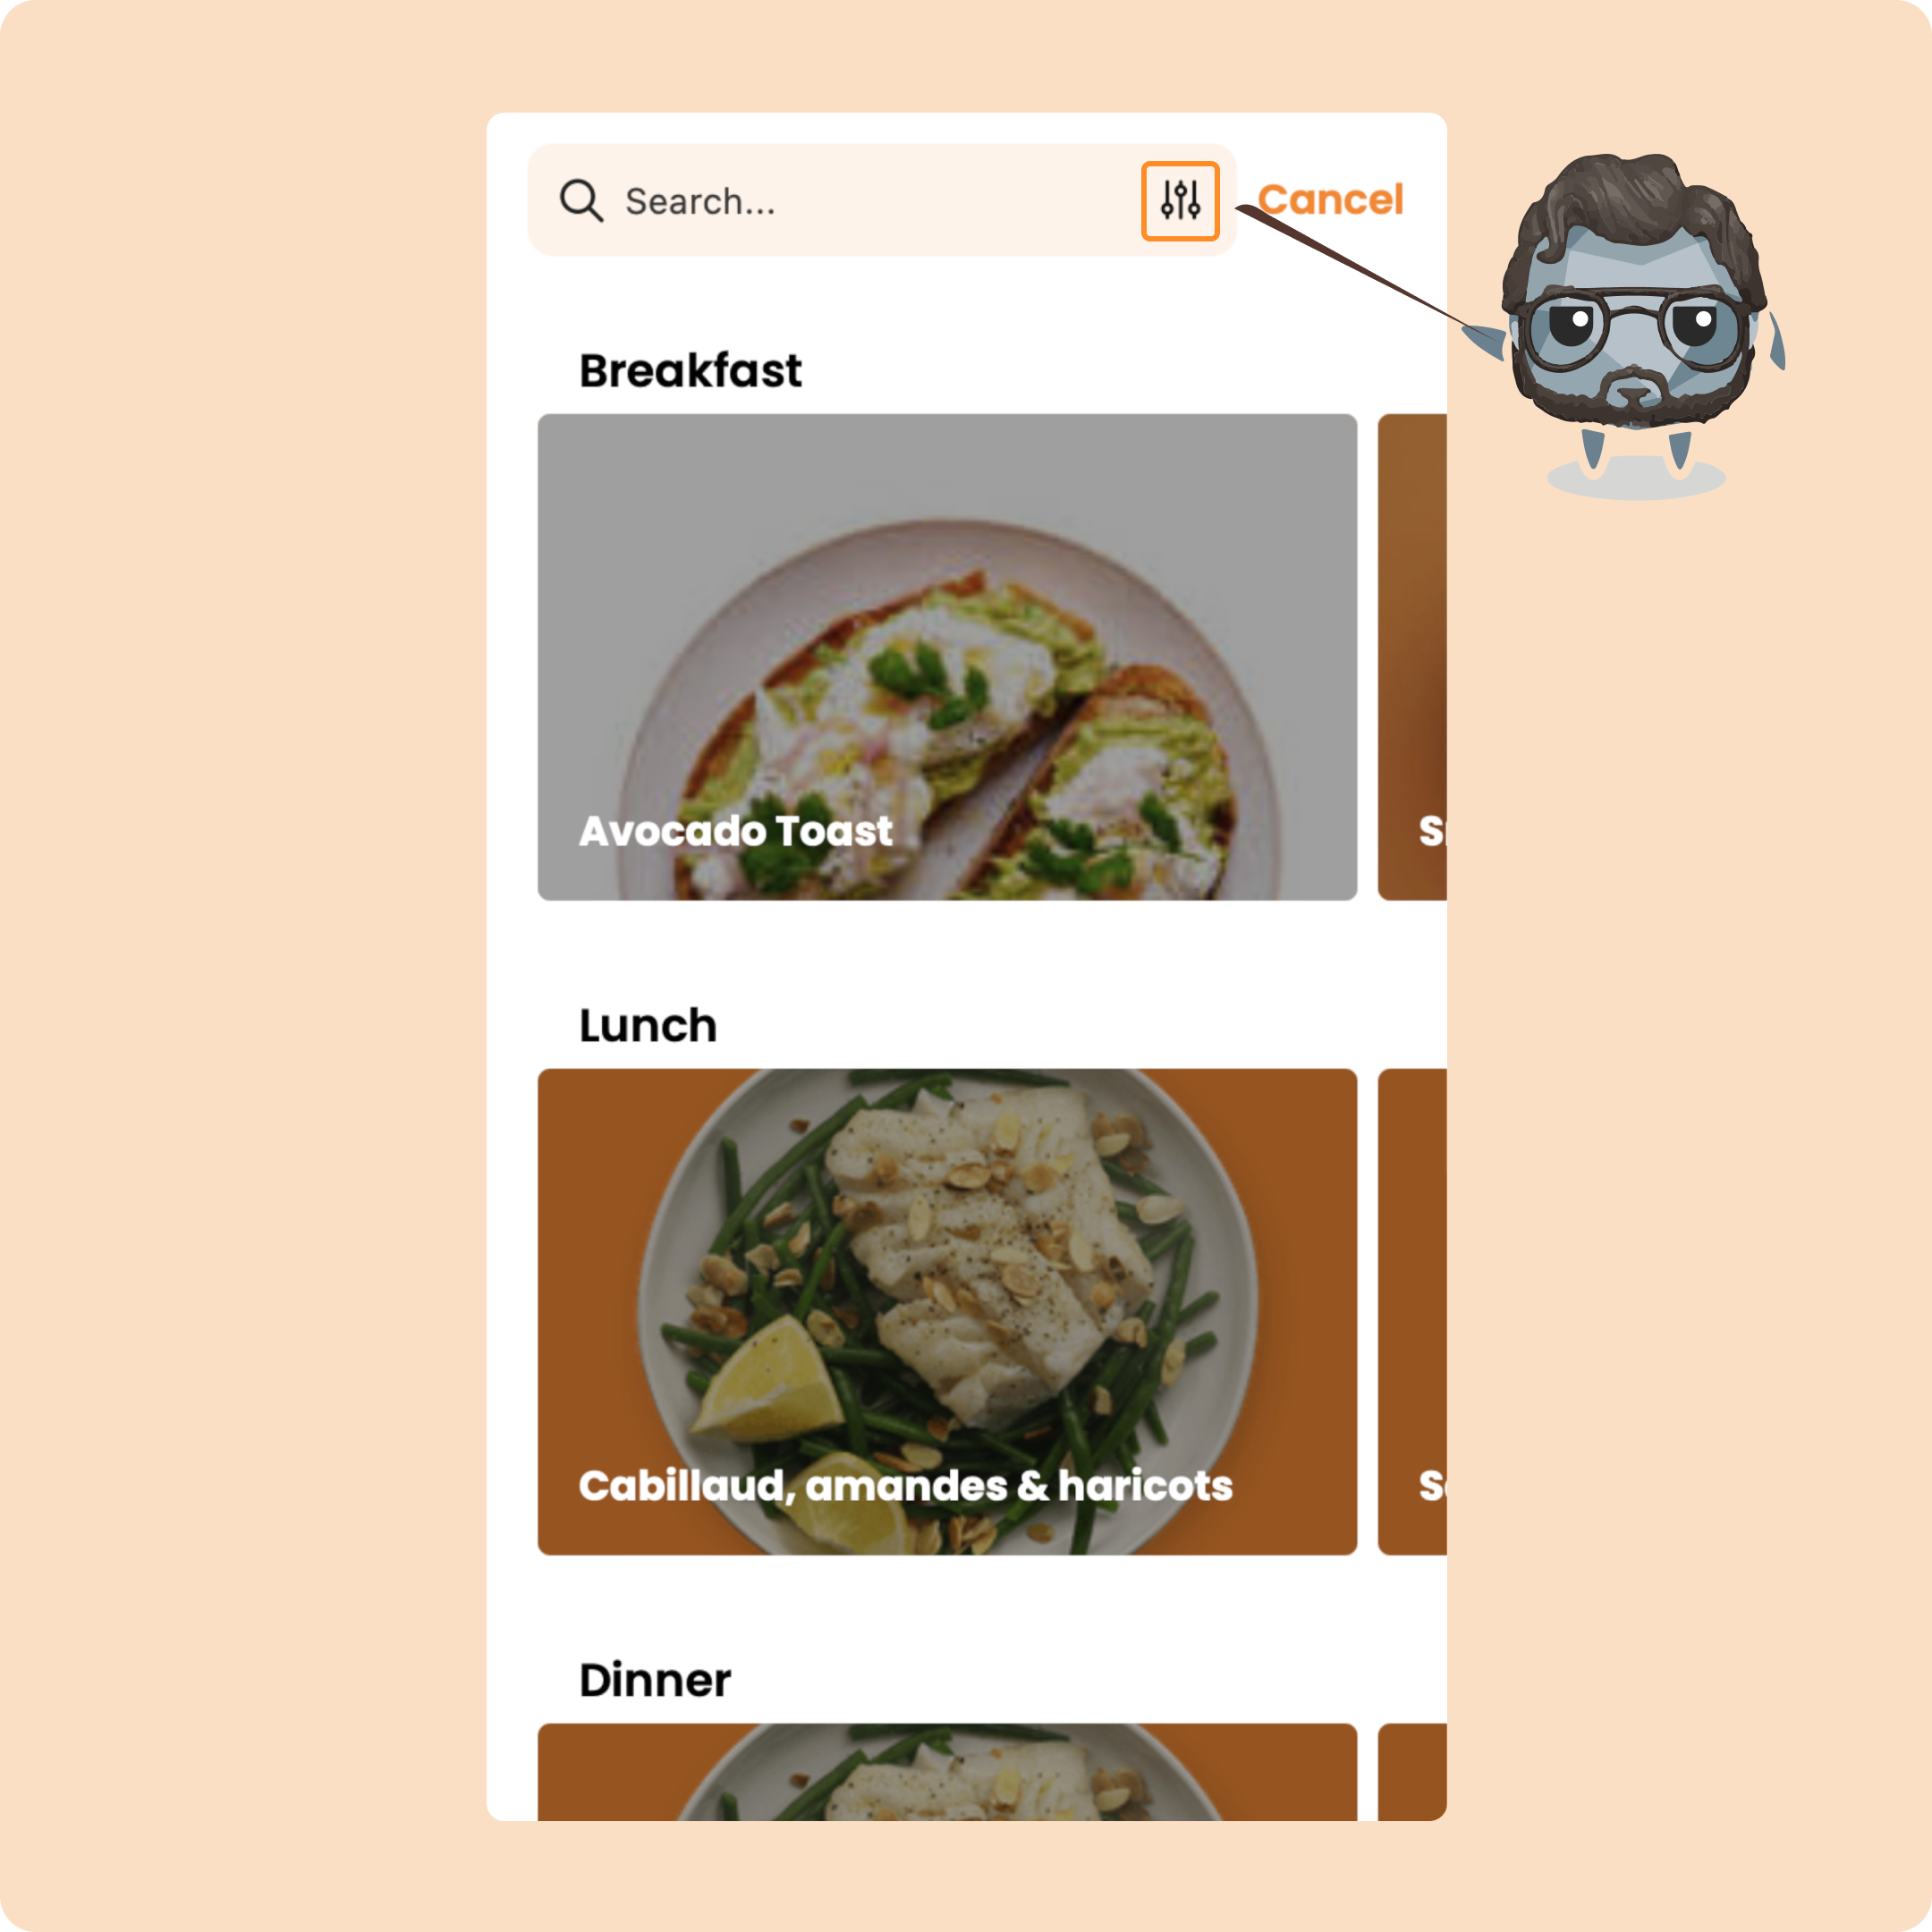
To see the recipes, you just need to click on the search bar.
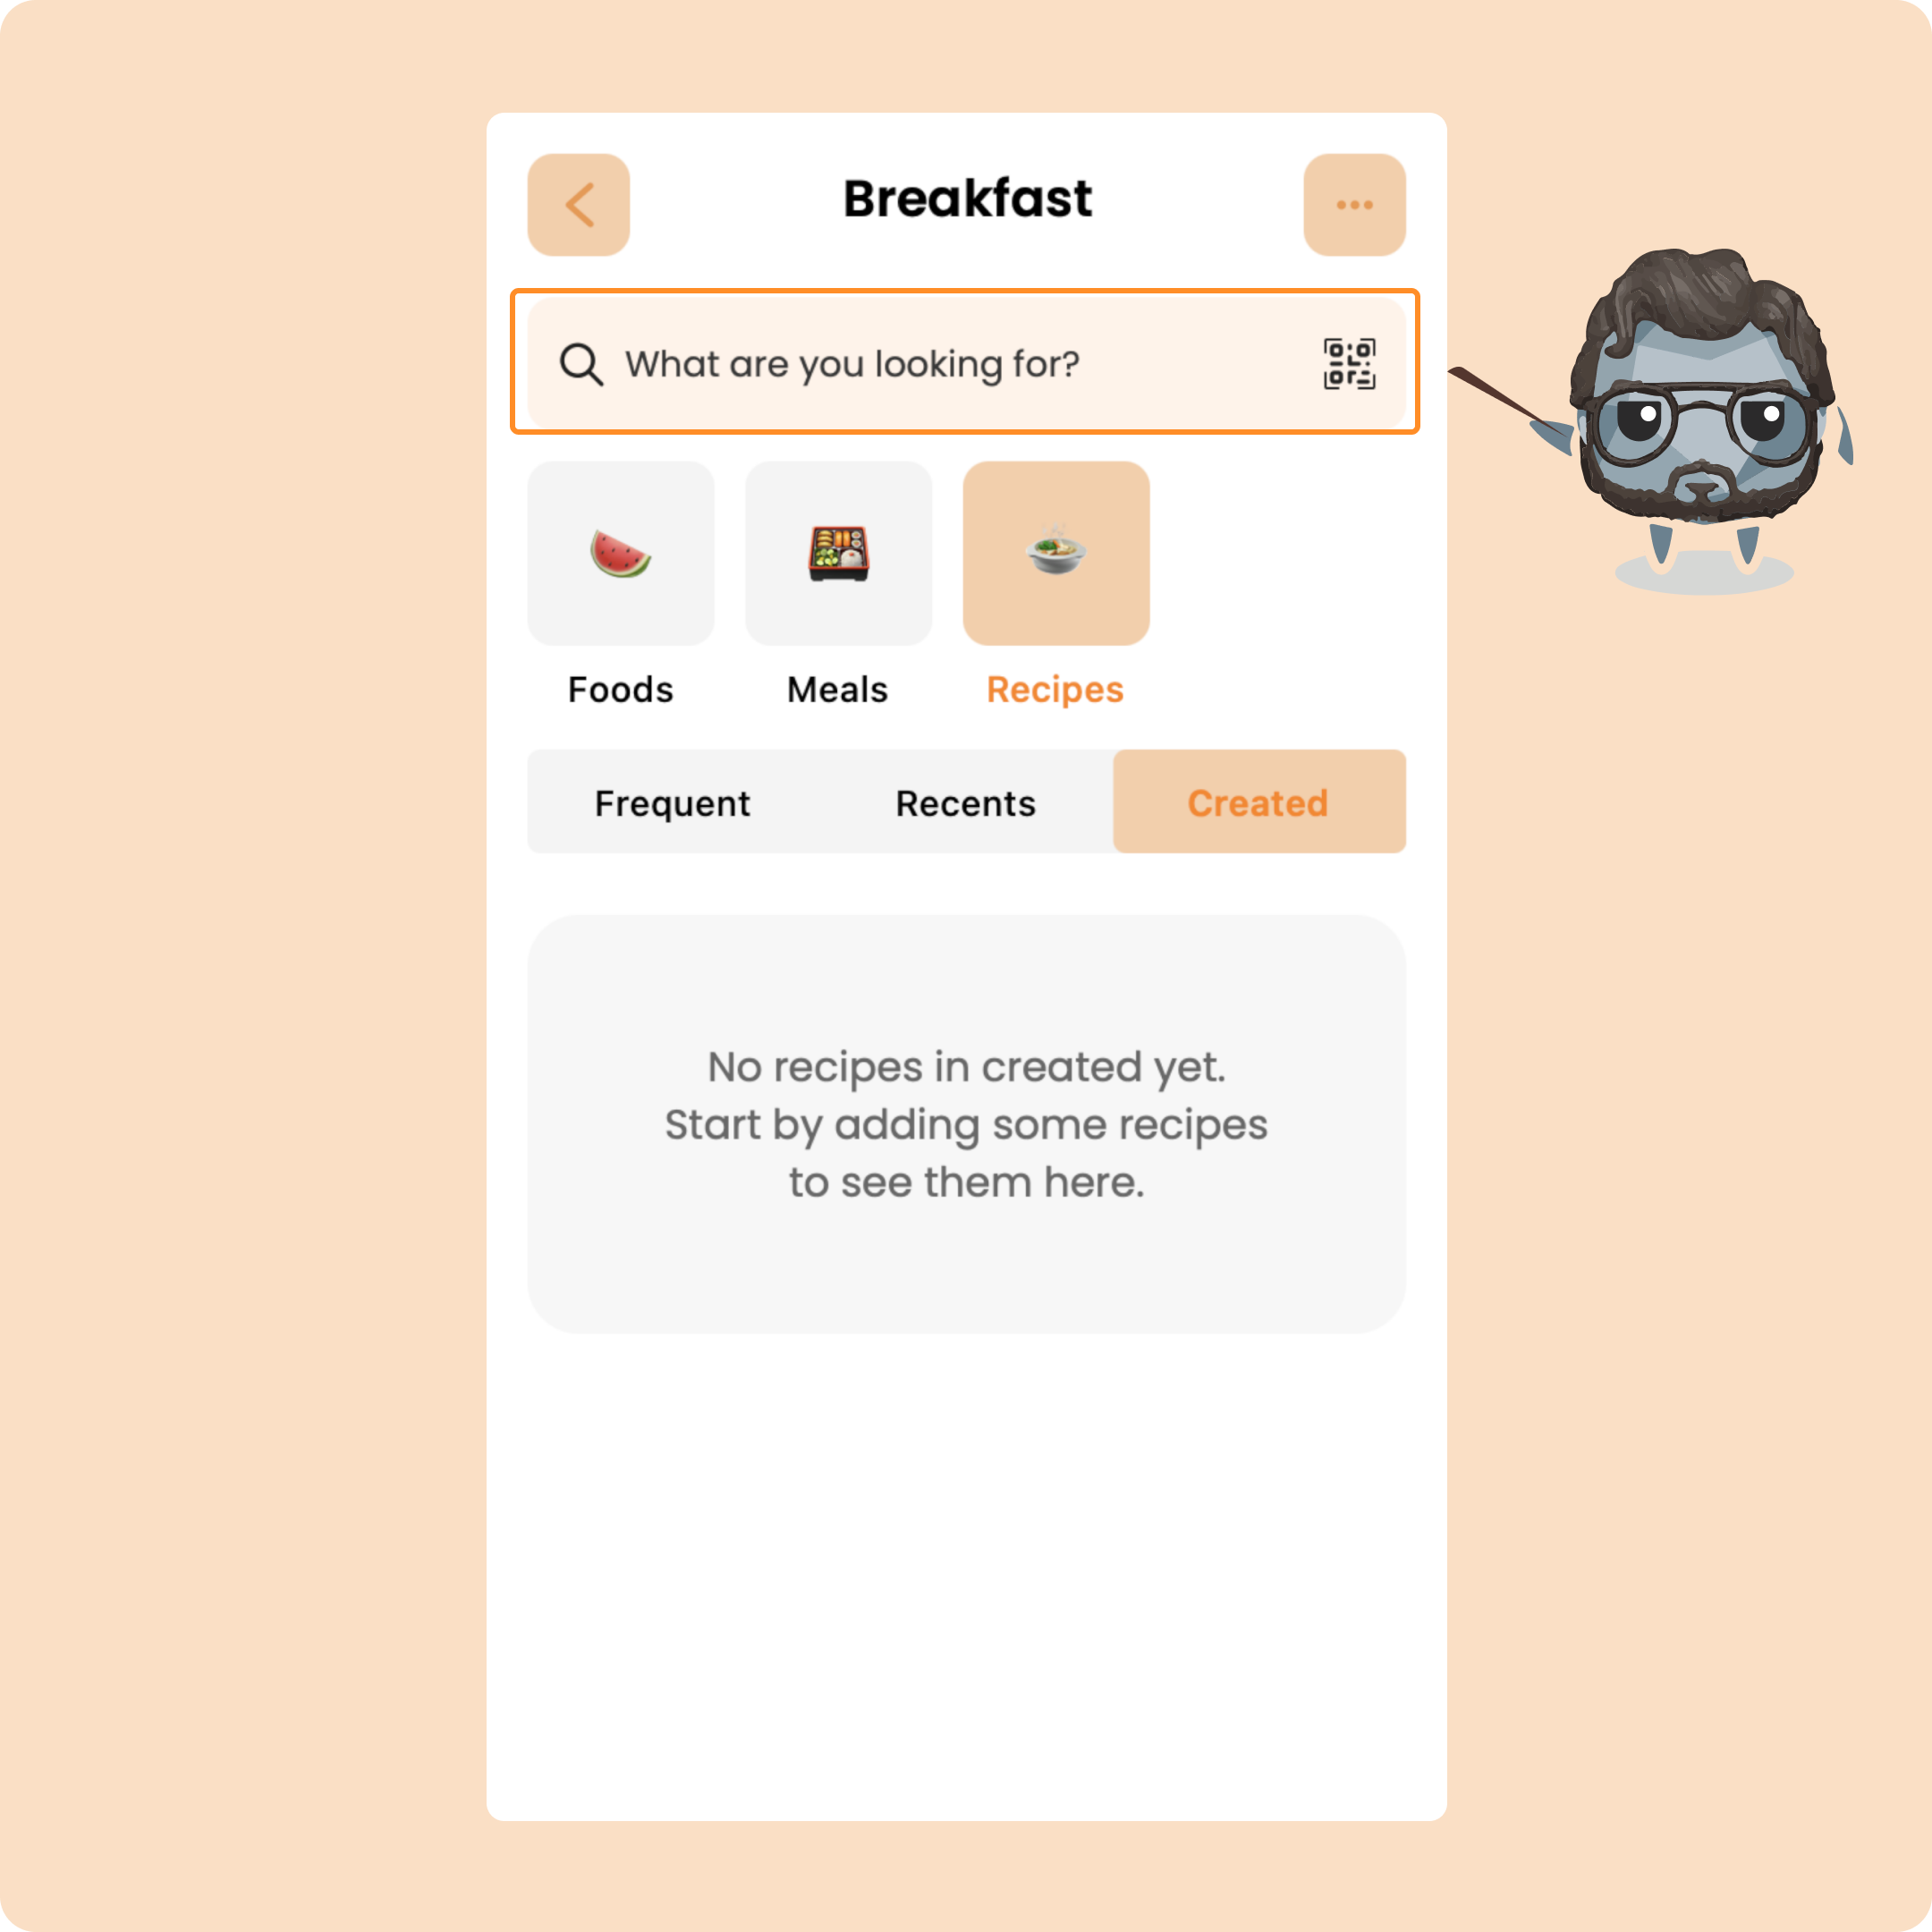
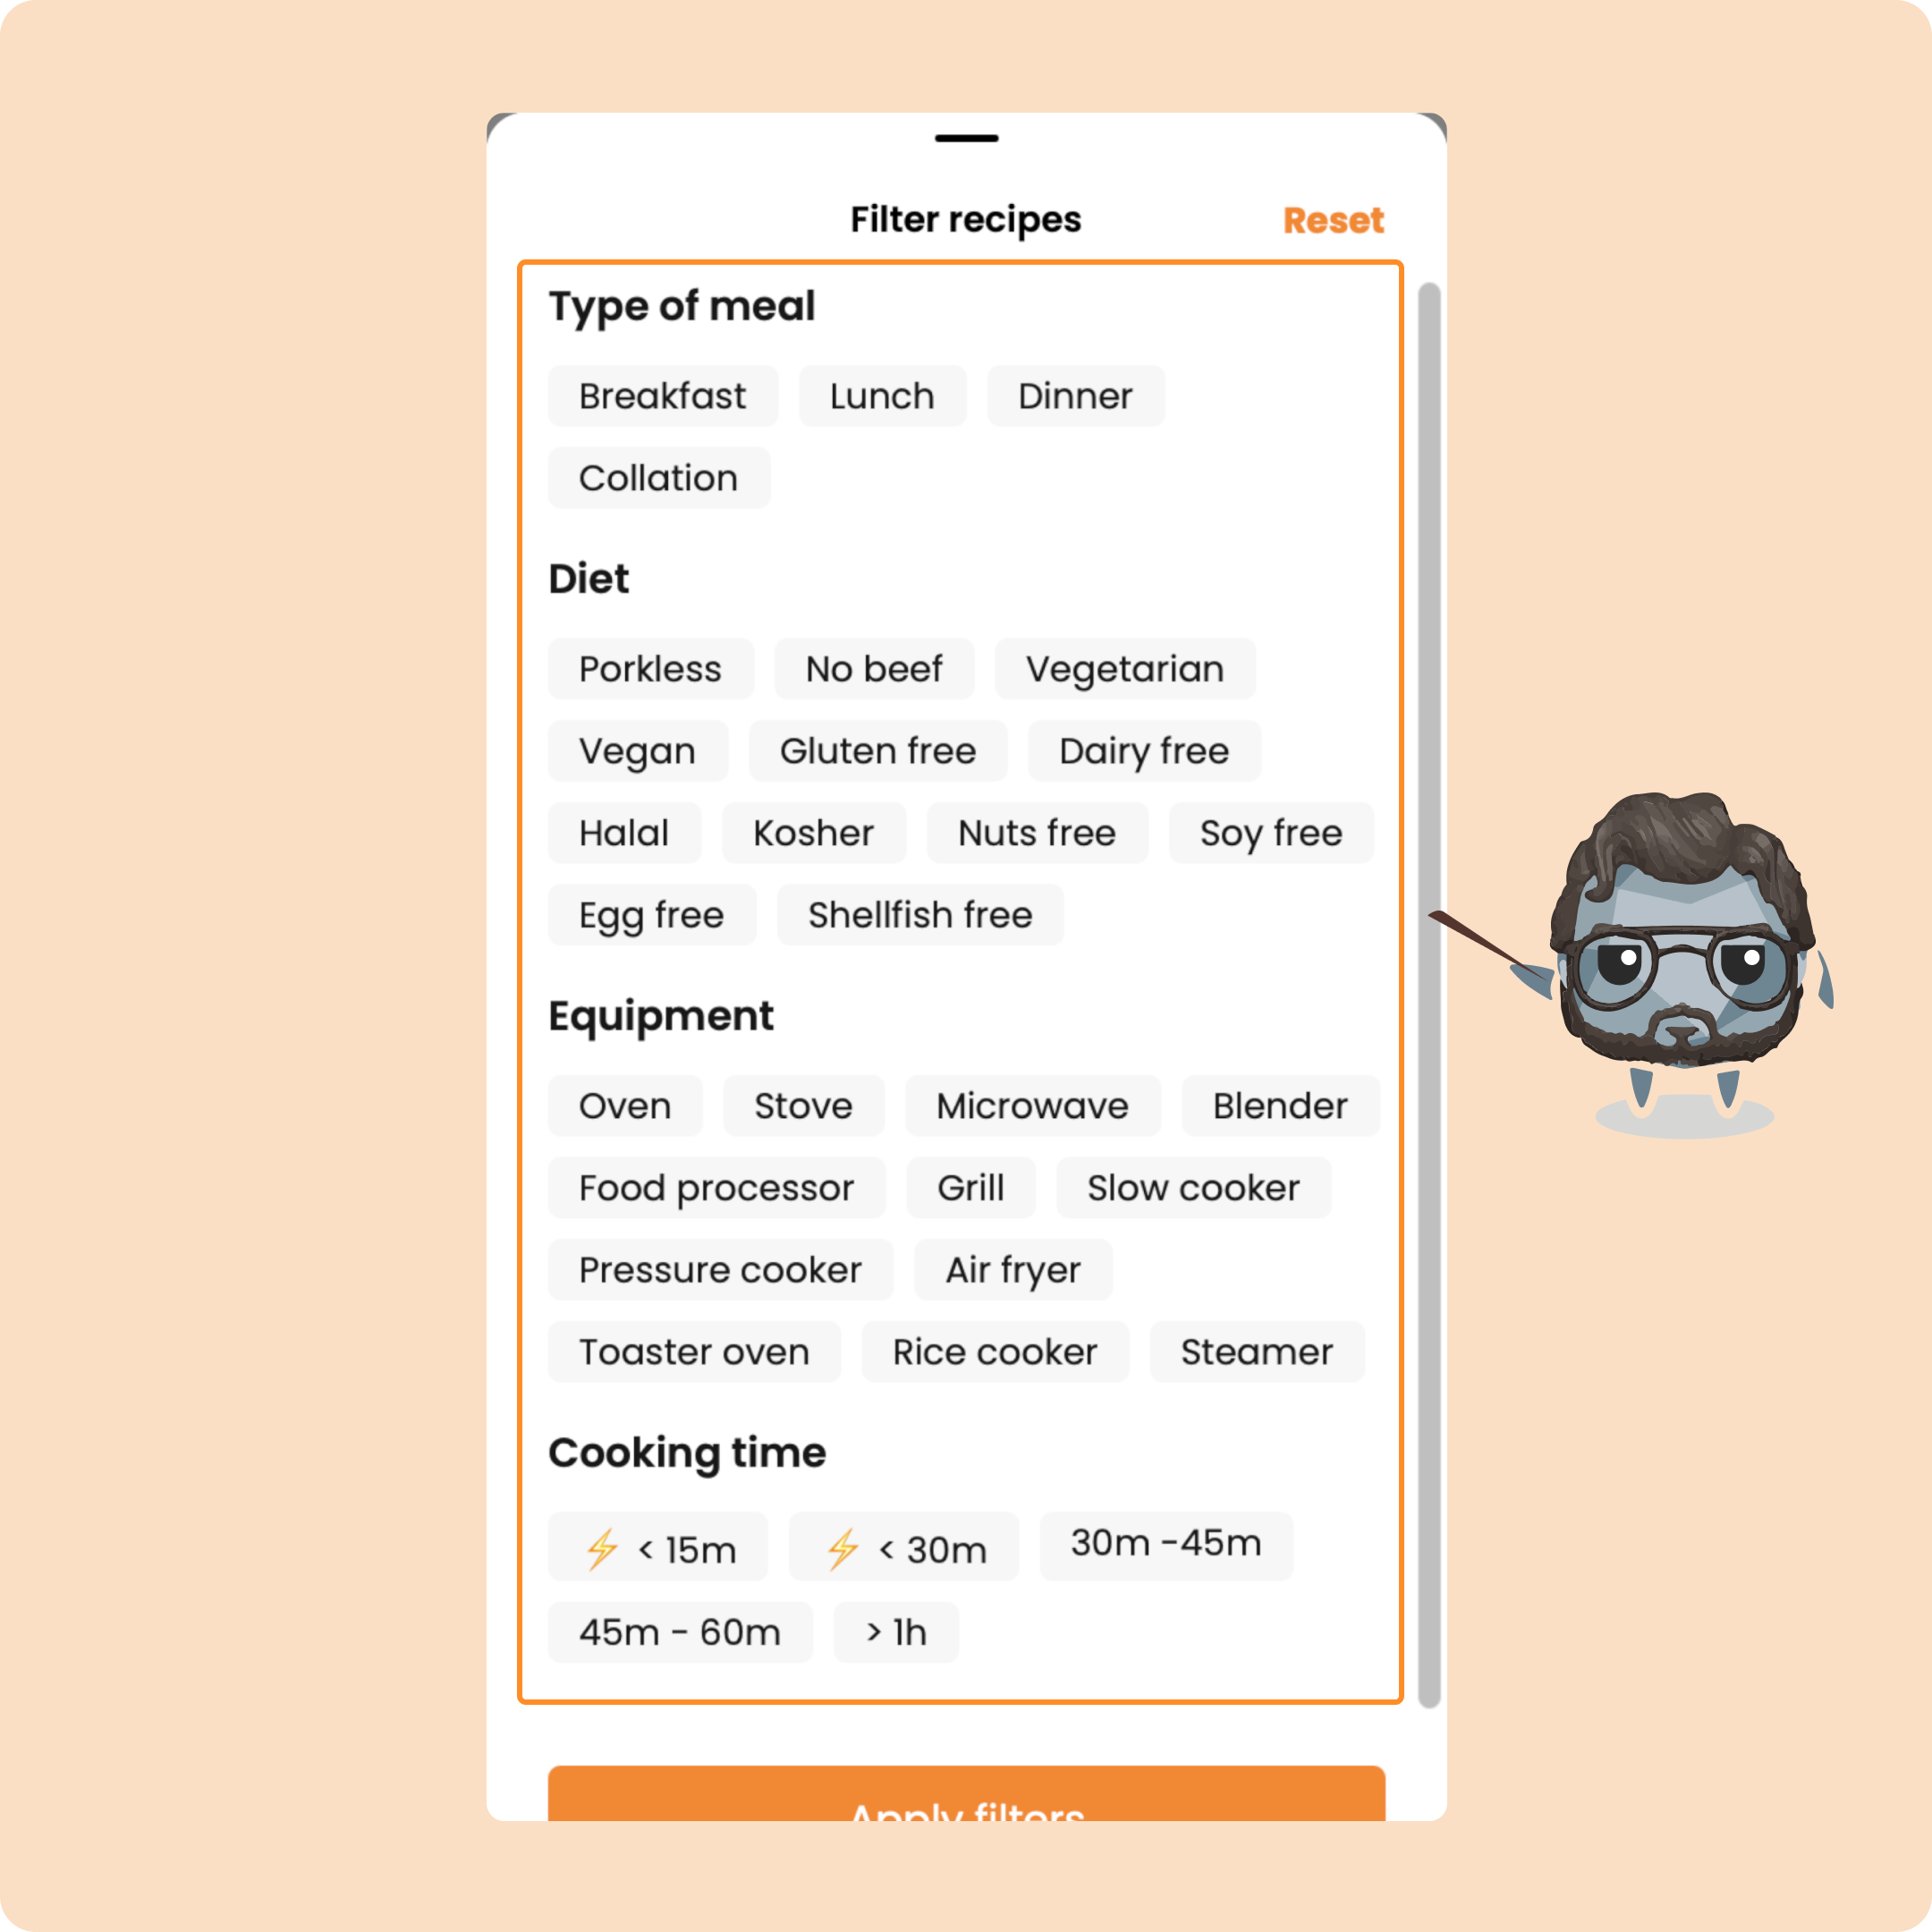
You can then search for a recipe using keywords such as the content of the recipe, the ingredients, the type of meal, etc...
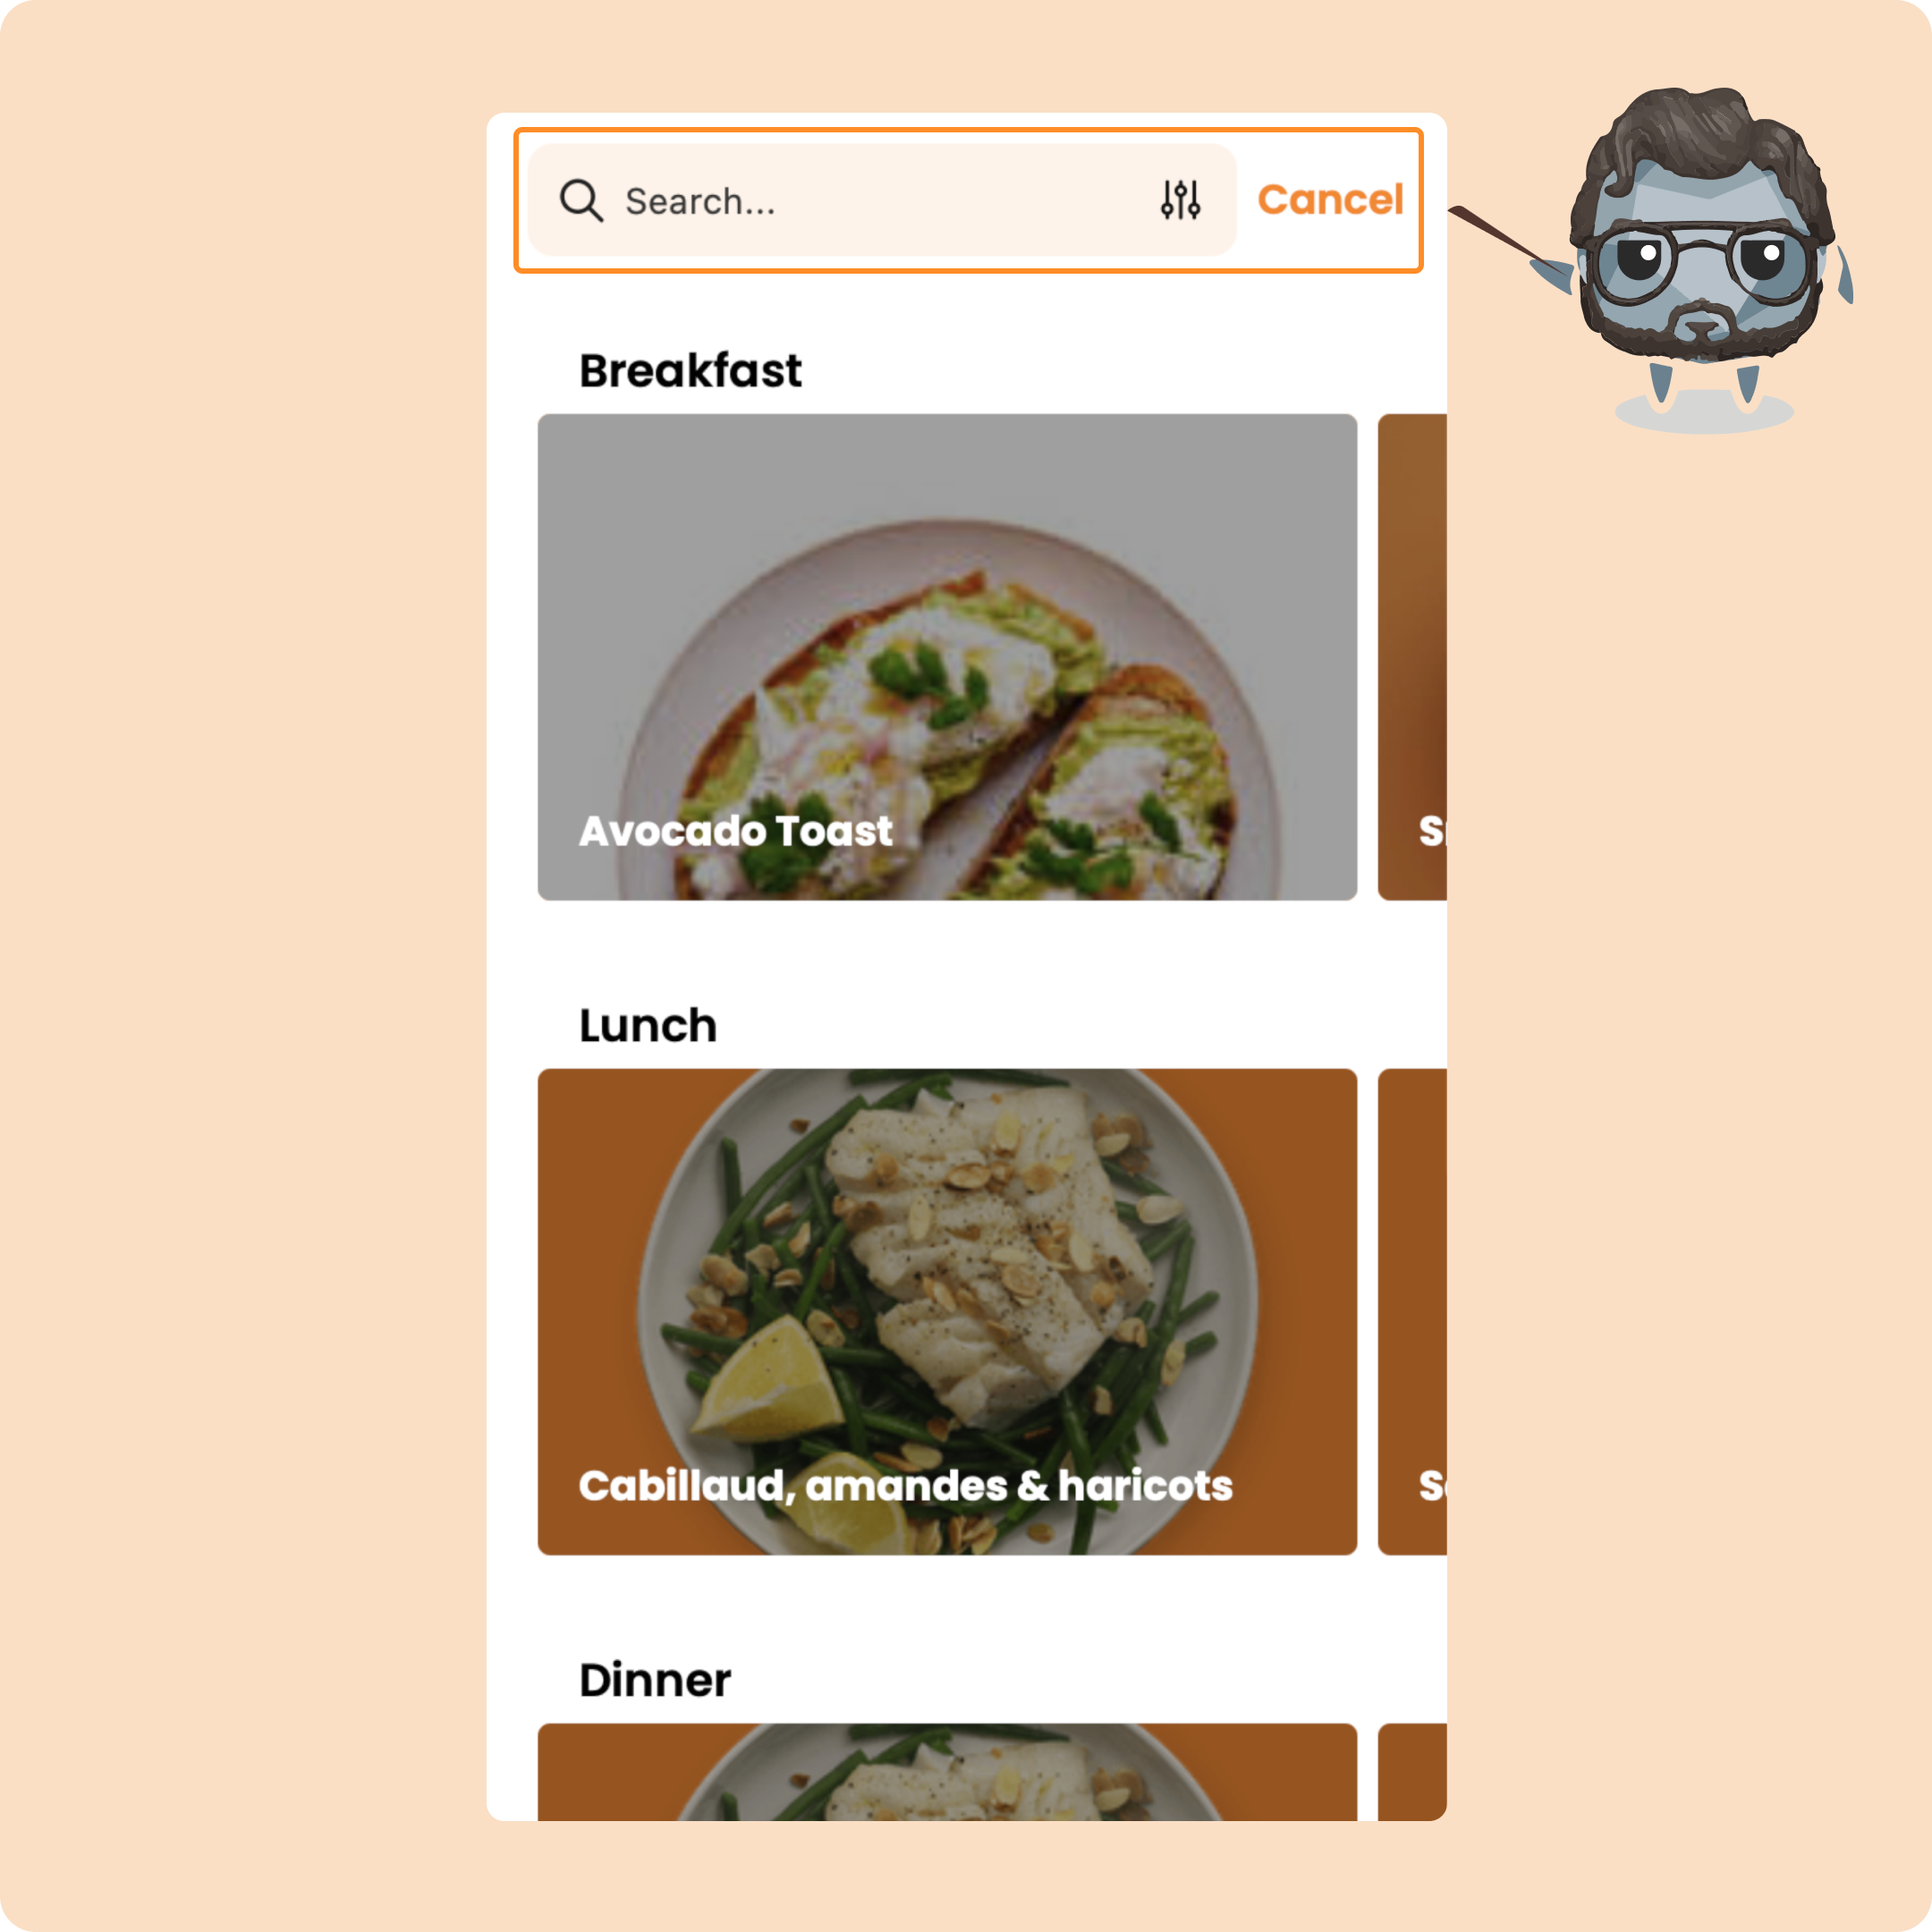
You can also use the filter which will allow you to efficiently filter the recipes according to specific criteria:
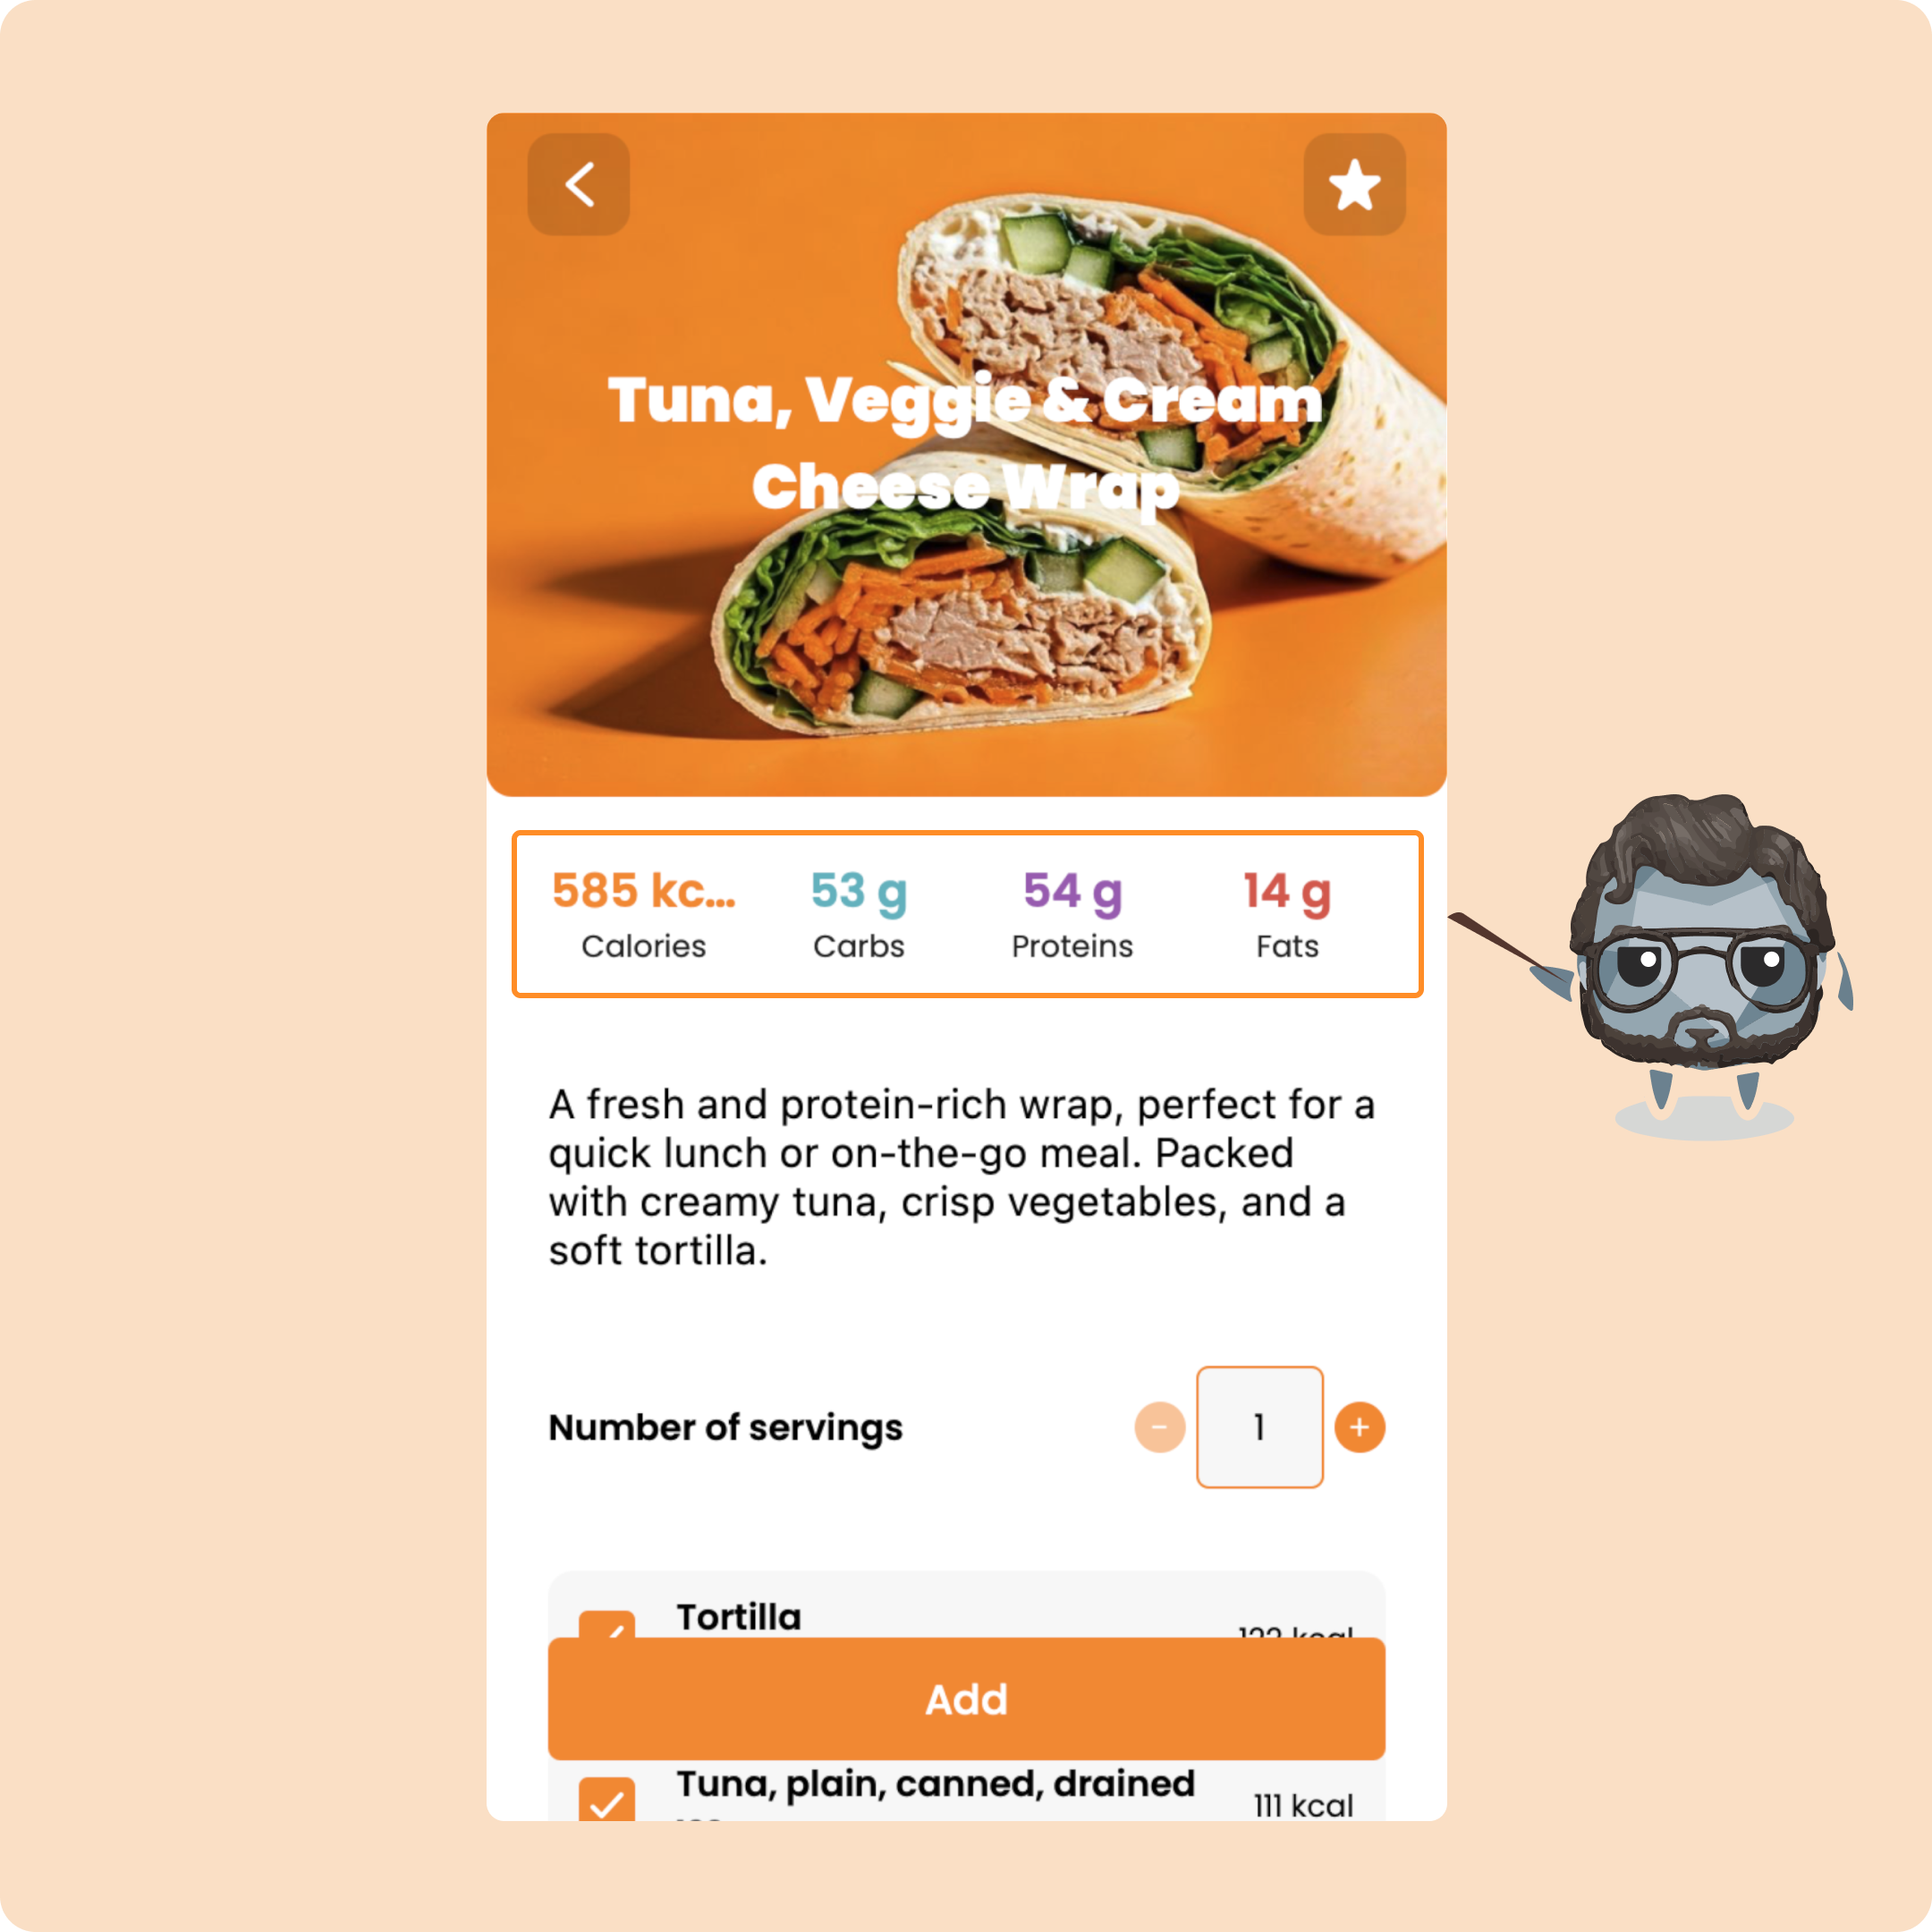
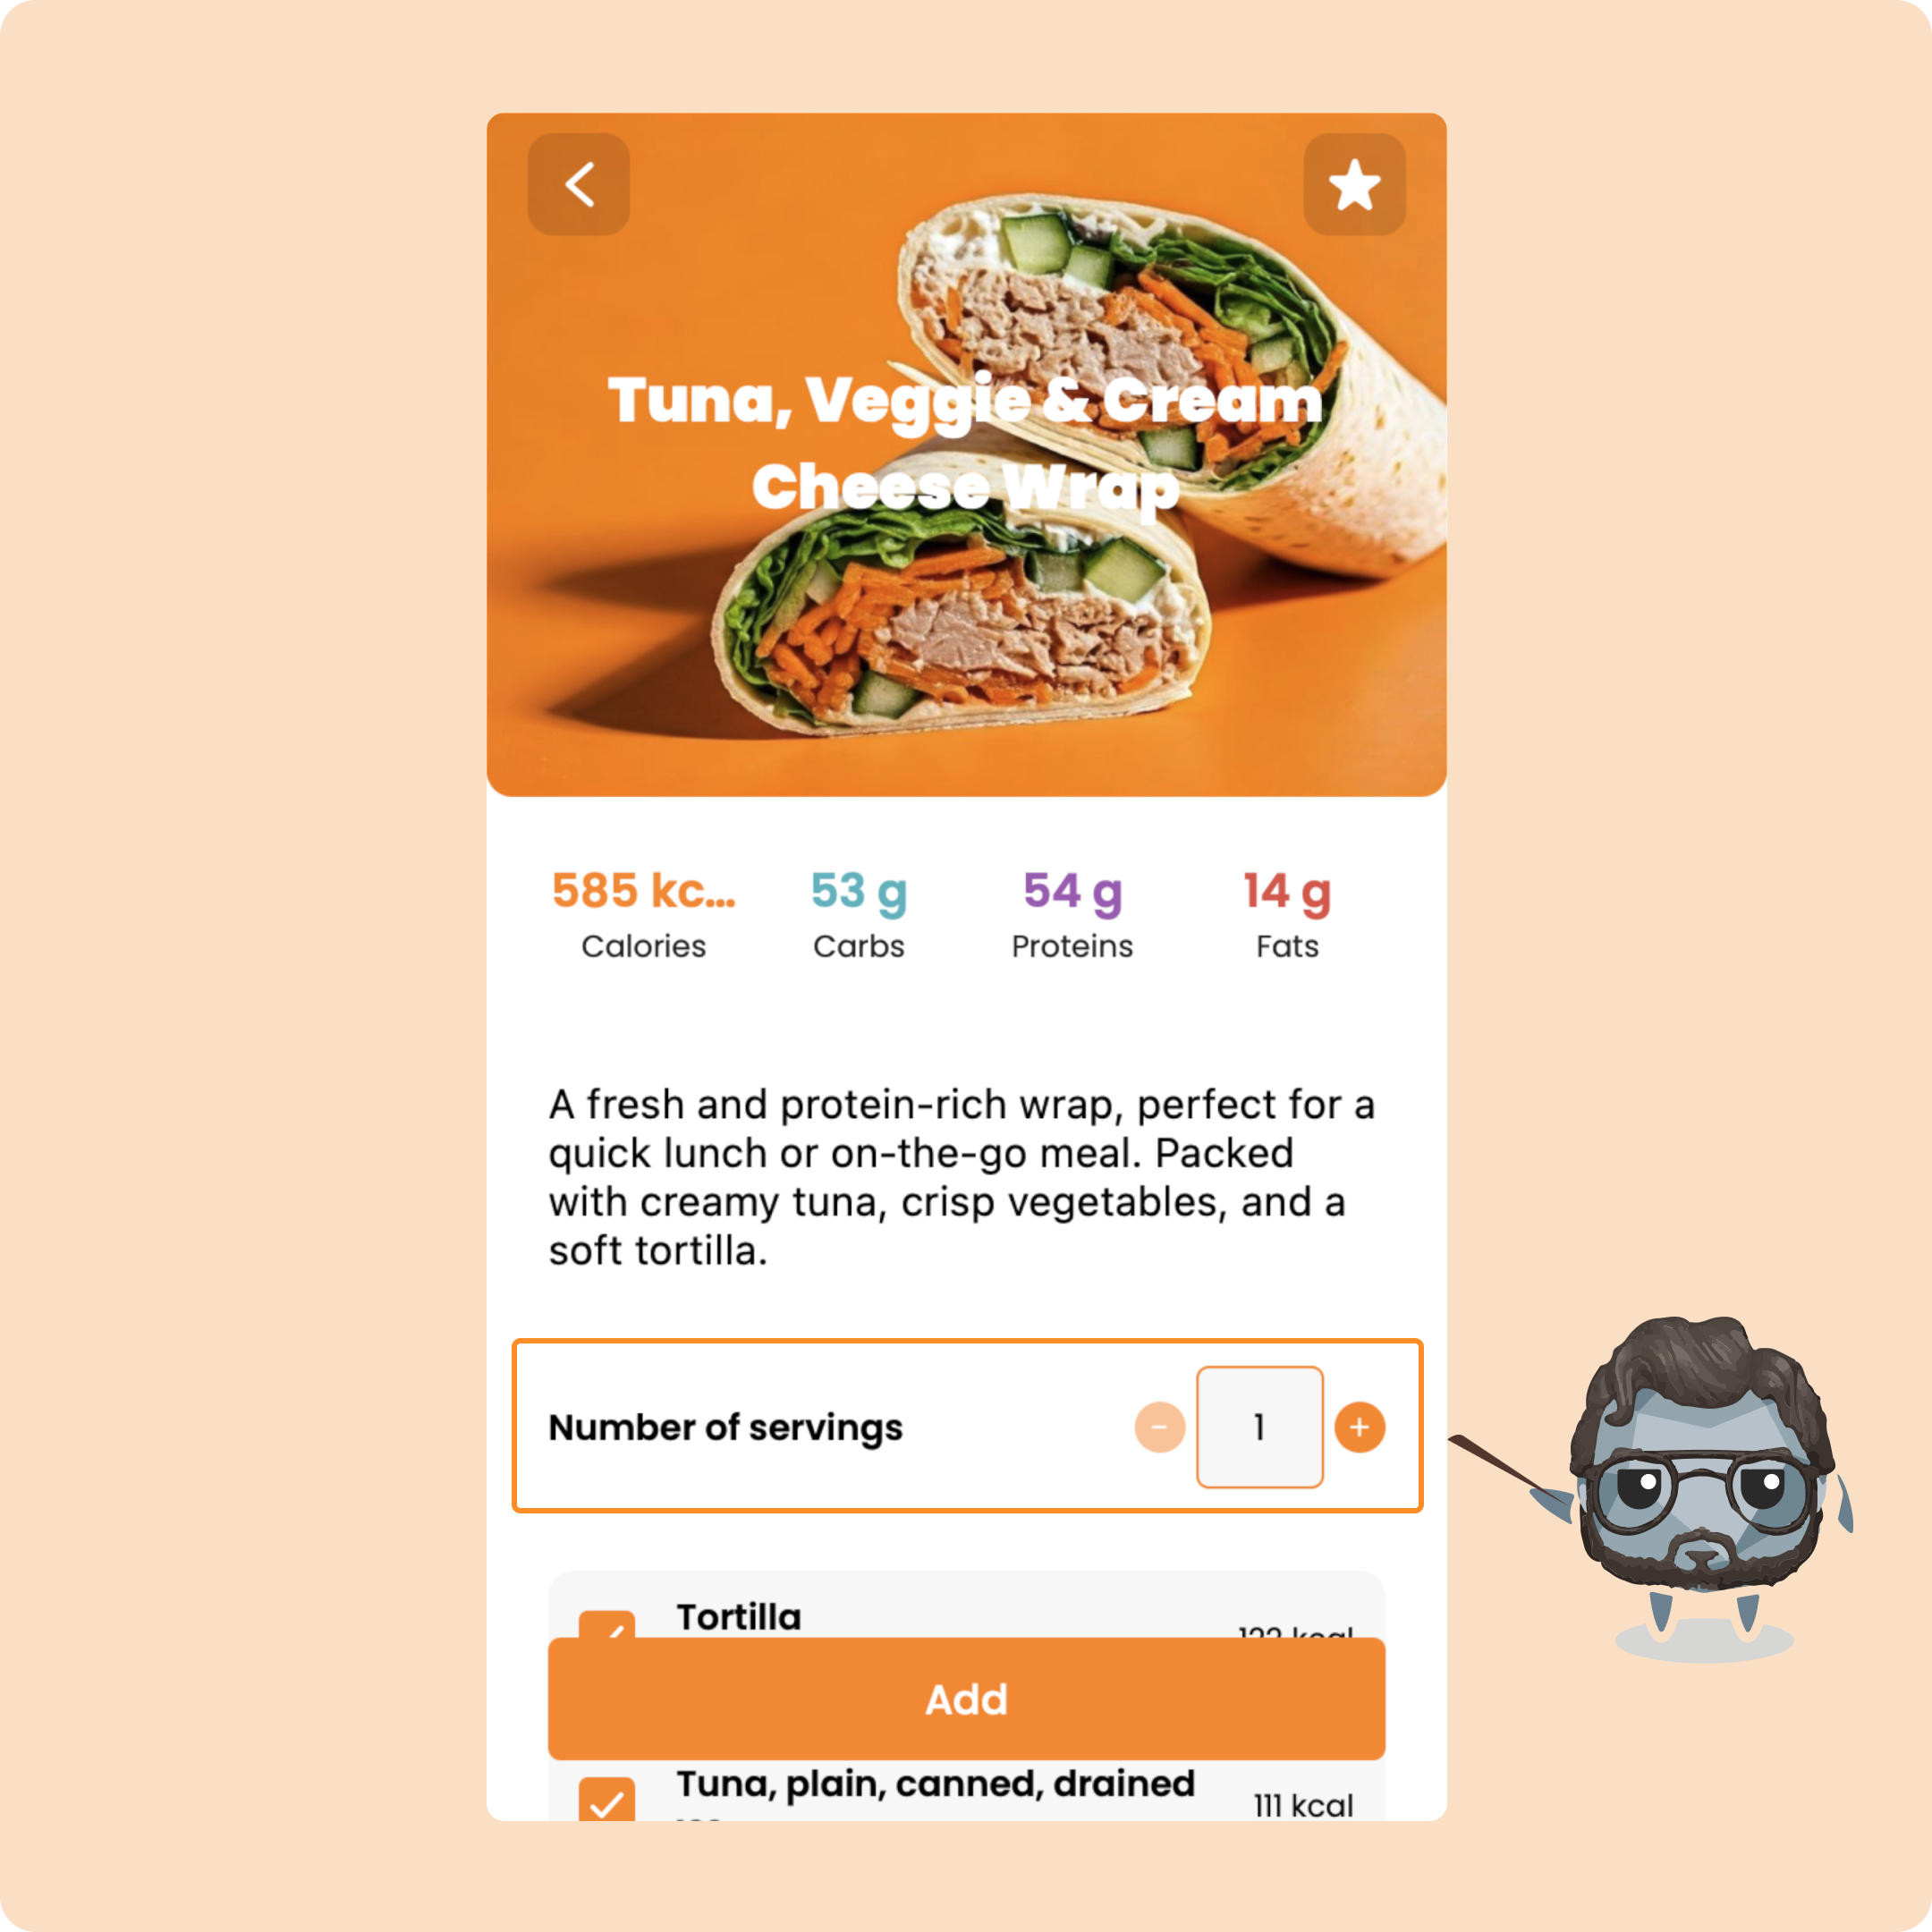
When you open a recipe, you will have several pieces of information.
First, the calories and the macros of the recipe:
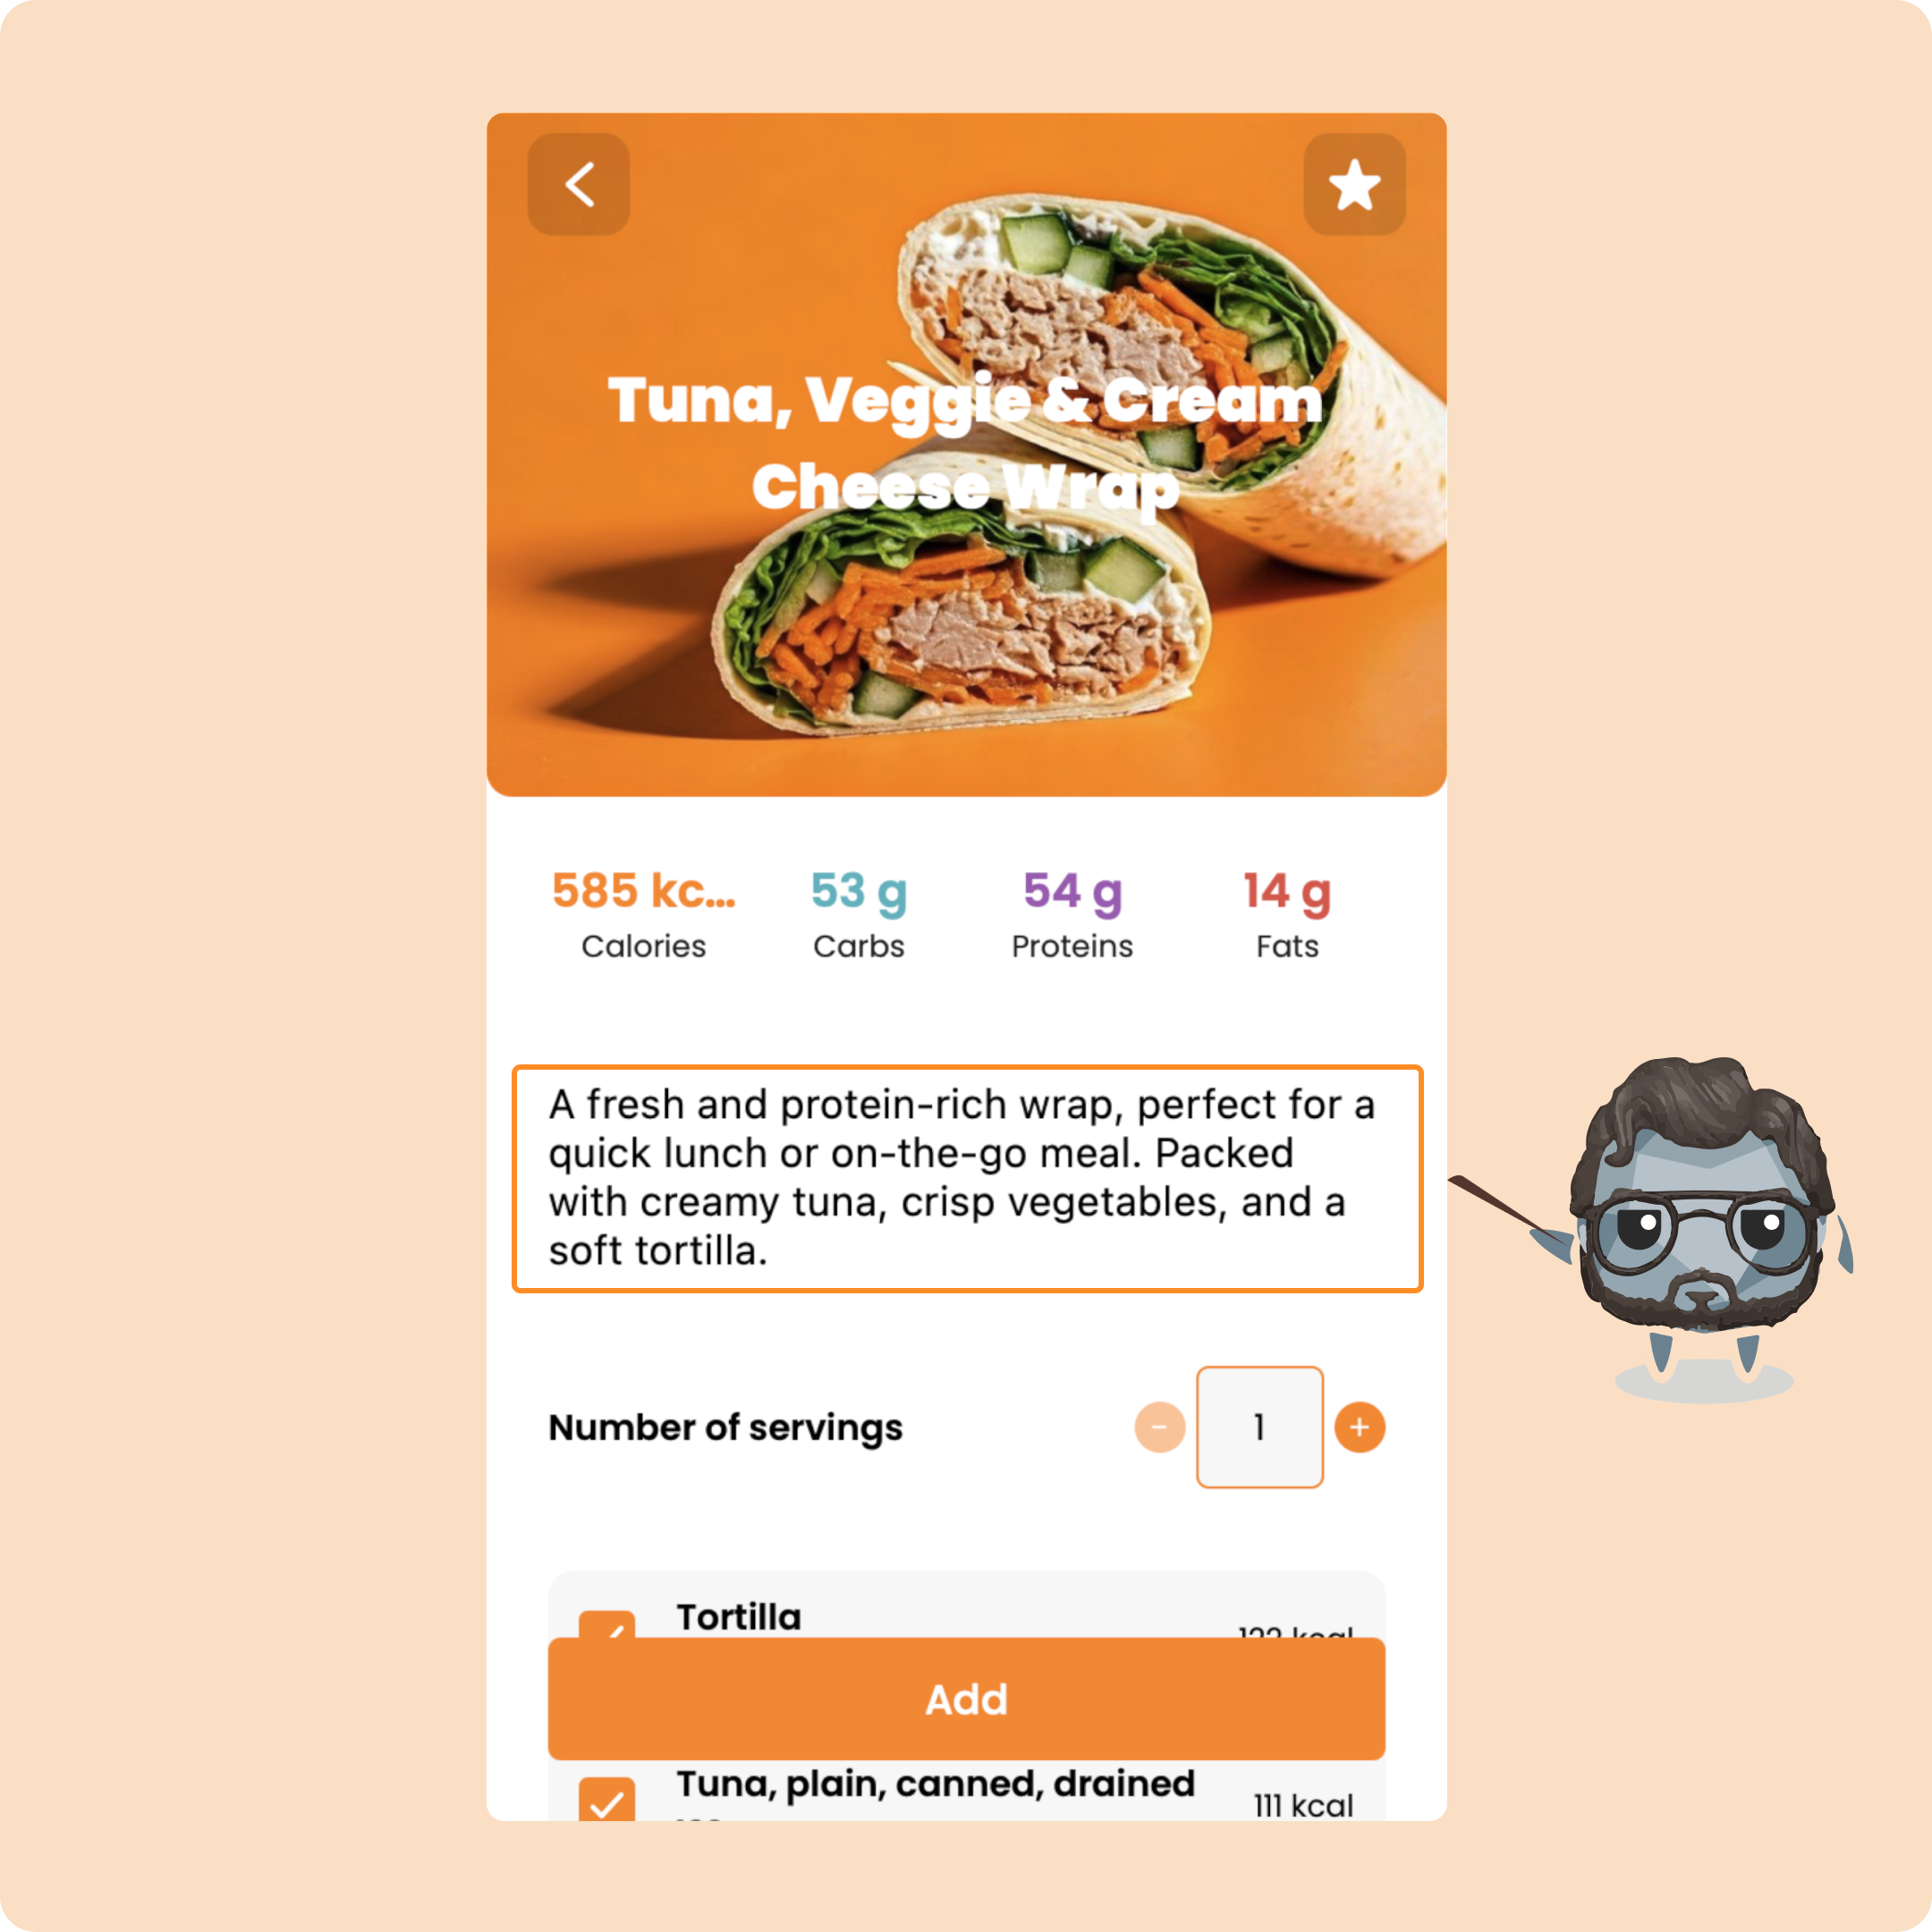
Next, you will have a short description of it:
Just below, you will find the number of servings (for how many people) of the recipe:
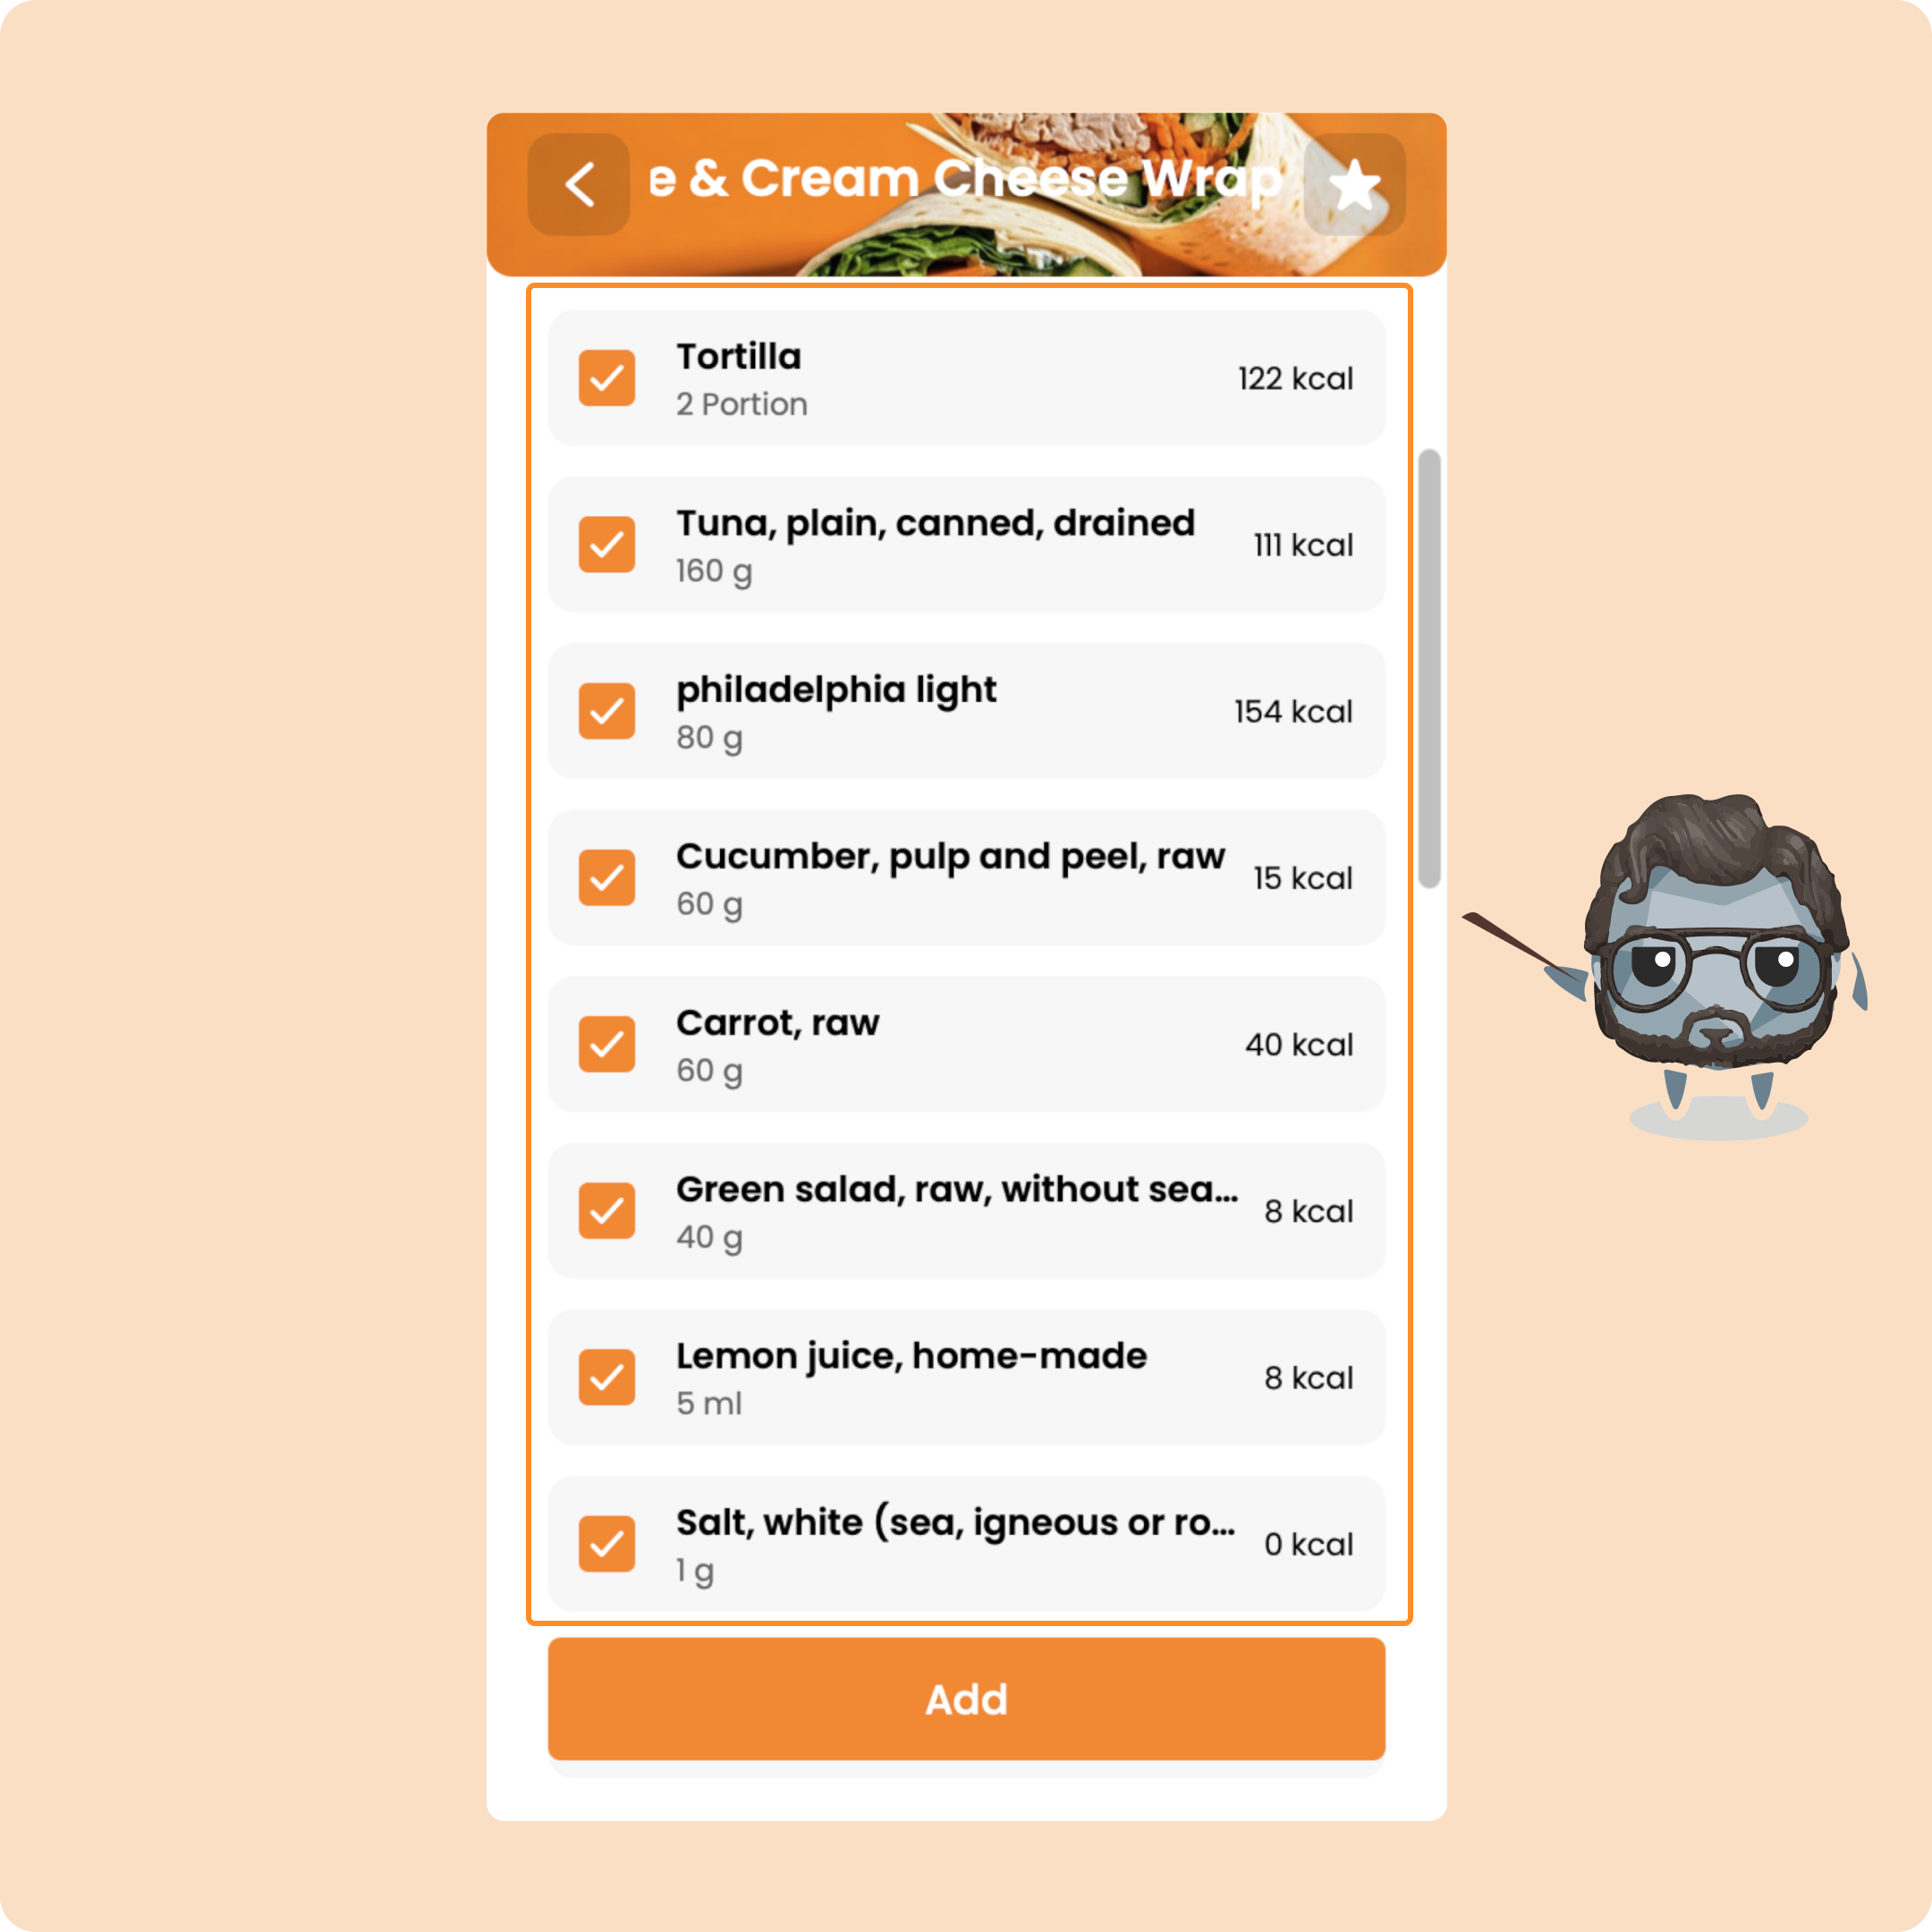
You will also find the different foods that make up the recipe:
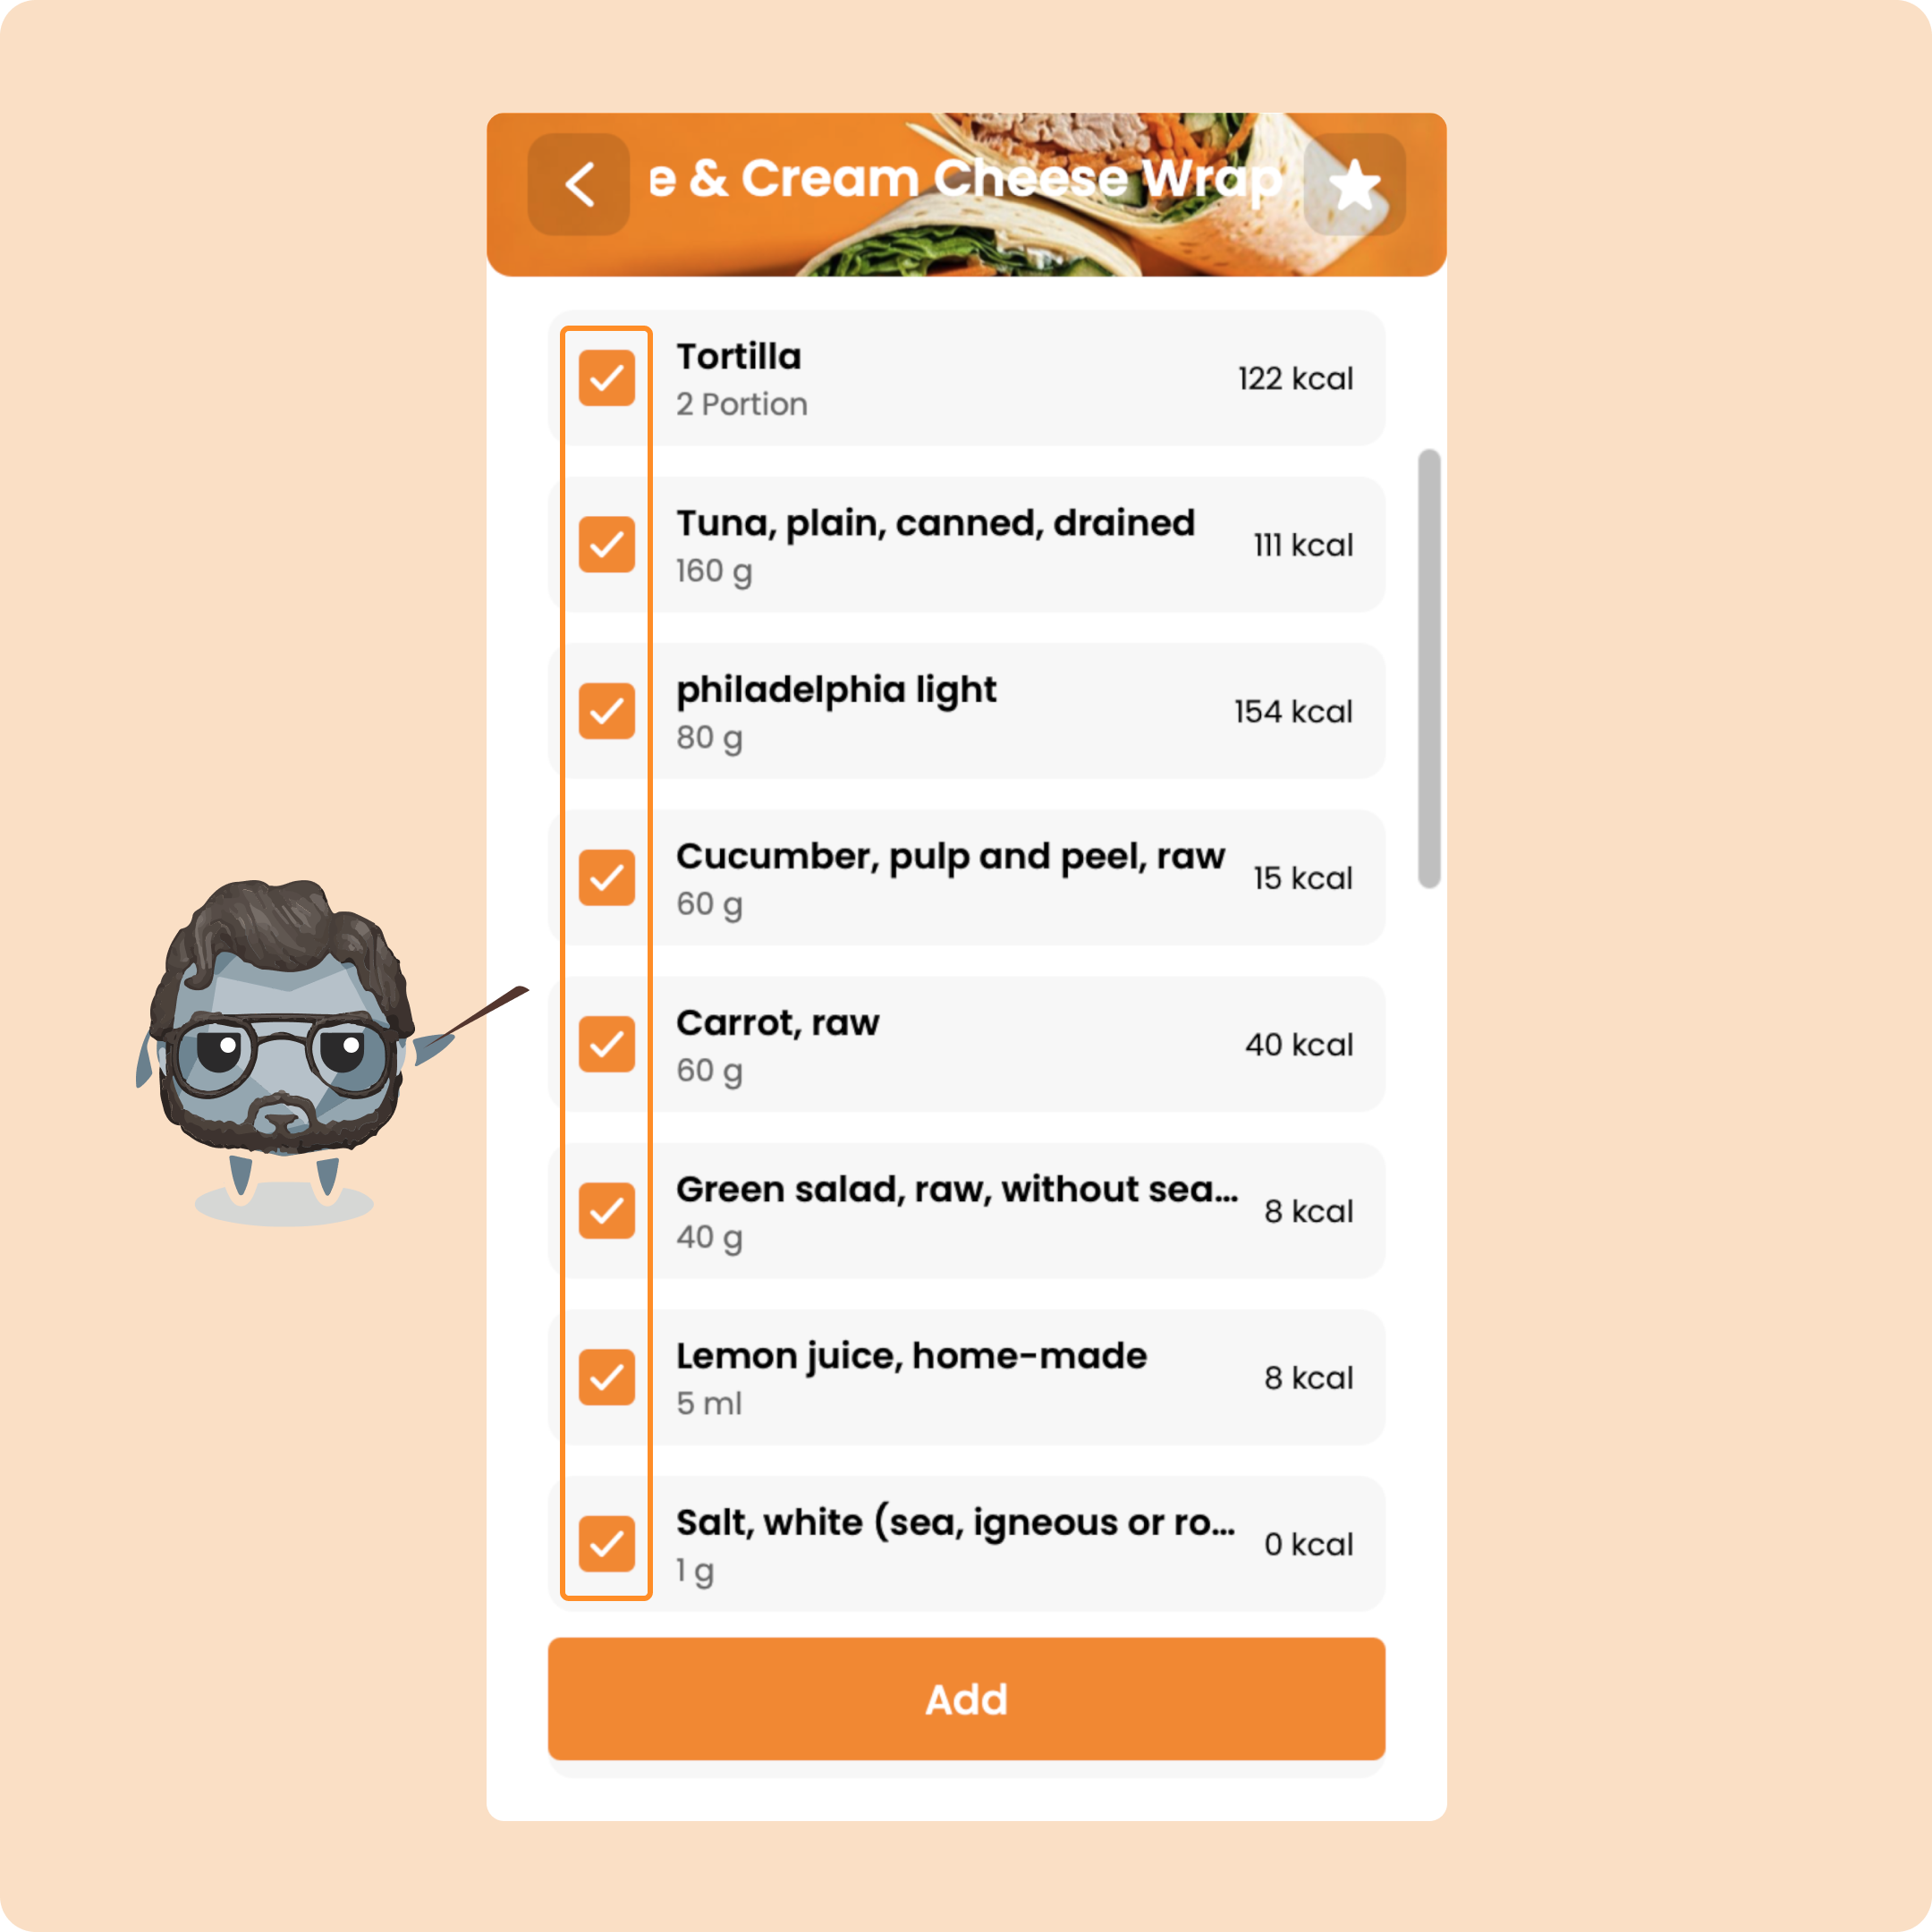
Moreover, each food, if you do not have it or if you do not wish to consume it, can be removed by unchecking it:
Just below the foods, you will find in detail the instructions to follow to make the recipe:
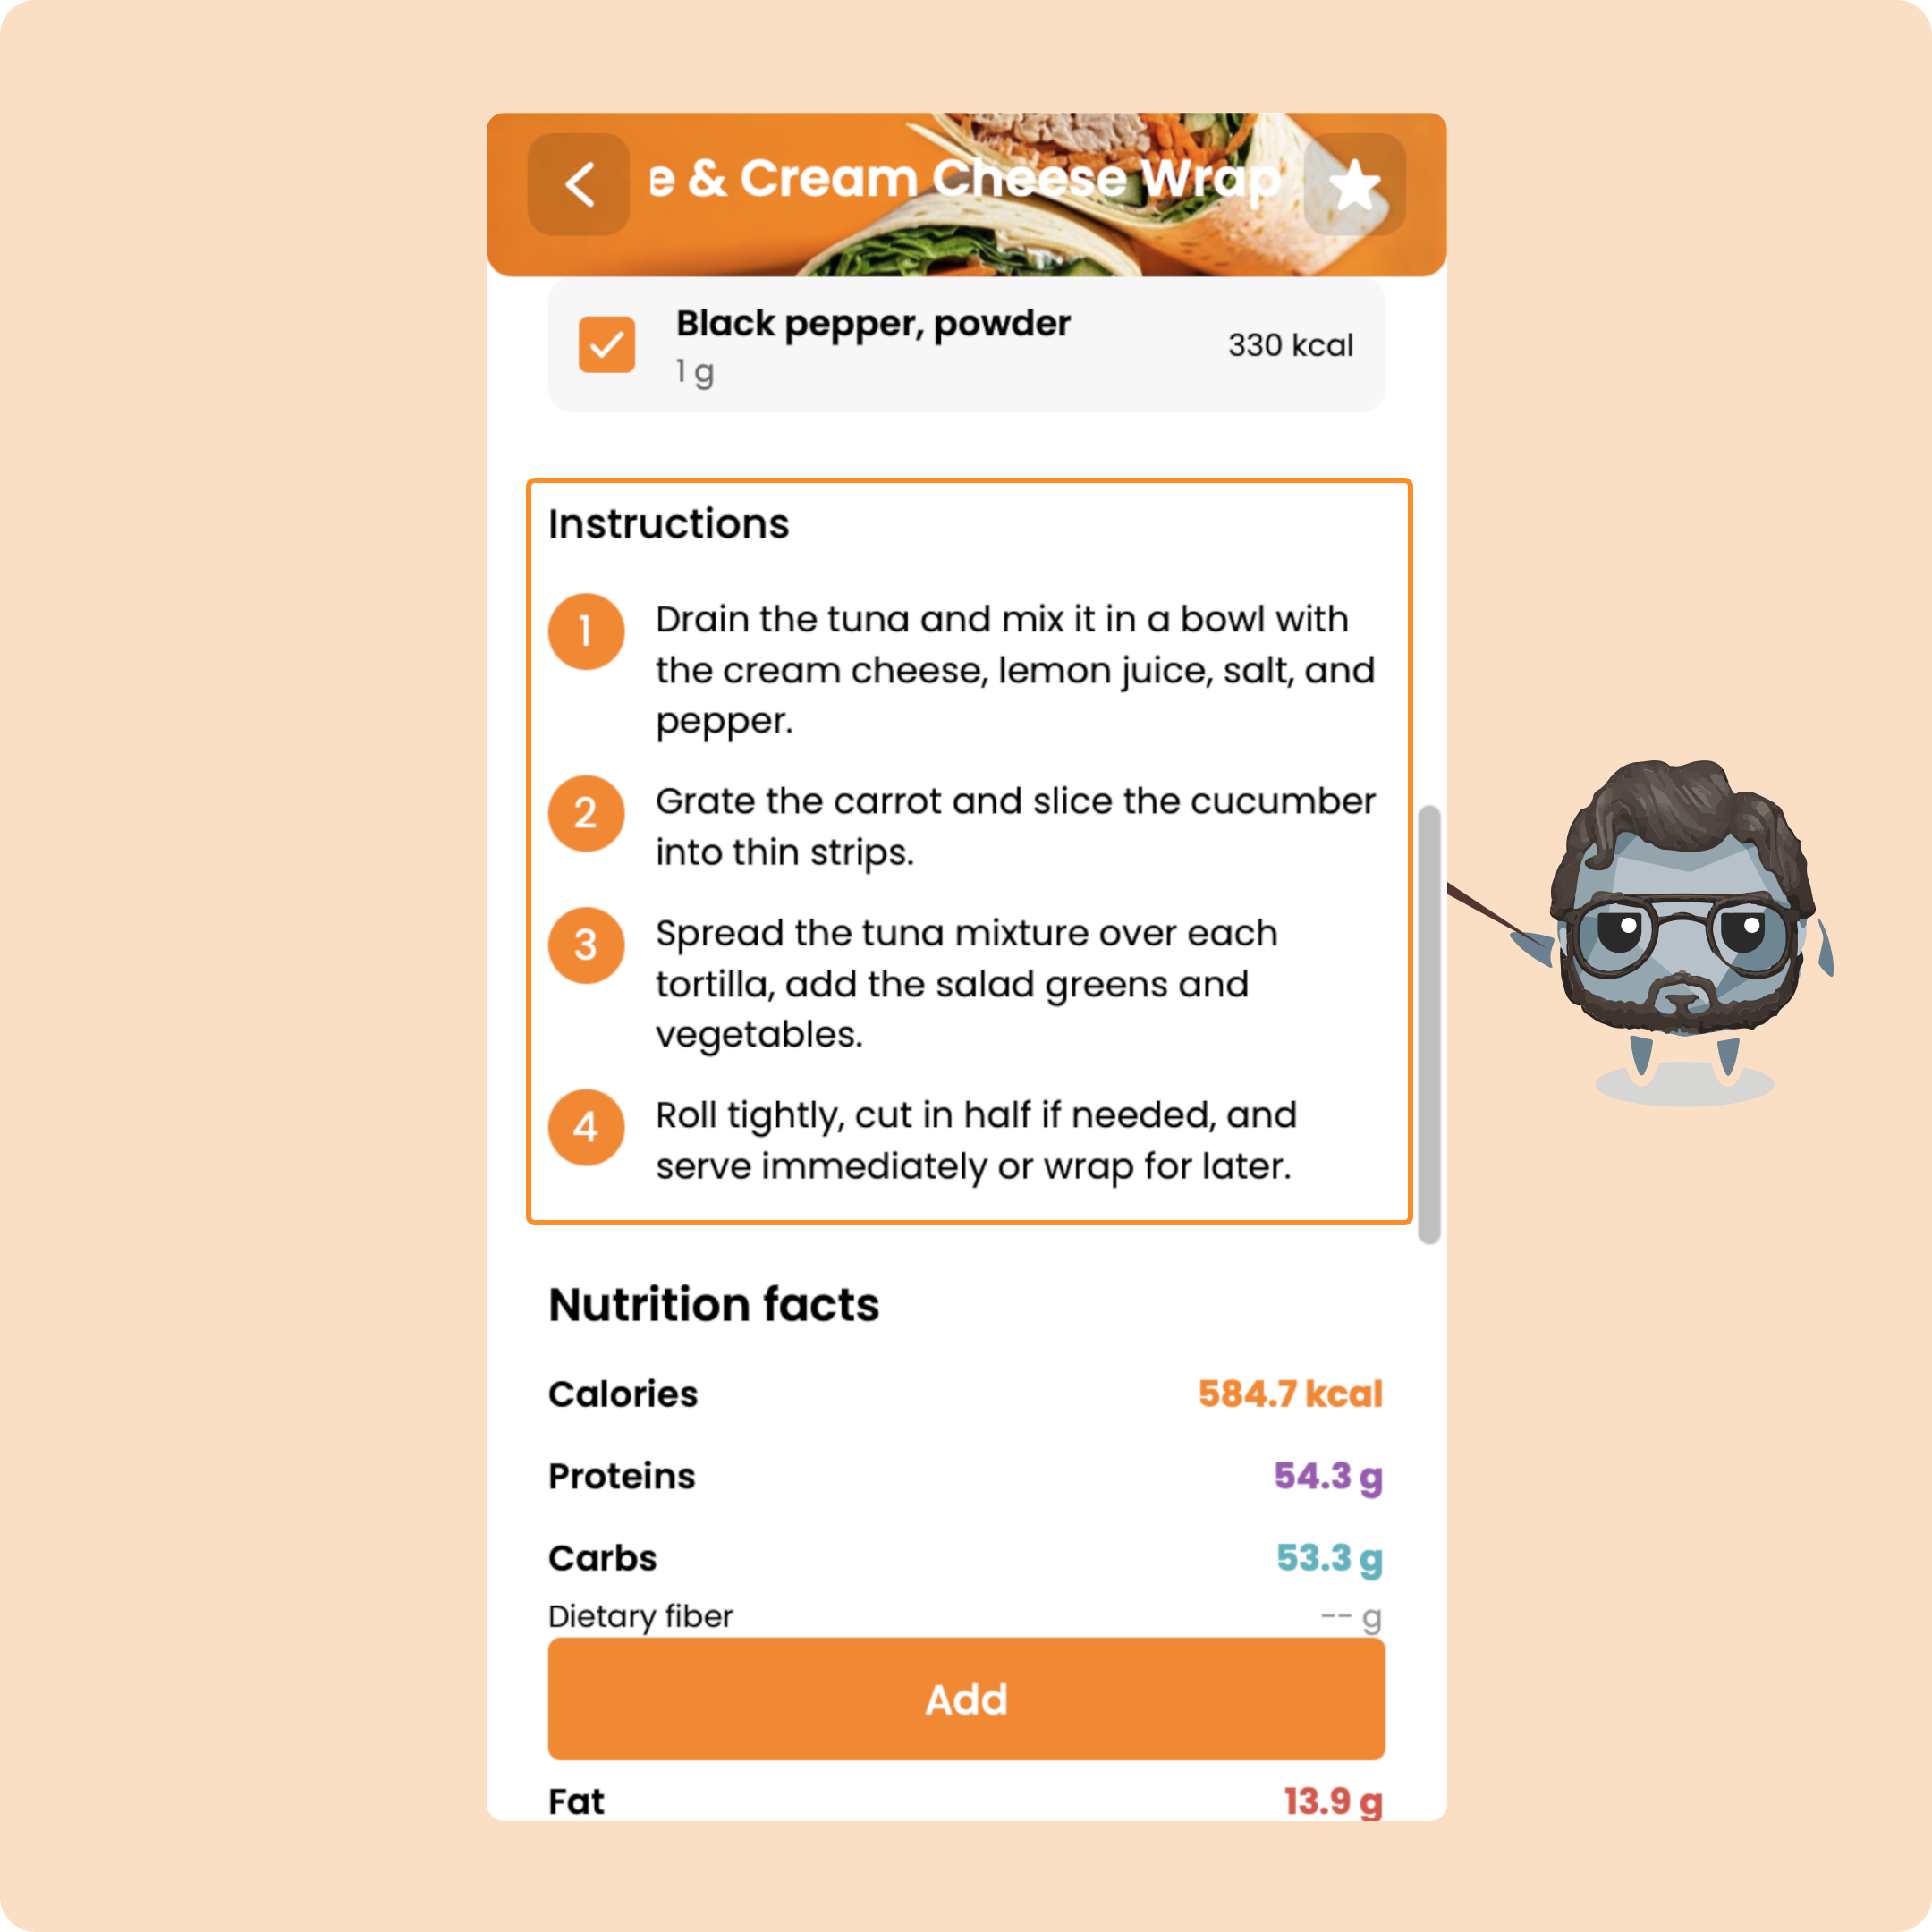
And finally, you will find the nutritional facts:
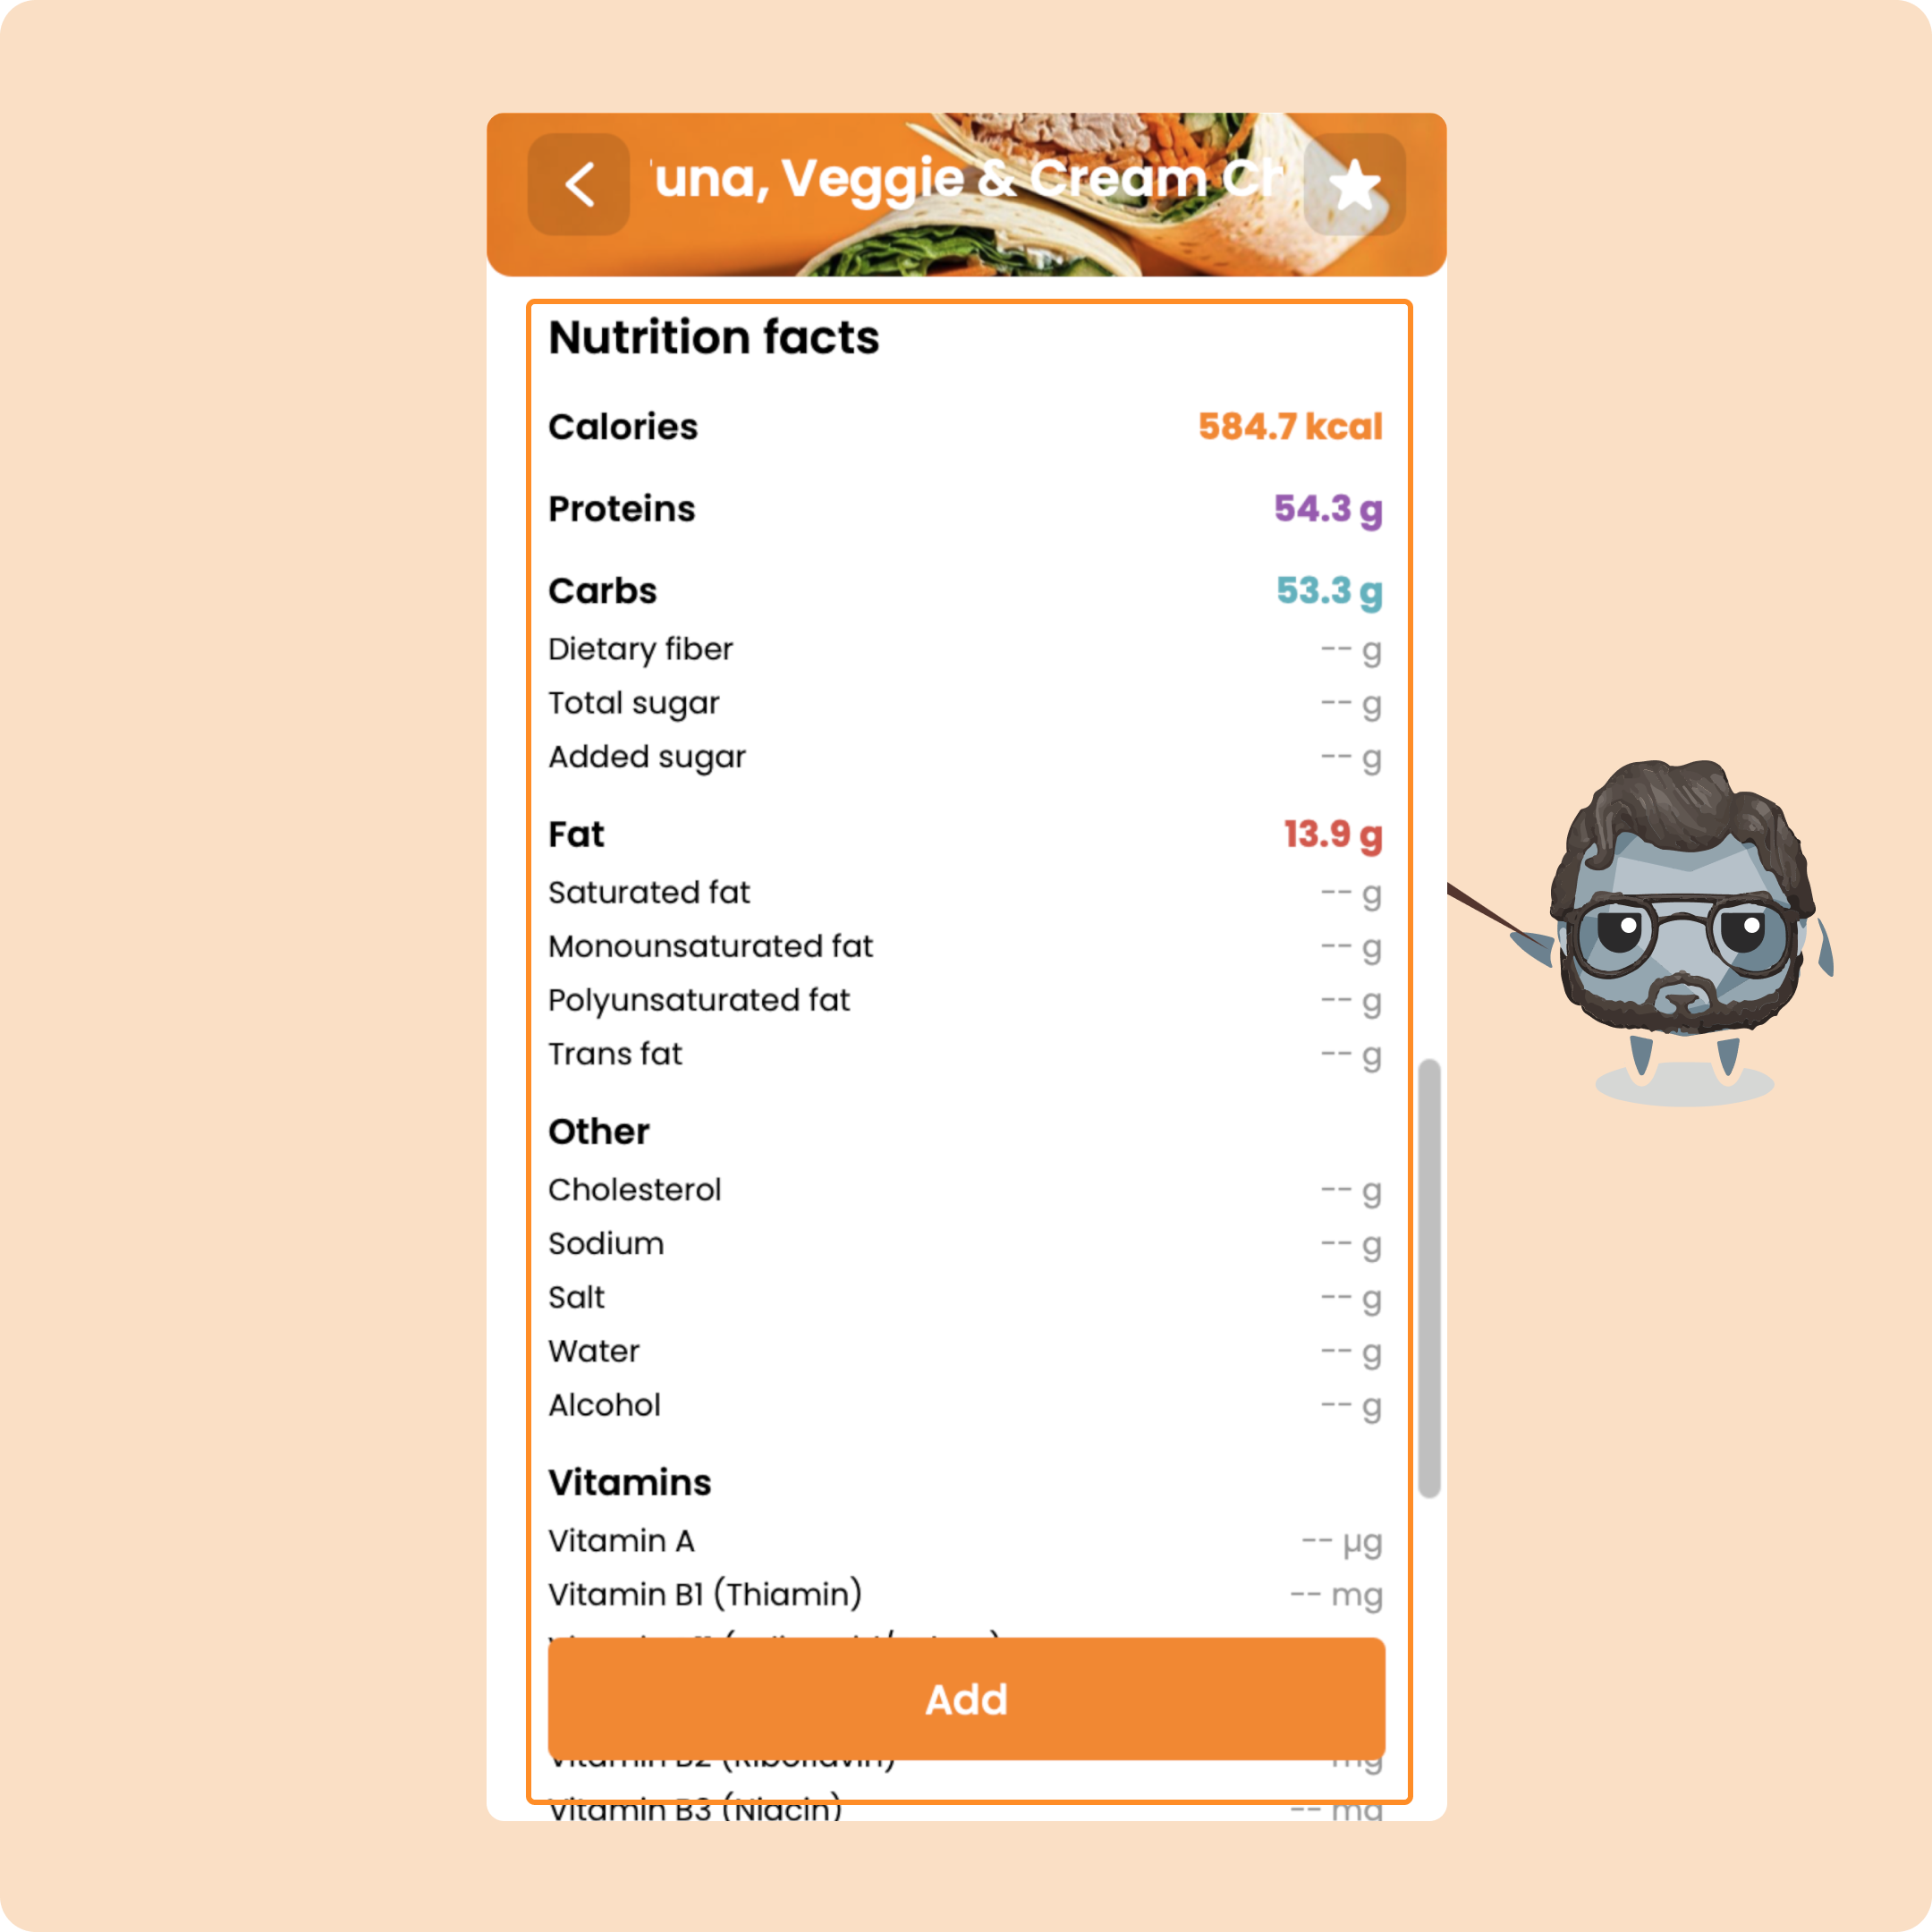
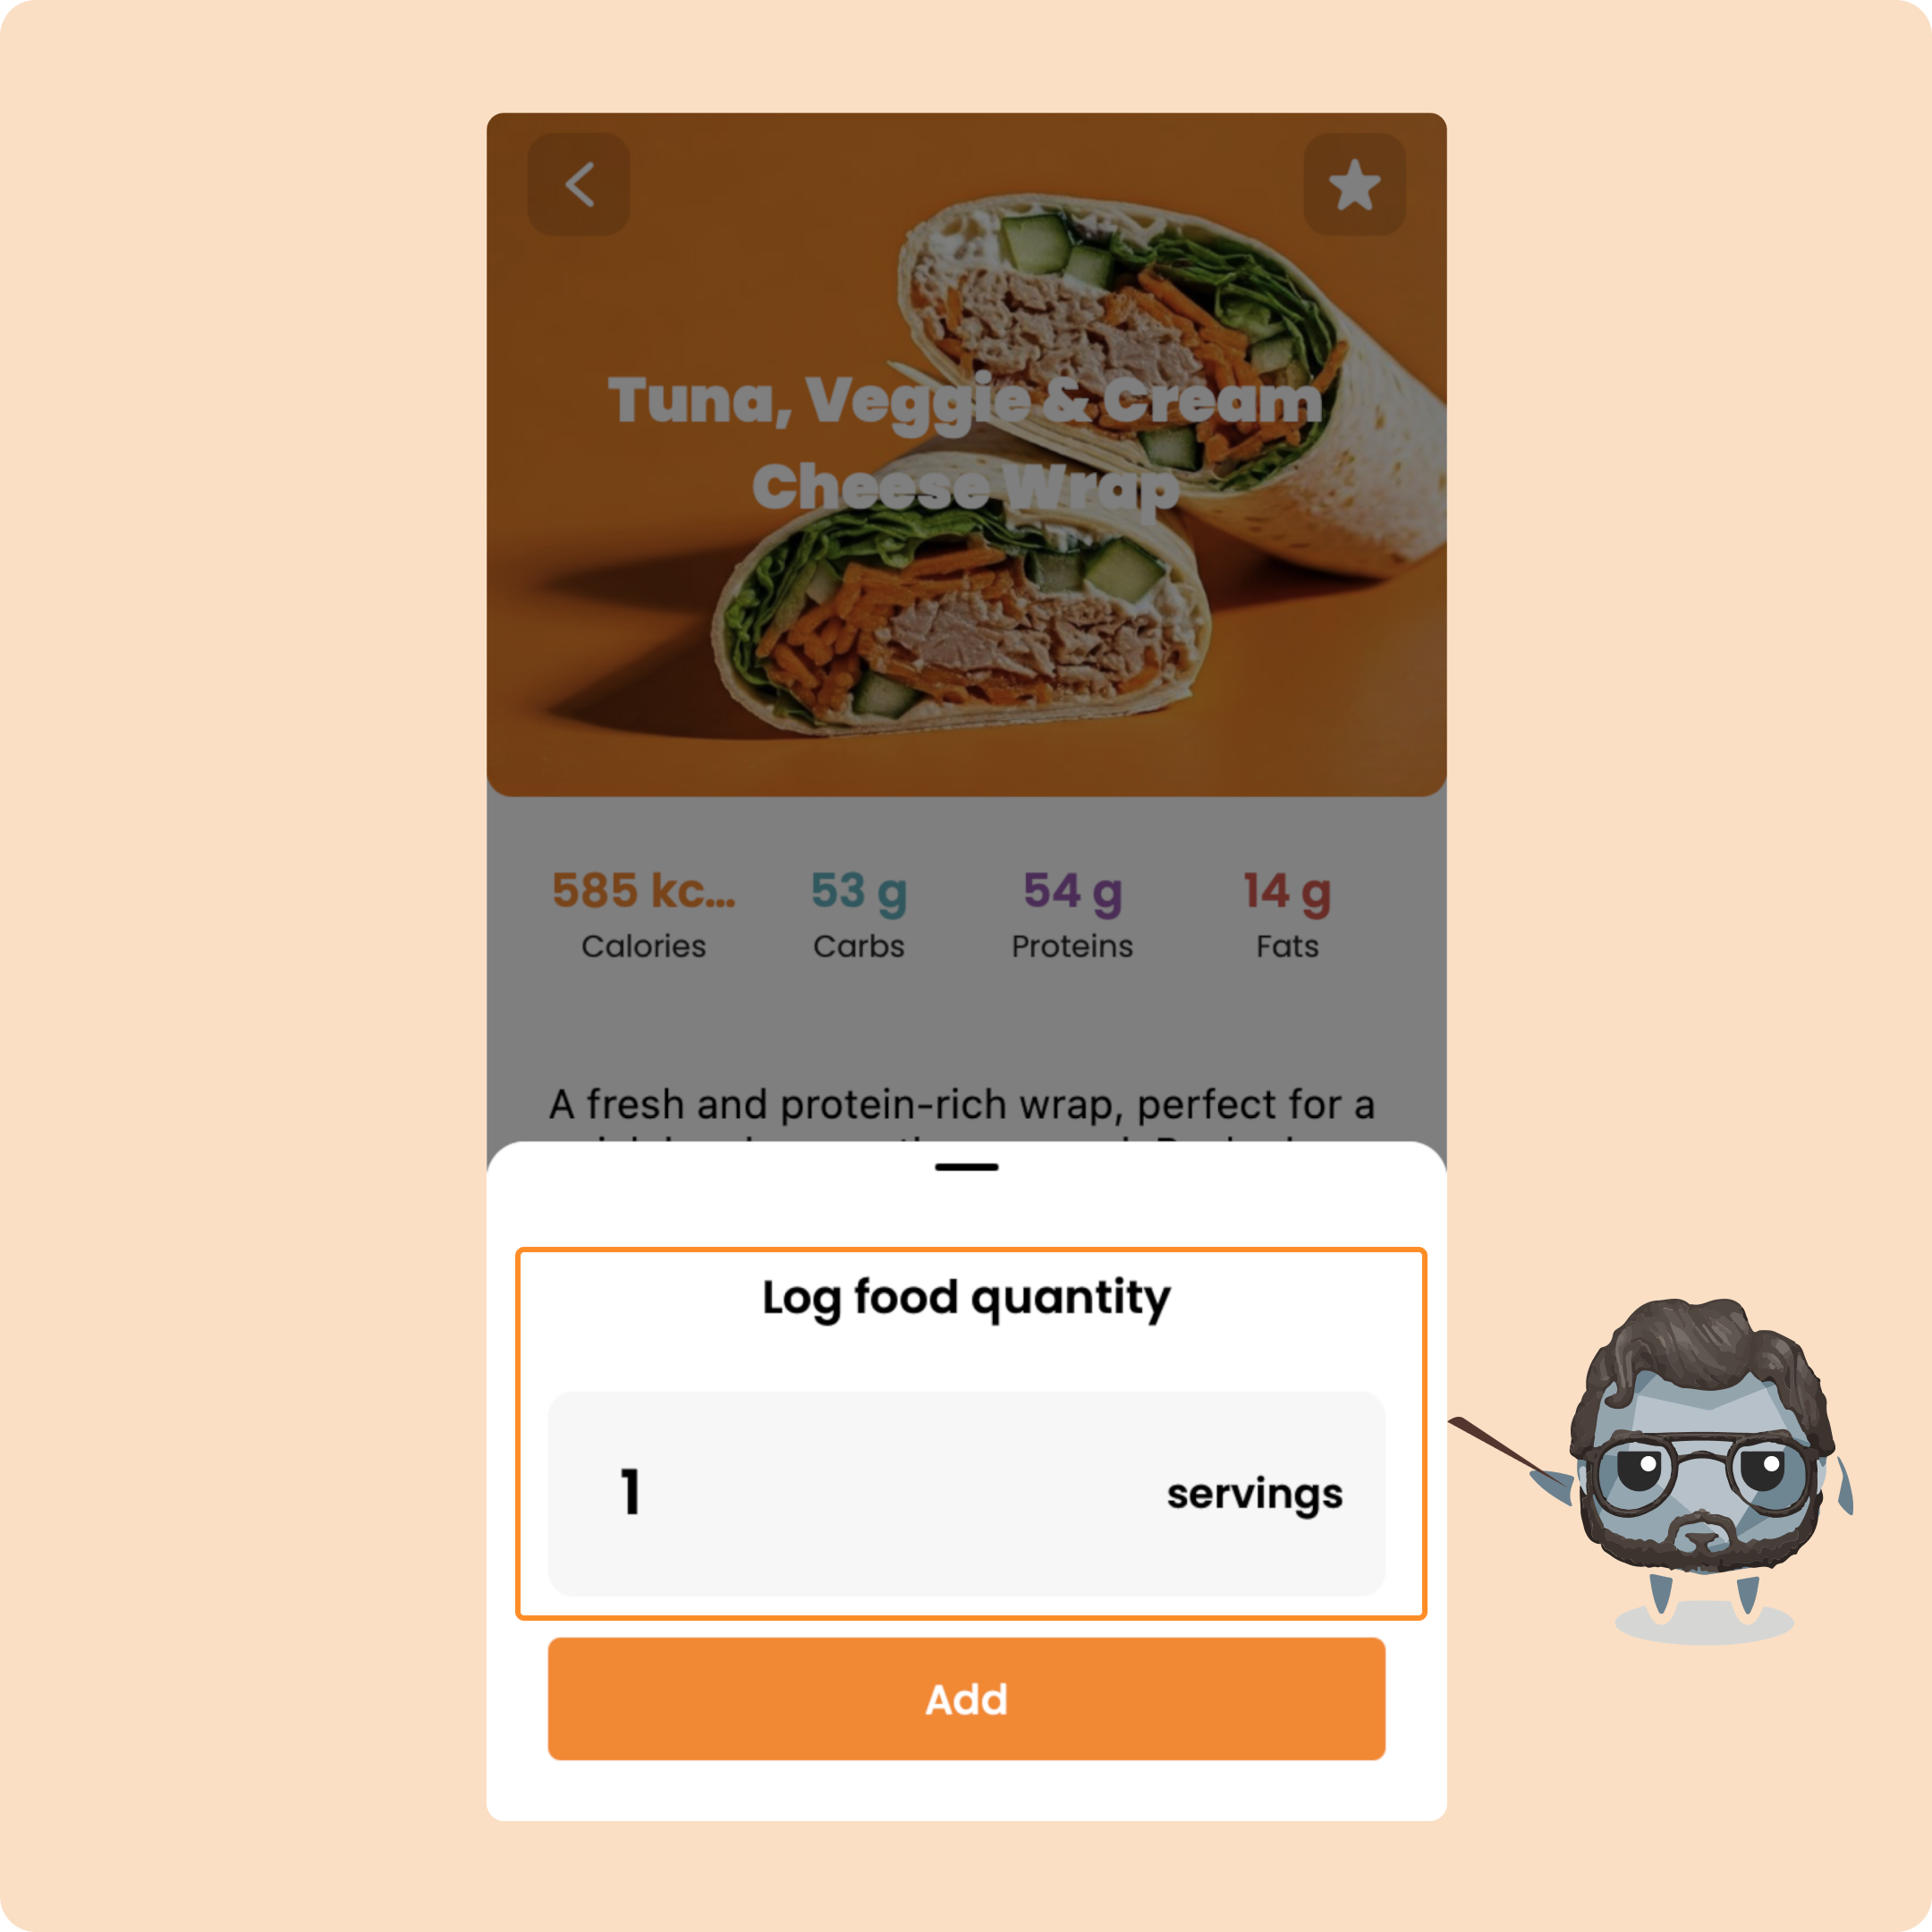
To add the recipe to your meal, you will simply need to click on the "Add" button and determine the portion that you want to make.
For example, if you want to make these wraps for 3 people, you will enter "3".
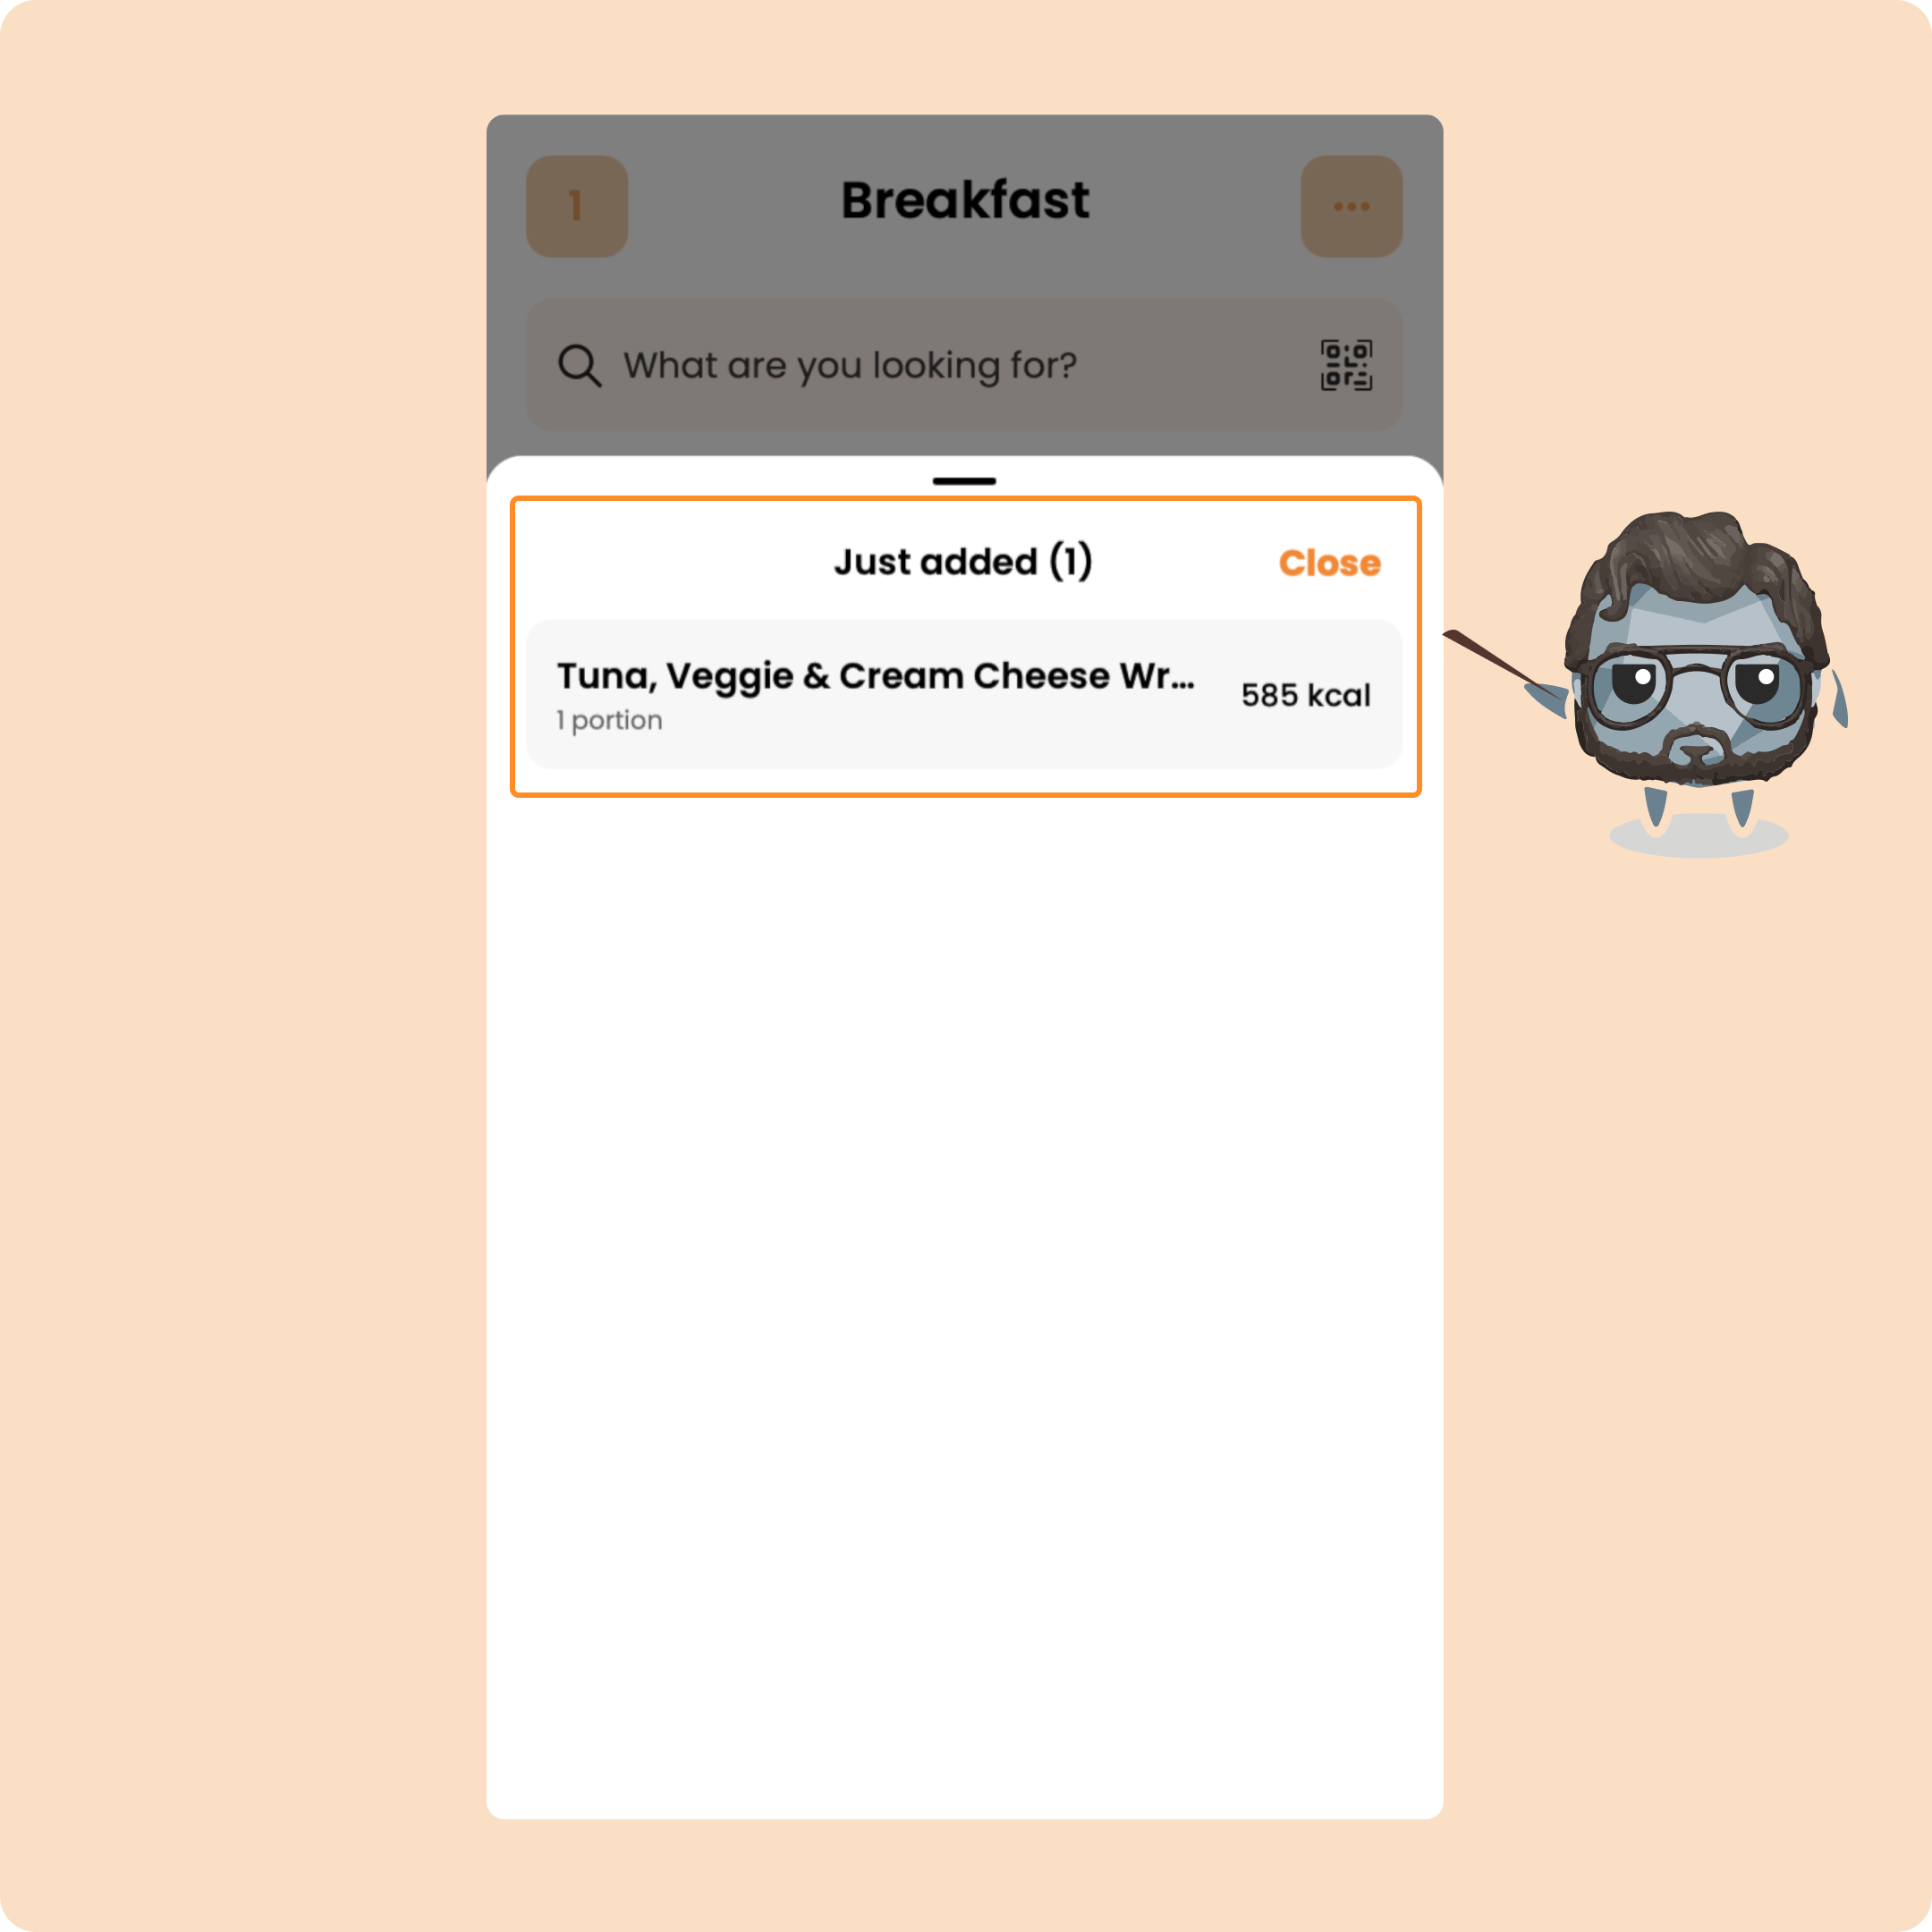
You will then find the recipe in the list of additions:
Create your own recipes on Gymkee mobile
As we shared with you a few lines earlier, on Gymkee you also have the possibility to create your own healthy recipes to log them more easily.
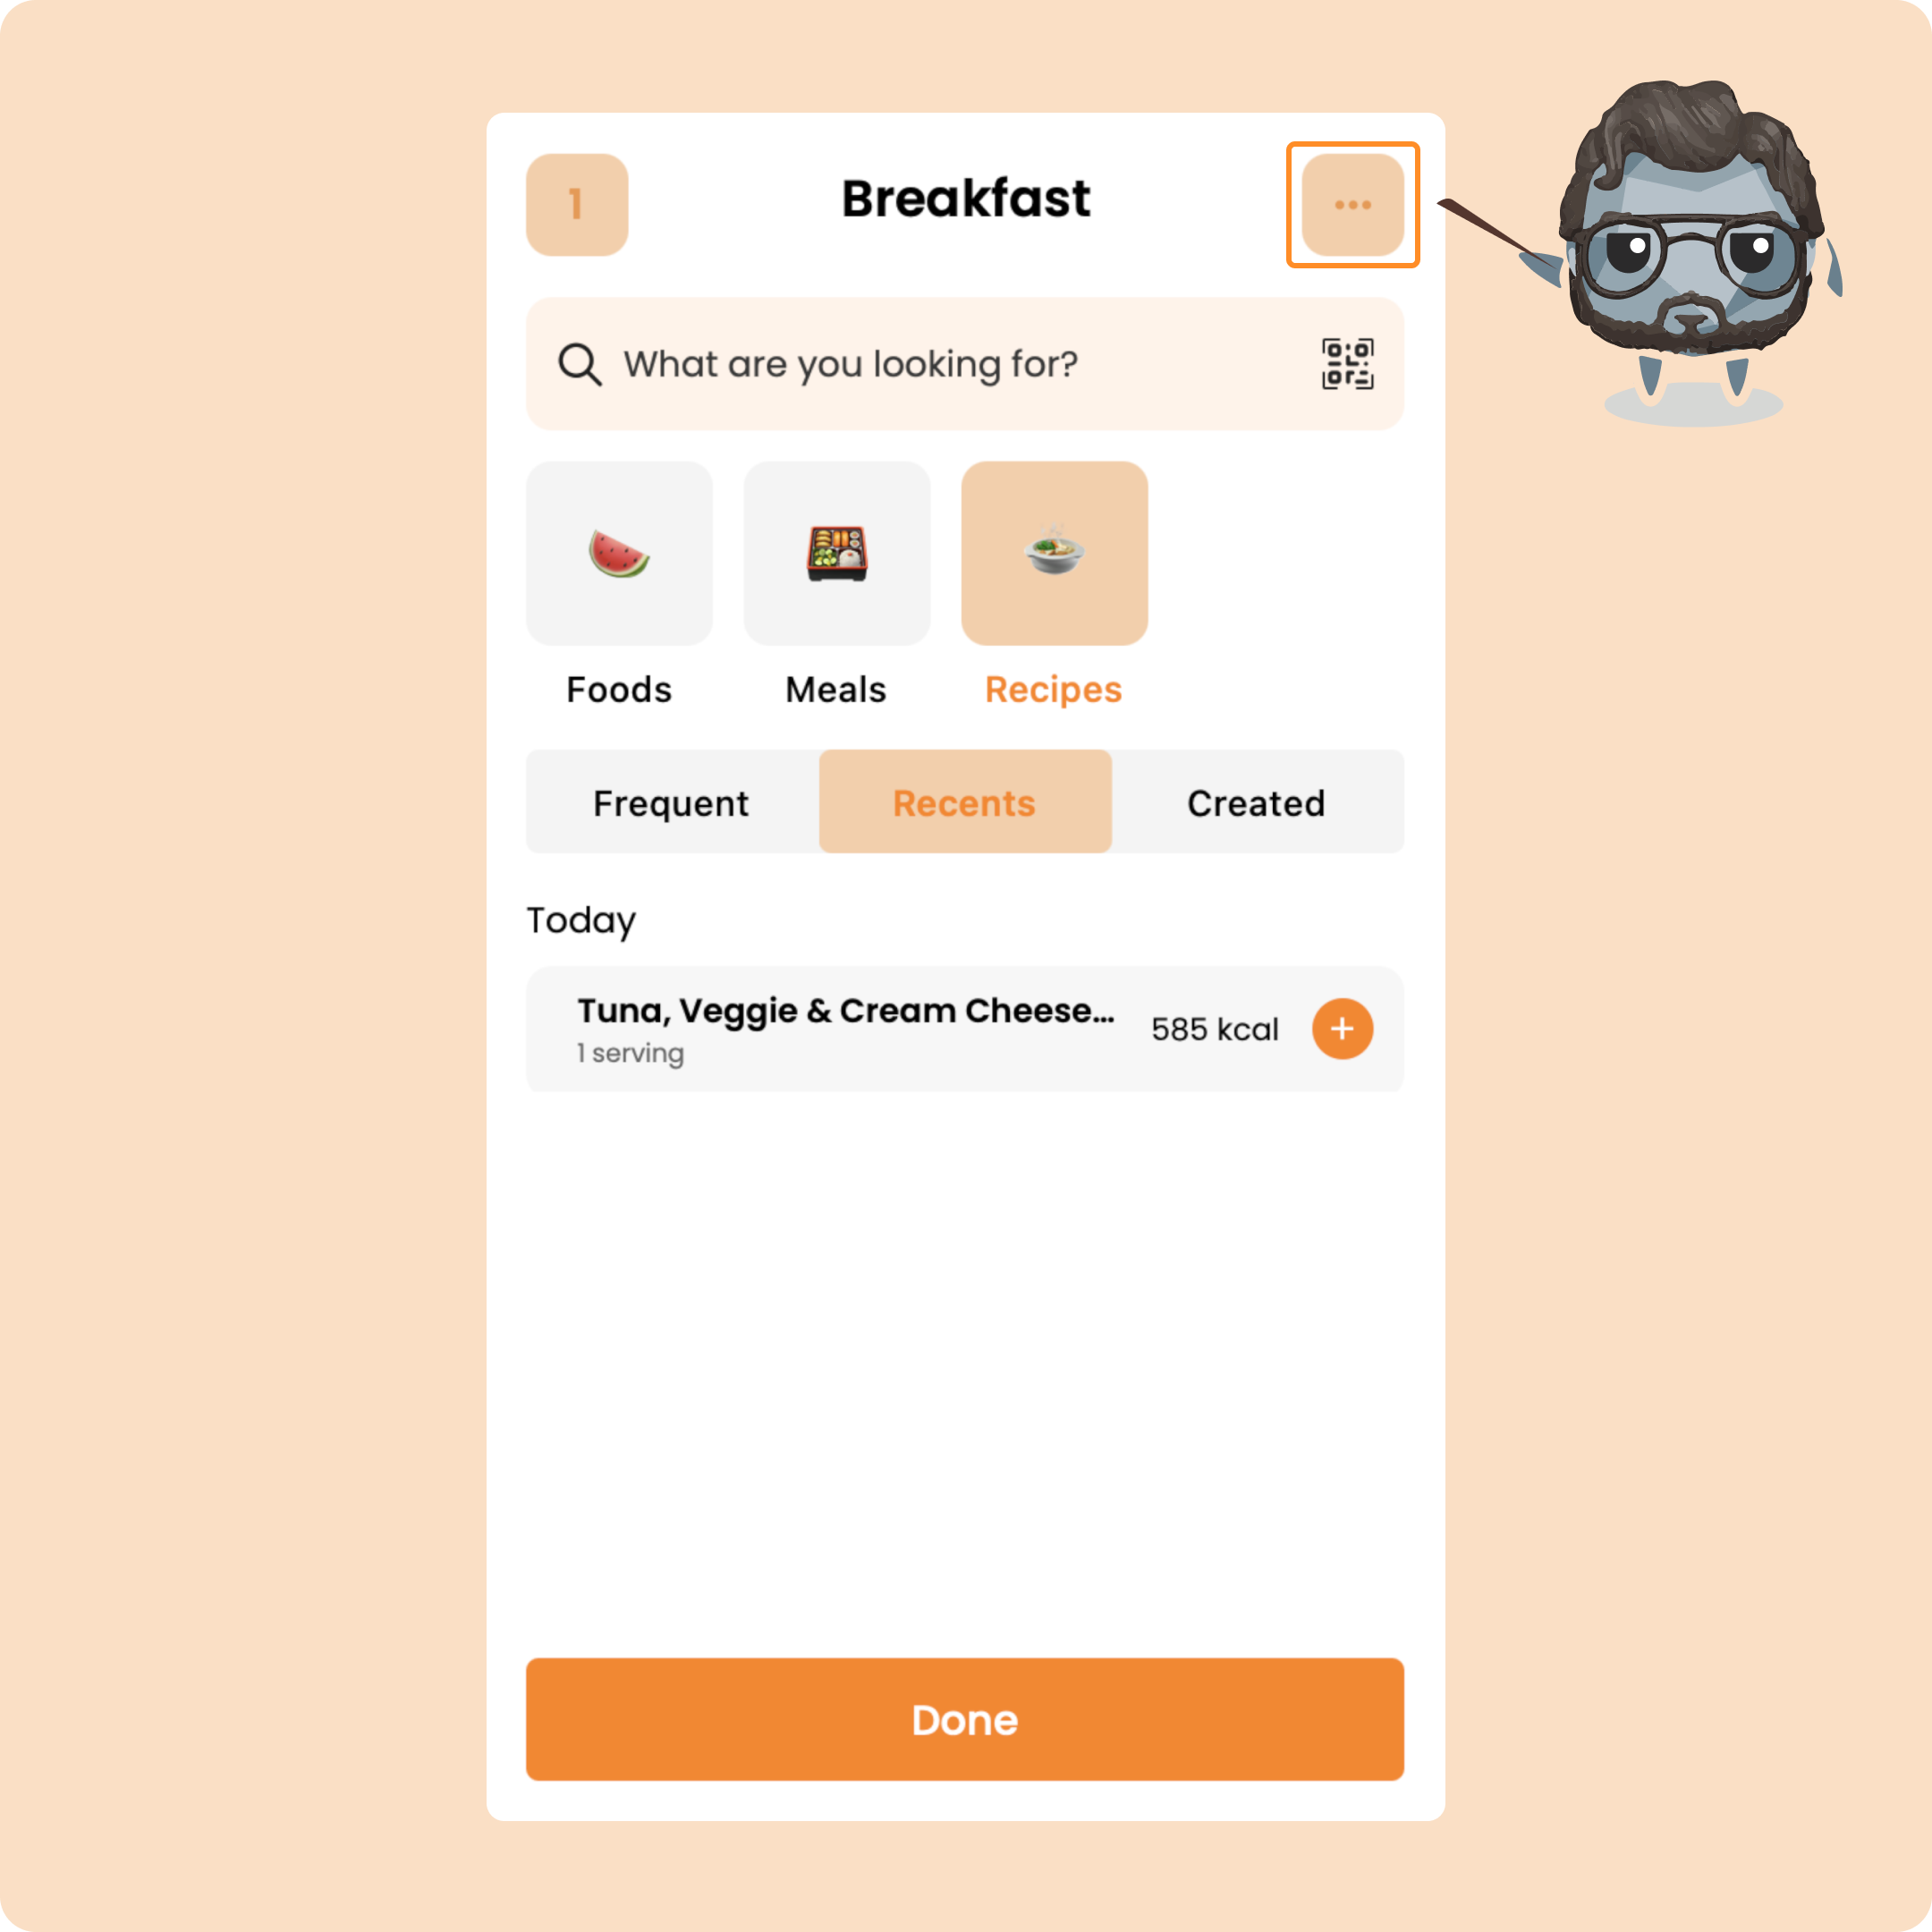
For that, go to the quick actions menu (the 3 little dots at the top right on the main page).
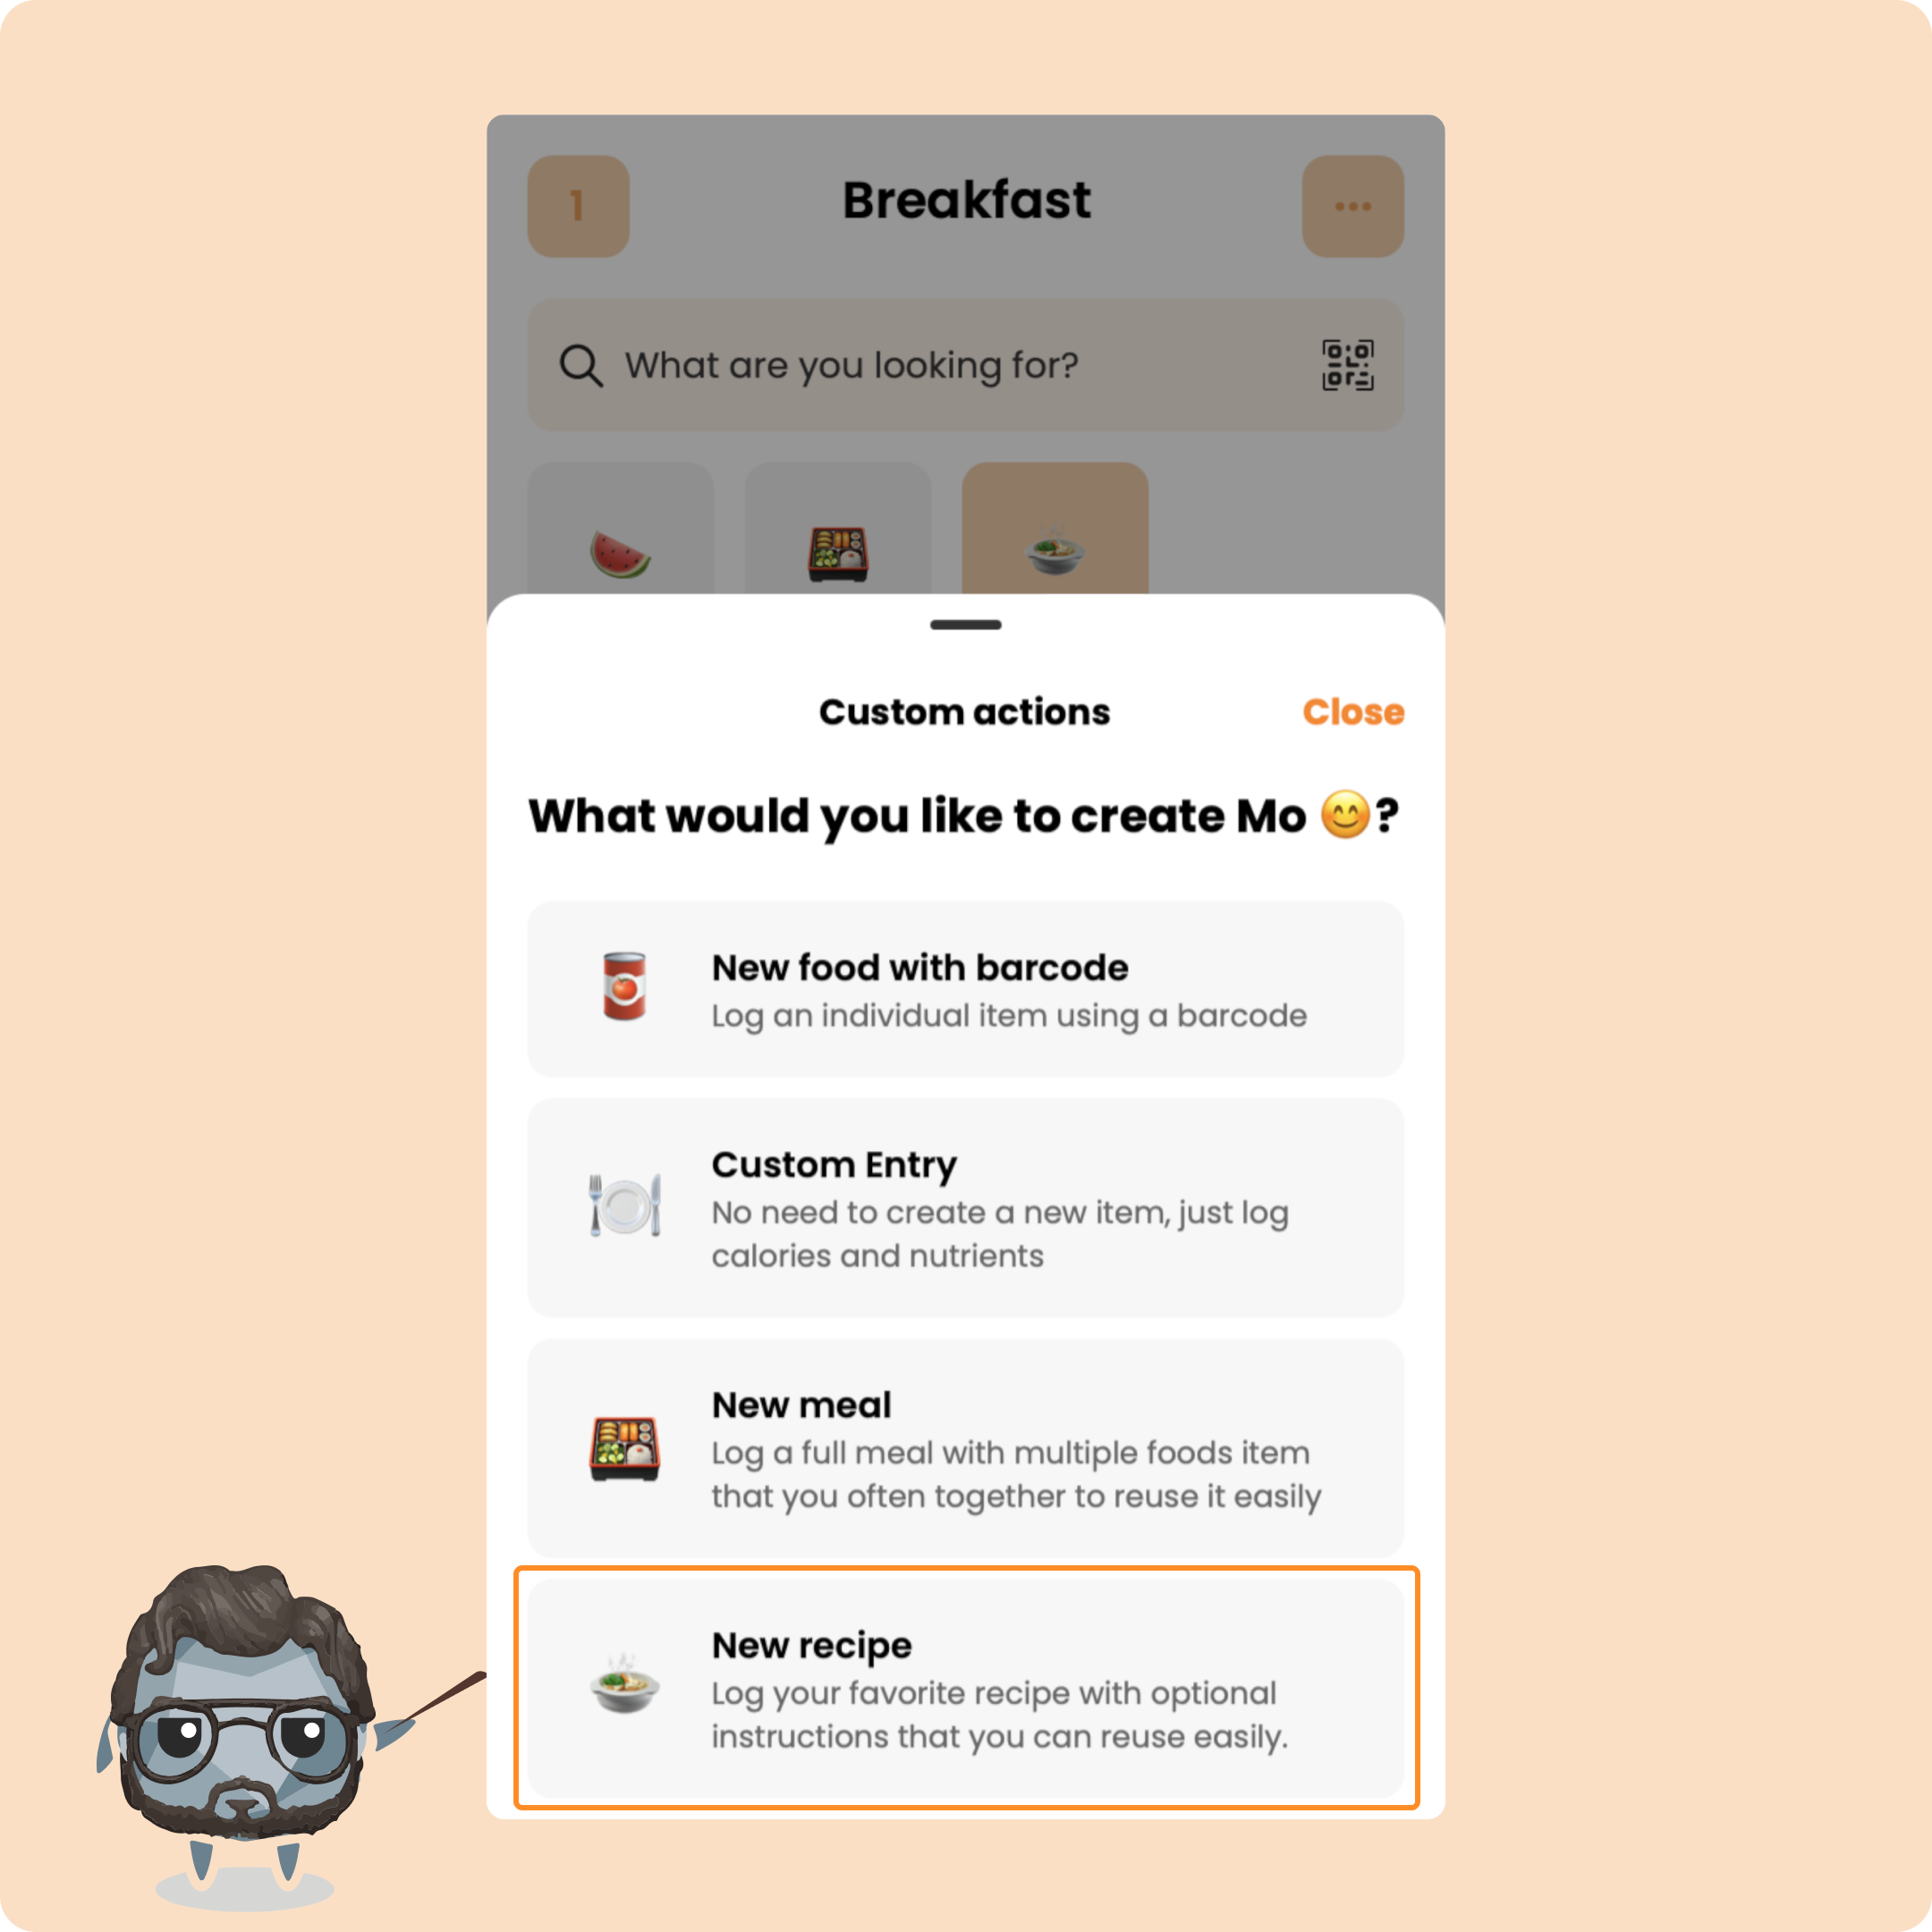
Then click on "New recipe"
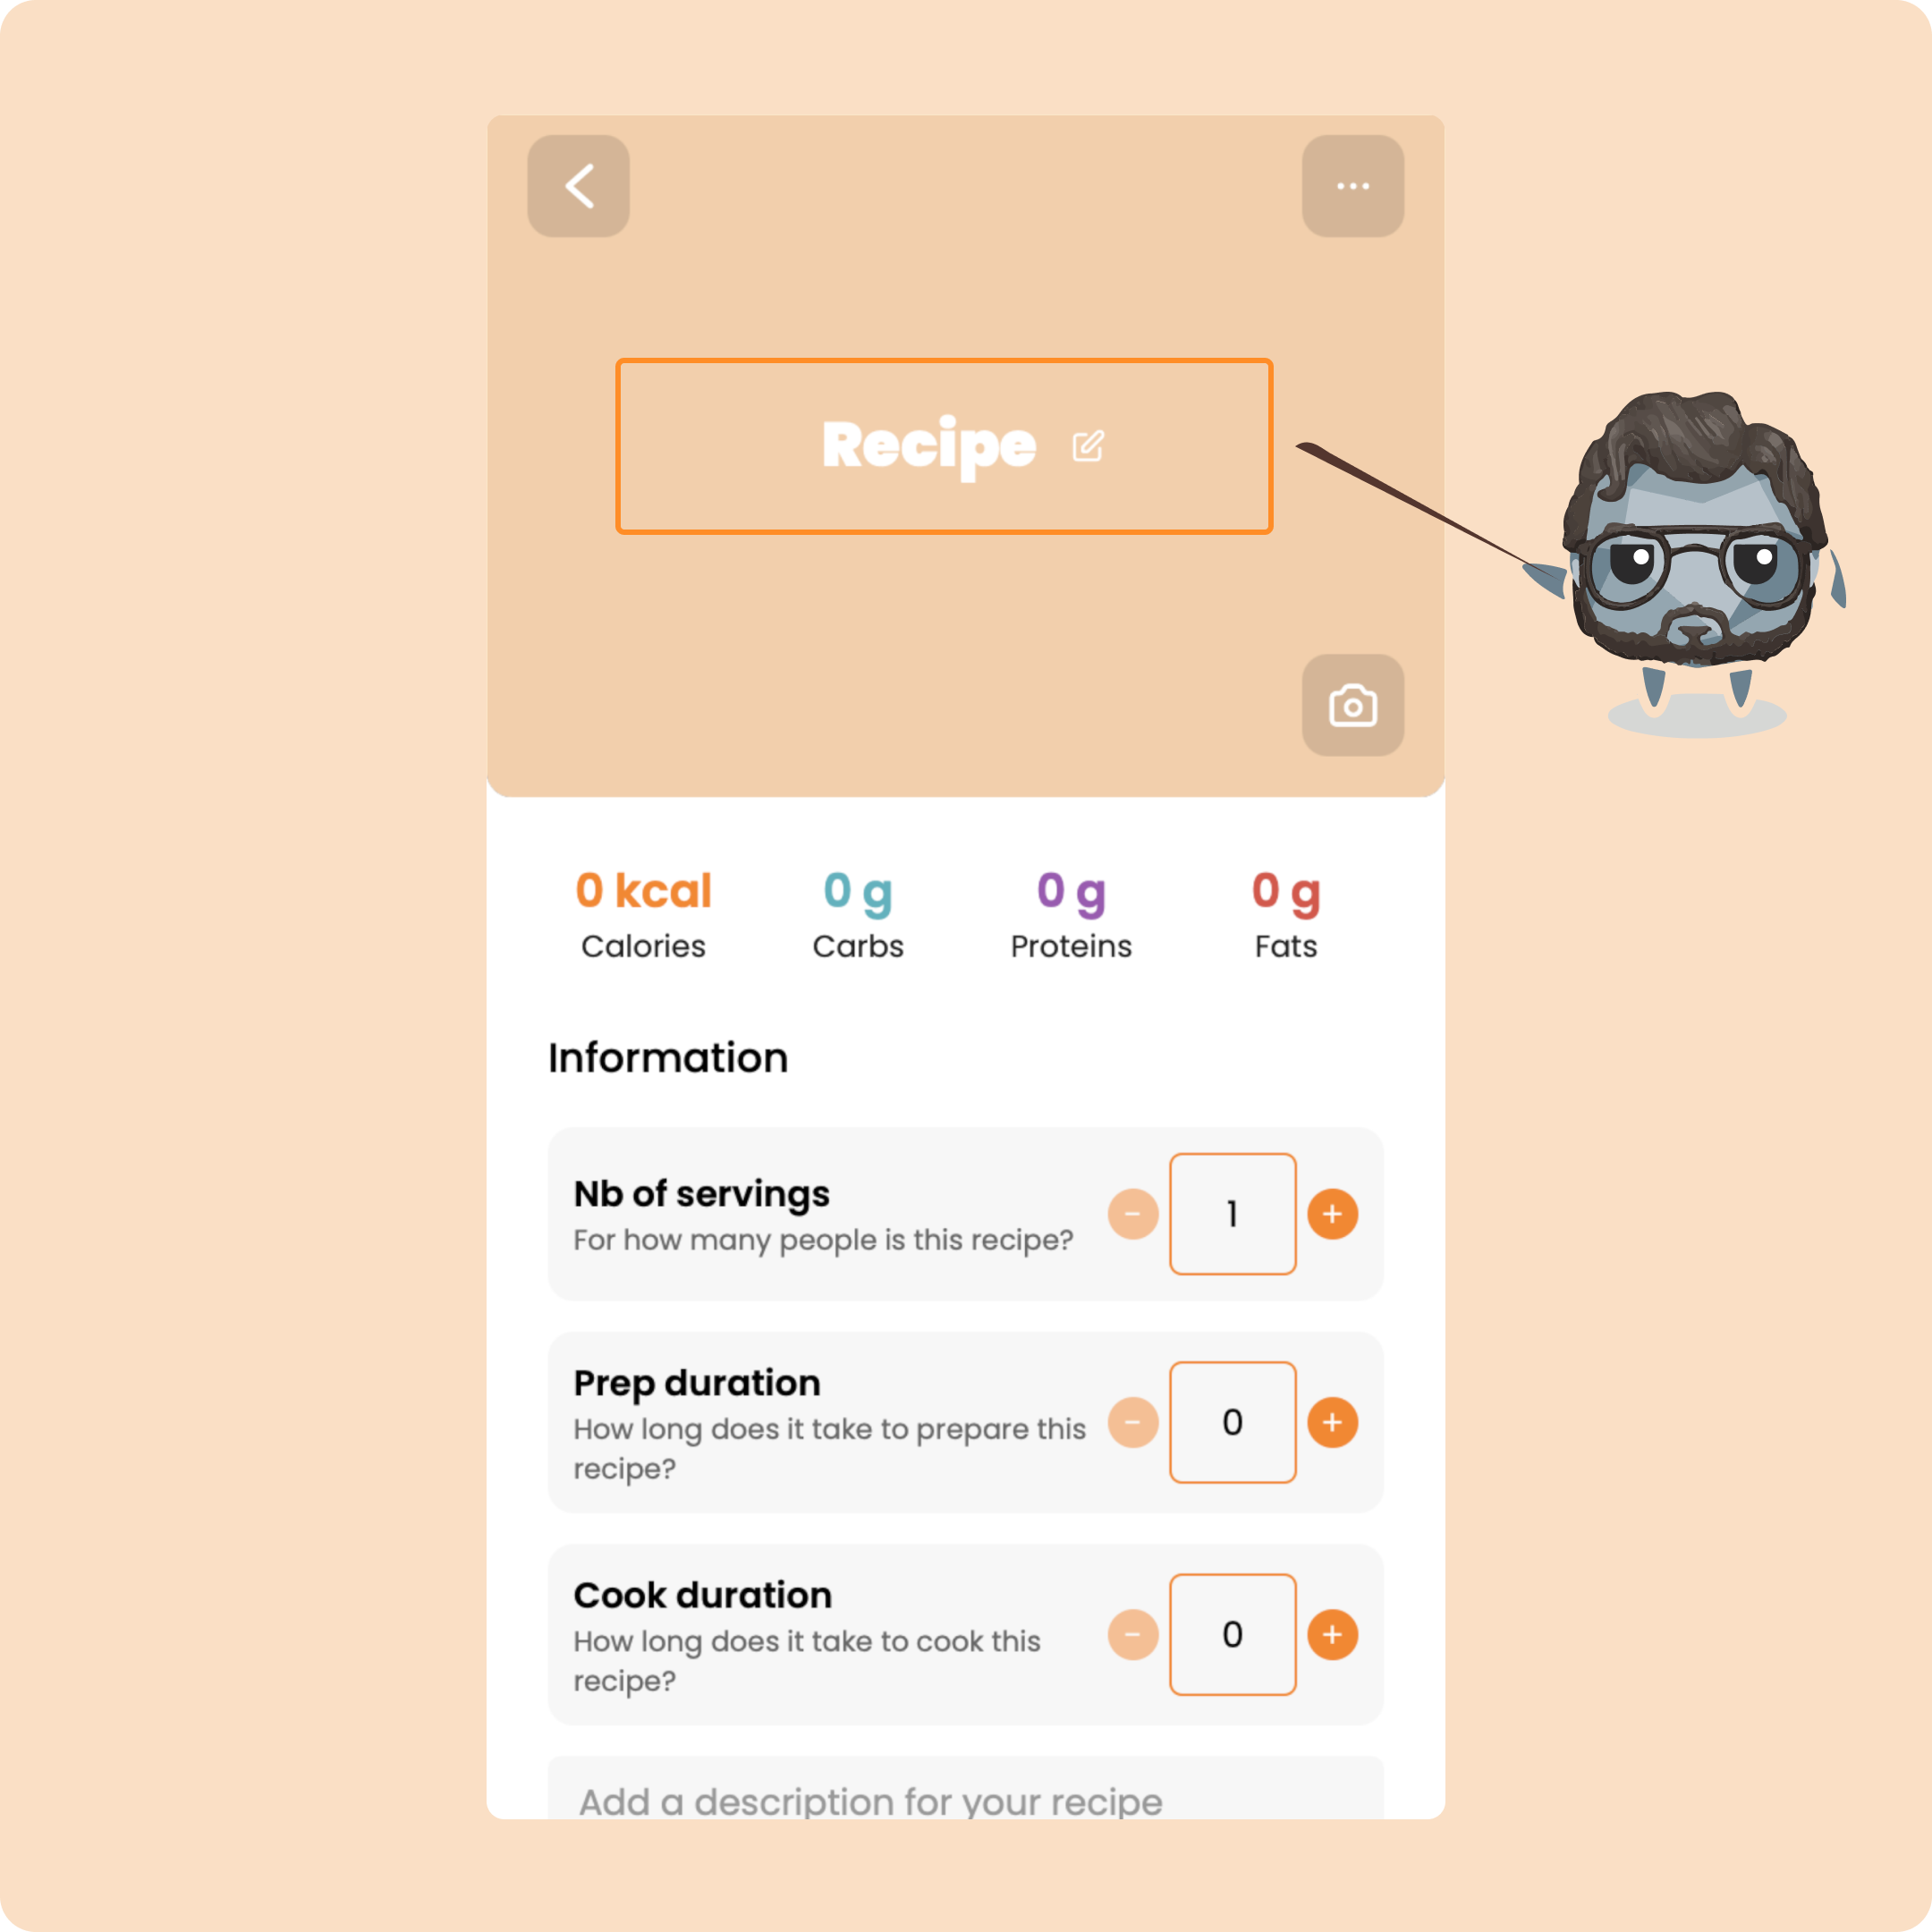
Once you are on the creation page, you will be able to add the different elements that make up your recipe.
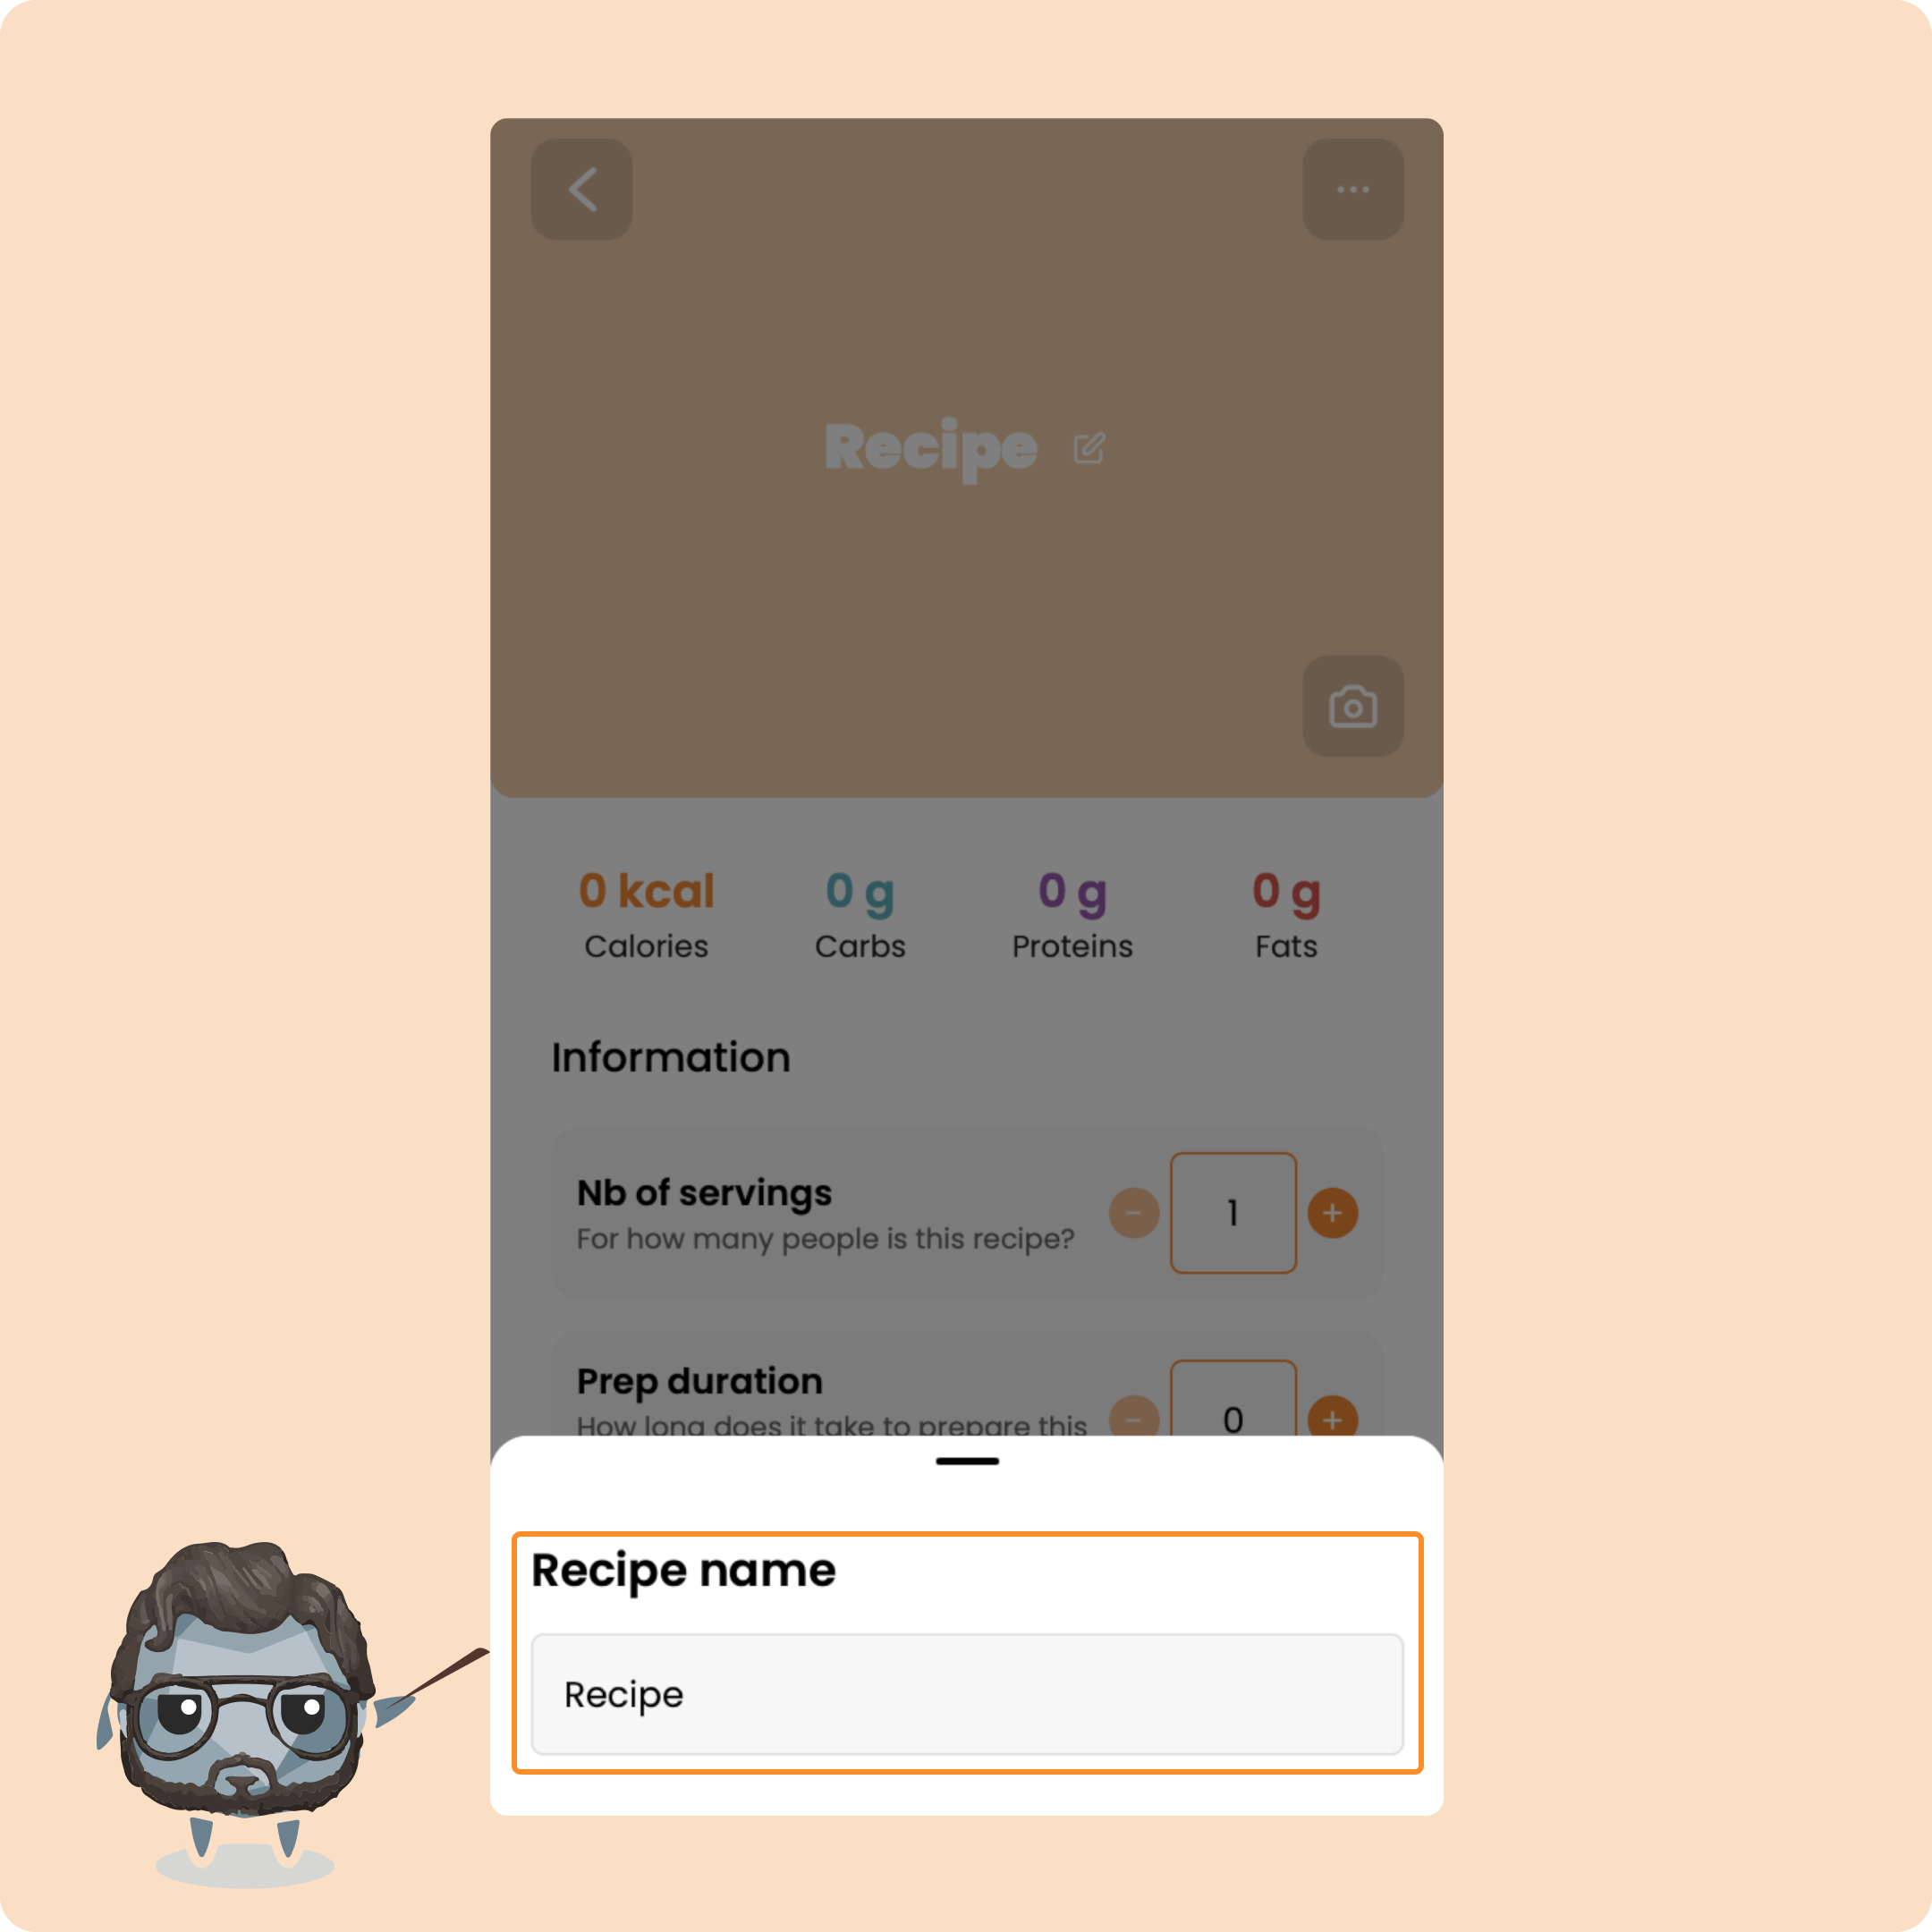
First, give it a name.
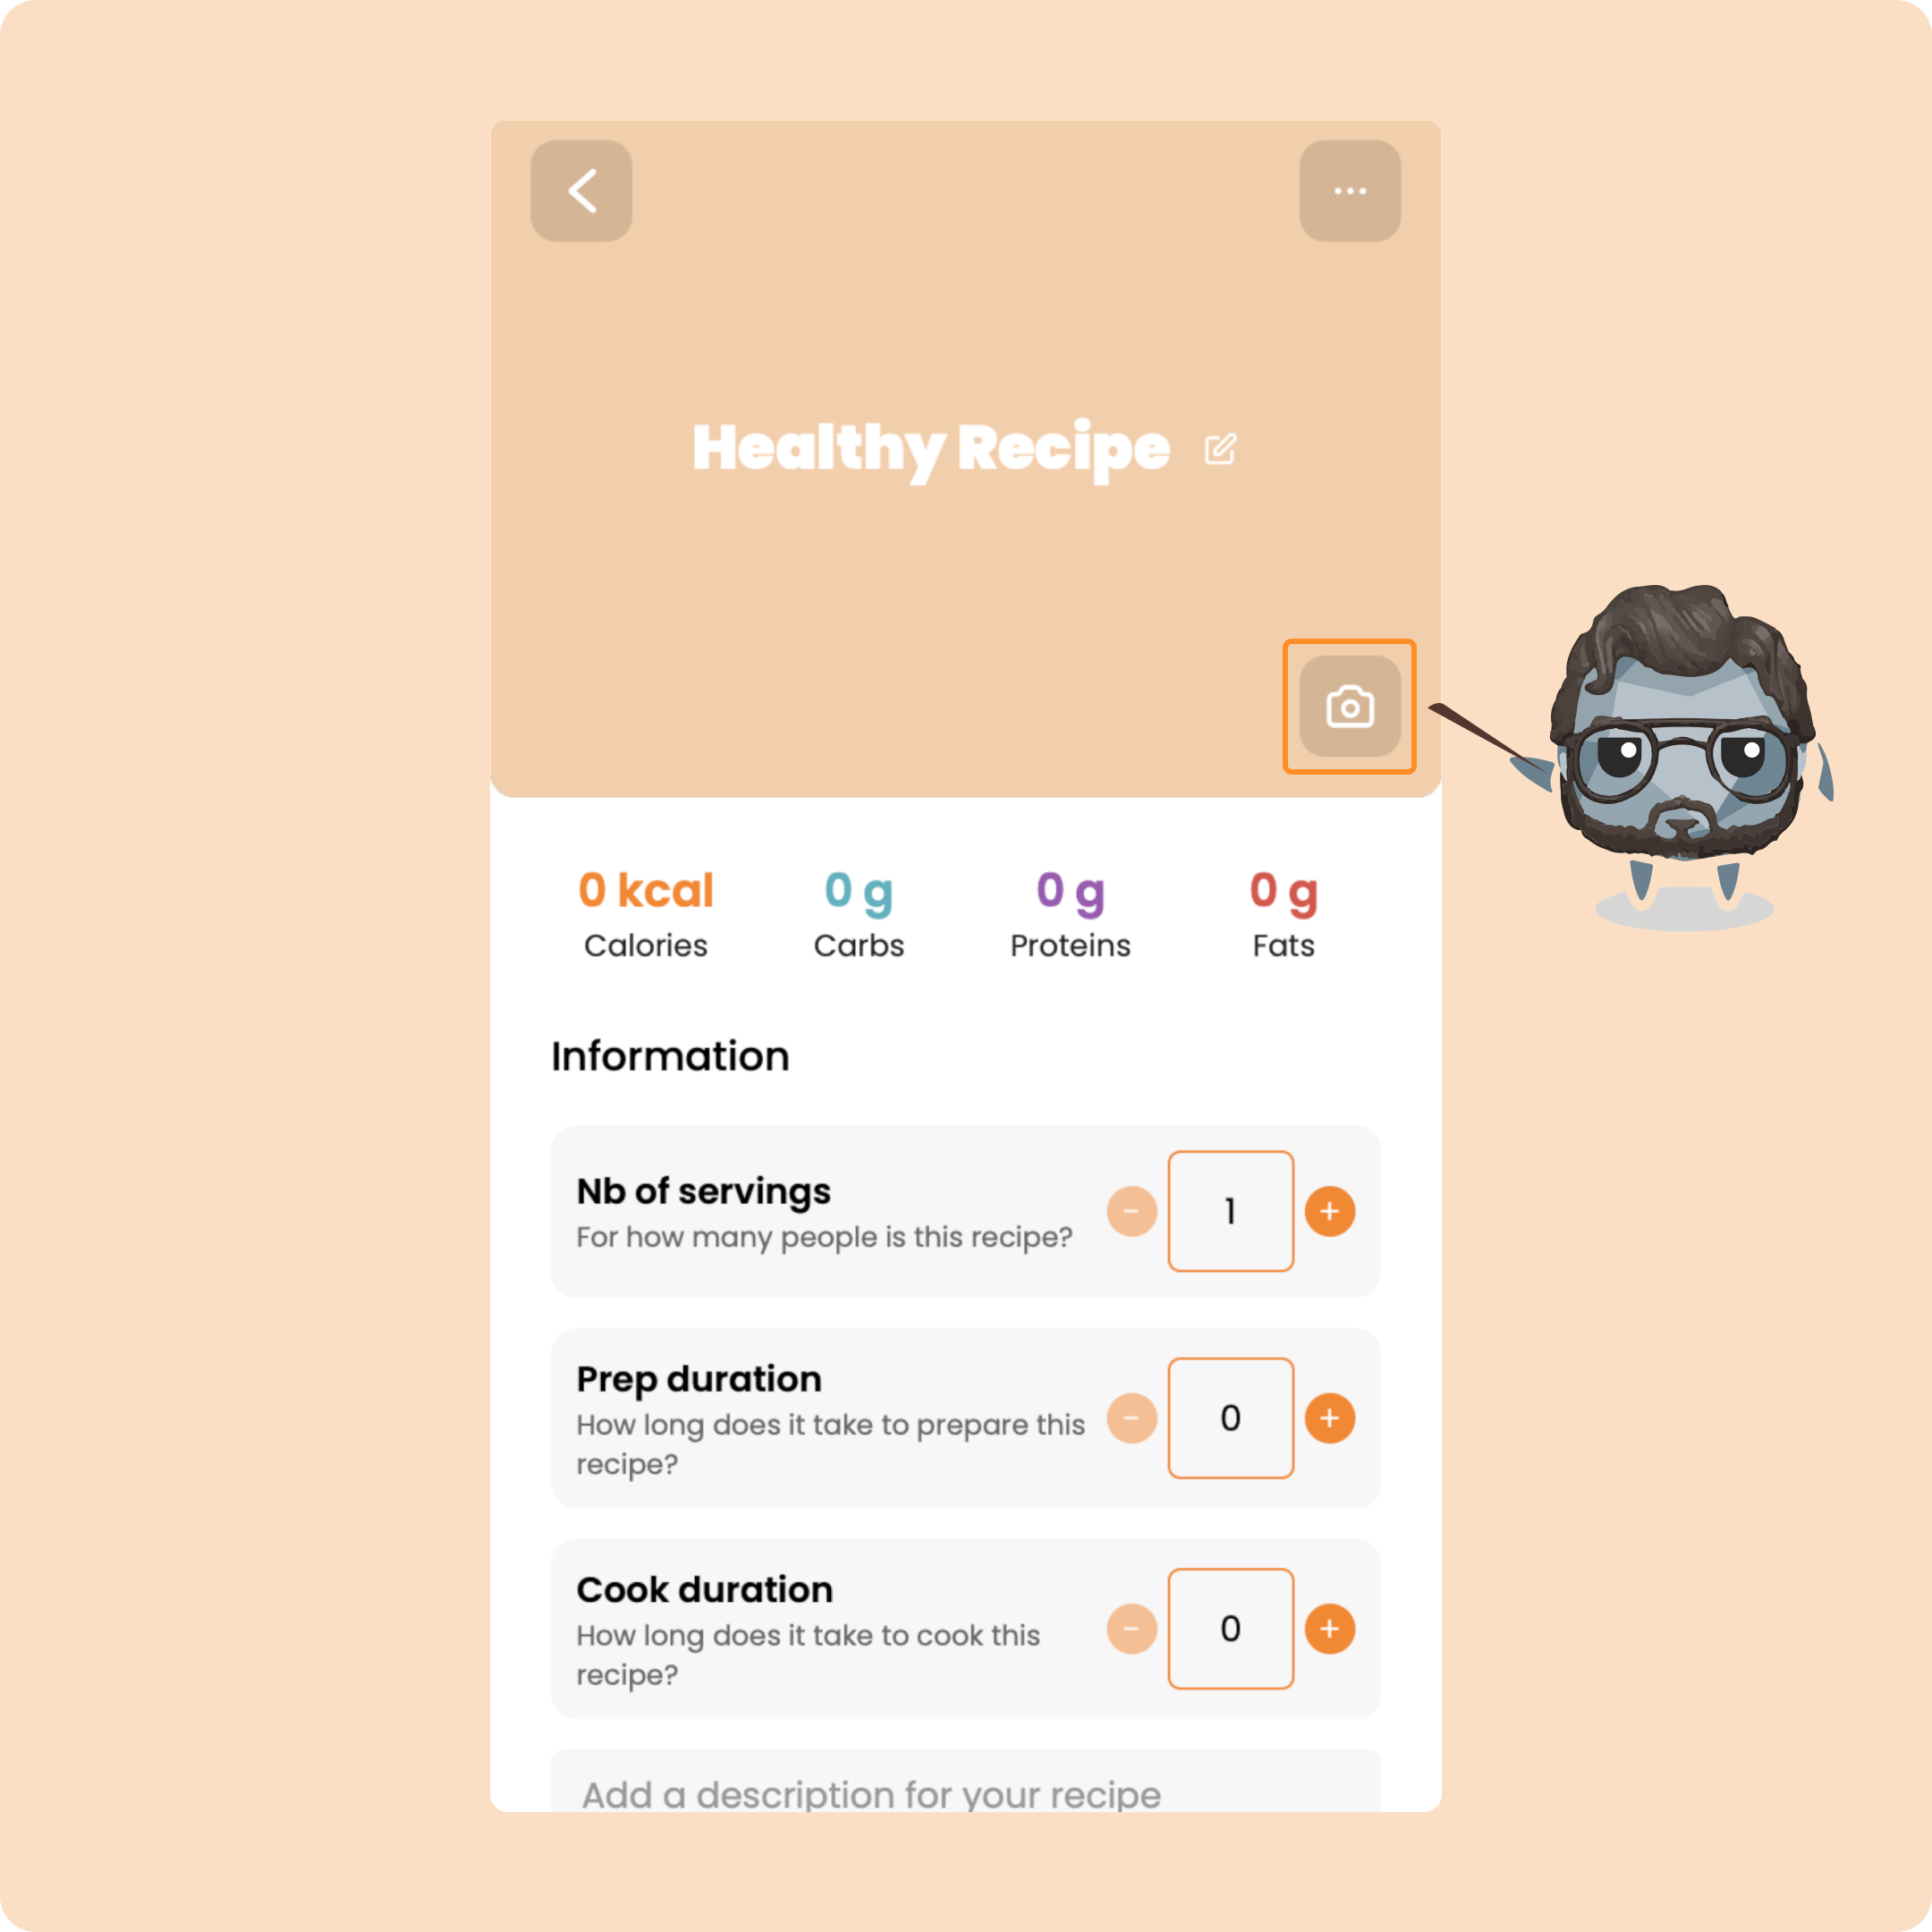
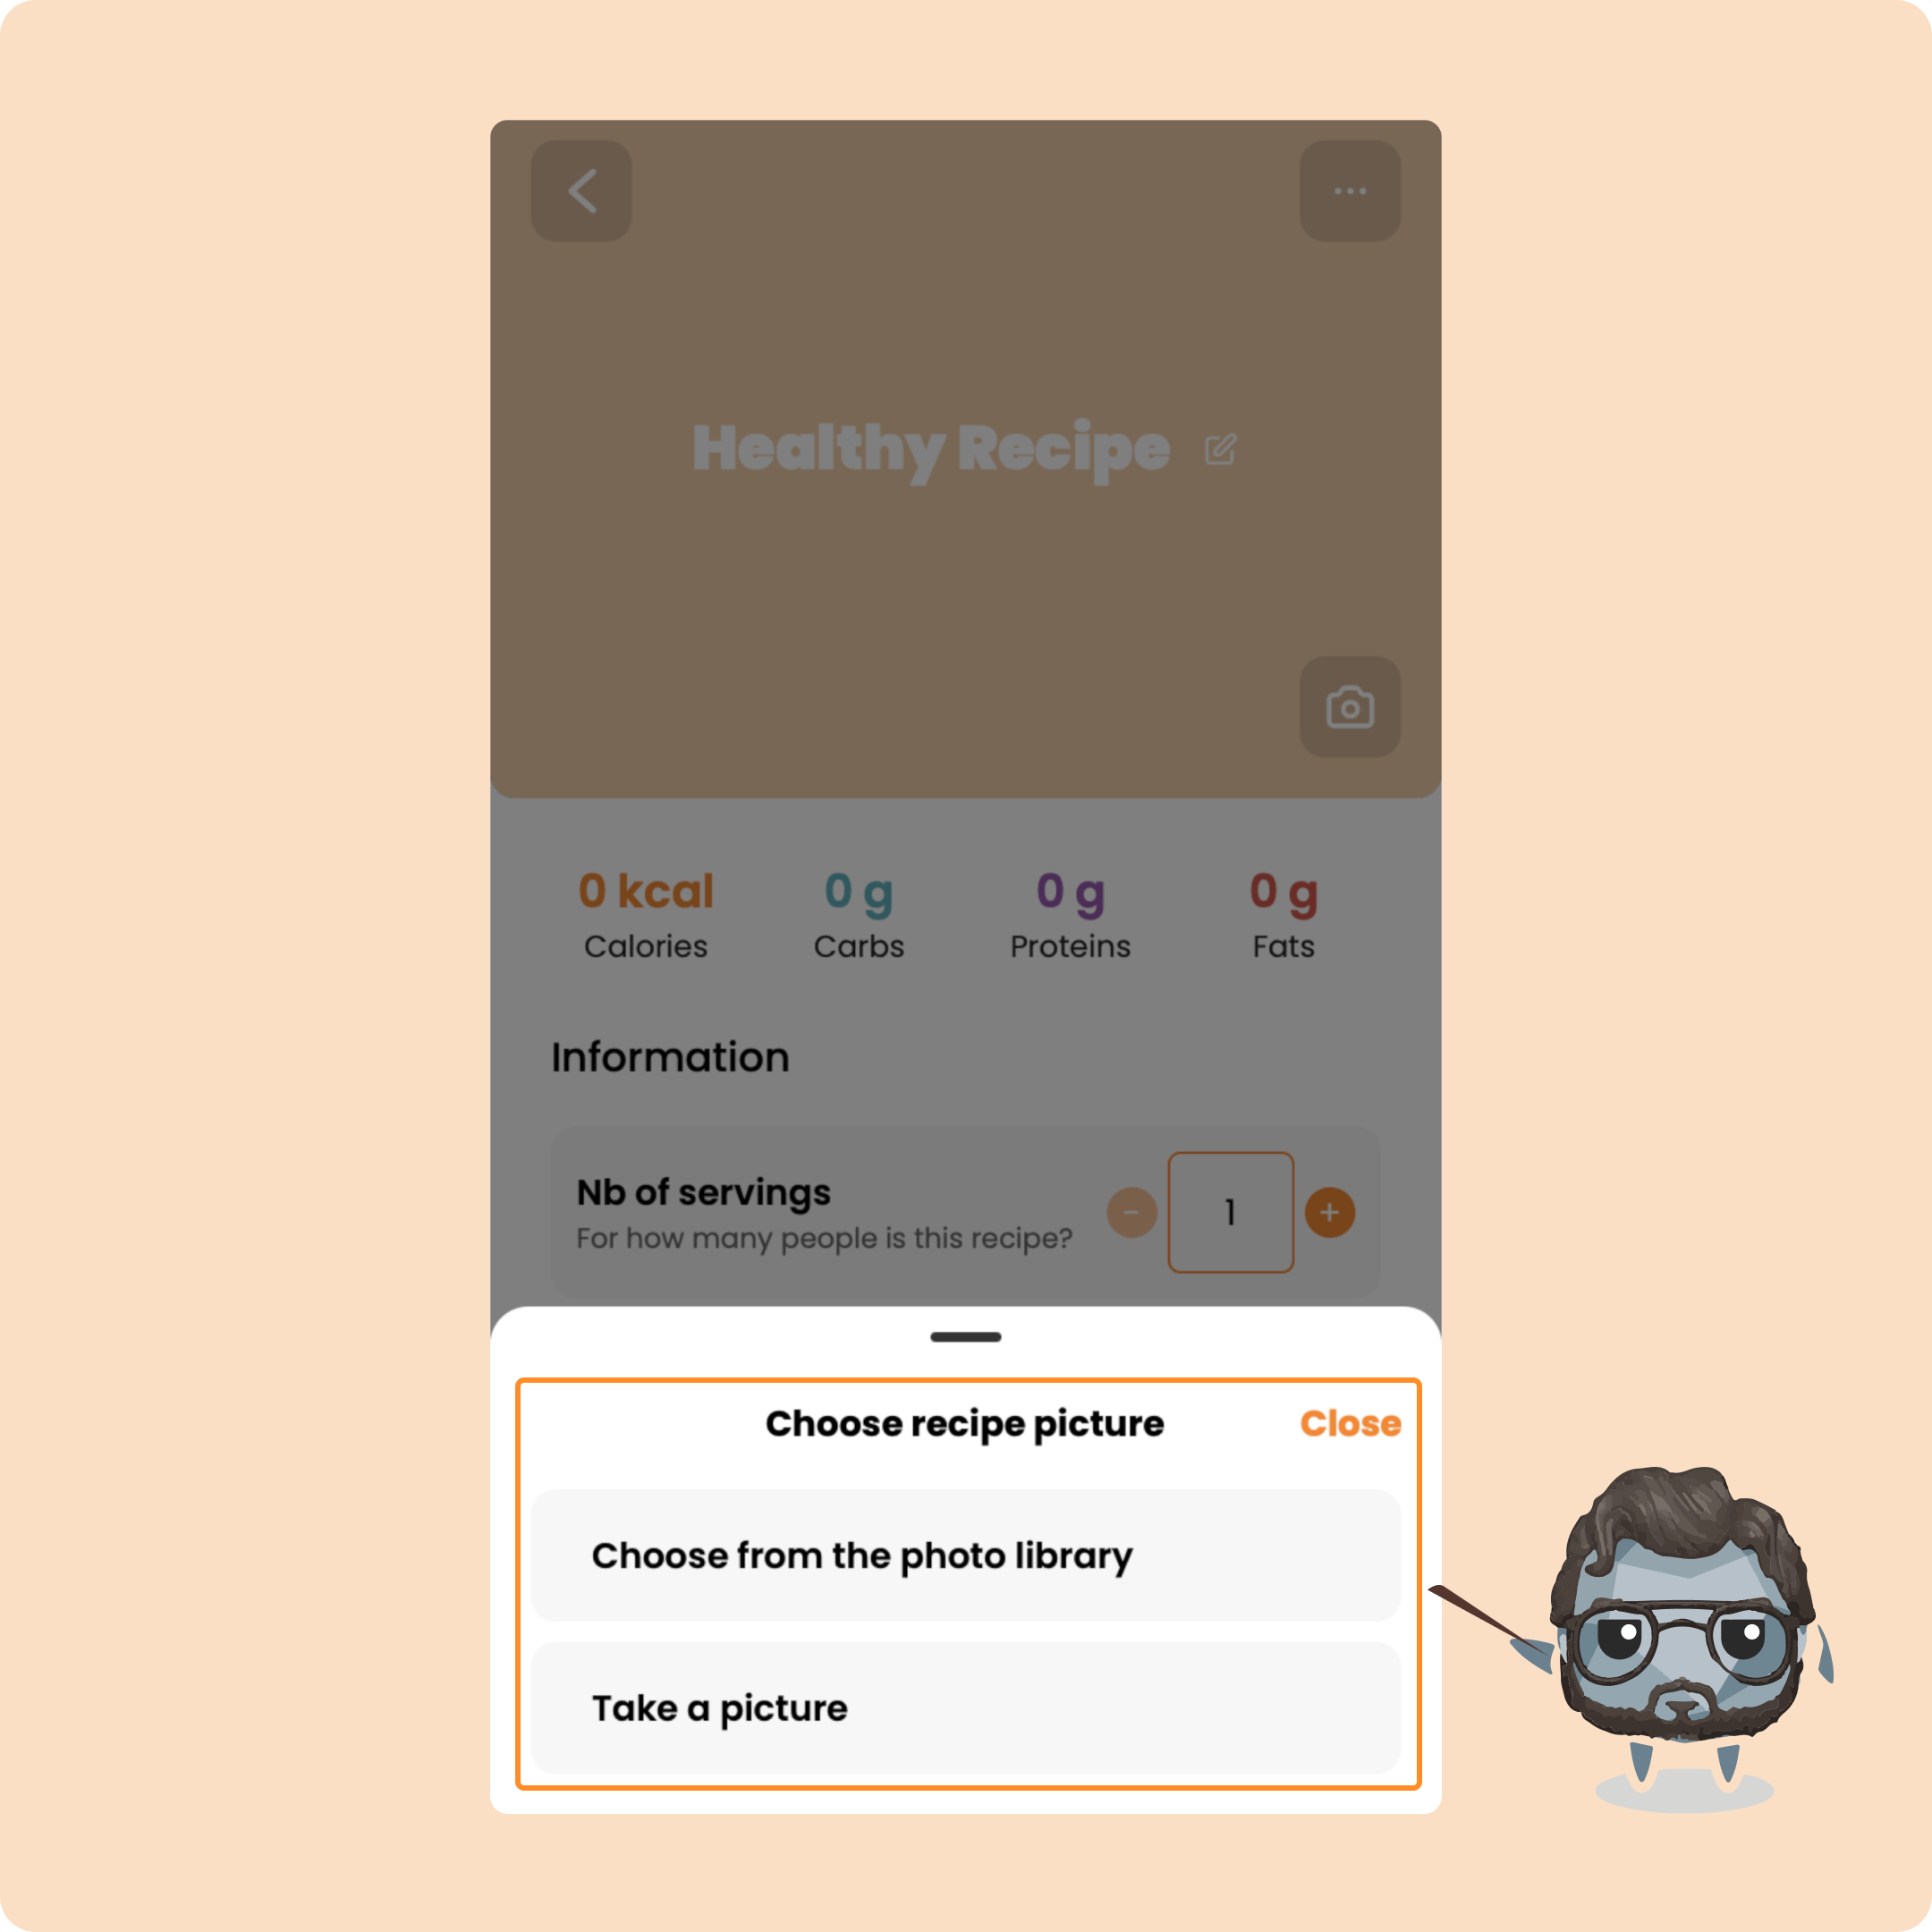
Next, if you wish, you can add a photo for your recipe:
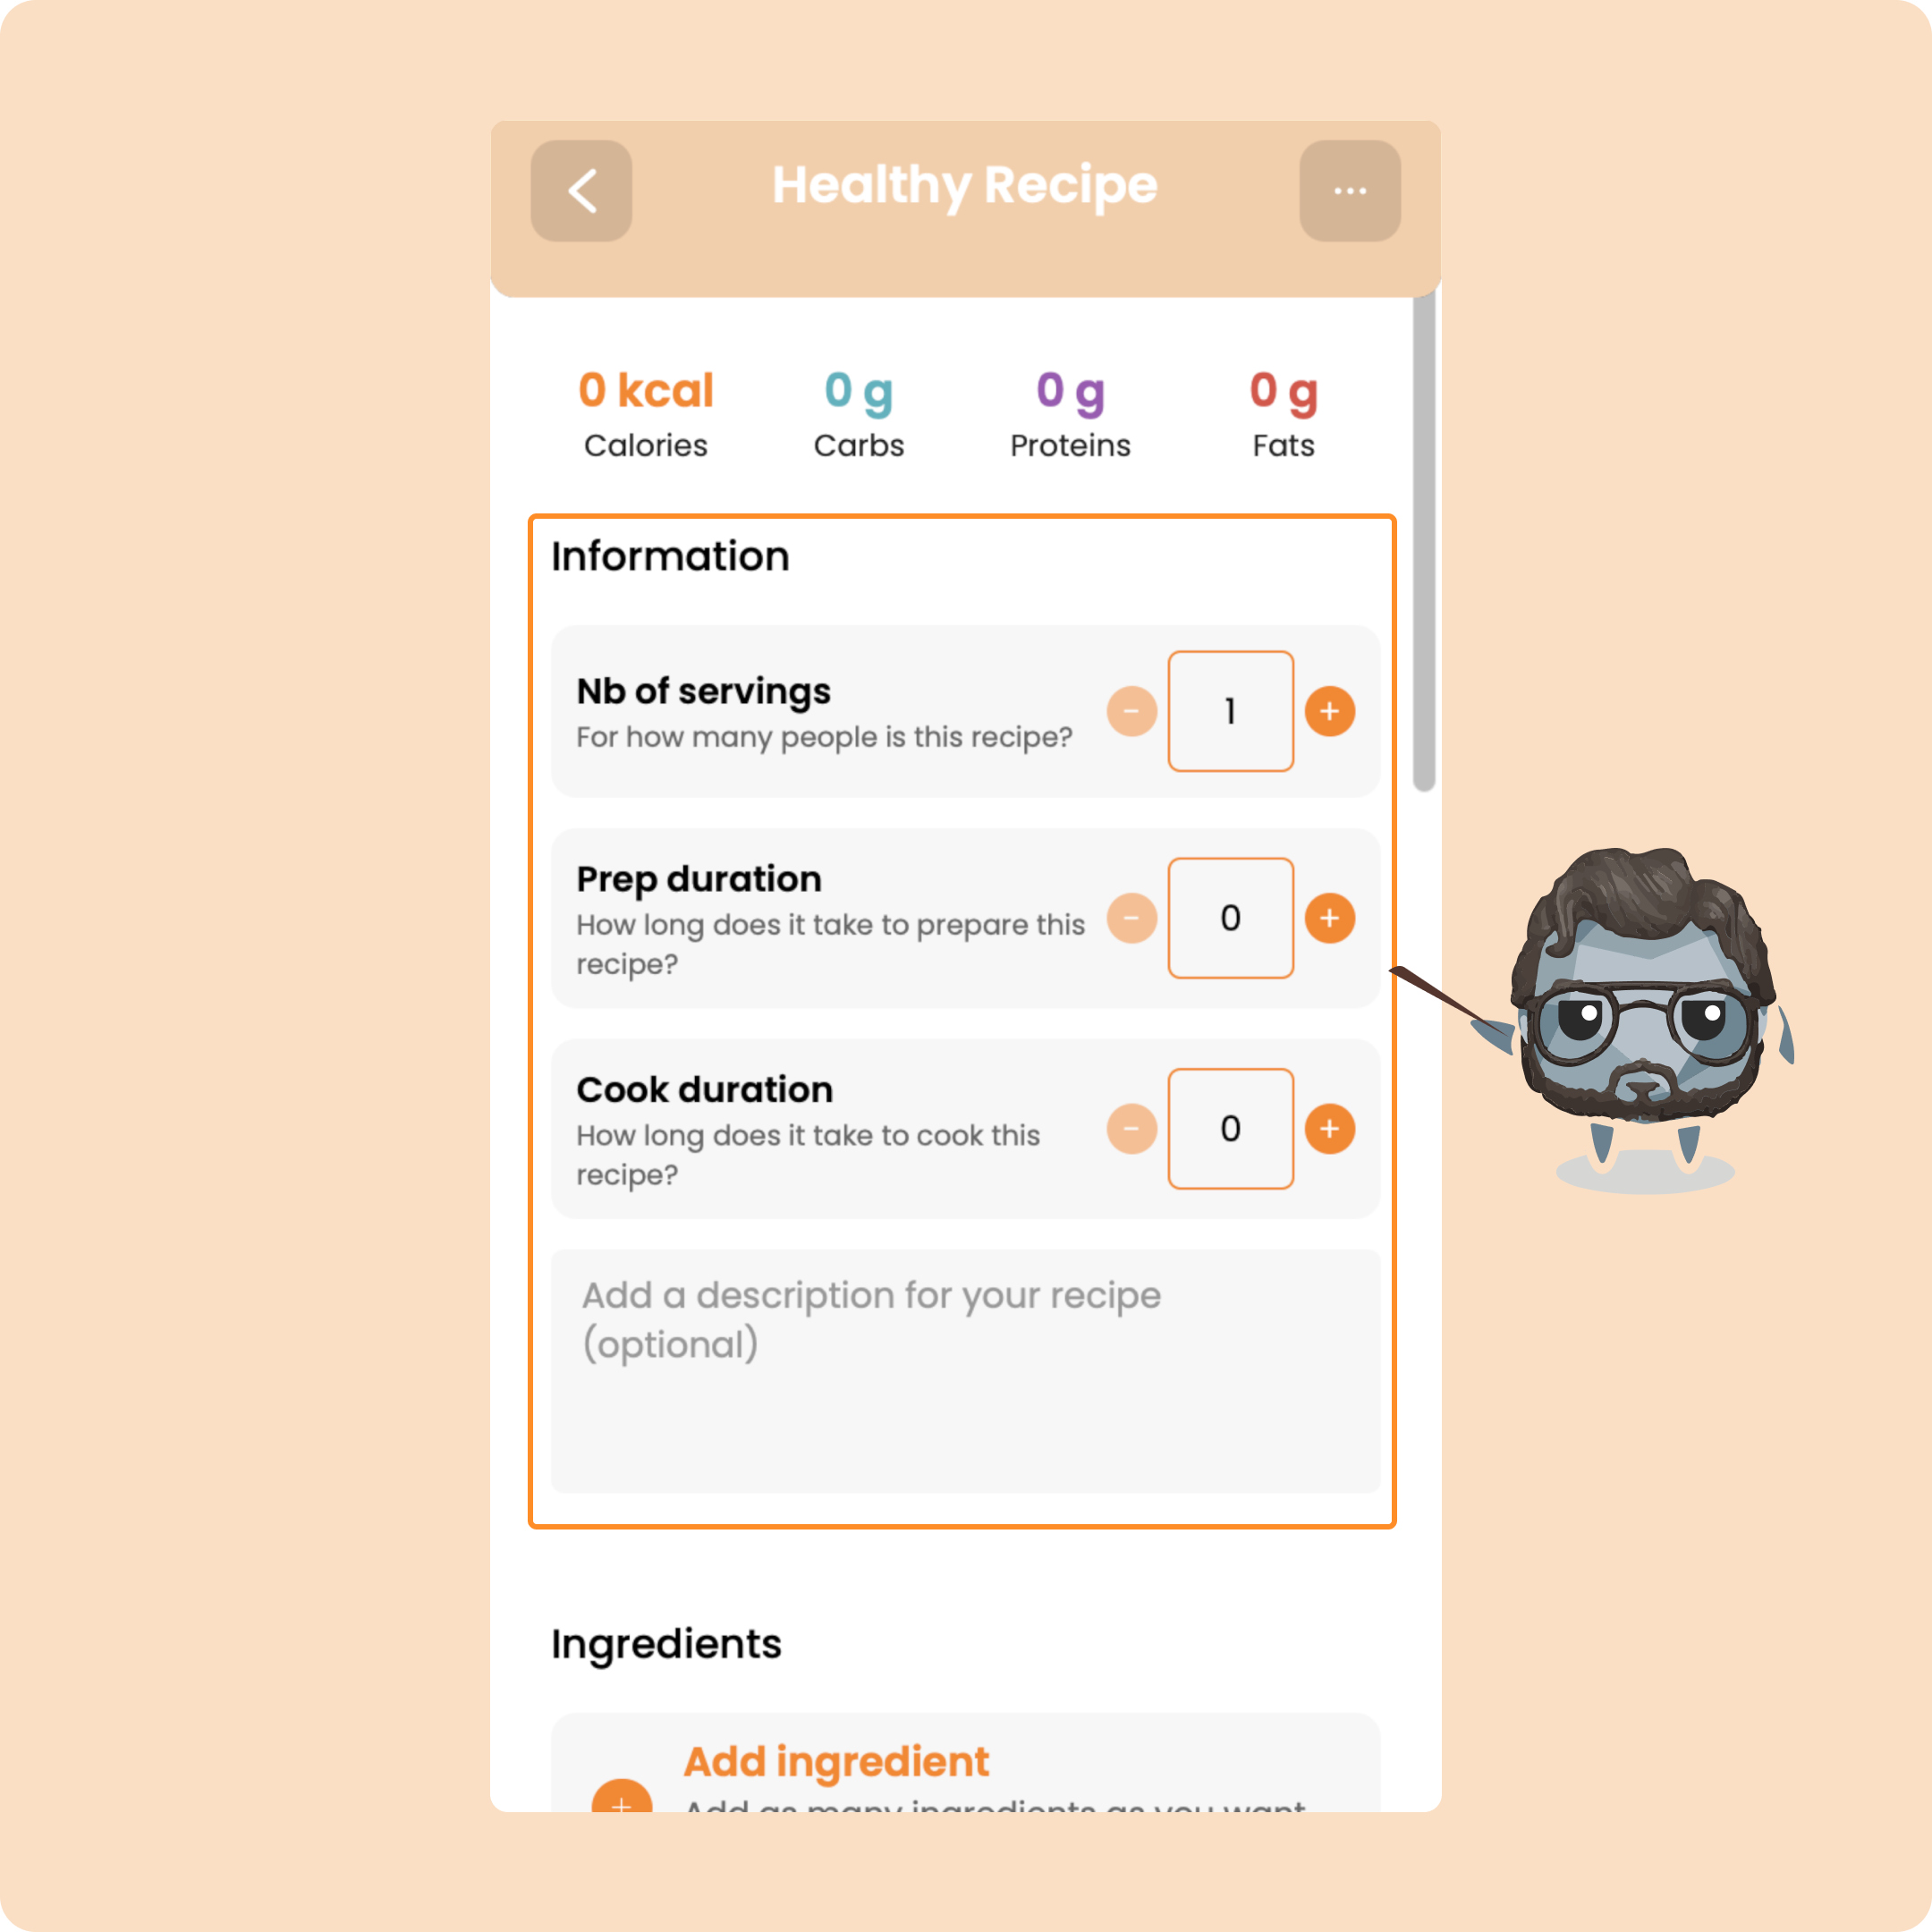
Next, add the number of servings, the preparation time, the cooking time, as well as a description
Right after, you will be able to add the different foods that make up your recipe:
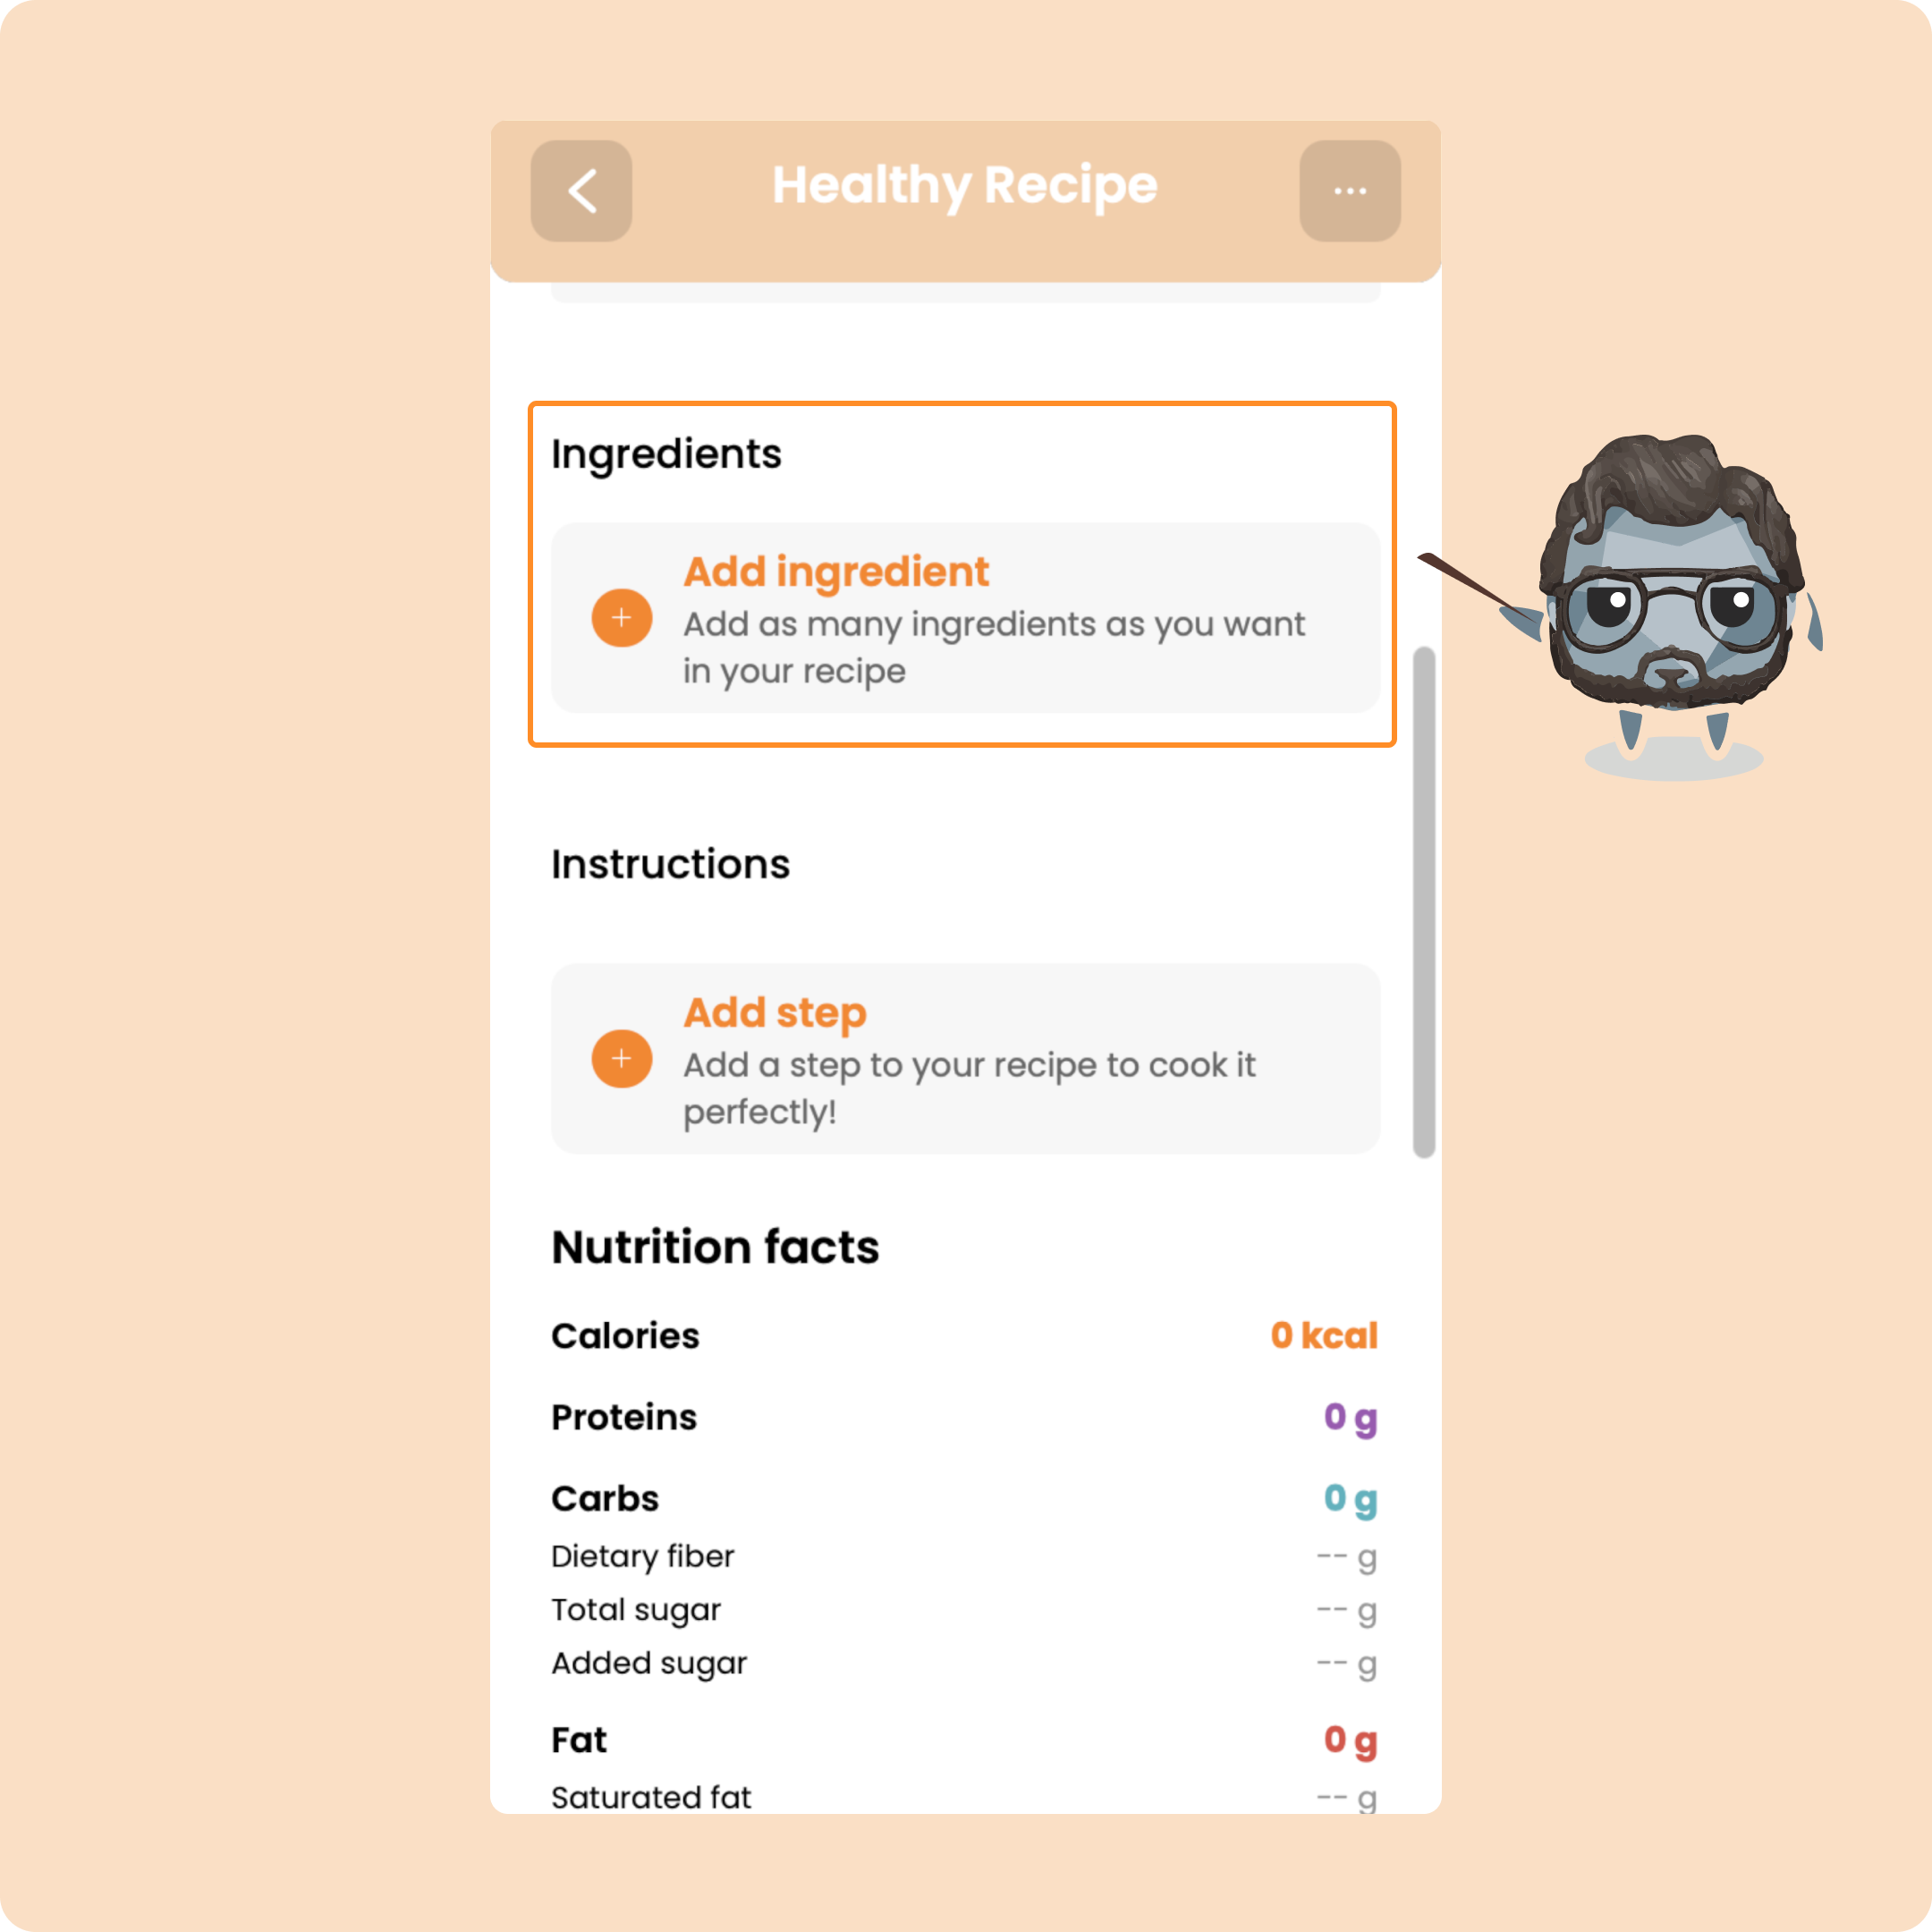
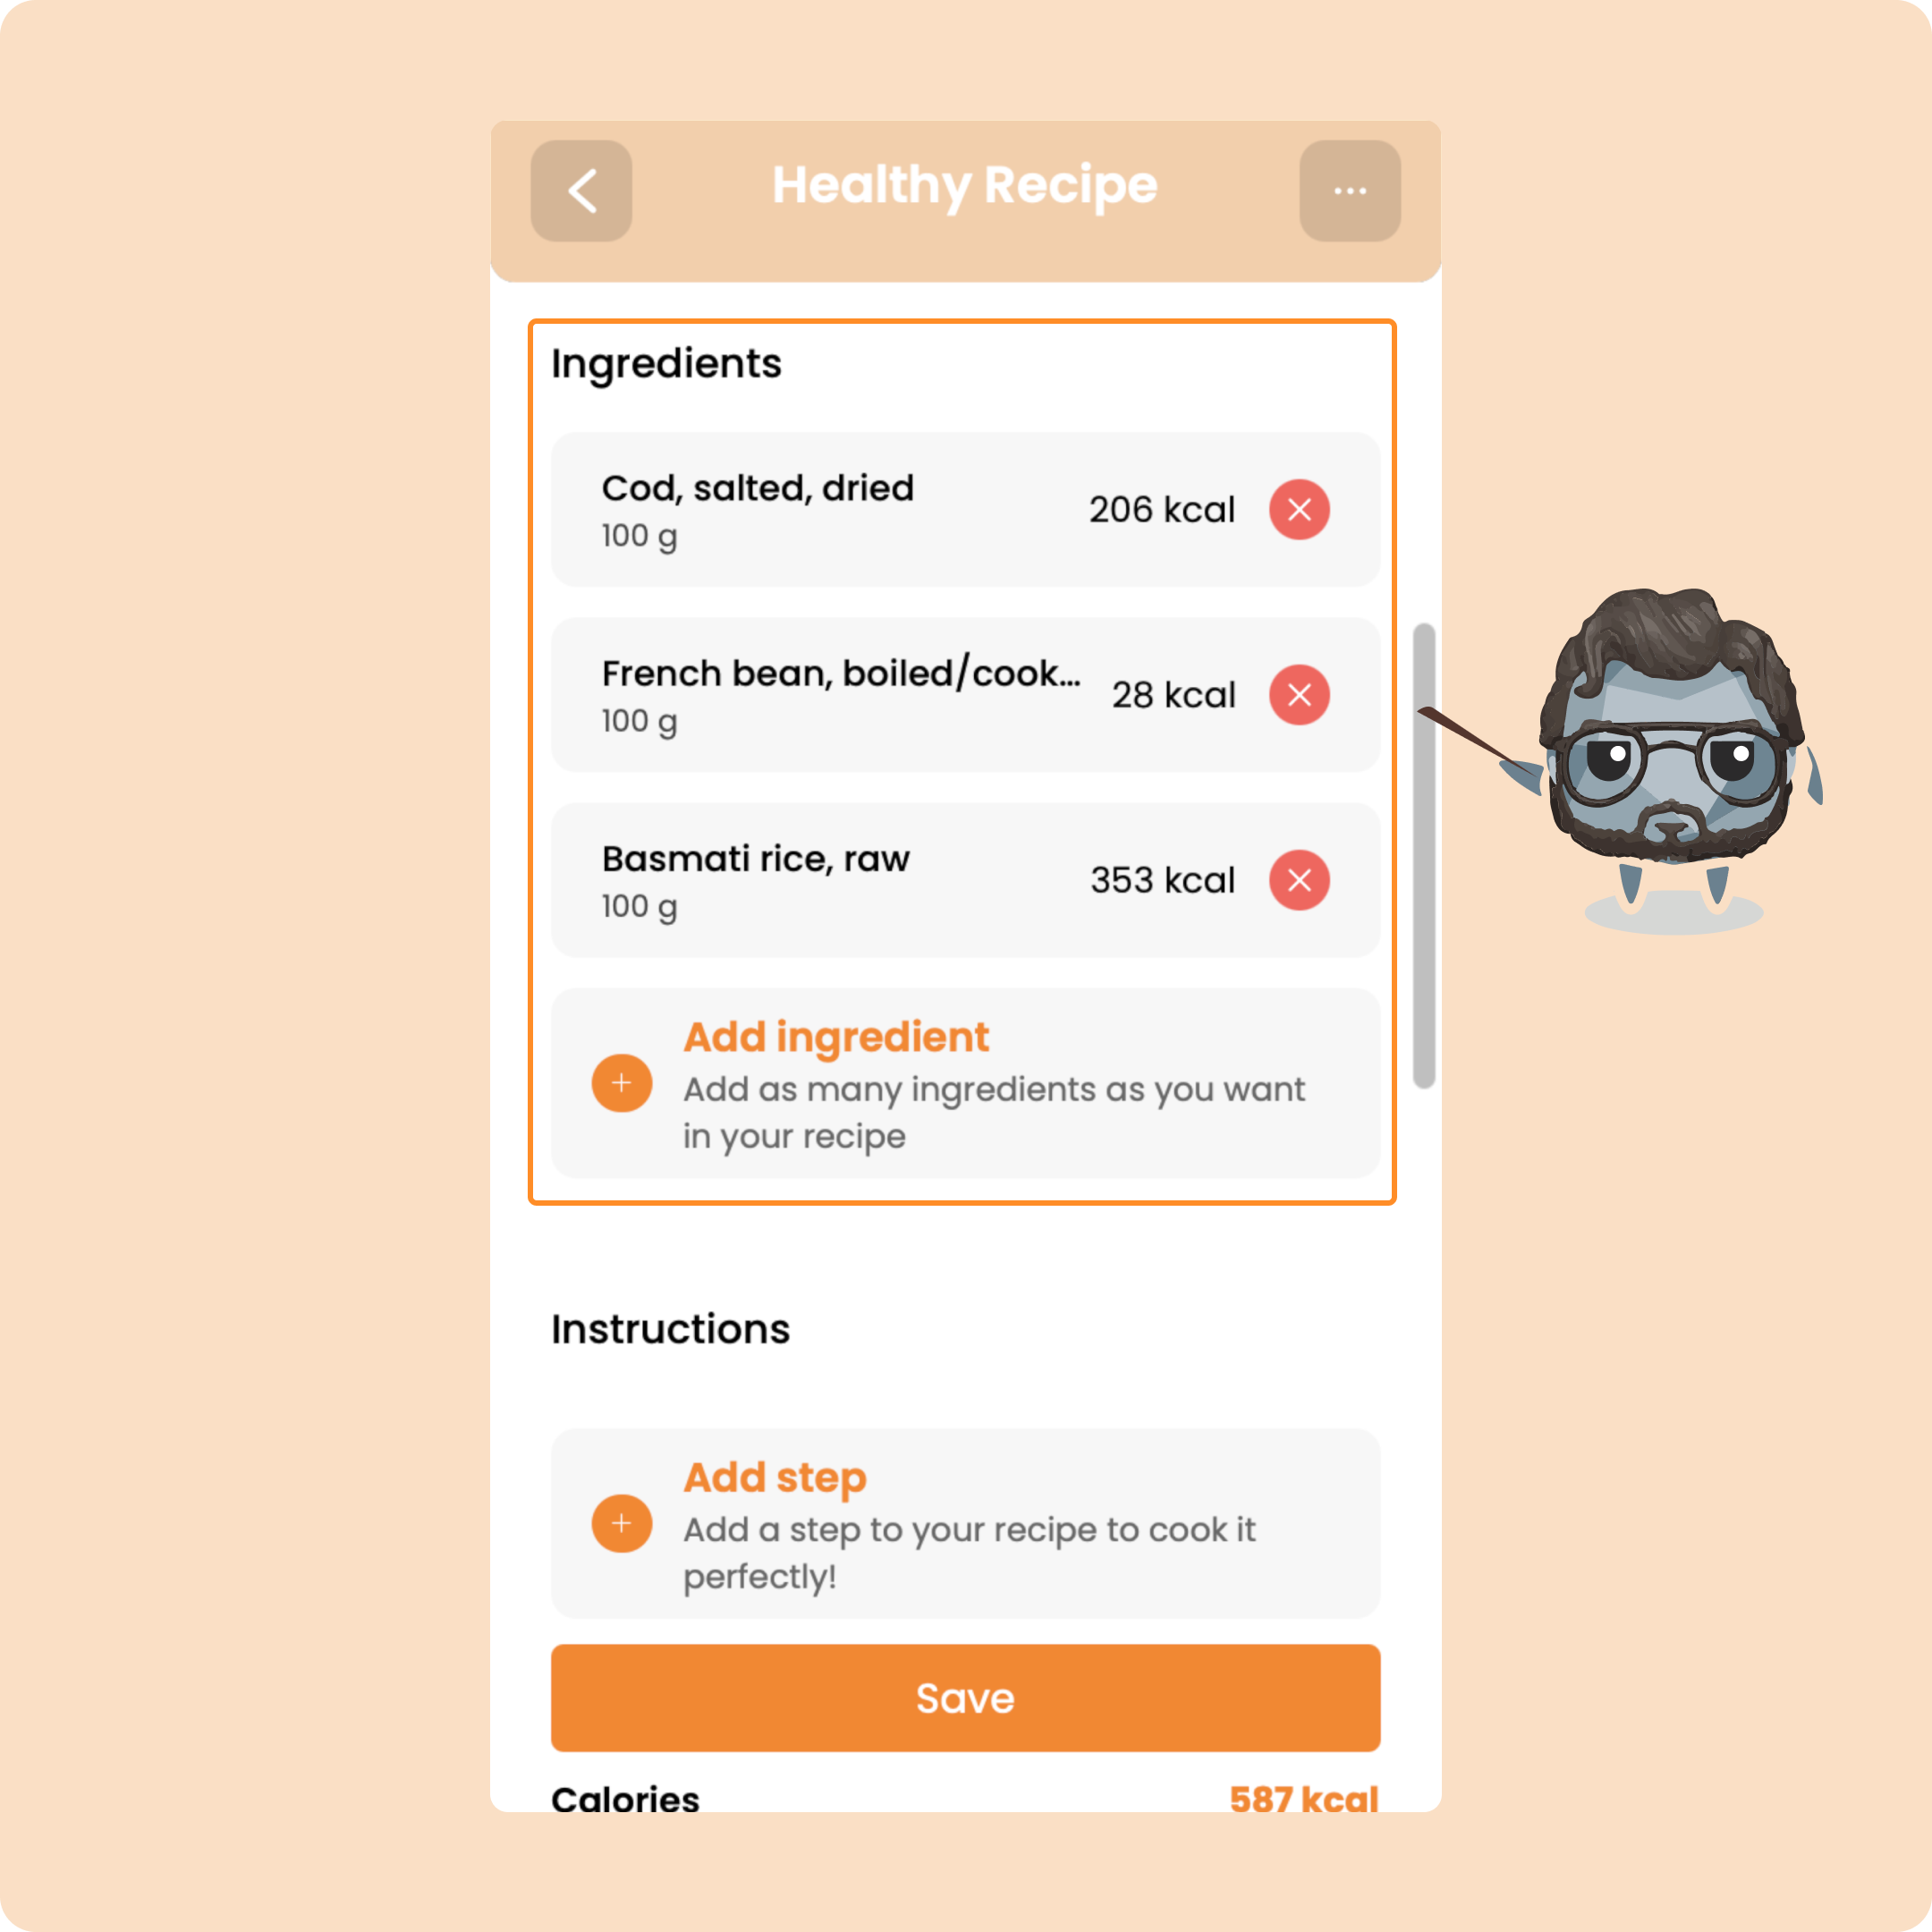
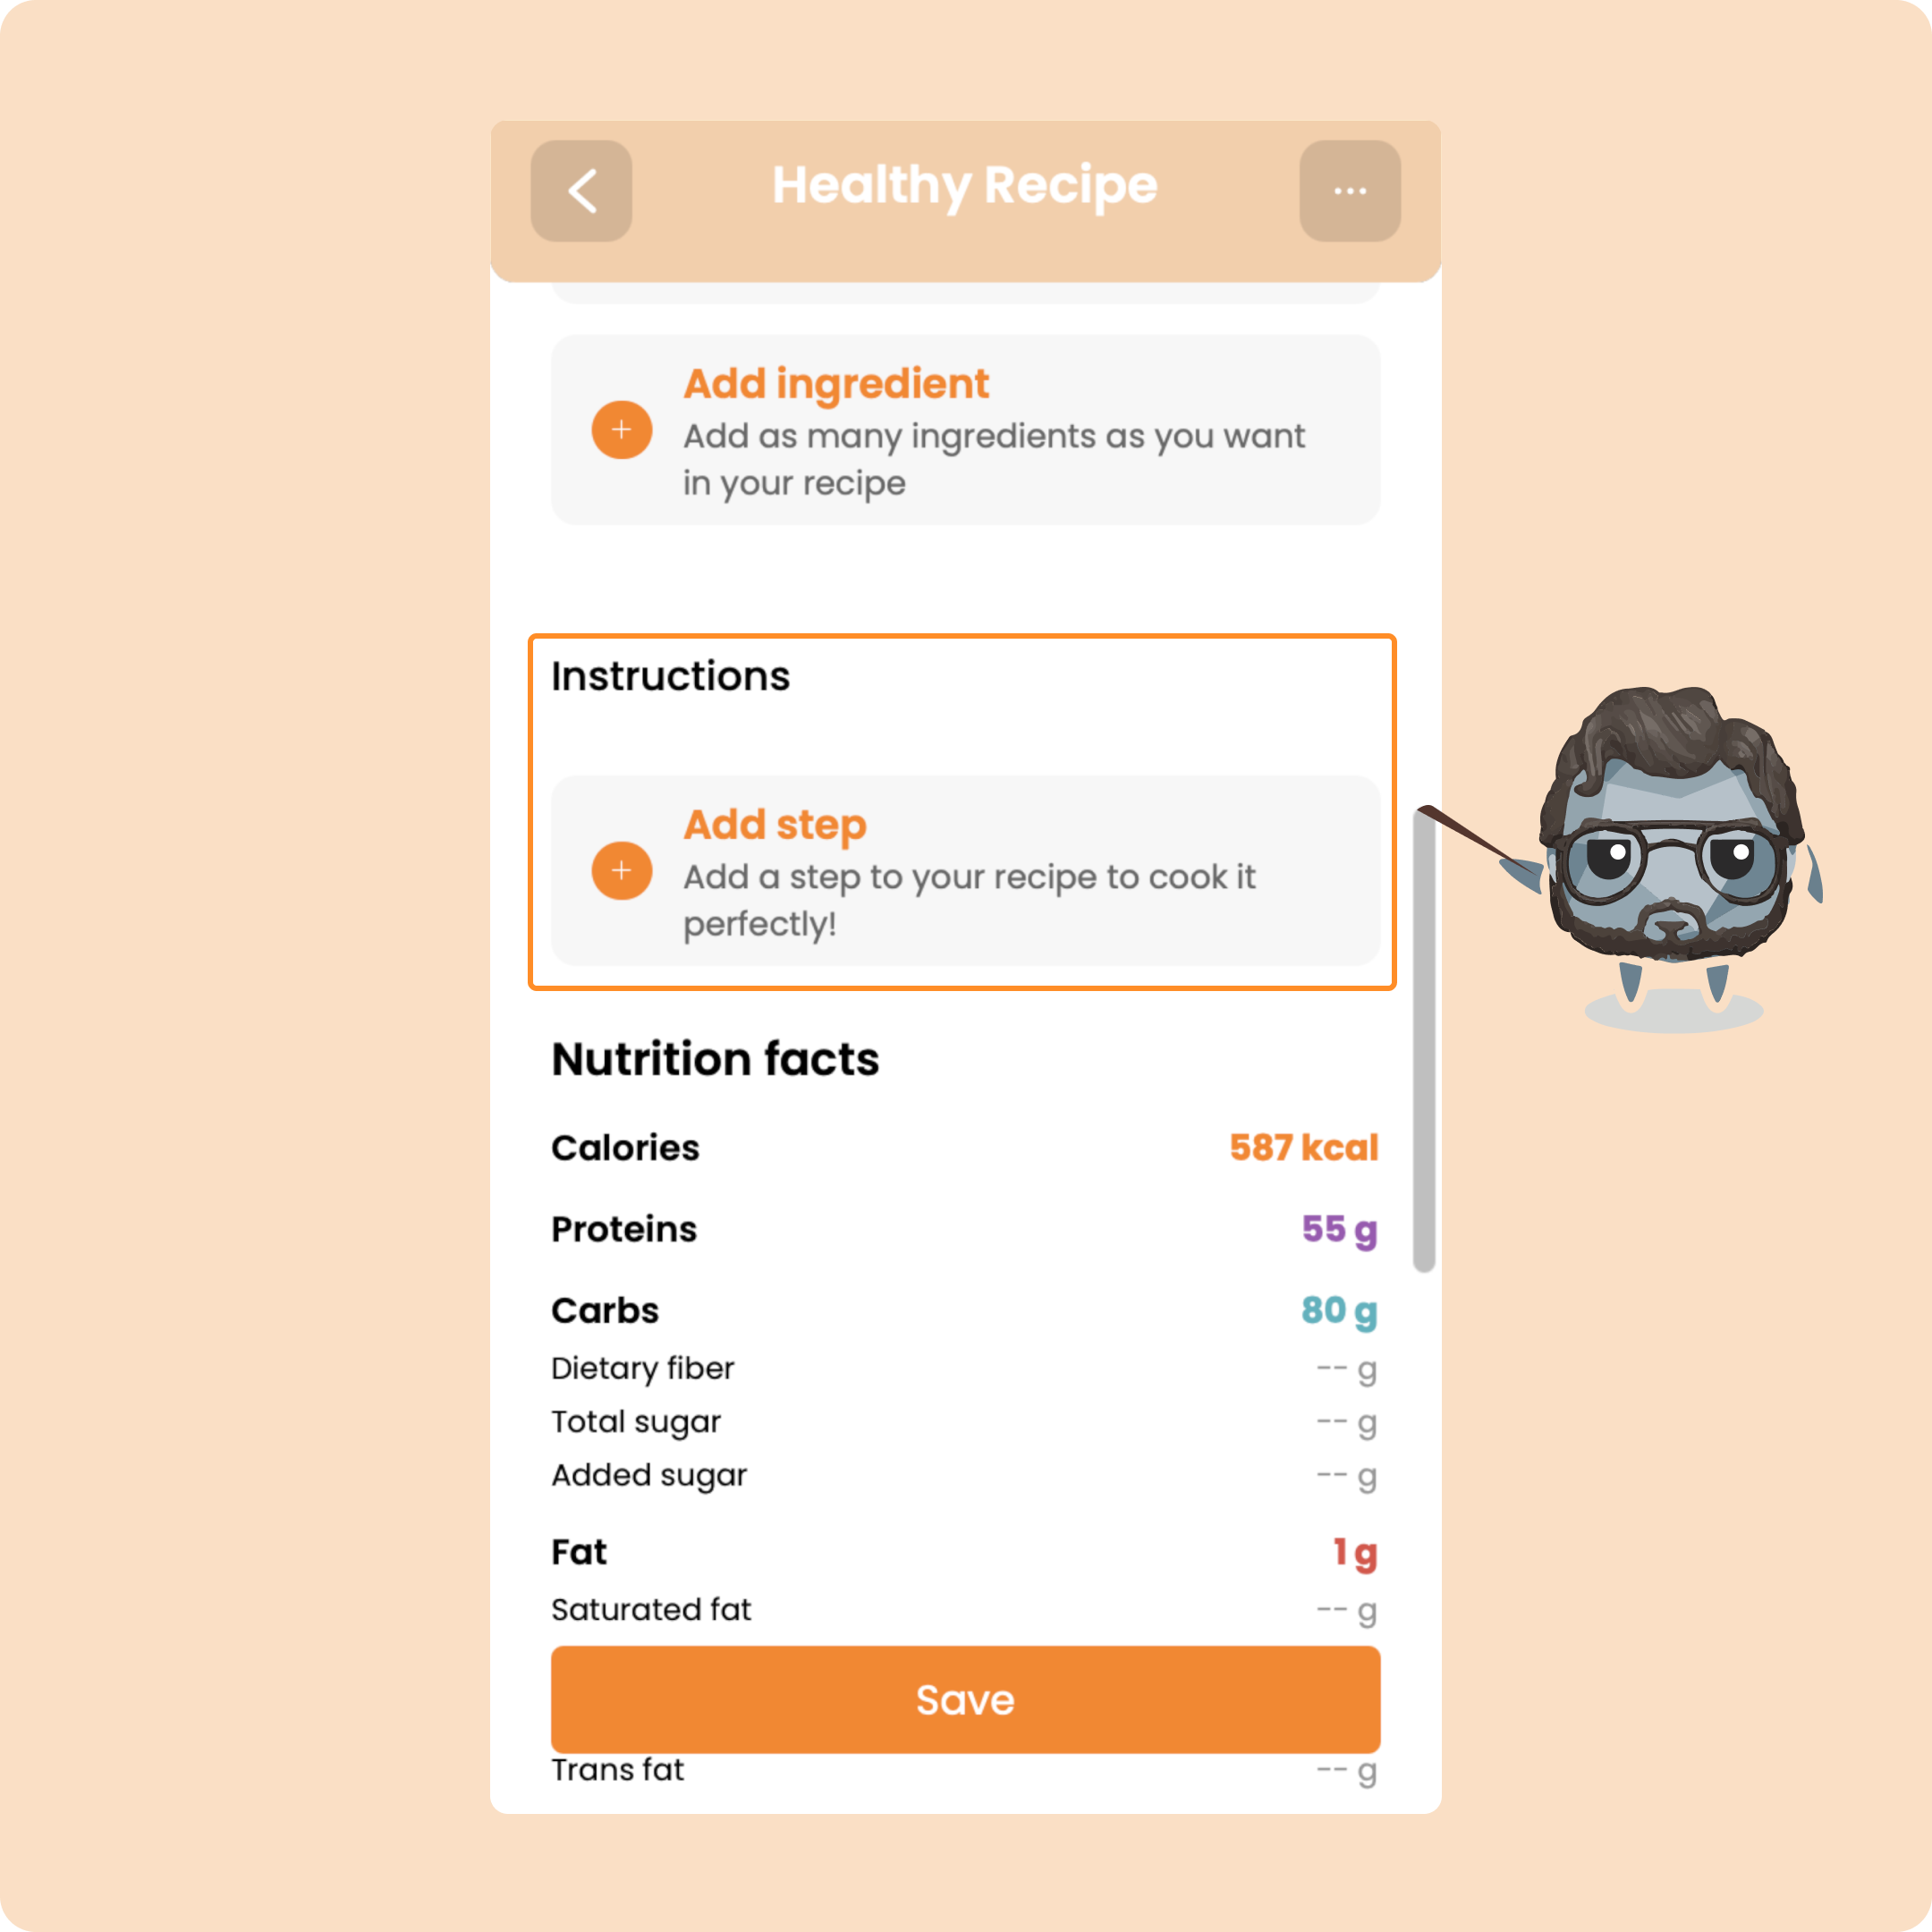
To finish, you will be able to add the different preparation and cooking steps of the recipe.
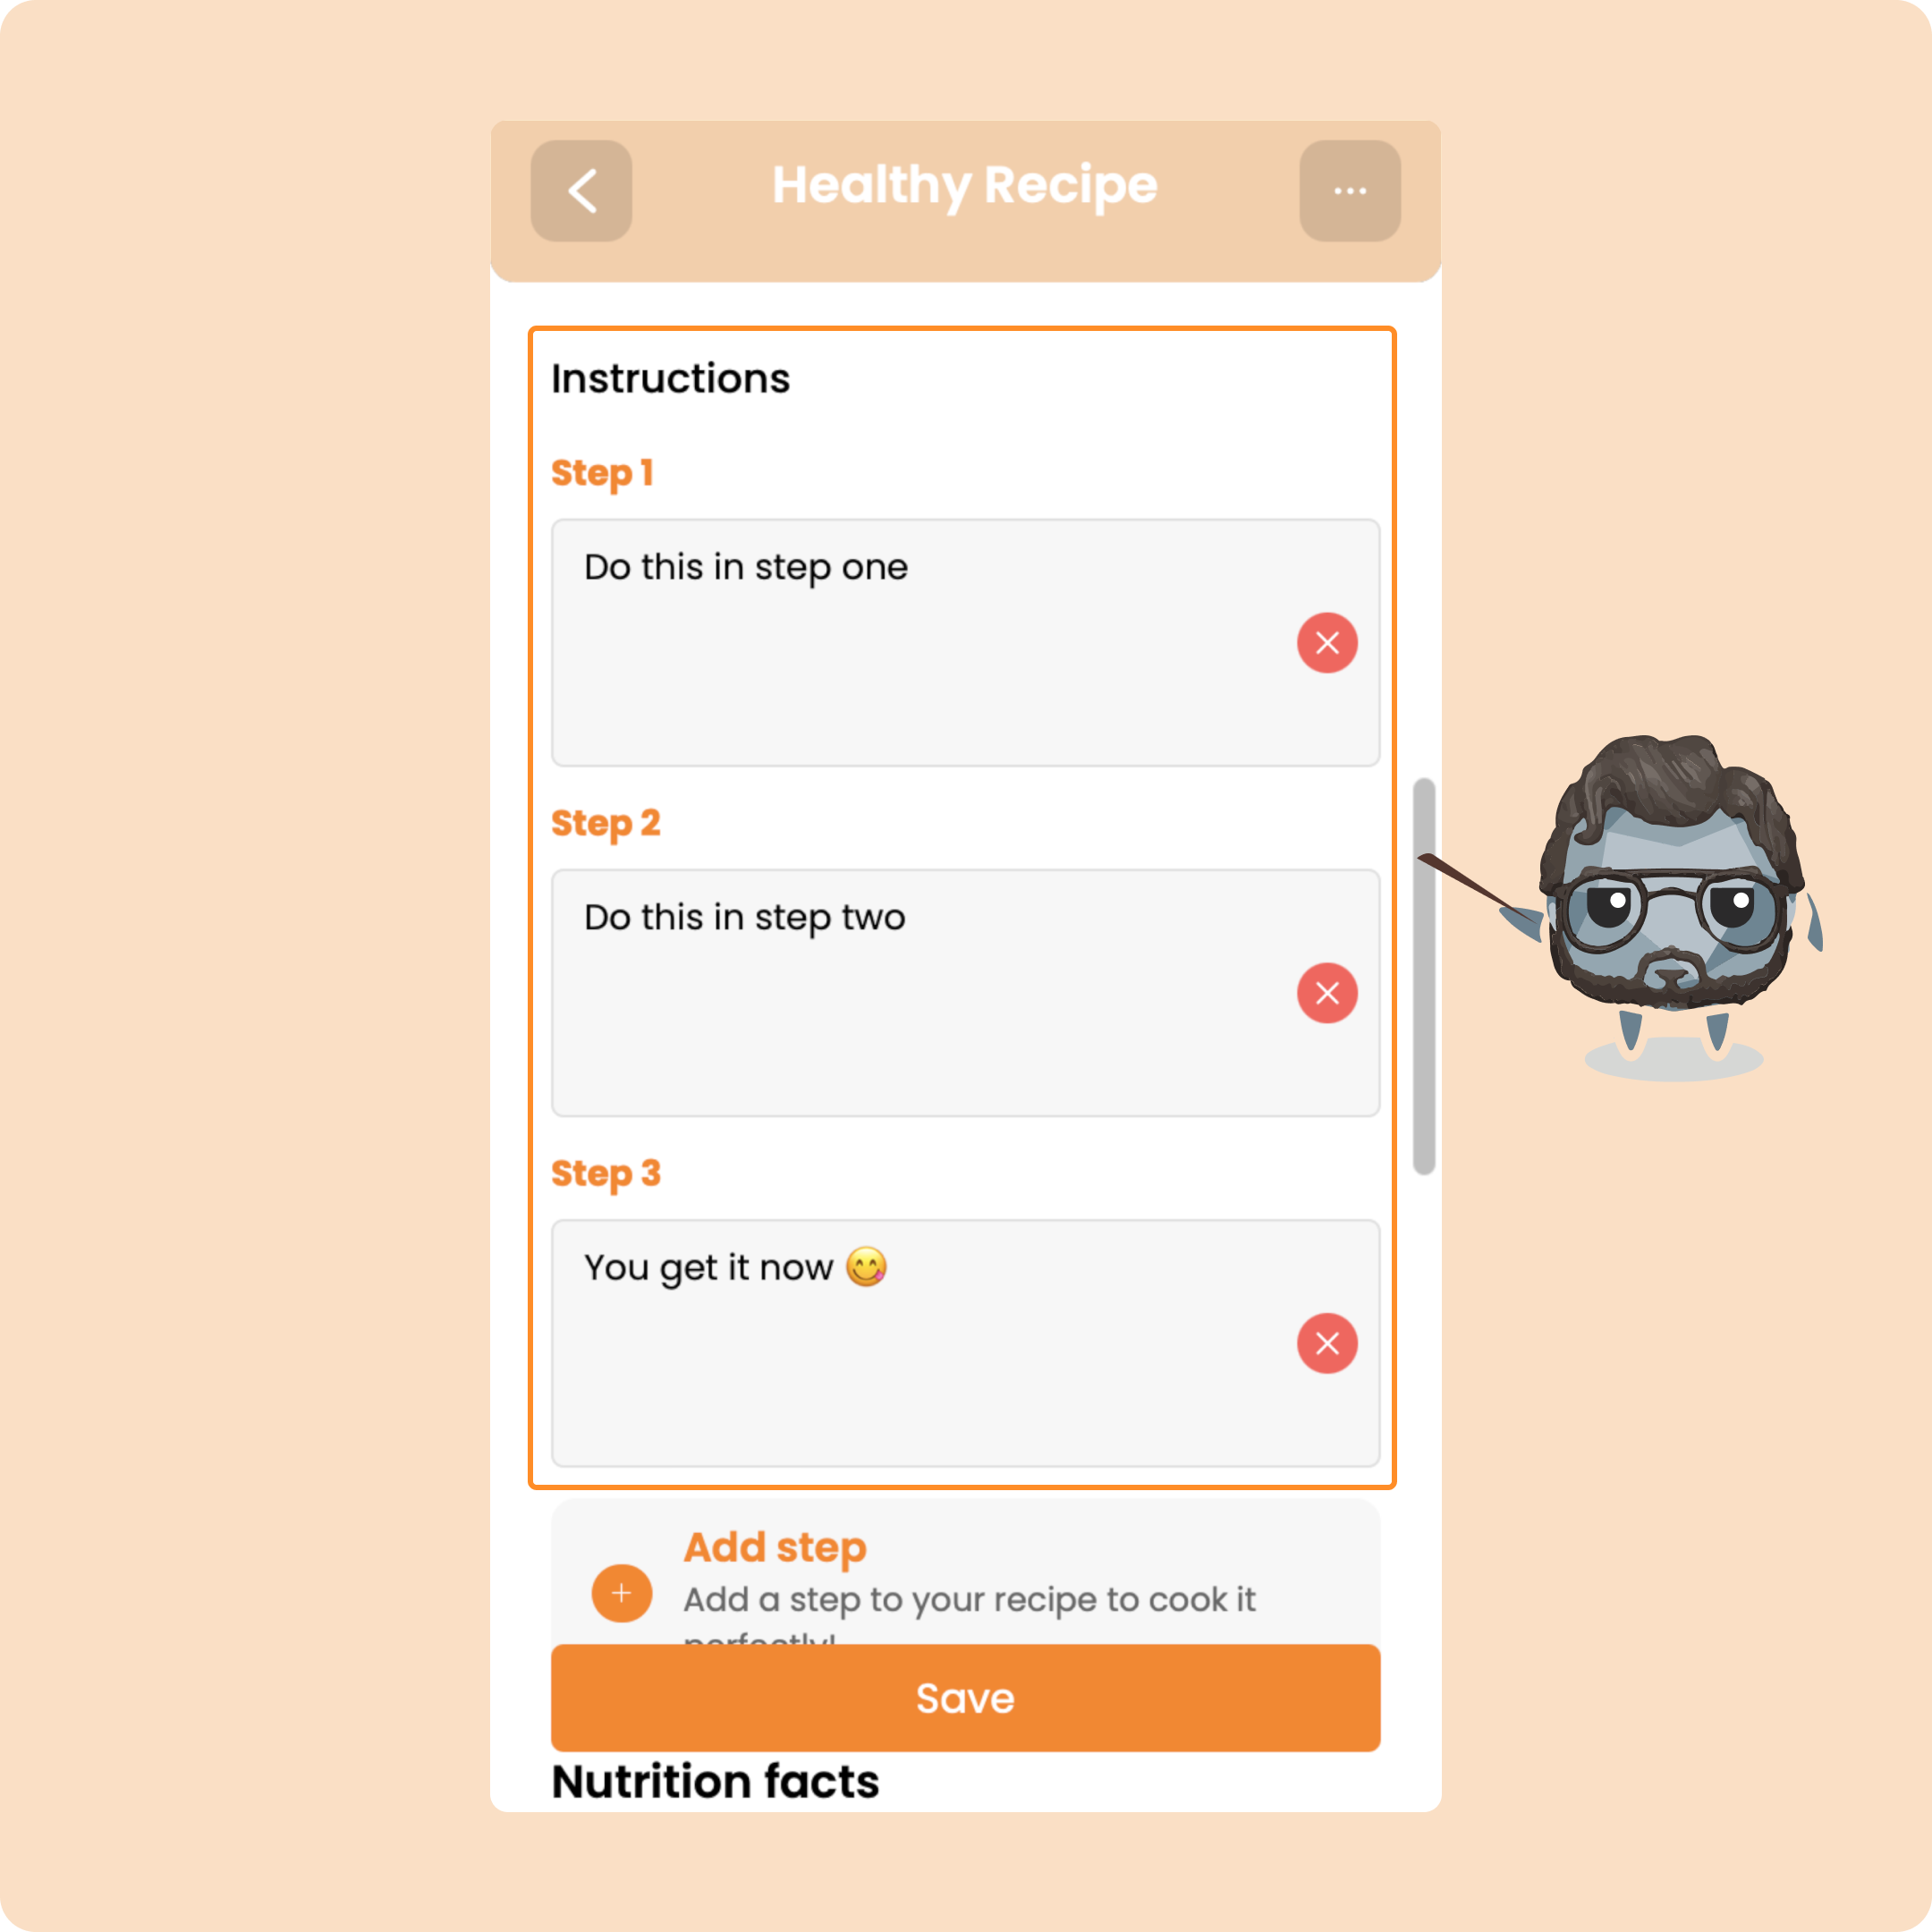
Once the recipe is added, you will find it in the "Created" section